Adobe Photoshop comes with a limitless amount of options & choices. I imagine I will be discovering new tricks, settings, options and hidden features years from now. It is what keeps me hooked!
Recently I got an excited email from one of theStudio Designers, she’d found a new-to-her option in photoshop that made her designing faster, neater & cleaner. It is the same option that I love when making the big, huge, previews for our Monthly Mega’s.
It took me years of using photoshop to discover that the Layers Panel has an options screen. It took me even longer to take advantage of the options to optimize my preferences. Now when I pull together those big, huge, mega previews, I have my Layer Panel Options set to make my job a little easier.
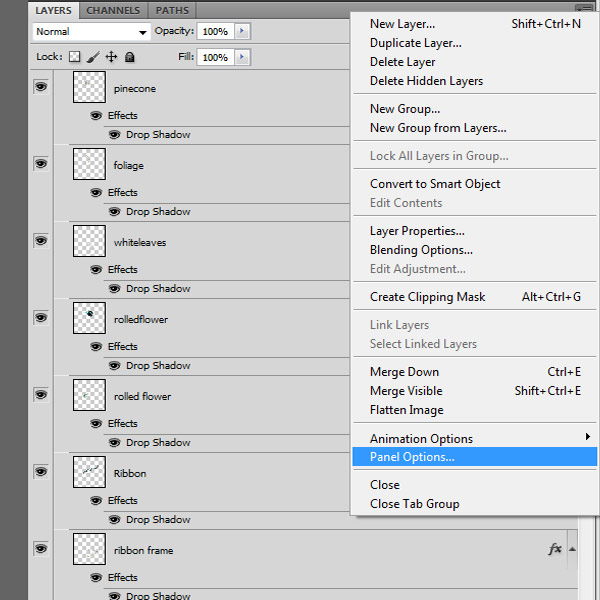
You can find your Layer Panel Options by clicking the small drop down arrow, top right of your Layers Panel. Then scroll down & click on Panel Options:
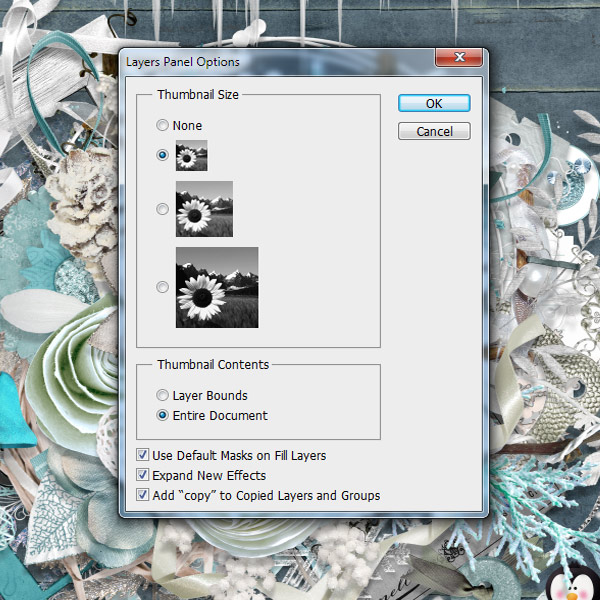
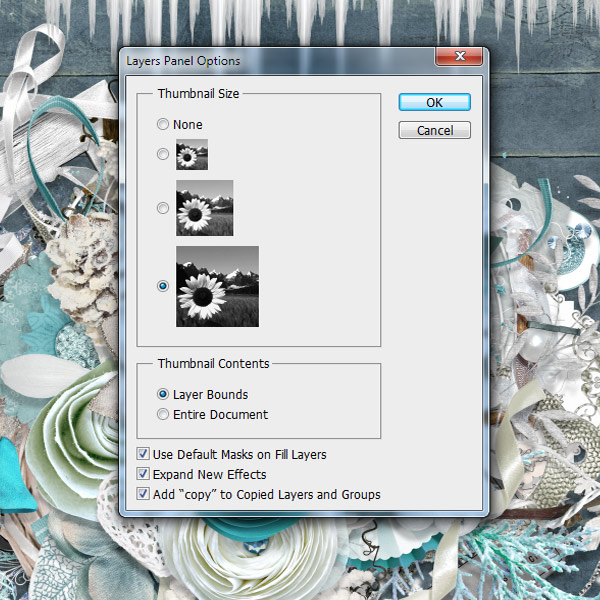
Once you click Panel Options the Layers Panel Options box pops up. I originally had mine set to small Thumbnail Size; with the Thumbnail Contents bound to Entire Document and all the default choices checkmarked “yes”:
The biggest problem for me, was that I had a hard time finding what layer I was working with. I had already renamed my layers to remind me, but with over 100 layers, that wasn’t helping enough.
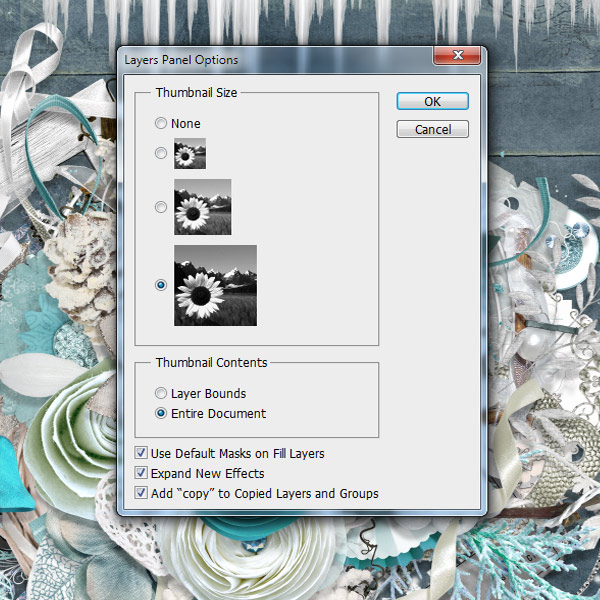
The first preference I wanted to change was my thumbnails size. I clicked the option to set my Thumbnail Size to large.
A large thumbnail is better, but I still had trouble making out most of the elements I’m working with:
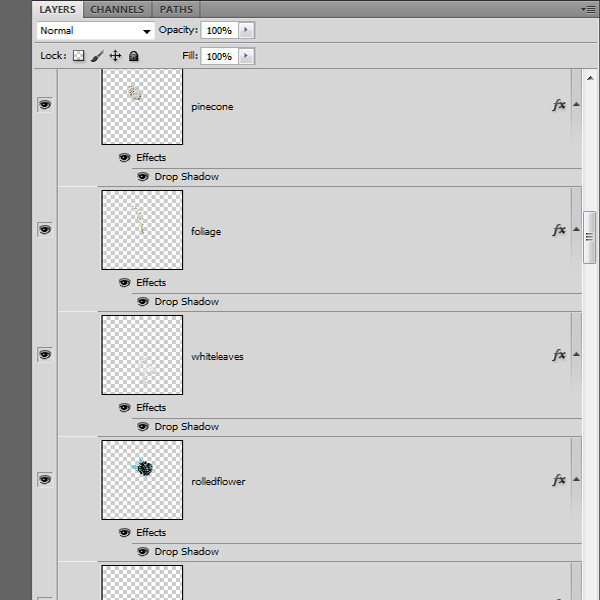
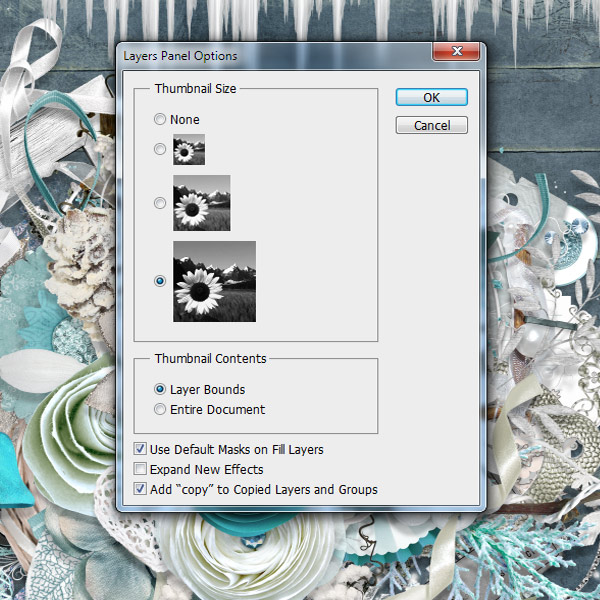
By again bringing up the Layers Panel Options I choose to restrict my Thumbnail Contents to Layer Bounds. In other words, I ask the Layers Panel Options to show me only the visible pixels on each layer, do not include the empty space.
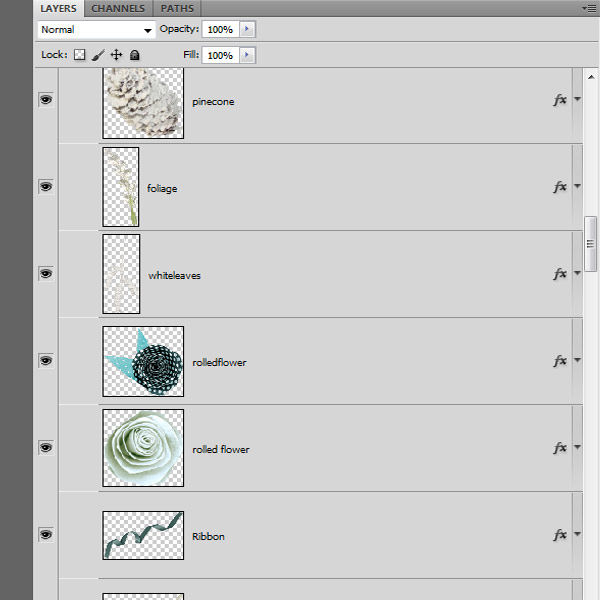
Now I can see the element on each layer! This makes it much easier to move things around, whether I am previewing, clustering or creating a layout, seeing is much better than guessing.
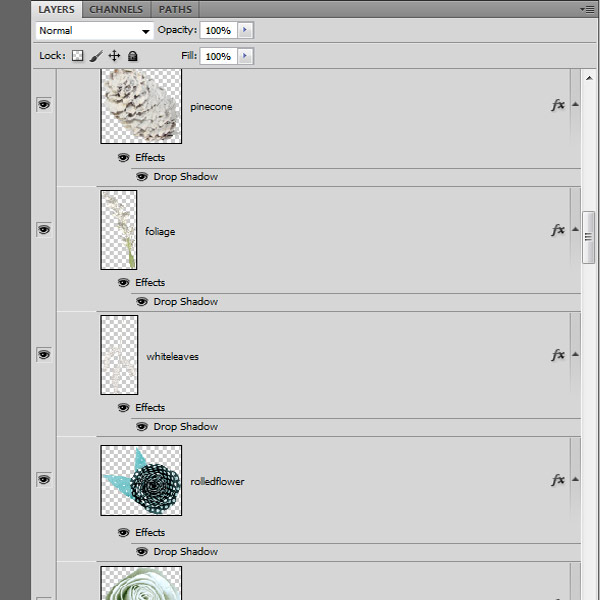
The only thing, for me, that makes the Layers Panel Options perfect is to have my Effects collapsed. Not hidden, but collapsed so that I have more thumbnails available at a glance.
When I work with previews, I usually only have a Drop Shadow selected. However, I can have 4-5, or more Effects, per element, while designing. That quickly fills up my Layers Panel.
I have Expand New Effects unchecked on my Layers Panel Options.
By unchecking my Expand New Effects it means that every time I add a drop shadow (or blending option, bevel and emboss, stroke, etc.) it shows only as the “fx” with the small dropdown arrow.
Photoshop now does not list all the options I set under my layer. This saves tons of space in my Layers Panel and optimizes visiblity.
Note: this only works on new effects. Not on effects already in place.
I used our January Mega Kit: Winter Ice to create my screenshots for this tutorial. All elements shown are available as part of this kit.




[…] Photoshop: Layer Panel Options – 1 freebie(s)? […]
Thank you so much for this tutorial. I have PSE 10 and have hopes that Elements can also use this information. I copied all the info here so I can try it while working in PSE.
Thanks for this great tip. As I was reading your post I was actually following along with the instructions. I now can see my thumbnails more clearly and not have to guess what’s there. I use PS CS6. Thanks so much!
I am so appreciative of your tuts. So many artists use psp and I have pse10. I’m pretty new at this tuts thing and I’m technically challenged. Just purchased pse 10 and have very little knowledge of this program. Soooo, thank you for sharing your knowledge. I copied this tut for later use.
Again, thank you for sharing. They are a blessing to me!
This is wonderful help, thank you so much
Thanks for another Great Reminder! No I know how to change my setting again. :0)
Your Tuts are so Great, with all the screen shots using a file that is relative to Digi-Scrapping. Makes it so much easier to understand.
Hi there, I have been using PSE for a long time, and just recently got PS CS6. I’m having a hard time adjusting, and have a few questions that I thought maybe could be answered here. What’s the best way to add a paper or element to a scrapbook page document? In Elements, it was easy to just drag the file up from the project bin into the document, but I’m not finding an efficient way to do this in CS6. Also, in Elements, when a digital product is added to its own layer, the layer is automatically named with the file info. In CS6, it just says layer and the layer number. Is there a way to make CS6 to automatically use the file names for each layer? Thanks!
Great questions, Jenny! Watch for a tutorial on this next week!