I love the look of photographs that have been blended into a background paper. Today let’s take a look at a few examples of this technique and then review how easy it is to do.
This layout was created by Norma, a member of my Creative Team, using Firm Foundation. I really like how Norma blended this lovely photo of her and her Dad into the background, then included the color photo in her cluster.
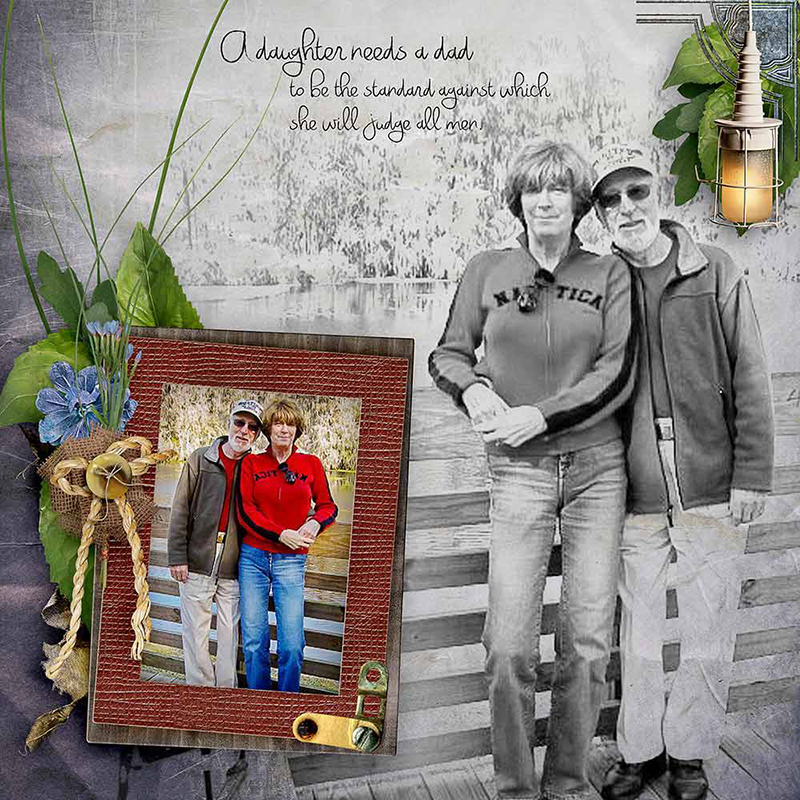
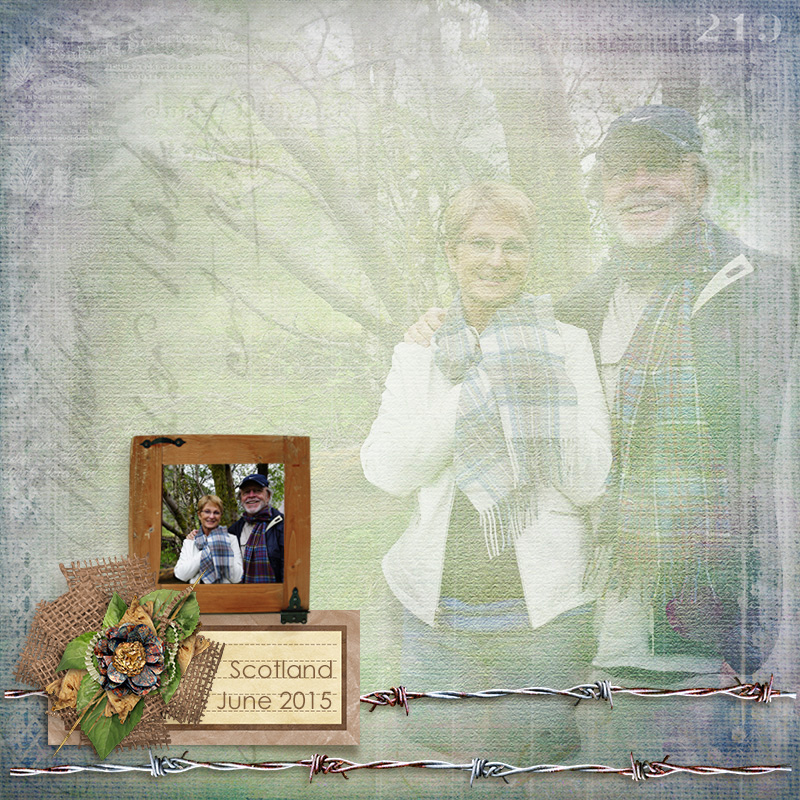
In this layout, Norma placed her photo into a photo frame, and blended just the edges of the photo into her background.
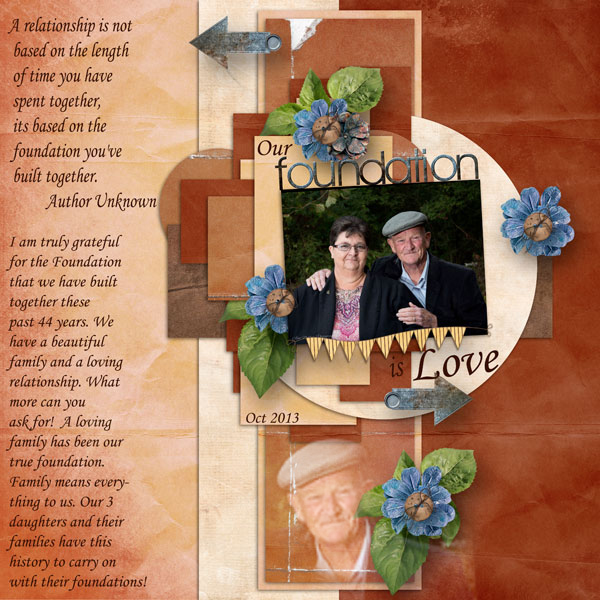
Here’s another example from Cathy, also a Team Member. I really like how Cathy has highlighted her husband by blending his image into the paper strip below her cluster.
Here’s how to accomplish this look:
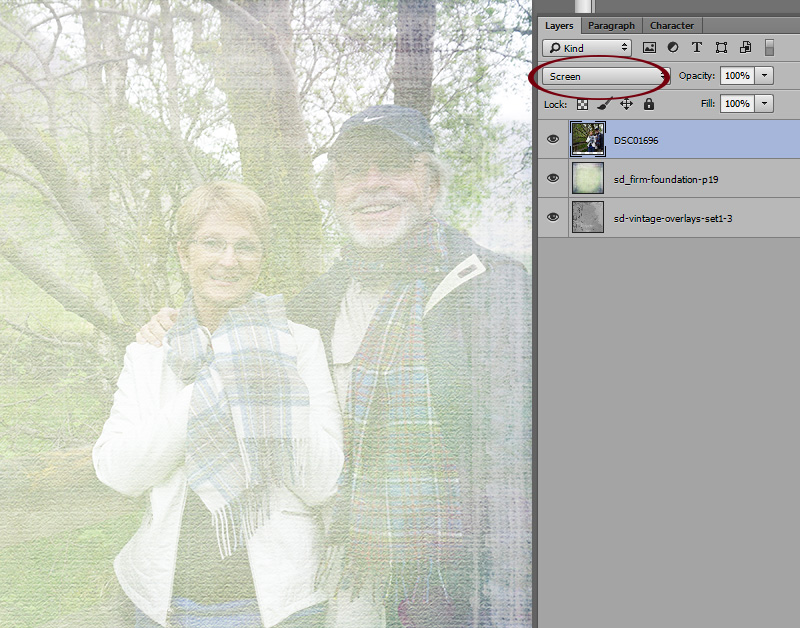
1. Place a photo above a background paper layer. For this tutorial, I have used 2 papers, simply because I liked the look. Vintage Overlays Set 1, paper 3 is set at 100% opacity, and Firm Foundation Paper 19 is set at 75% opacity. My photo is the top layer.
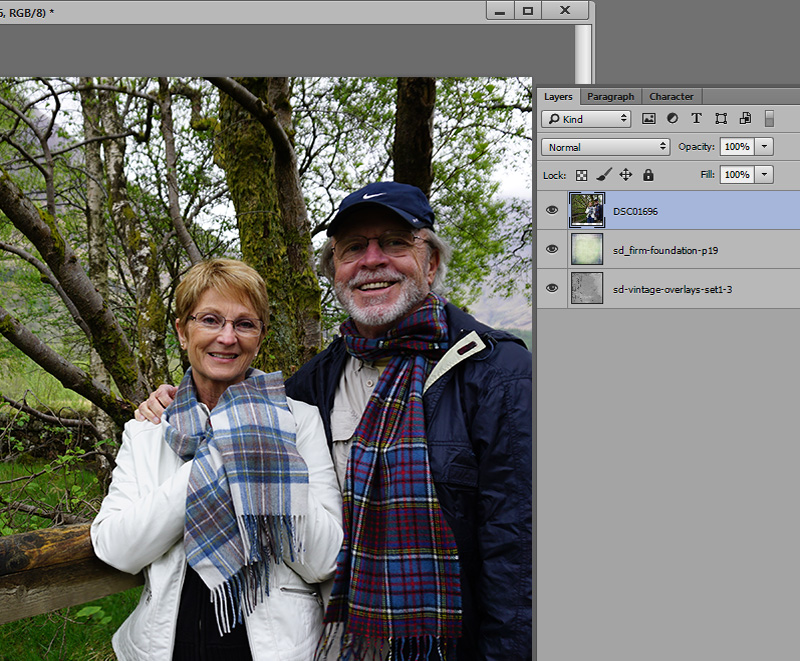
2. Change the Blend Mode of your photo, selecting the effect that you like best. I chose Screen for this photo.
(Need a quick review of what Blend Modes are? See Blend Modes – Just what are they? and How to Quickly Change Blend Modes.)
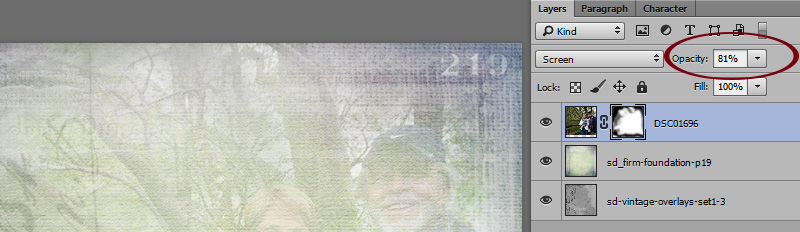
3. Experiment with the opacity of your photo. I set mine at 81%, using the Opacity Option at the top of the Layers Panel. There’s nothing magic about that number. I just moved the slider, keeping my eye on the photo, and stopped when I was happy with what I saw.
4. If you are happy with the results, you are done. I didn’t like the harsh lines along the edge of my photo, and I wanted a little more of the background paper design to show thru on the top and left edges of the document.
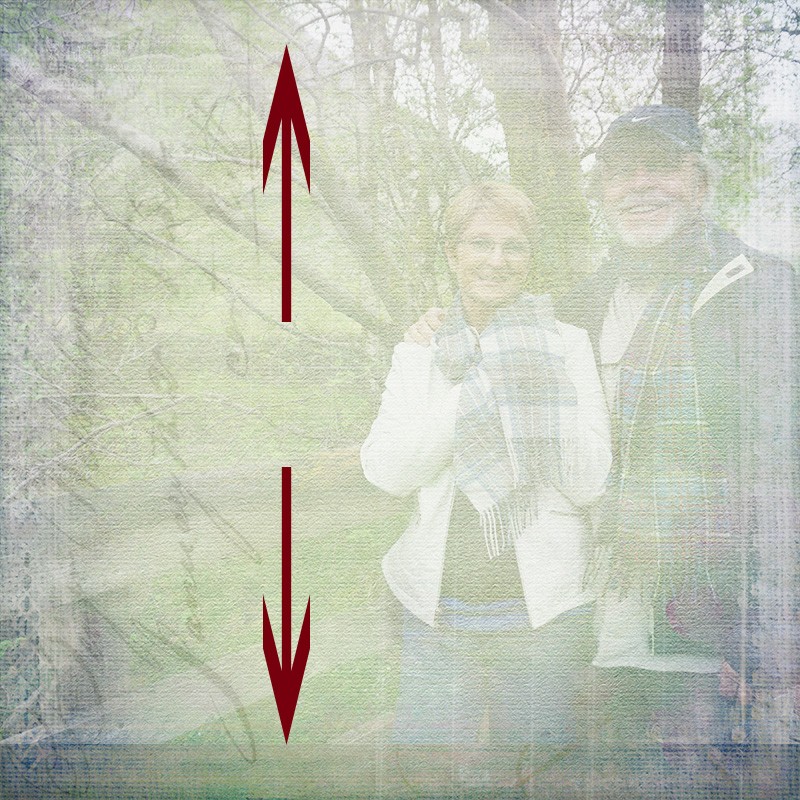
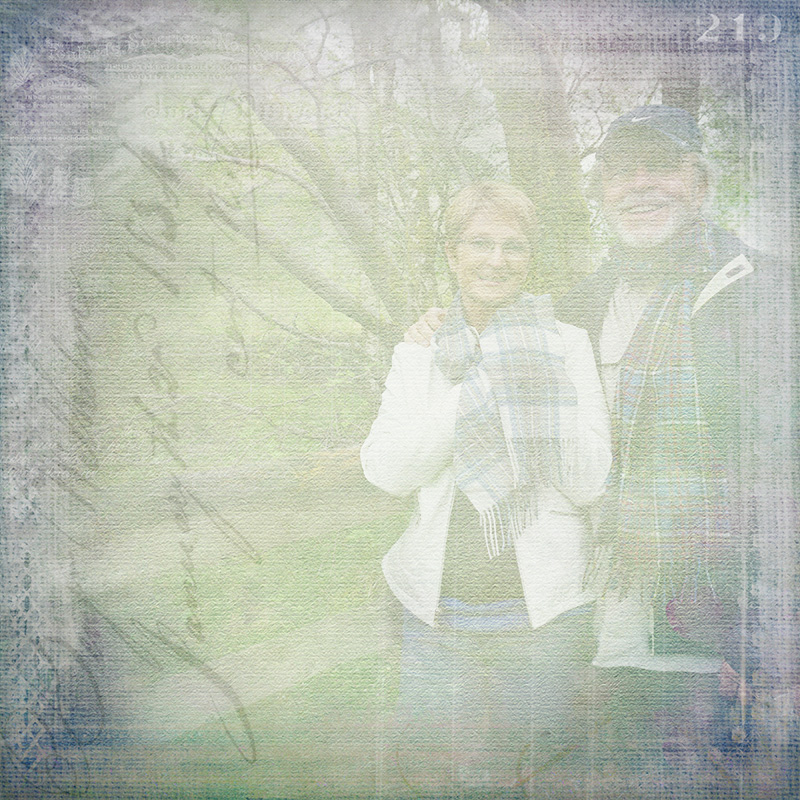
I placed a mask on my photo and brushed away the parts of the photo I didn’t want. (Using Layer Masks in Photoshop.) Here is the result:
That’s all there is to it!
When you experiment with this technique, or any technique you learn through our tutorials, we encourage you to upload your results to our Gallery! Show off your hard work! Please include the name of the tutorial and provide a link to it, in case some of our readers missed it!
Thanks for coming by! See you next week!


thank you
Very nice! I love masking! You ‘removed’ enough of your background photo so that just the two of you peeked through. That is so cool! I did a layout last night where there was lacy stuff over a person’s face. A quick dab, dab, dab with a blend brush and the face showed through, leaving the overlay design everywhere except on the face! Looked nice! I also keep forgetting I can reduce the opacity! Grrr!
Thank you for the stacker page and the wonderful tutorial.
Su
Thanks for the instruction–you always have such great ideas and great instruction!
It sounds so simple and love the Father’s Day examples, I could really use more time each day just working on all these projects like this, and I am retired too. Your inspirations and ideas are truly a blessing in my life.
[…] the rest of this tutorial on theStudio’s blog! Learn just how easy this technique is to do! Here is the layout I created using the techniques […]
Thank you, Genie, Su, and Kathleen for your comments. Yes, Su, masks are great for removing areas of unwanted design/texture. I love non-destructive nature. I struggle with the same thing, Kathleen…. there’s never enough time in the day!
Thank you so very much for this tutorial and the great PDF file to have for my reminder. I have tried a few times to blend a photo in the background and most of the time without success. I really appreciate this tutorial and can’t wait to try it. Also thanks so much for the stacked paper. Just can’t tell you just how much your tutorials have helped me.
You are welcome, Carol! I appreciate your comments!
Thank you Karen for all your tutorials. I have a large file of teaching information from you.
I still struggle with getting photos blended into the background – hopefully I can follow your steps and have great results.
Thanks, Steph! I’m sure you can do it!
Thank you, Karen, for great tutorials! I’m inspired!
Thanks for taking the time to leave a comment, Janytime! I’m so glad to know you are inspired!
[…] the layers palette & cleaned up the edges a little & quickly with the eraser.Extra: See our Blending a Photo into a Background […]
[…] the rest of this tutorial on theStudio’s blog! Learn just how easy this technique is to do! Here is the layout I created using the techniques […]