Two weeks we looked at how to Align and Distribute Items in a Photoshop Document. Since the writing of that article, several of you have asked if you could use the align/distribute tools to create a scalloped border. The answer is yes, you can; however, there is a faster, easier way, using a brush. Today let’s take a look at how to do that.
Screenshots today are from Photoshop CC2015. This technique works the same way in both Photoshop and Photoshop Elements.
- Open a blank document.
- Set your foreground color to your chosen color. I am going to choose black, simply because it’s easy to see.
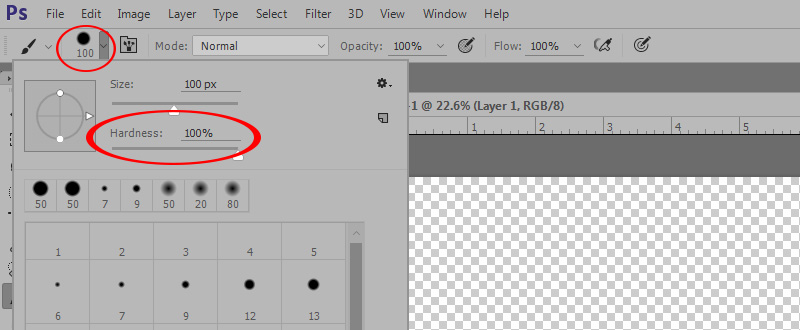
- Choose a hard round brush the size that you would like your scallops to be. I have chosen a brush 100 px in size, with the hardness slider all the way to the right to get a hard sharp edge on the brush.
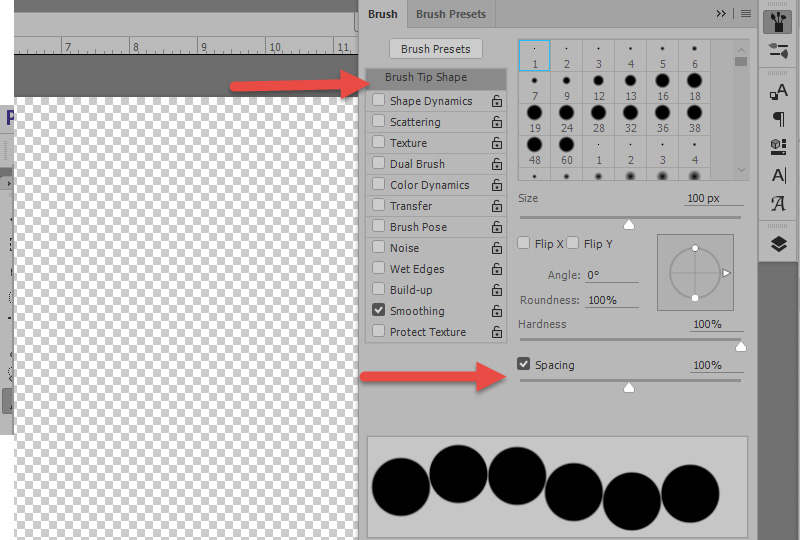
4. If you do not have your Brush Panel visible, go to the top Menu Bar and choose Window > Brush to open your brush panel. Once you have the Panel open, cluck on the “Brush” tab at the top of the Panel. Adjust the Spacing of the brush to 100%.
5. With the brush still selected, stamp down on the blank layer on one side of the document. Release the mouse button. Depress and hold the Shift key. Stamp down once on the opposite side of the document. The Shift key will constrain the line of the brush, resulting in a straight line.
![]()
6. You now have a few options:
a. You can color the border, apply a style, or clip a paper to it; then place it on your page wherever you would like it.
b. You can add an additional edge to it. To do this, create a blank layer. Select the Marquee Tool. Drag out a rectangle the width you would like it to be. Fill it with your color of choice.
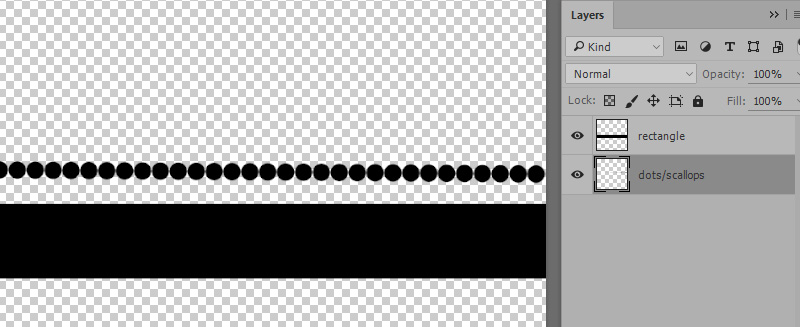
7. Using the arrow keys on your keyboard, nudge the rectangle into the middle of your dots/scallops. Right click with your mouse and choose “Merge Layers” to create one file.

8. You now have a template that you can save as a PNG for use both now and in the future.
Vary the brush size to create a larger or smaller scalloped edge!
You may download a PDF of this tutorial here: How to Create a Scalloped Border.
You may view a You Tube video on the SnickerdoodleDesigns You Tube Channel and also on the Digital Scrapbooking Studio’s You Tube Channel. Take a minute to subscribe to both channels so you don’t miss any tutorials unique to each channel!


This was a great tutorial for me. You always make it look so easy. I love borders like this and the wave borders if I find any. Thanks so much — and as always, a great big thank you for the PDF file.
Thanks so much I get so much from your tuts and I try to keep a pdf copy to be able to refer back to if I need to. You make them very easy to follow and learn. I appreciate all you share! Have a wonderful weekend!
Thank you, Carol and Maryanne, for your comment. I so appreciate the feedback! 🙂