This weekend I came across a black and white photo that I had hand-tinted. Do you remember doing that? Using special pens and/or inks? It was a tedious process and could take hours, depending upon what was being hand-colored. It made me soooo happy that I now work mostly in the digital world. What was calling “hand-tinting” we can accomplish in Photoshop with a technique called “selective coloring,” and we can do it in just a minute or two!
This technique works in both Photoshop and Photoshop Elements.
Here’s how:
- Open the photo you would like to color, duplicate it, and close the original. (It’s always a good idea not to work on an original photo.)
- Make a copy of the duplicated photo using whatever method you prefer.
- Convert the copy to Black and White using your favorite method. (If you add a Black and White Adjustment Layer, merge the Adjustment Layer with the Copy so you have one colored photo and one black and white photo.
- Add a Mask to the black and white photo. If you are not familiar with masks: How to Use Layer Masks
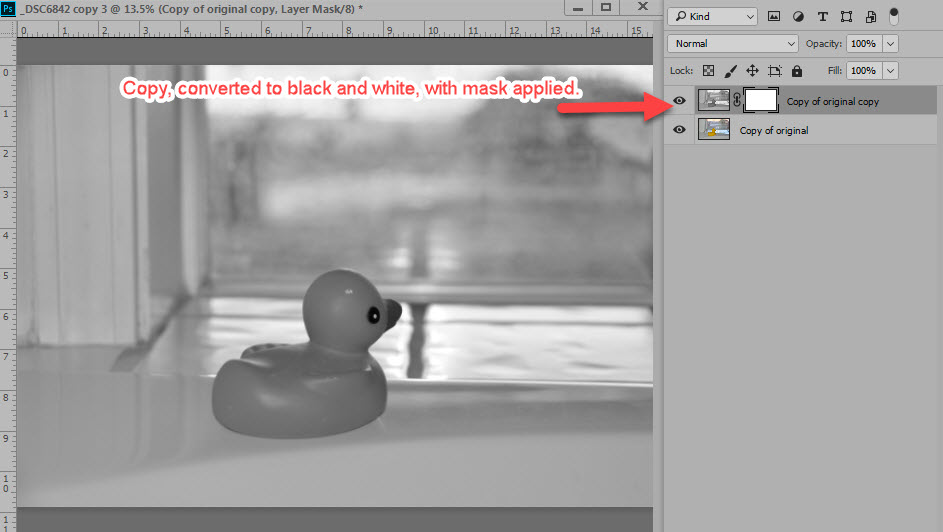
Add a Mask to the black and white photo
- Set your foreground color in the Color Picker to Black.
- Choose a soft-edged round brush.
- Click on the mask to make it active.
- Start painting on your image where you would like color to be visible.
Example #1:
- When you have a photo with an easily defined image you want to color, such as the duck in this photo, click on the thumbnail of the photo, and use the Quick Selection Tool to easily select the image. (This works because of the selection you have made. If NO selection is made, you will need to click on the mask to make it active and paint on the mask, as stated above.)
- Click on the brush tool to select it, (making sure your foreground color is black), and paint over the selection to reveal color.
- TIP: This works because of the selection you have made. If NO selection is made, you will need to click on the mask to make it active and paint on the mask, as stated above.
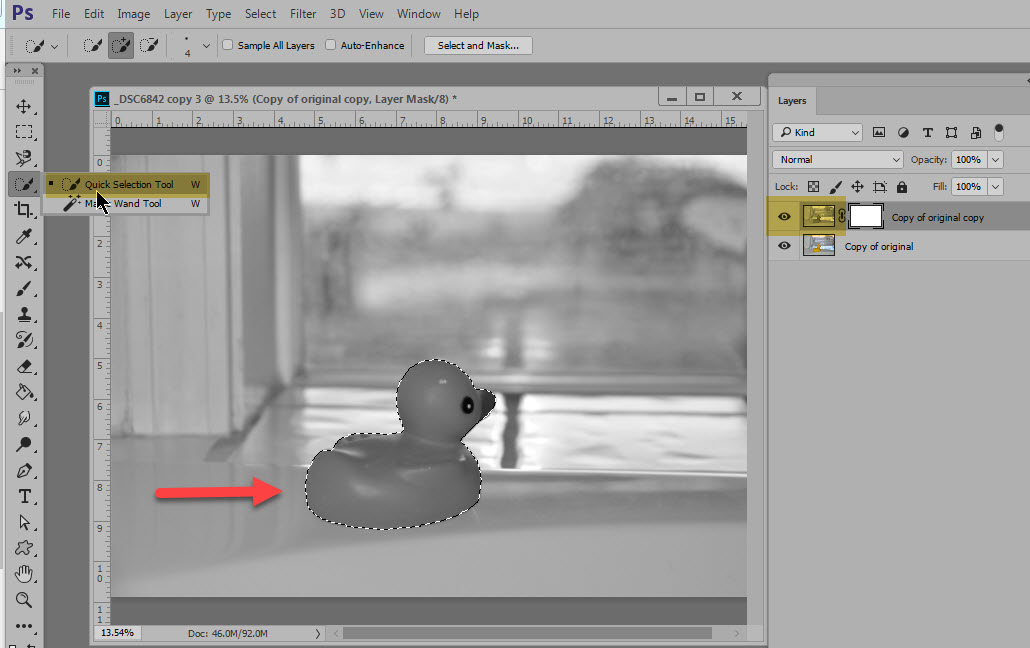
Use the Quick Selection Tool to make a selection, if it is easily identifiable.

Paint over the selection to reveal color
Example #2:
- Not all images you might want to recolor will be as easy to select. If that is the case, follow the general instructions above, and reduce your brush size to reach into smaller areas, then enlarge it when you are in bigger areas. It will be more time-consuming and tedious, but with patience, it can be done.
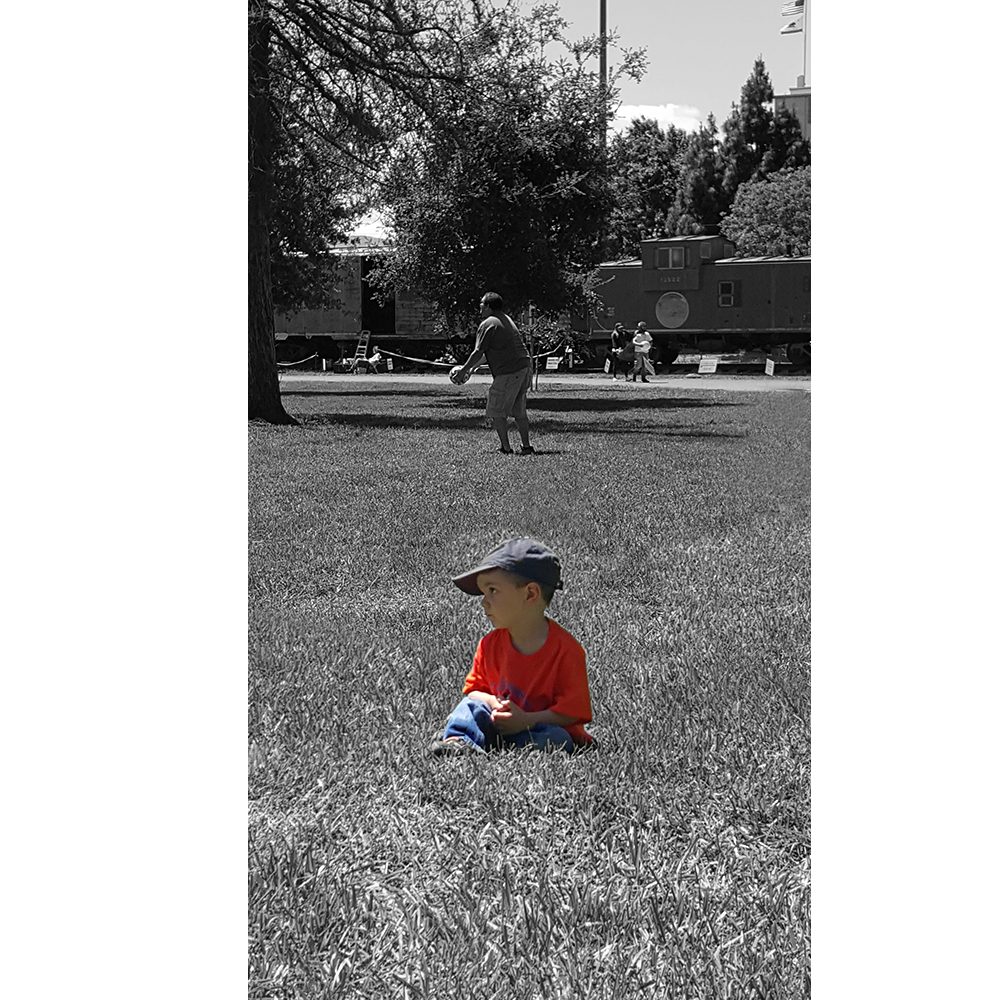
Reduce your brush size to reach into smaller areas, then enlarge it when you are in bigger areas.
I hope you have fun with this technique!
If you would like to download a PDF of this tutorial, you may do so here: Selective Coloring


If you add a Black & White adjustment layer, it should load with a (white) mask already applied. You can just paint into that mask with black to get your color back. No need to have a copy of the image itself, so that helps to keep the file size small 🙂
Yes, that is true in Photoshop esha3d. In PSE, if you Convert to Black and White, you don’t get the mask; but if you apply a Hue/Saturation Layer Adjustment and Desaturate the colors, you do. There are so many options to get to the final point, it seemed best to just explain what result you needed to get before moving on. Thank you for pointing this out in case others were wondering about it too!