
This post was originally published in September 2016. The tutorial is original to Karen of SnickerdoodleDesigns. She has many more amazing Photoshop and Photoshop Elements tutorials on her site: SnickerdoodleDesigns.
This month we are exploring Photoshop Layer Styles. (Photoshop Styles 101: The Stroke; How to Load Layer Styles; Photoshop Styles 101: Color Overlay).
For this tutorial I am using Photoshop CC2015.5. The Color Overlay Styles Option is not available in Photoshop Elements. However, I do explain a work-around at the end of this tutorial.
Last week we learned what the Color Overlay in a Styles Effect is, where it is located, and one way of how to use it. Today, let’s look at:
- how to change the Color Overlay if we would like to, and
- how to alter the overall look of a style using color

Pictured above is a black version of a word art graphic.
Pictured below is the word art graphic, to which I have applied a Stitching Style.

While I like the Stitching Style on the word Sunshine, I don’t want it to be pink. Here’s how to change that:
- Look at the layer to which you have applied the Style. (In this case, the layer with the text “Sunshine.”)
- Double-click to the right of the Color Overlay Effect. This will open the Layer Style Panel; Color Overlay options.
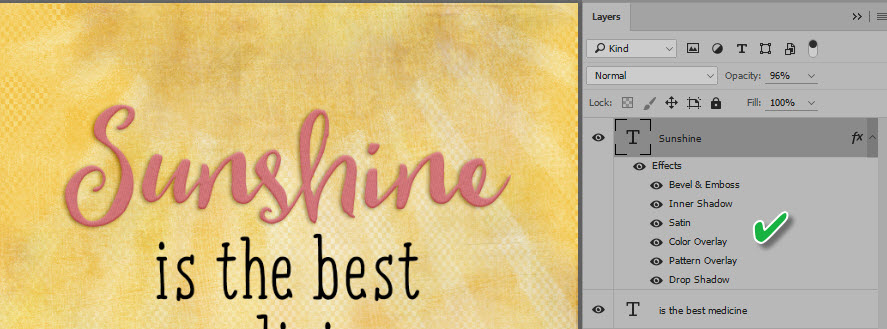
You can see that the Color Overlay on the Style is pink.
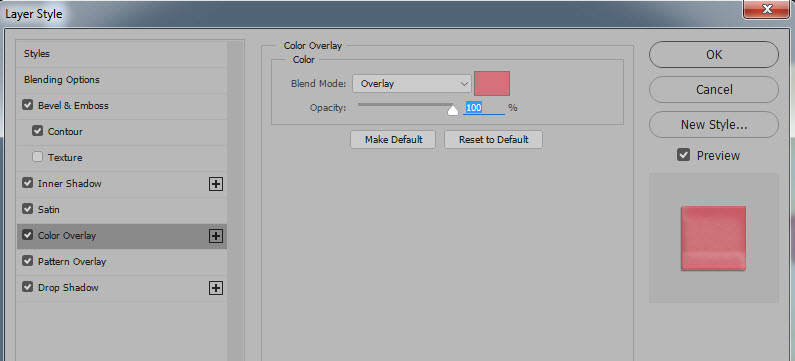
- Click inside the color box to the right of the Blend Mode to open the Color Picker.

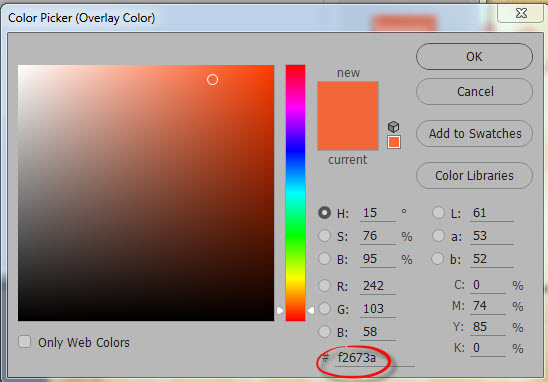
There are multiple ways to choose the new color you would like to use. Here are 4 easy ways:
- Click on the circle in the large color box and drag it around until you find the color you like.
- Use the Slider to drag it up or down to choose a color.
- Enter the color values by number
- Enter the Hex Code
I would like the word “Sunshine” to be orange. I know the Hex Code I want to use is f2673a. Once the Color Picker is open, I highlighted the Hex Code present, and typed the new Hex Code over it.
Doing so changed the color of the Style, while still retaining all of the other Style attributes: Bevel & Emboss, Inner Shadow, Satin, Pattern Overlay, and Drop Shadow.

This looks good, and I’m happy with it. Easy, right?
Depending upon what color the original style is and what color you are changing it to, you might run into a little problem. In the example below, I applied the purple stitching style to the text, then changed the Color Overlay to orange. The text doesn’t look very good around the edges. That is because the original purple style had, not only a purple Color Overlay, but also other purple effects.

Here’s what to do if you run into this problem:
- Click on the first Style Effect to open its options. In the image below I have clicked on the Bevel & Emboss Style on the left, to open its options on the right.
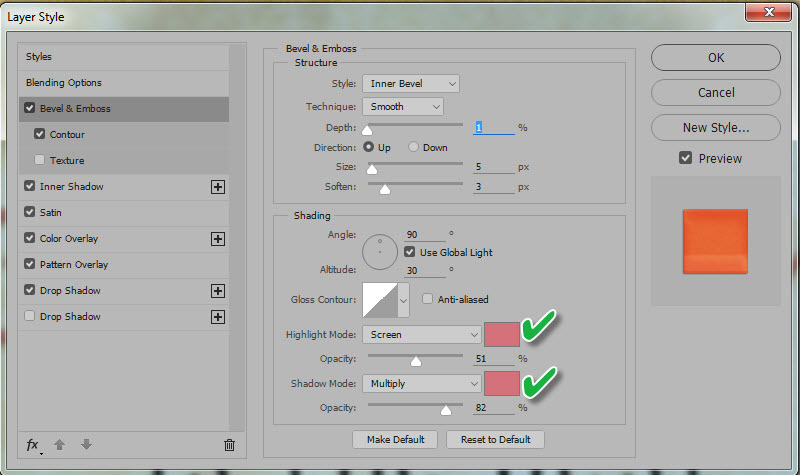
You see that the Highlight and Shadow modes are Pink. Click in each color box, one at a time, to open the Color Picker; change the pink color to the color you chose for the Color Overlay. Using the Hex Code is the easiest way to do this. Just copy and paste what you used for your Color Overlay.
Continue doing this for each Effect that is in the Style. In this example, you would click on and change the color in Bevel & Emboss; Inner Shadow; and Satin.
Here is the purple stitching style, with all of the purple attributes changed to orange! Much better!

Photoshop Elements Users: Here is a work-around for you that gives similar results.
- Apply any layer style to an object (text, element, etc.)
- Double click on the FX icon on the layer to which you have applied the Style to open the Style Setting box.
- Remove any Drop Shadows if there are any, by unchecking the Drop Shadow box. Click OK.
- Right click on the object’s layer and “Simplify Layer.”
- In the top Menu Bar: Enhance > Convert to Black and White. Choose the Style (Infrared Effect; Newspaper; Portraits; Scenic Landscape; Urban/Snapshots; Vivid Landscapes) that you would like to use. (Portraits seems to typically be the best for this work-around.)
- With your Object layer selected, in the top Menu Bar: Layer > New Fill Layer > Solid Color. Tick the box that says: “Use Previous layer to Create Clipping Mask.” Click OK.
- The Color Fill Layer will be clipped to your black and white Object. The Color Picker box will open. Follow the instructions above (for CC users) on how to select your new color. Once you have entered your new color information in the Color Picker, click OK.
- Change the Blend Mode of the Color Fill layer to Overlay.
- Now you can reapply a Shadow Style, if needed.
Understanding how Styles work, will demystify them. I hope you are on your way to feeling more comfortable using Styles!
And if you would like to view a You Tube video, you may do so on the SnickerdoodleDesigns You Tube Channel, or the Digital Scrapbooking Studio You Tube Channel. Be sure to follow both, so you don’t miss a thing!


Thank you very much <3
Awesome tips in here thank you