I’m furiously working on books over here. It’s my go-to Christmas present. What else would I give? I recently started doing one for me too. A year of Toiny, if you will. Of course my beloved Scottish moo’s have a starring role.
If this isn’t your first time to our site, you know that I also love journaling. I believe that pictures and words tell the whole story. And I love the whole story! Quick aside, I’ve been in love with photobooks since childhood. I remember long hours spent sitting with my Oma and her photobooks, asking who’s that? Even then, some 40 years ago, she didn’t remember all the people. Not a single one of her photobooks had names, dates or places. I vowed then & there I’d always tell the story, name the people, place & date.
While I use word strips & word art quite a bit, I also have A LOT to say. I also like my pages in a spread to match. That’s where today’s quick tip comes in. It’s a quick & easy way to add a matching page to your book and tell a nice, long story.
I am working in Photoshop CC today, but most of this should easily translate to any scrapbooking software. I started with my favorite Scottish cow layout:

created with Love of Autumn by The Urban Fairy
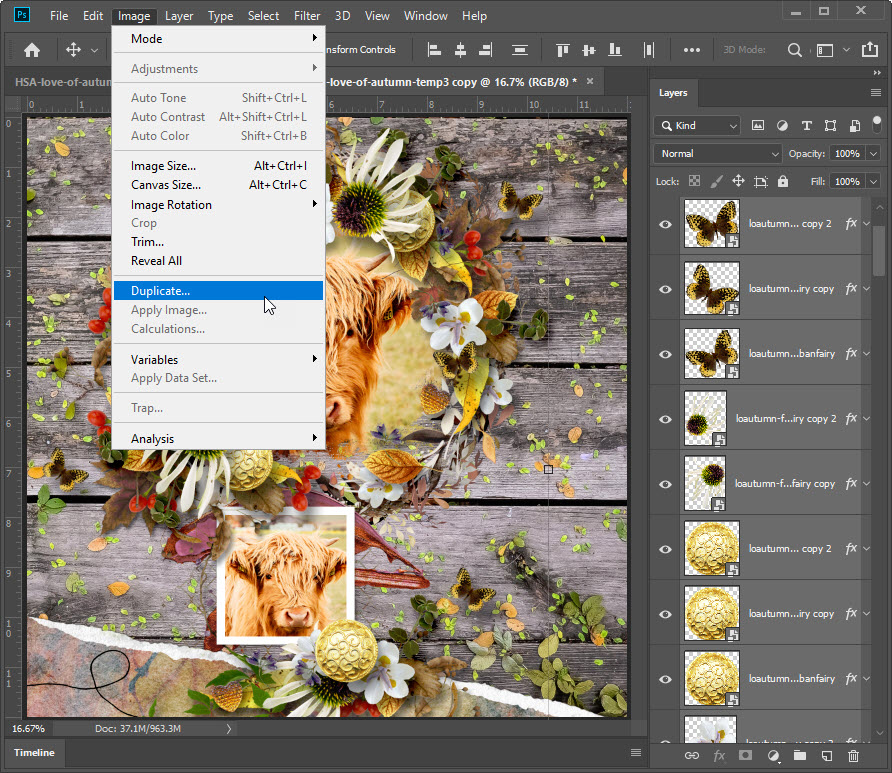
I opened my saved TIF file, and then immediately duplicated the entire layout: Image –>Duplicate
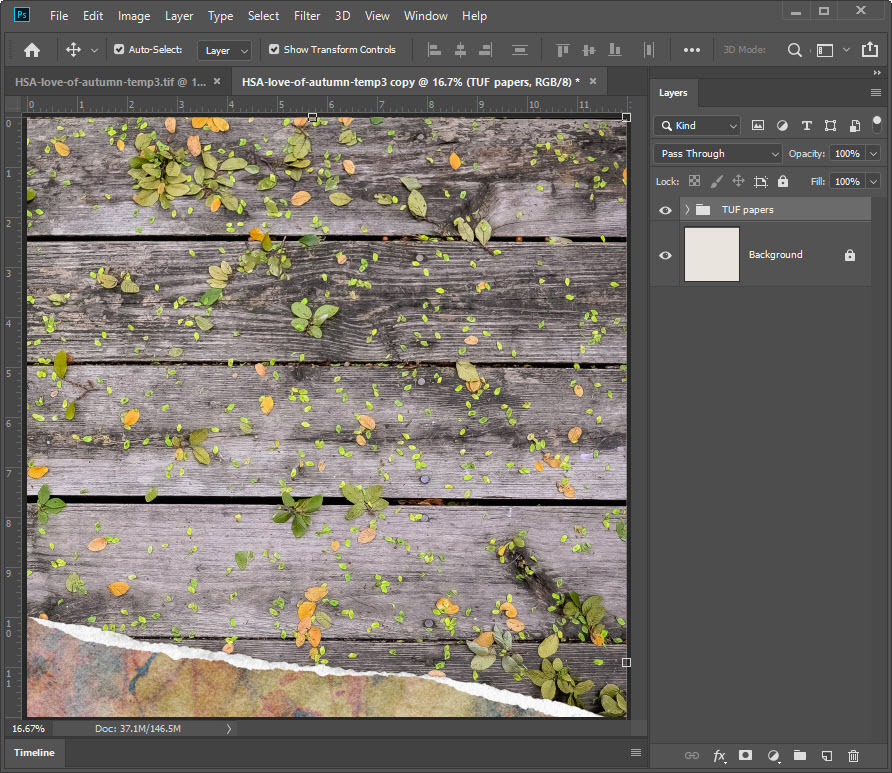
Since my intent is to journal, I only need the background papers. I simply selected & deleted all the elements in my Layers Palette, including my beautiful cow photo’s.
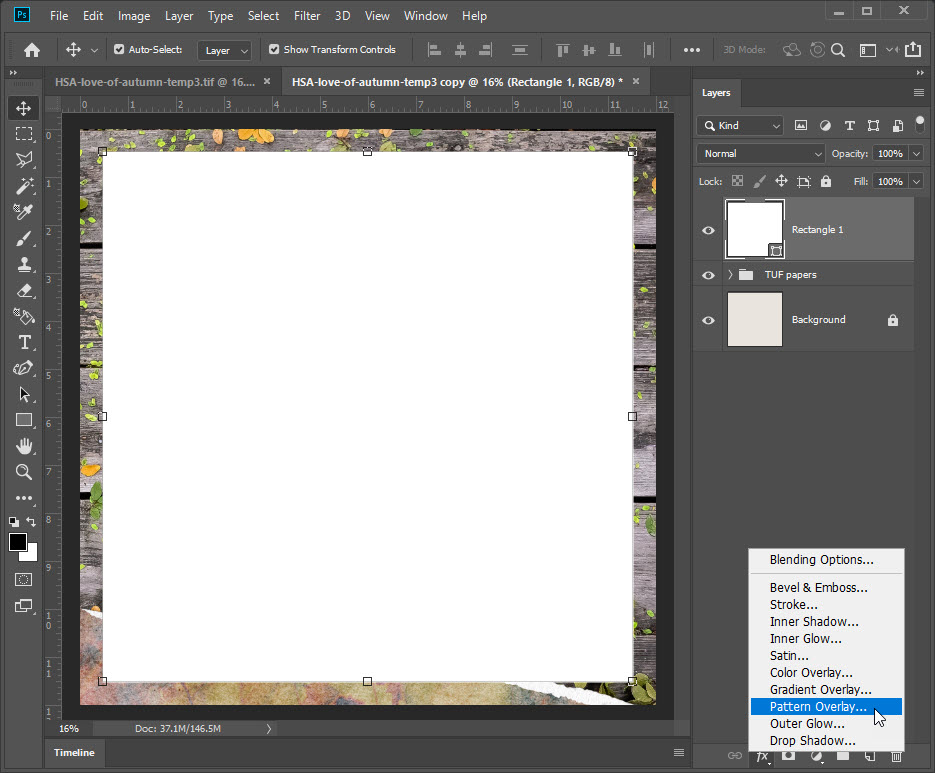
I intend to tell a story. A rather long story. So I am choosing to add a vellum layer to this rather dark & busy background. I start by drawing a rectangle, really a square. Choose the Rectangle Tool in the side menu and draw a perfect square by holding down the Shift Key as you do so.

With the new rectangle layer selected, we are going to add some texture to make our vellum look more realistic. You can skip this step or if you don’t have photoshop & pattern overlays available you can use a texture overlay as a separate layer to get a similar effect.
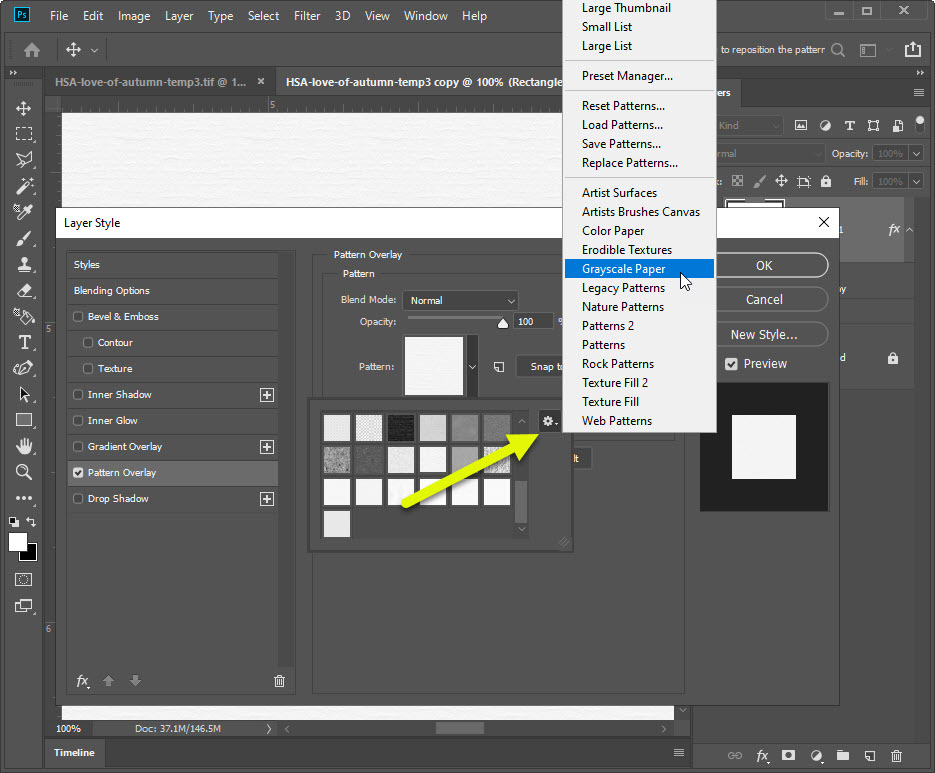
Go to your Layers Palette and choose Pattern Overlay:
With the Pattern Overlay selected in my pop-up box, I choose the Linen texture. I kept it at Blend Mode: Normal:
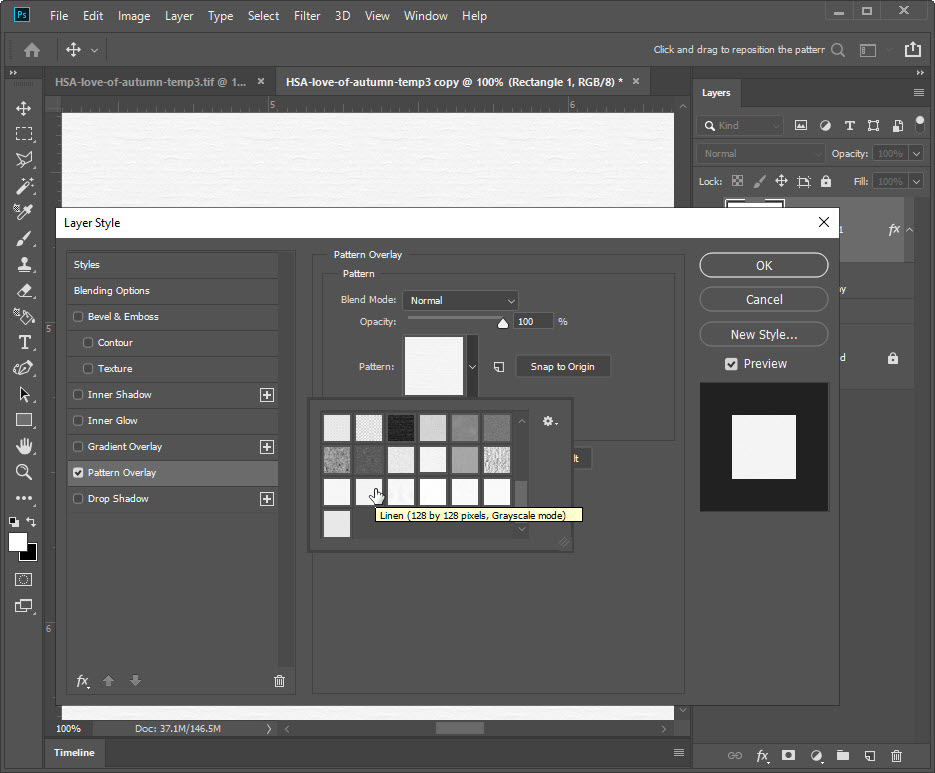
Quick aside, if the Linen texture does not pop up, simply click on the teeny-tiny flyout wheel and choose Grayscale Paper.
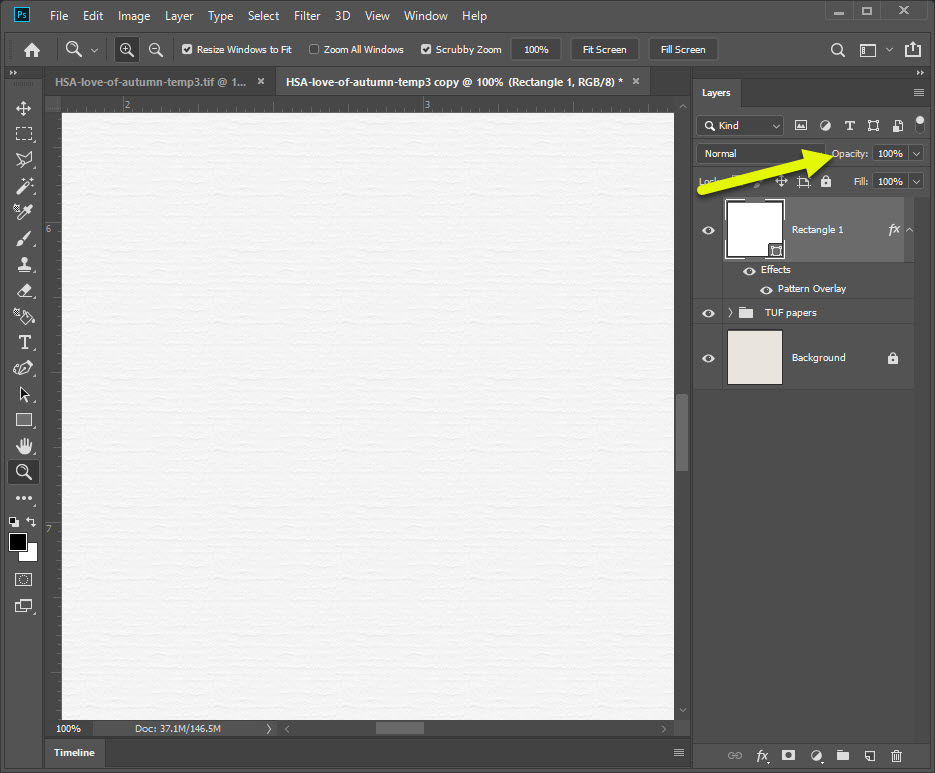
A closeup of the texture at 100% before we finish styling our vellum. We also want to decrease Opacity to finish the vellum look. Because my background is dark & busy, I will be decreasing my Opacity to 84% you may choose to decrease your opacity even more:
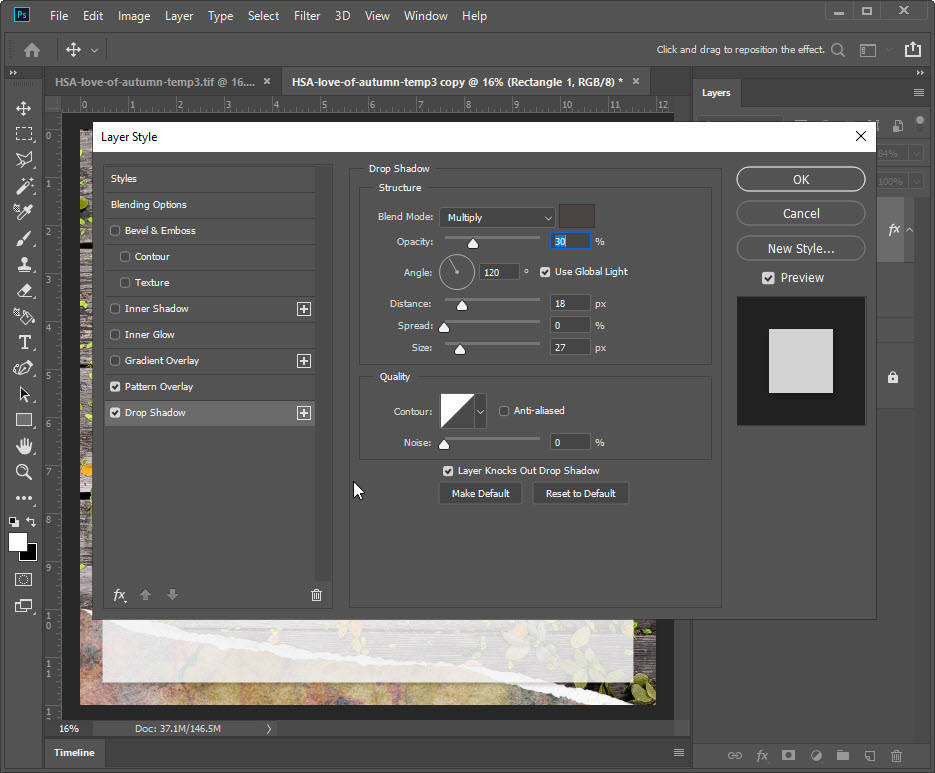
As a final touch to the vellum, I’ve added a drop shadow Layers Palette –> Drop Shadow
- Blend Mode – Multiply
- Distance – 18 px
- Size – 27 px
- Everything else is set to default
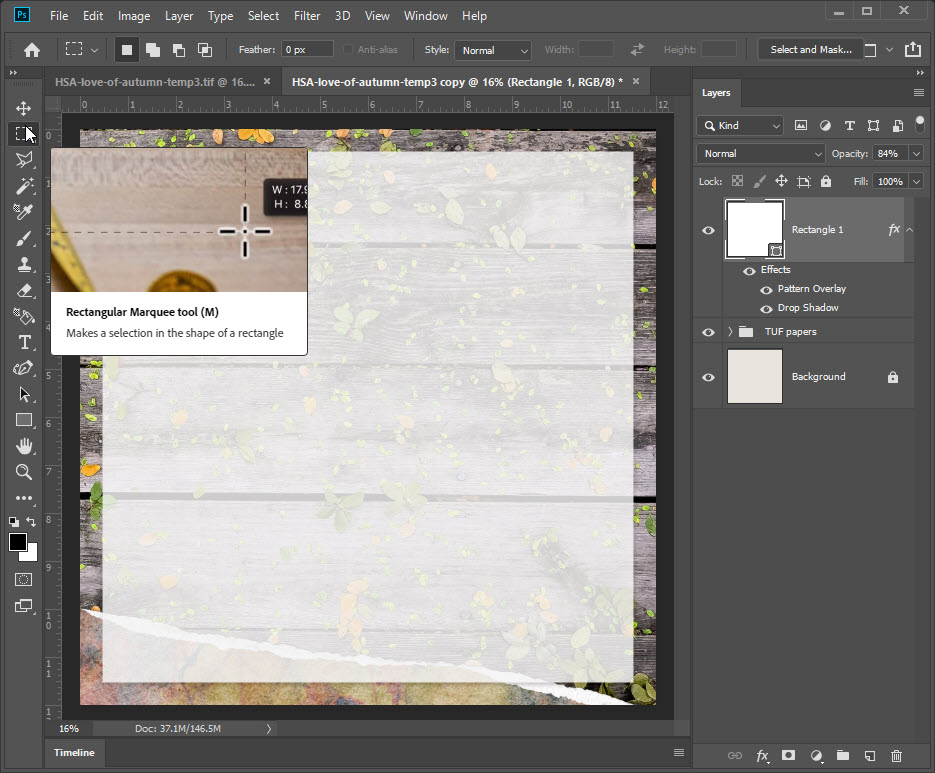
With our vellum set, we need to create a Text Path for our story. I started with using the Rectangular Marguee tool to draw the shape I need.
Note: You can draw any shape using any tool(s). I like simple. This is simple.
Create a New Layer, right-click on your screen and choose Make Work Path:
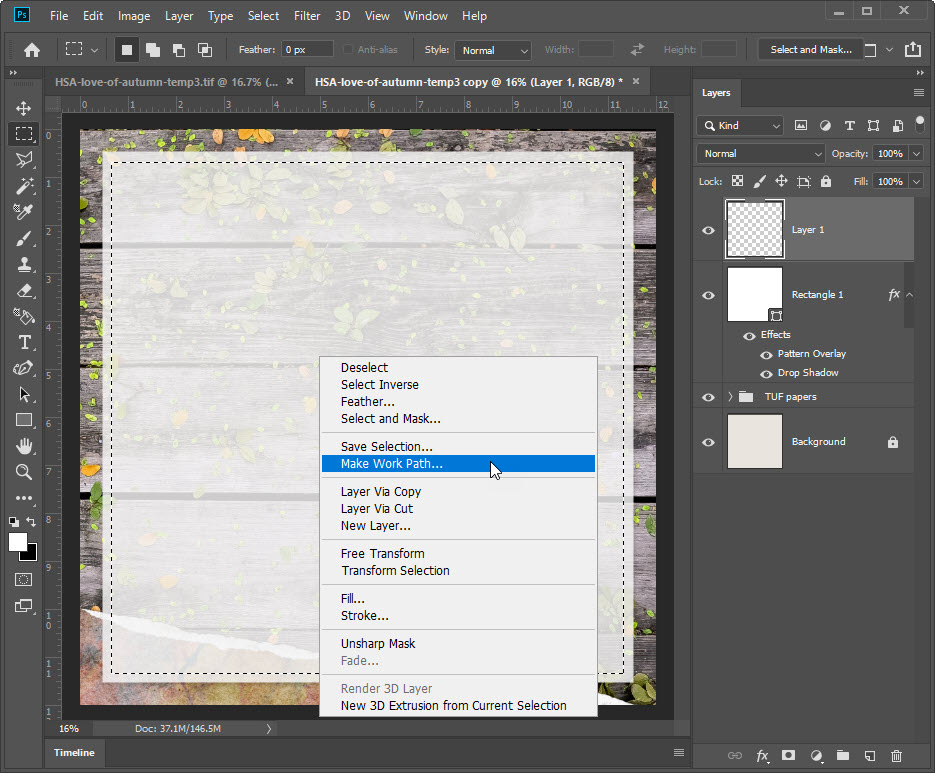
Your “marching ants” have turned into straight lines, or a work path. That means all your typing will be contained within that path. Switch over to the Type tool and start typing! Or do as I did and simply copy & paste your text in. I used my blog post Snow & Cows for the text here:
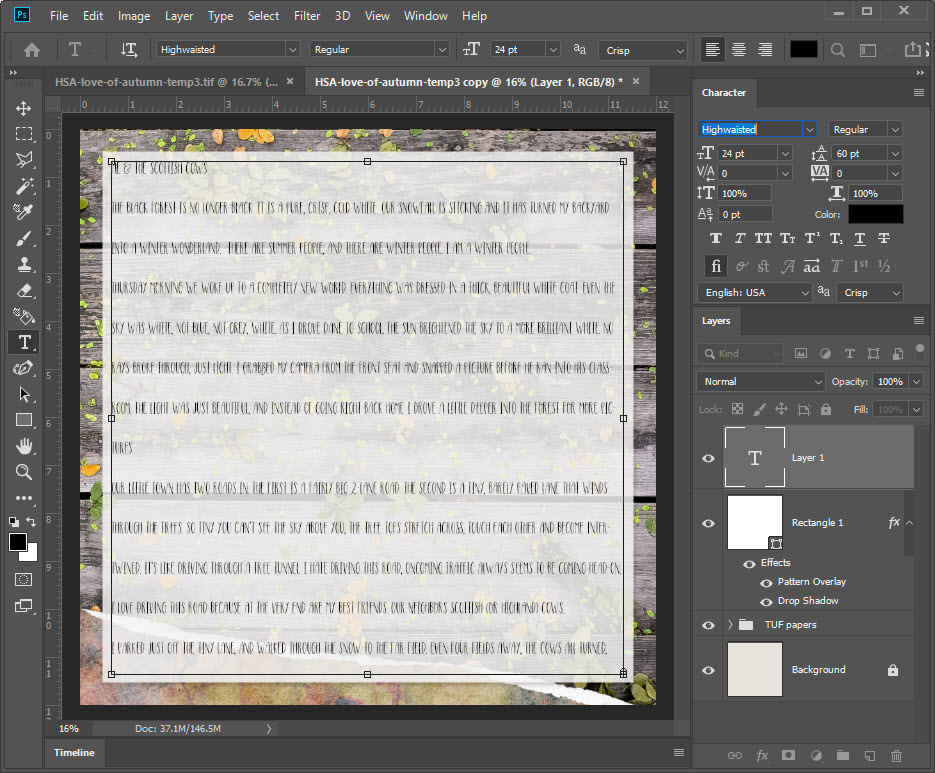
Notice that it picked my last text, or Character, settings used. I like this font, Highwaisted, but I need to adjust my settings to get the text to fit. I also want to make my title a little bigger & bolder:
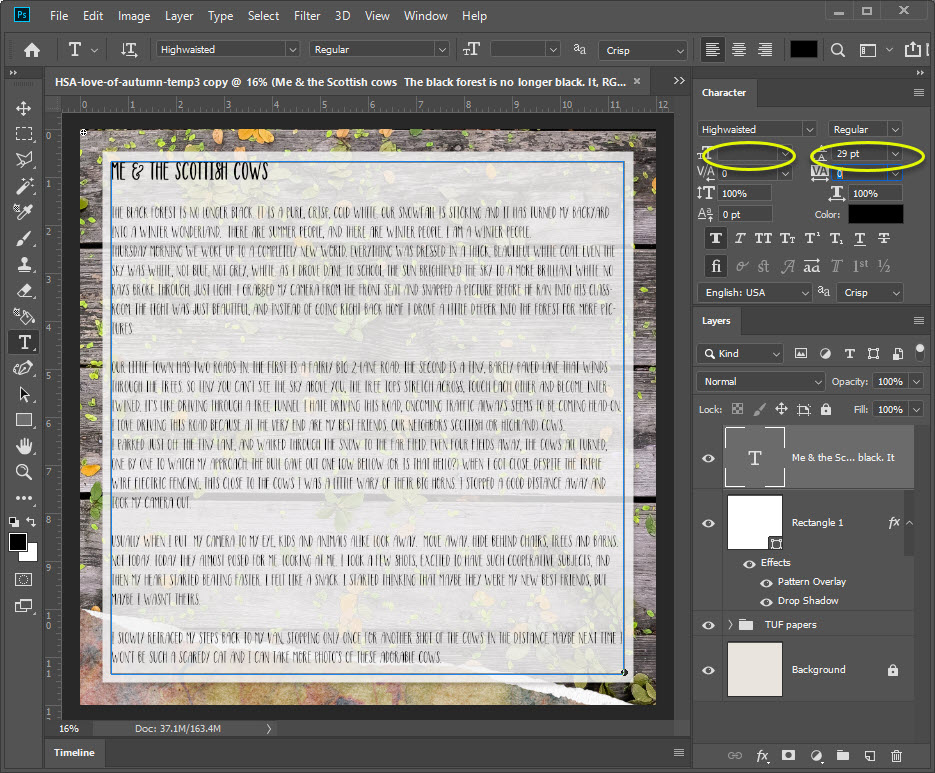
As a final step, I added in the place & date. I simply added in a text box to get the look I want. Now I have two pages, perfect for my “year of Toiny” photobook.
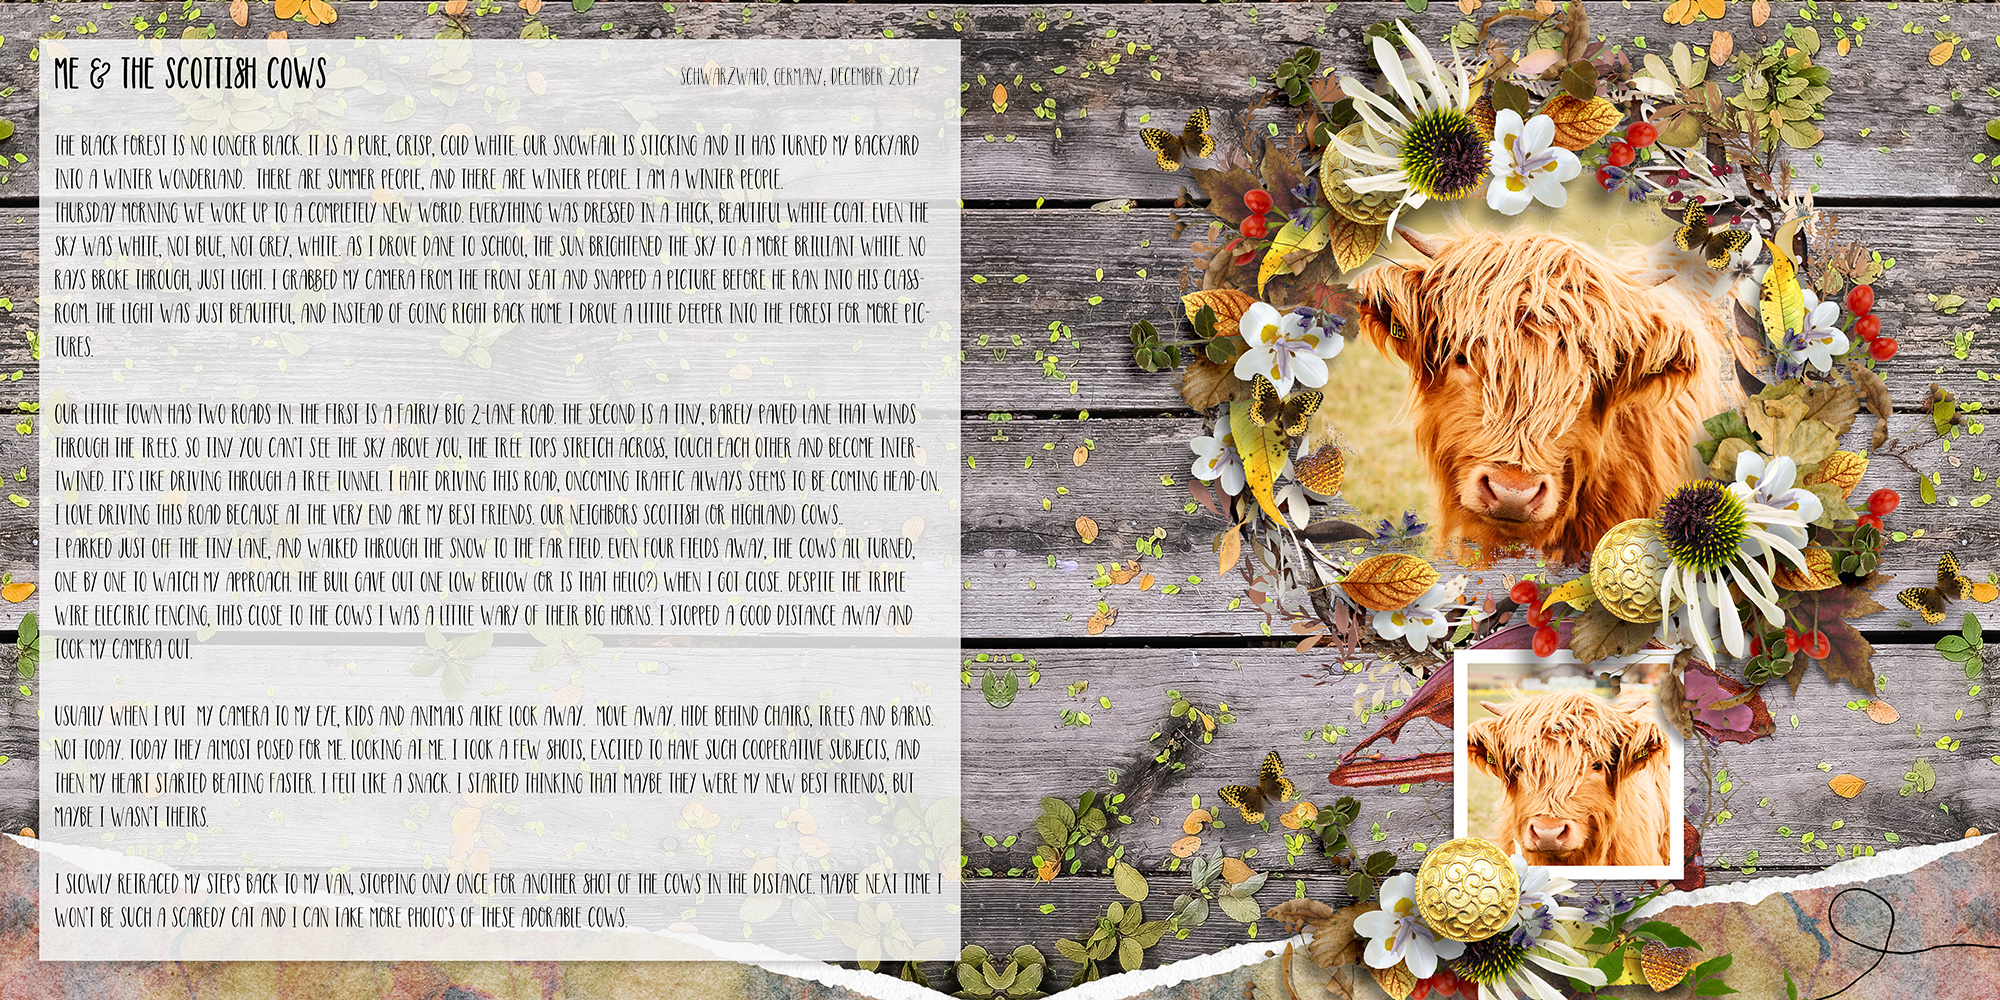
I used the Love of Autumn by The Urban Fairy and the extra template set Love of Autumn by Heartstrings Scrap Art.


Lovely tip on creating a “full size” journal page. I’ve always struggled with creating vellum. Love how you did that but…I use Photoshop Elements and am having trouble figuring out how to do the same kind of thing. Any help would be greatly appreciated. If you have any suggestions…you can PM me in the “Community” Thanks in advance.
Thank you so much for the tutorial. I had no idea how easy it was.
Thank you so much for the tutorial.
How wonderful thank you so much. I also use Photoshop Elements like Letsscrap, would be interested in any advice. Also can you advise why you use TIFF files? the Scottish Highland Beast brings back so many memories of our trip to see relatives back in 1991, they the beast’s are amazing for sure.
I use TIFF files so I have an image in my folders of the file I’m working on rather than a PSD logo. I have plenty of room on my harddrive so this works for me.
As for Photoshop Elements, which part specifically is the issue in recreating vellum? I do not have Photoshop Elements so I need to consult with my team. A specific question will help me get the answer you are looking for.
Hi Toiny…This is Debbie Heller (Letsscrap). I use PotoShop Elements (PSE) 2019. Once I get past drawing the white square there’s pretty much nothing that resembles your screen shots. I don’t see a “layers palette” the way yours looks. But I finally figured out a way to achieve the texture part by using a linen texture overlay sized to fit over the white square (blend mode set to normal & opacity set to about 55%). I set the white square opacity to 84% and get a nice result. I then merged those 2 layers. Unfortunately, the Drop Shadow part is presenting the biggest issue. In PSE the layer styles “palette” does not have the same options you show. Specifically, there is no Blend Mode option. Angle, Size, Distance, Opacity and color are all I can change on shadows. When I apply a drop shadow using the settings you show for the options that I can change it doesn’t just put a shadow around the edges…it darkens the whole square. So, trying to do a shadow doesn’t work for me. I did try separating the shadow to its own layer and applying a blend mode of Multiply (to only the shadow) and it didn’t really make any difference. So, for now I can’t figure out how (easily) to do a drop shadow on vellum short of monkeying around with the separated shadow to create just the “edges”. But your tutorial did help me realize that the biggest reason I was never happy with my other attempts at creating what I thought was “pretty” vellum was because I wasn’t applying a texture. Because of your tutorial I have now figured that part out. Hopefully this will also help Christine. Thanks for your tutorial and maybe this long reply will give you a better idea of what is different in PSE. Have a great weekend.
Thank you so much for the tutorials, love them !