
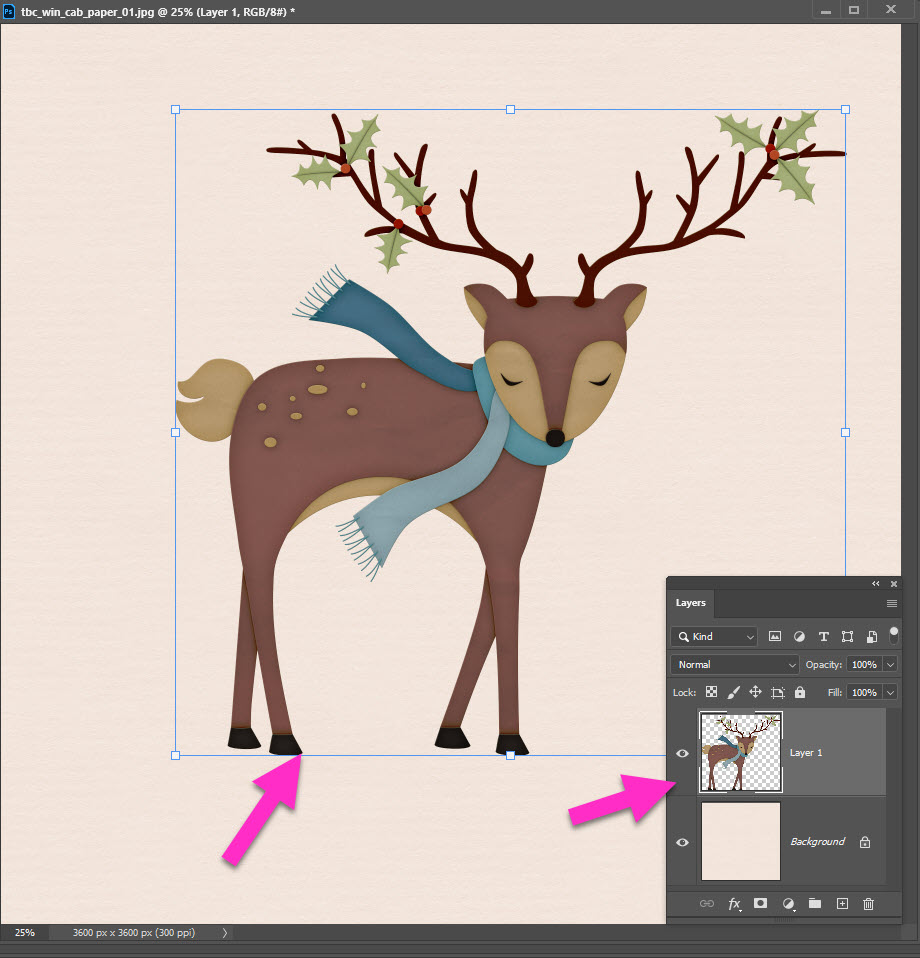
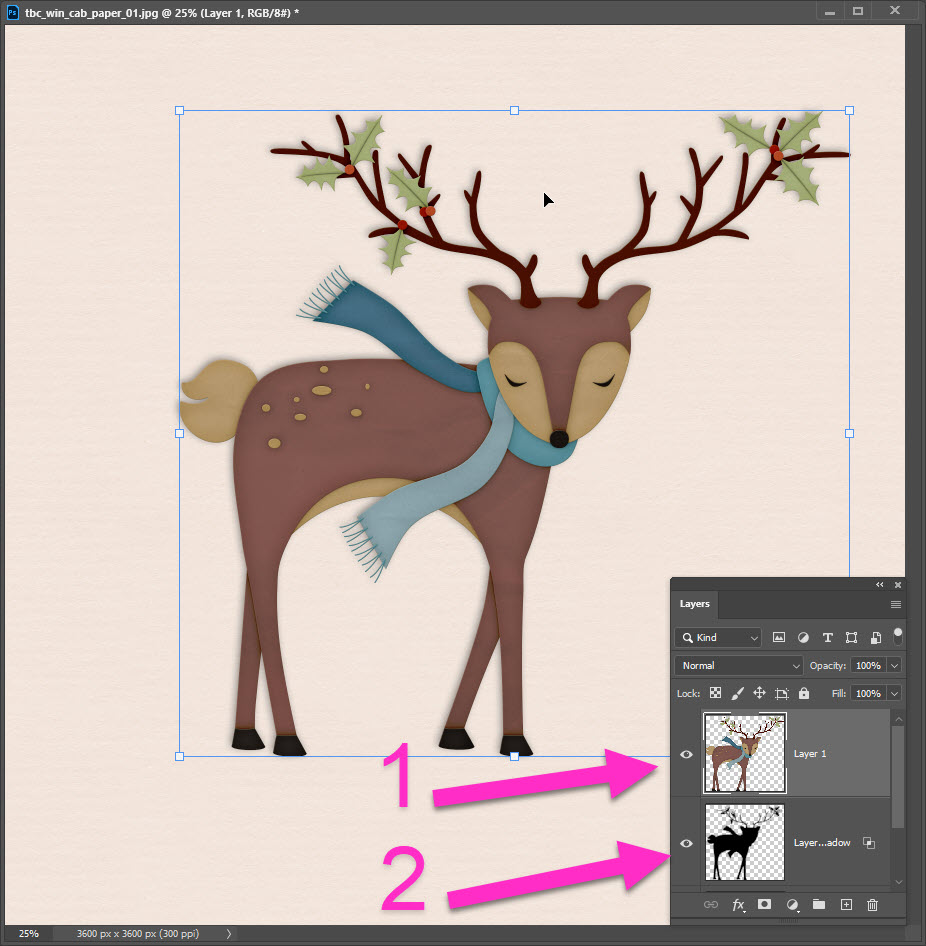
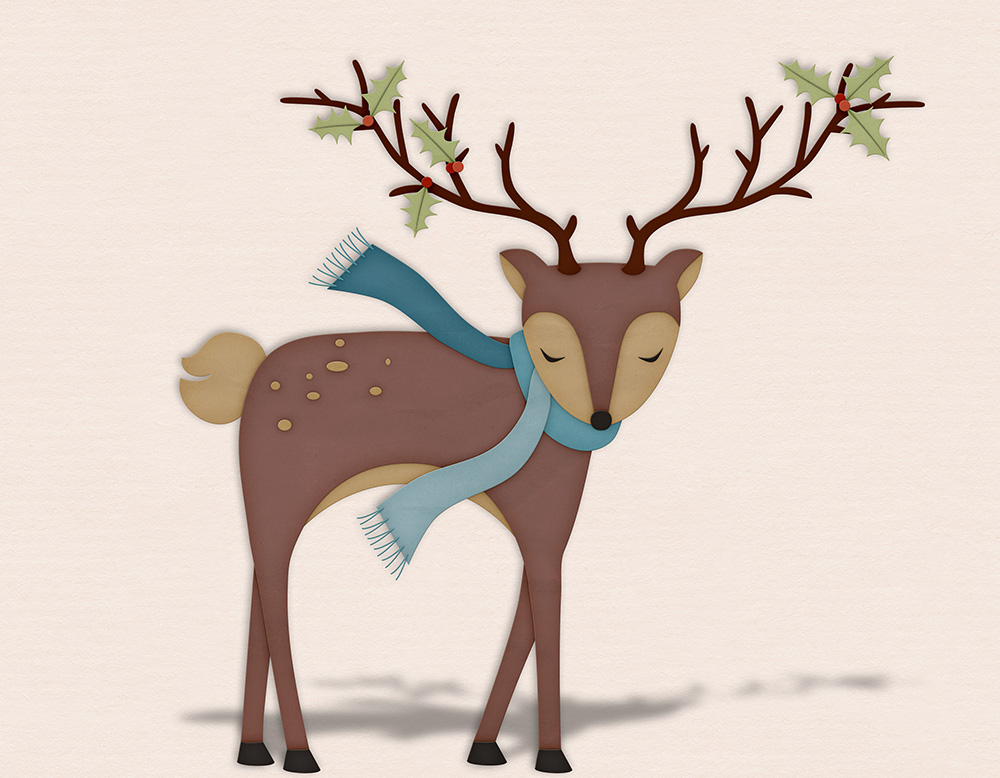
If you are playing along in our Layout-a-Day: Winter Cabin, you know that you’ll be getting this adorable deer as your prize today (January 12, 2021). I’m using him to illustrate how I sometimes double shadow elements. I find that a double shadow can be useful with animals or even people. Here, let me show you.
I start by dragging the adorable deer, by Aimee Harrison Designs, into my open document. In this case the solid paper from Tracey B Creations, also part of the January 12 LAD prize.
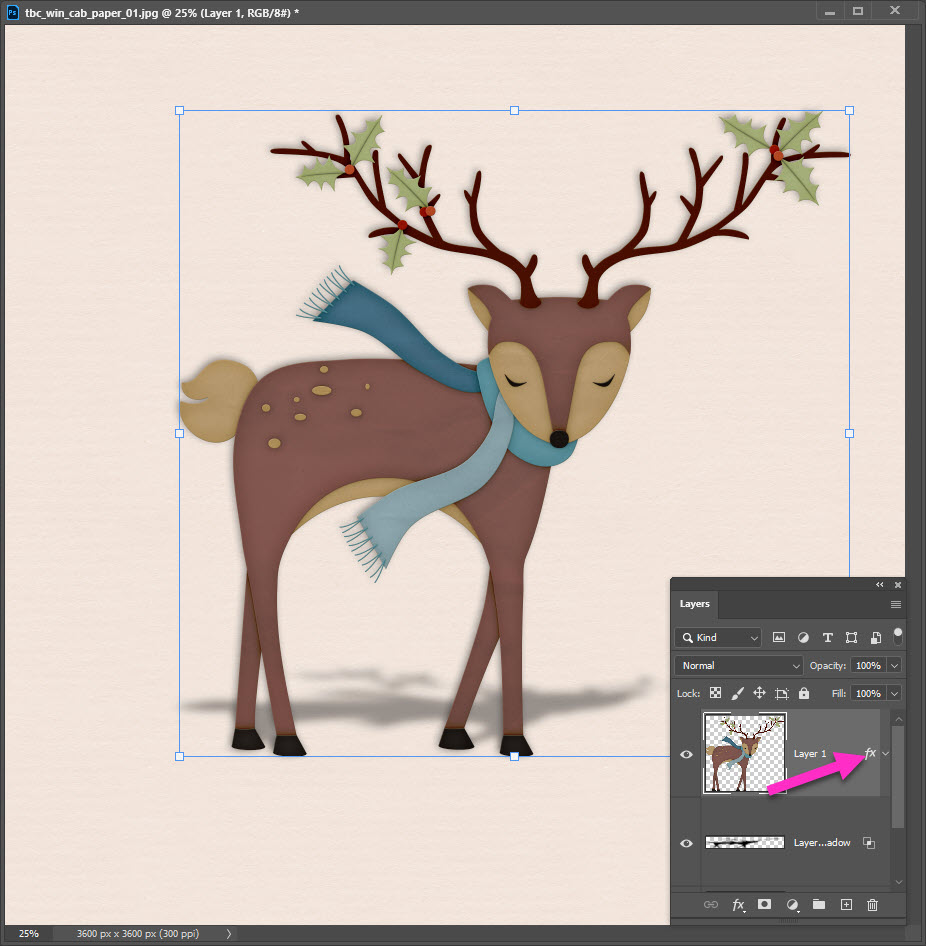
Note: I now have two layers in my photoshop document (PSD).
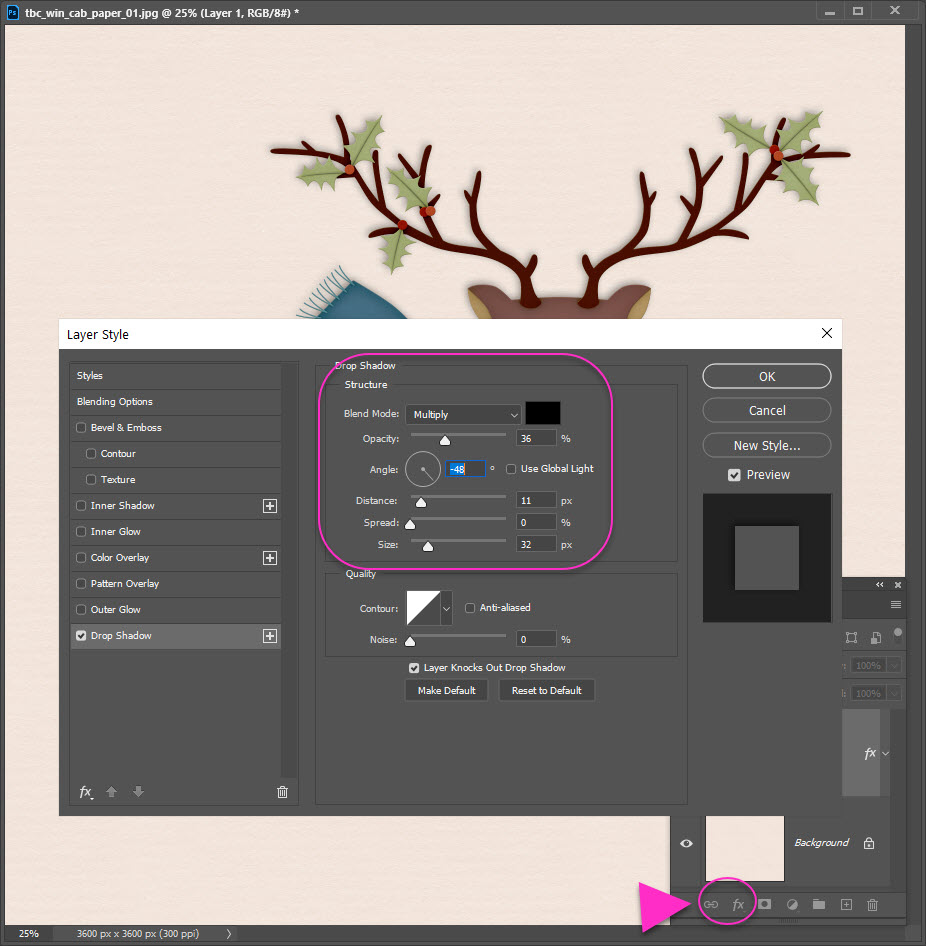
I need to start with the first shadow. These are my settings and my shadows are light, on a light background. Please adjust accordingly dependent on your background.
- Make sure you are on the adorable deer layer
- Click the fx to open the drop shadow panel
- Set your Drop Shadow to:
- Blend Mode: Multiply
- Opacity: 36%
- Angle: -48
- Distance: 11 px
- Size: 32 px
- Click OK
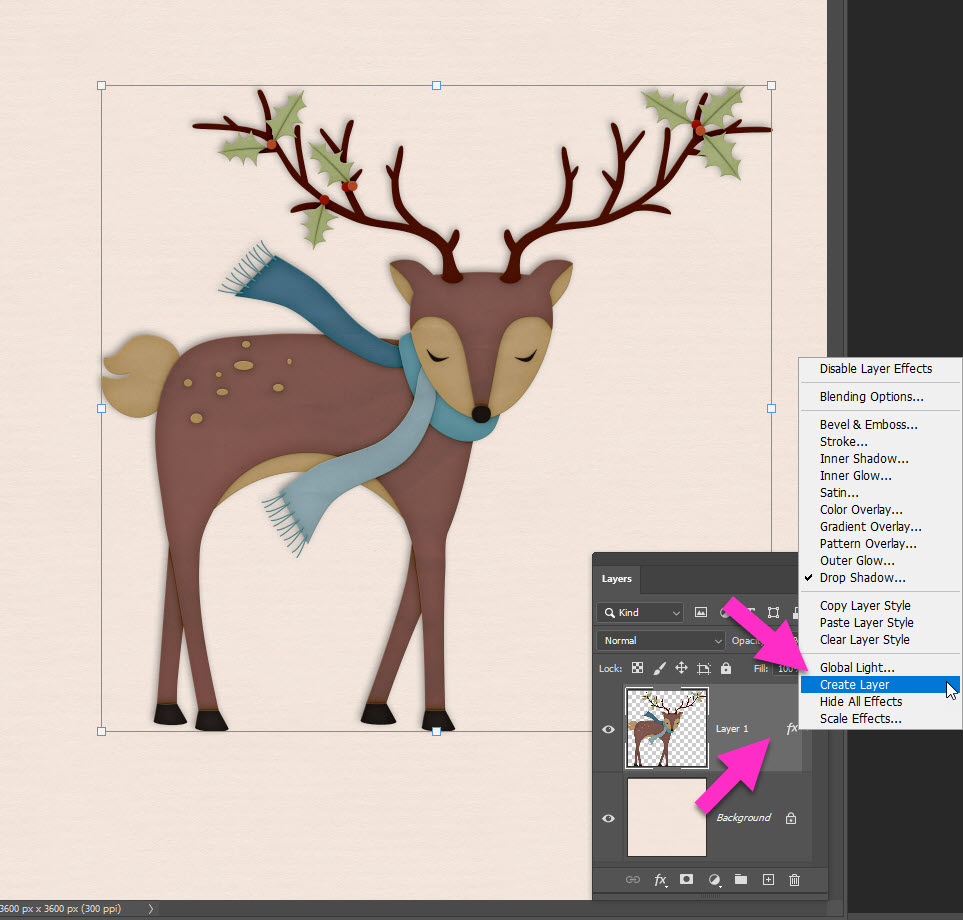
Double check you are on the adorable deer layer:
- Hover your cursor near the fx on the deer layer
- Right-click; and a pop-up menu appears
- Click on Create Layer
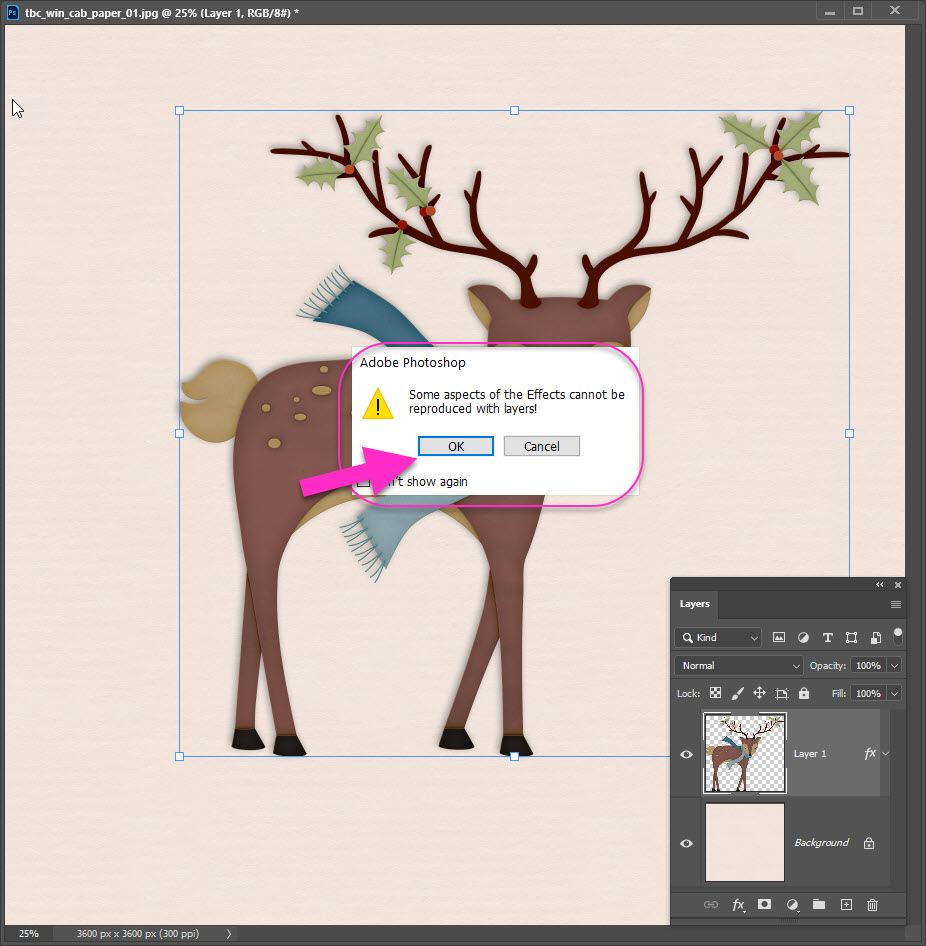
As soon as you click Create Layer, a pop up occurs:
“Some aspects of the Effects cannot be reproduced with layers!”
Click OK
You now have two adorable deer layers:
- the original adorable deer element (Layer 1)
- the shadow (Layer 1 shadow)
We are going to Distort this new shadow layer so that it looks like there is a shadow under the adorable deer. To do this, make sure you are on the new shadow layer:
- In the top menu, click on Edit
- Click on Transform
- Click on Distort
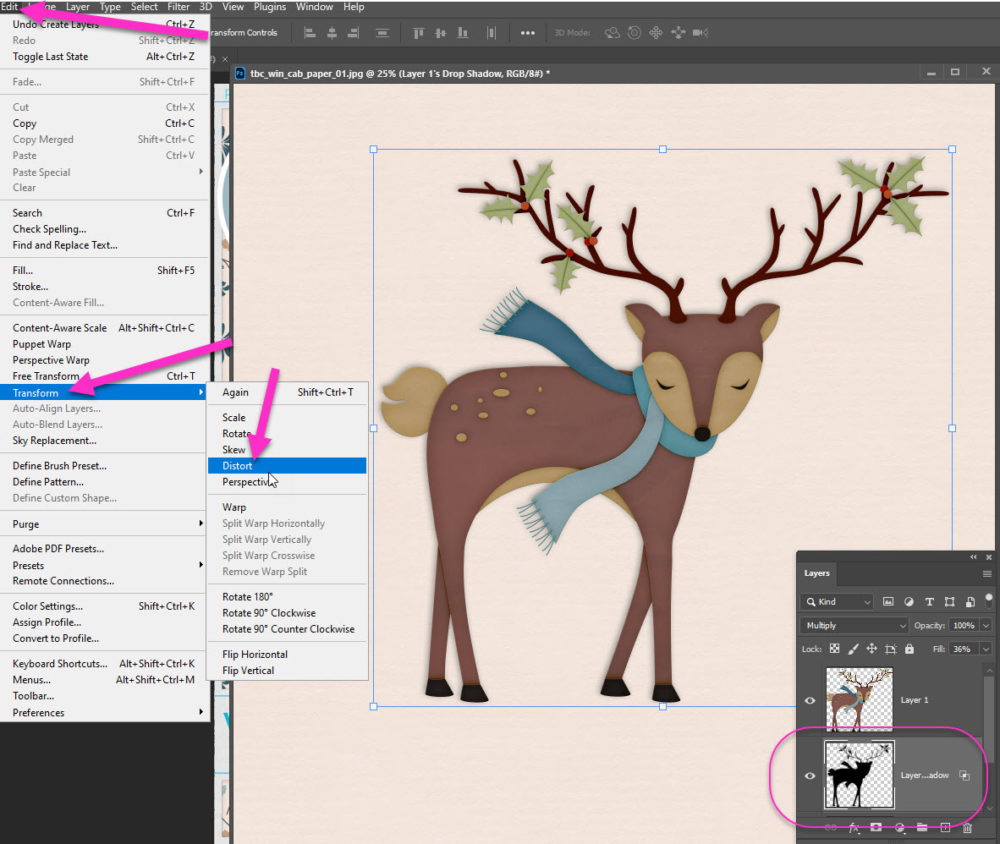
You can now grab the “handles” to Distort the shadow. Simply drag it down & closer to the deer until it looks right to you:


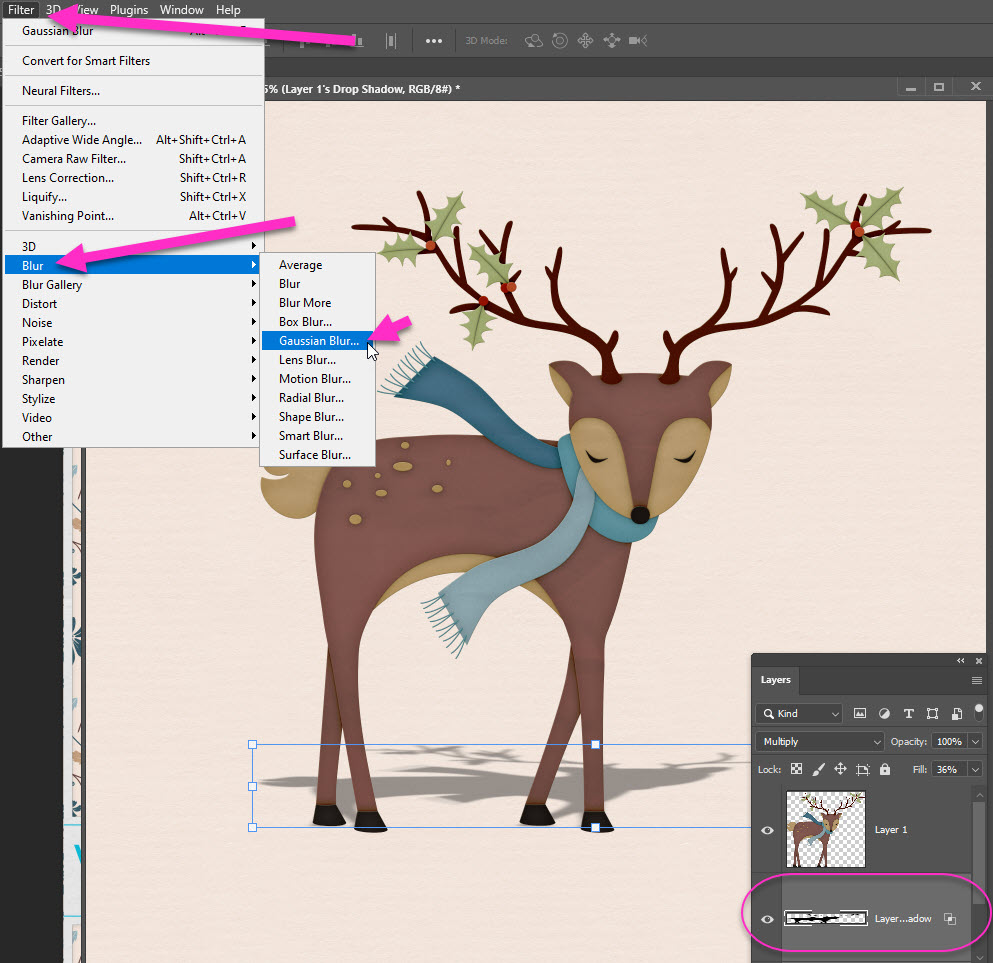
To make this distorted shadow even more realistic, it needs a blur to it. A shadow this far from the adorable deer will not naturally be crisp. Again, be sure you are on the shadow layer:
- In the top menu, click on Filter
- Click on Blur
- Click on Gaussian Blur
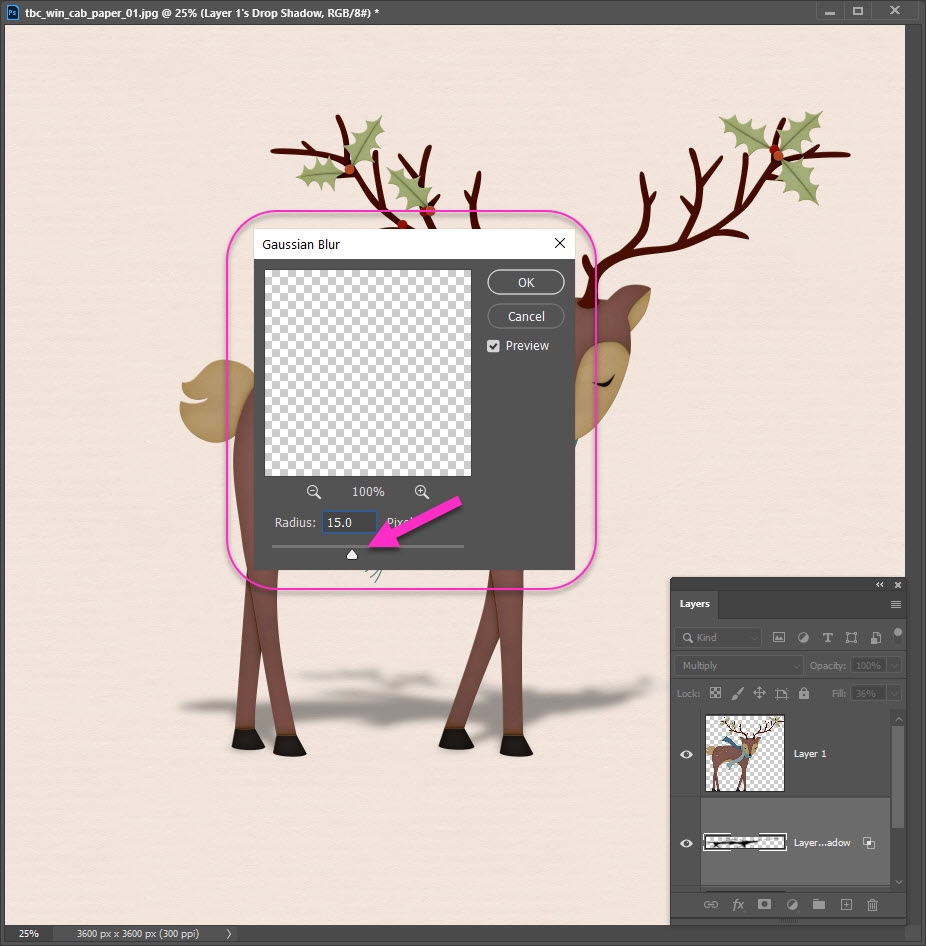
As soon as you click Gaussian Blur, a pop-up occurs. In this pop-up you can adjust the amount of blur by sliding the Radius slider on the bottom.
I set my blur at 15.0 Pixels
That’s it for the first shadow! Now click back onto the adorable deer layer (Layer 1) and reapply the original Drop Shadow settings.
Note: Photoshop remembers the Drop Shadow settings you last used as a default setting. This can be as simple as:
- Click fx
- Click Drop Shadow.
That’s it! Your adorable deer is doubled shadowed & ready for action.


Now that is cool and something I have never tried…. The drop shadow on the ground…. Will have to give that a run… Love it when I learn something totally new and useful! Thanks…..
Thank you so much for posting this. I have wanted to know how to do this in PS for so long. I normal use PSPX18 and it is very difficult to do, but this makes it so easy and I was actually able to do it without frustration. Wonderful tutorial.