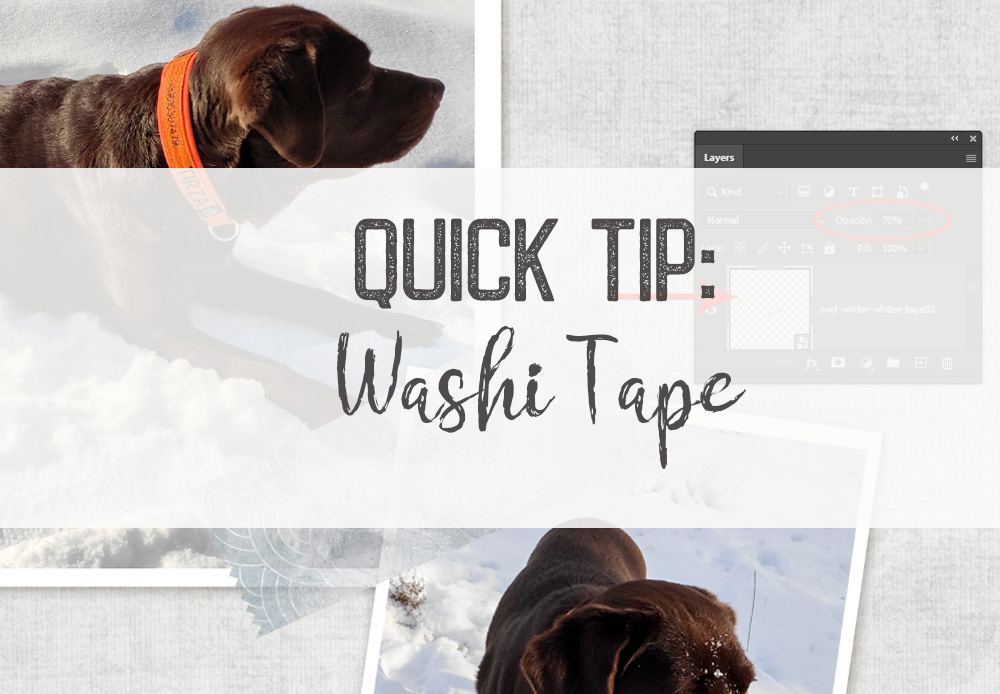
Hi Elly here,
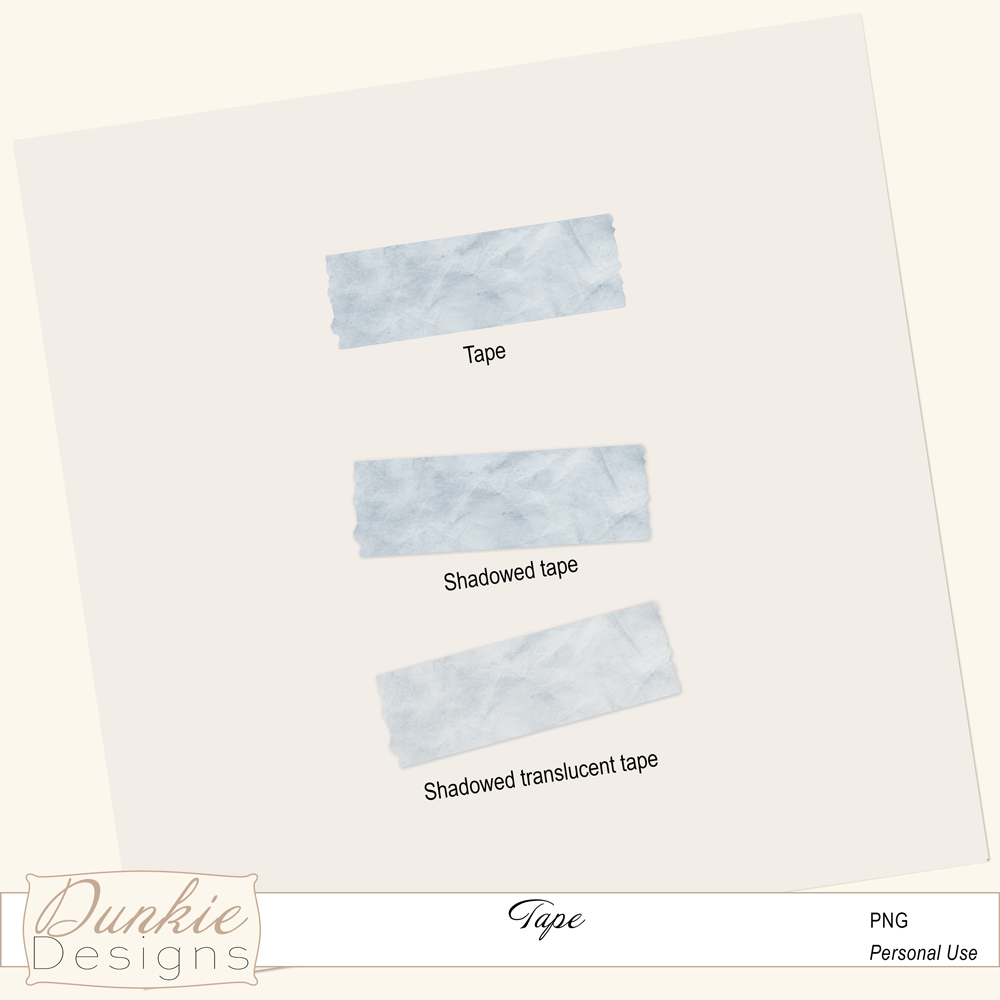
Today I will show you how to use and shadow a washi tape.
If you played along every day in our LAD: Layout-a-Day Winter Whites, you have 2 tapes now, 1 came with the mini from January 8 and the other with the mini from January 20. You can use any tape to follow this Quick Tip.
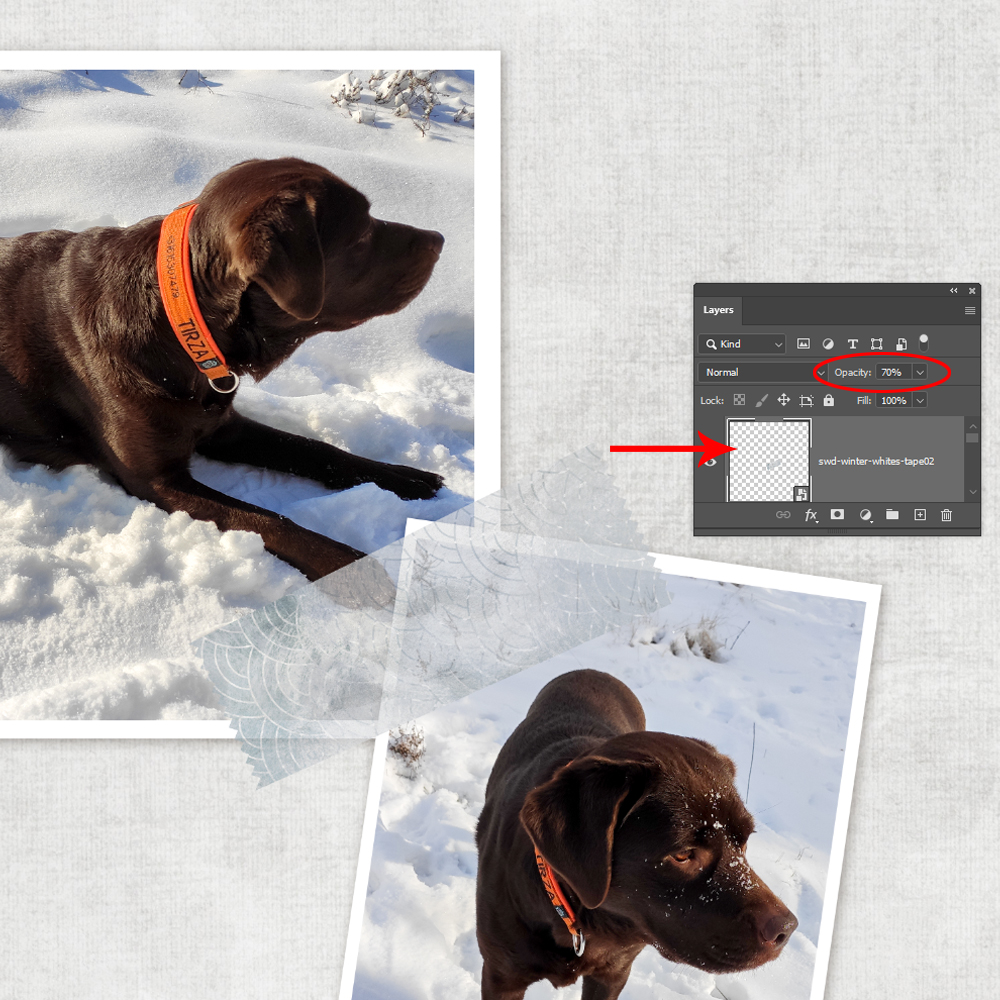
- Place the tape on your document.
- I used Toiny’s swd-winter-whites-tape02
- If you want the tape more translucent, lower the opacity
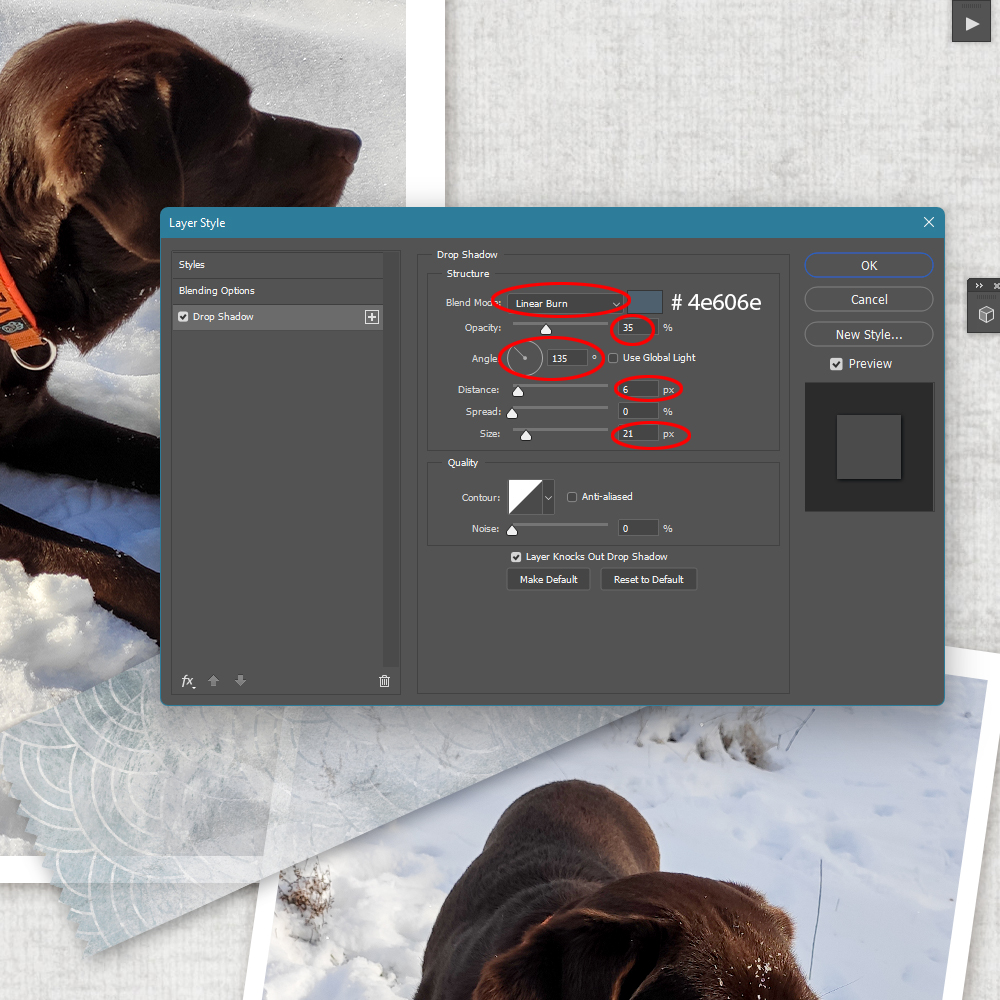
- Now give the tape a drop shadow.
Click at the bottom of the Layers panel on the fx button
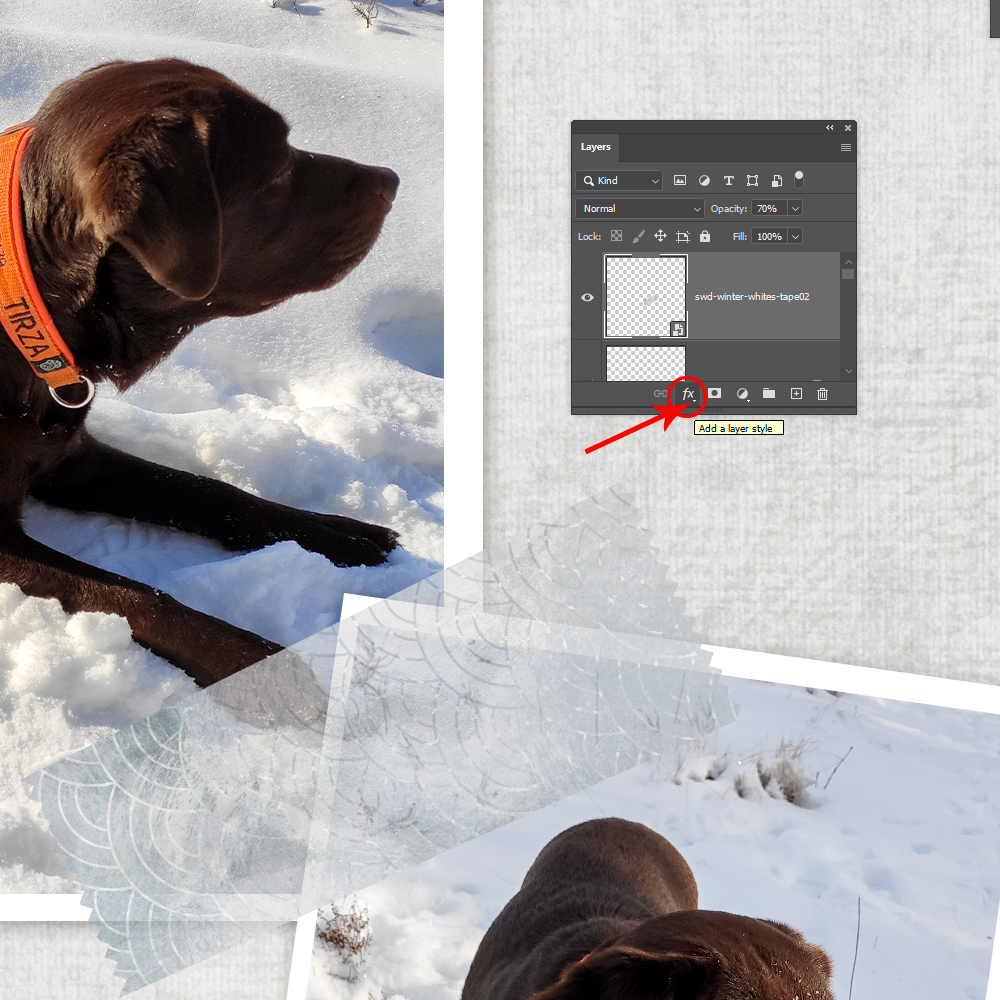
- Choose Drop Shadow

- These are my settings, you can adjust the color to your layout
Blend Mode: Linear Burn
Color: # 4e606e
Opacity: 35%
Angle: 135°
Distance: 6 px
Size: 21 px
- Put the shadow on a separate layer:
Right click on the fx button at the right of the tape layer and choose Create Layer
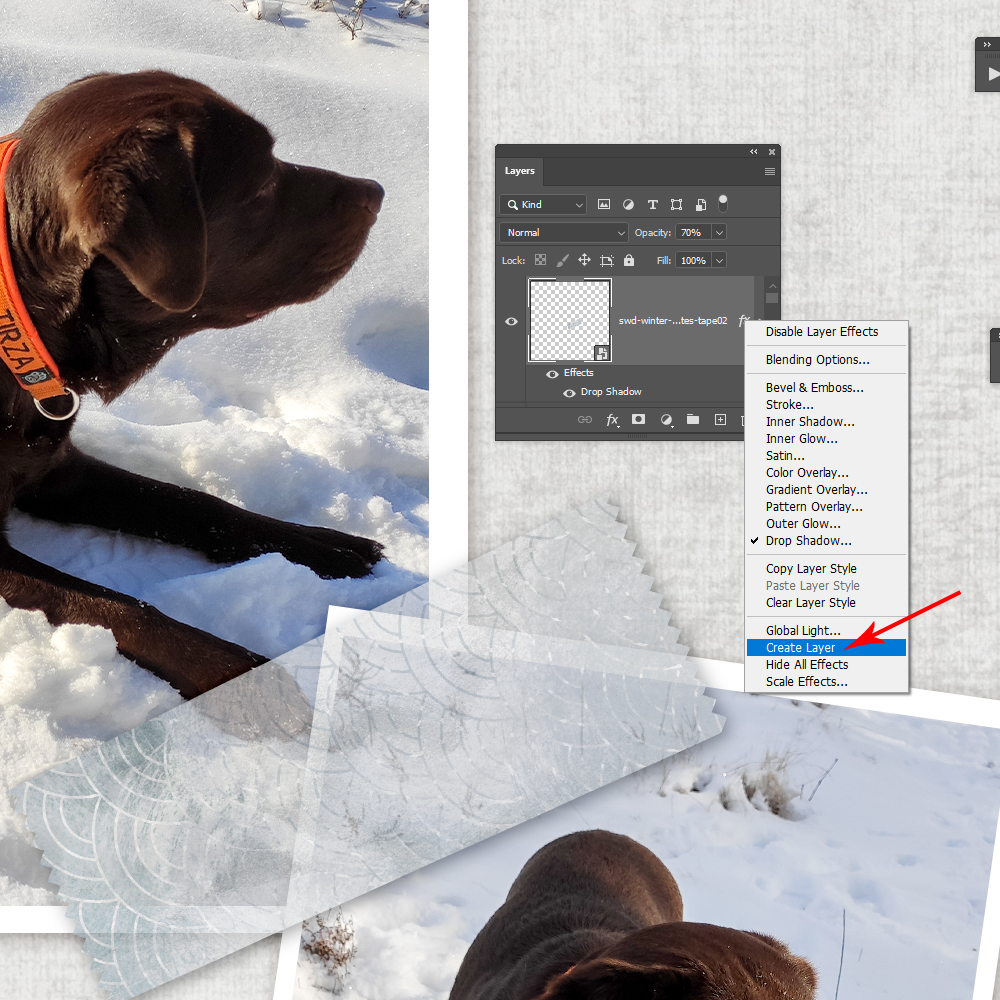
- Now you have new layer below the tape layer
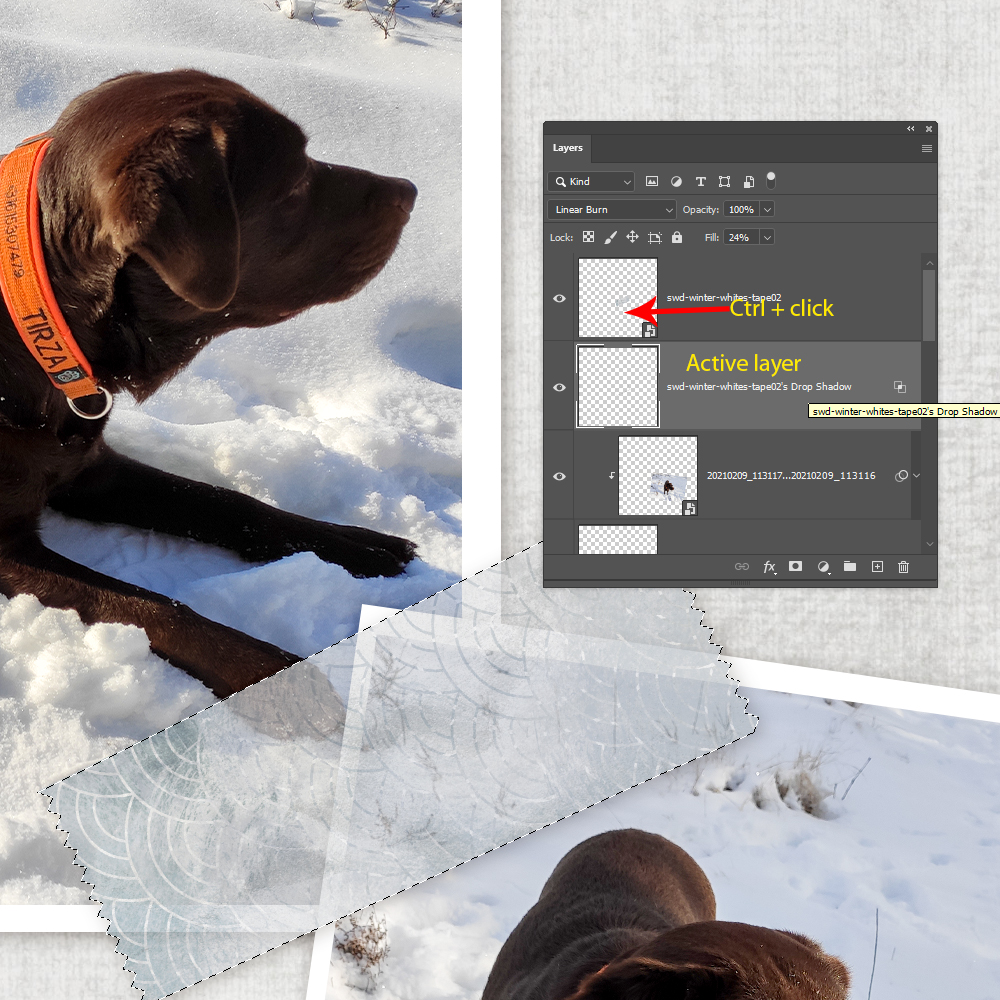
Because the tape is partly translucent we are going to remove the shadow behind the tape - Make sure the Shadow layer of the tape layer is active.
Ctrl + click on the layer thumbnail of the tape layer. You see the walking ants around the tape
Click on the Delete button
- Deselect: Ctrl + D or Menu Select/Deselect
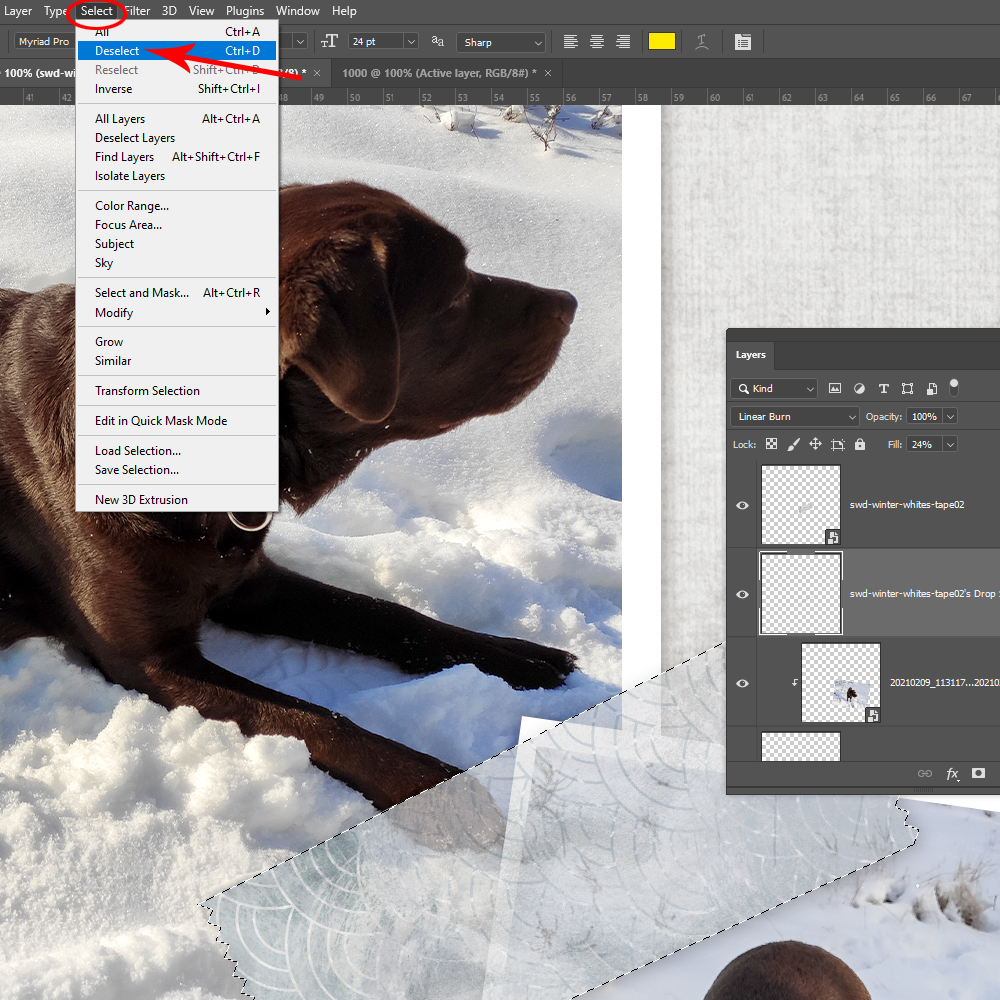
- Only the shadow of the tape has left, the tape is clear.
That’s all for the shadowed translucent washi tape.
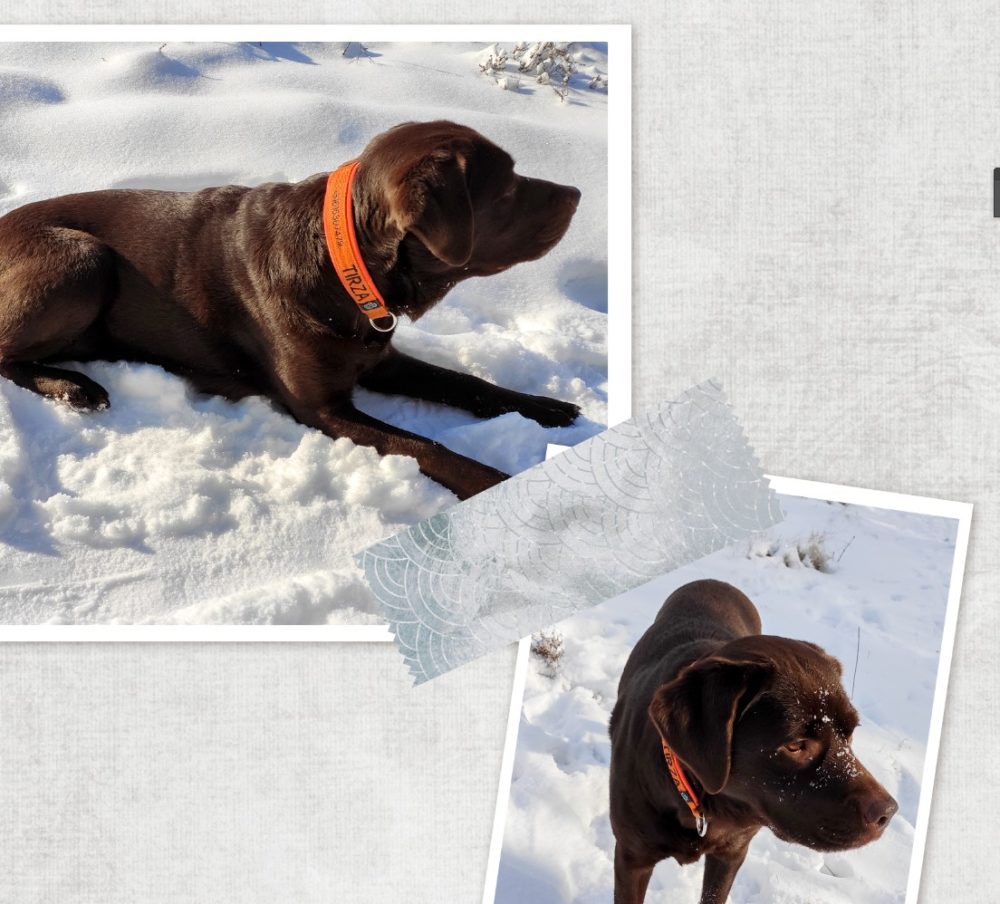
My finished layout, which I created with Winter Whites mini’s from the previous days

I made a washi tape freebie which is perfect for those of you with incompatible software to follow the Quick Tip, or those of just short on time today.
Happy creating!
Elly


Thank you so much
Thank you Elly.
Great tip and nice freebie, Elly! Thank you! 🙂