
Are you ready to do some photo editing? If you haven’t downloaded & installed Lightroom yet, take a moment to read my First Ever Lightroom post. Please join our 100 DAY Project. It’s free, fun & friendly and a great place to test out your new Lightroom skills.
I’m picking up right where I left off yesterday with this photo of Tess. I took this back in April out on the water in Oslo, Norway. As you can see it was a cloudy but very bright day, amplified by the water. It was close to impossible to get a picture of the people on the boat, in a good light. All my photos were backlit & the faces were in shadows. Luckily Lightroom to the rescue!
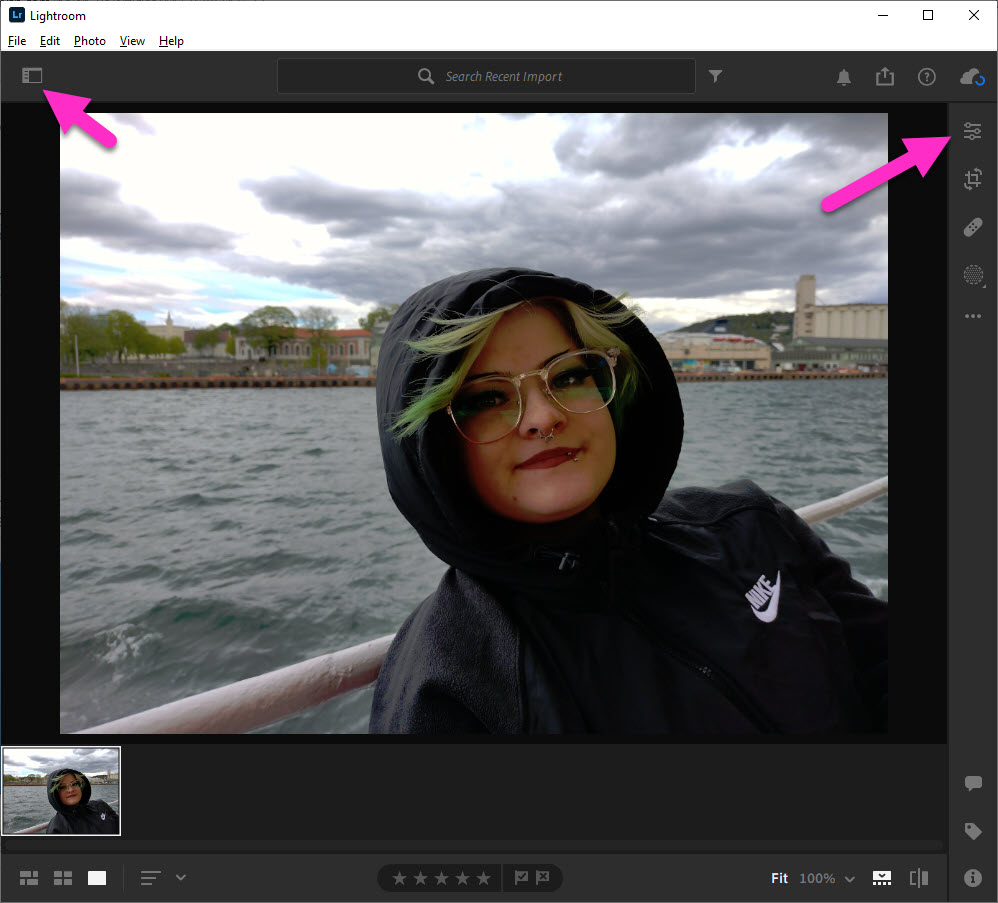
- Click on the Photos Icon to close the Add Photos fly-out menu
- Click on the Edit Icon (top right) to open the Edit fly-out menu
A quick stop, once the Edit Menu is open, there are lots more edit options than you see! To access these, you need to slide down the menu bar on the right. It’s thin, narrow & light grey. It can be hard to see and very easy to miss. We will use this to scroll down to some more options in just a minute.
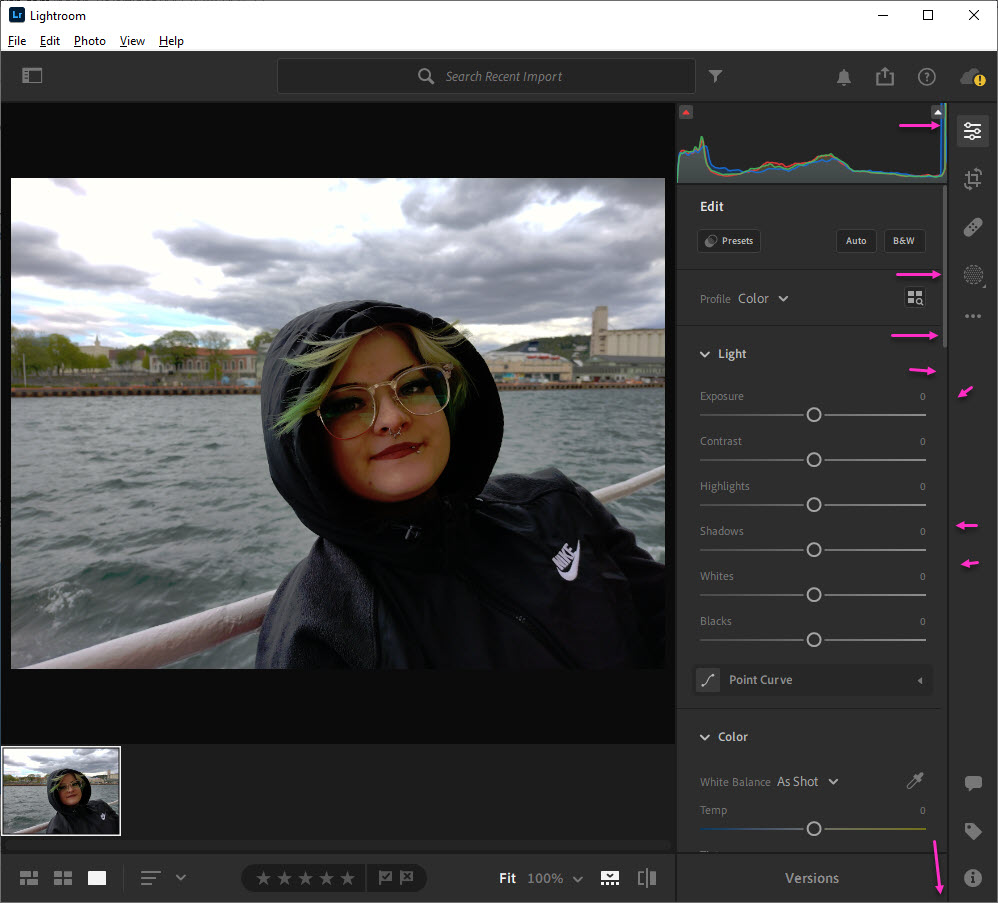
In general, this photo is dark. My phone tried to adjust for the brightness by putting a lot of shadow in the photo. First thing we’ll do is increase the Exposure a little.
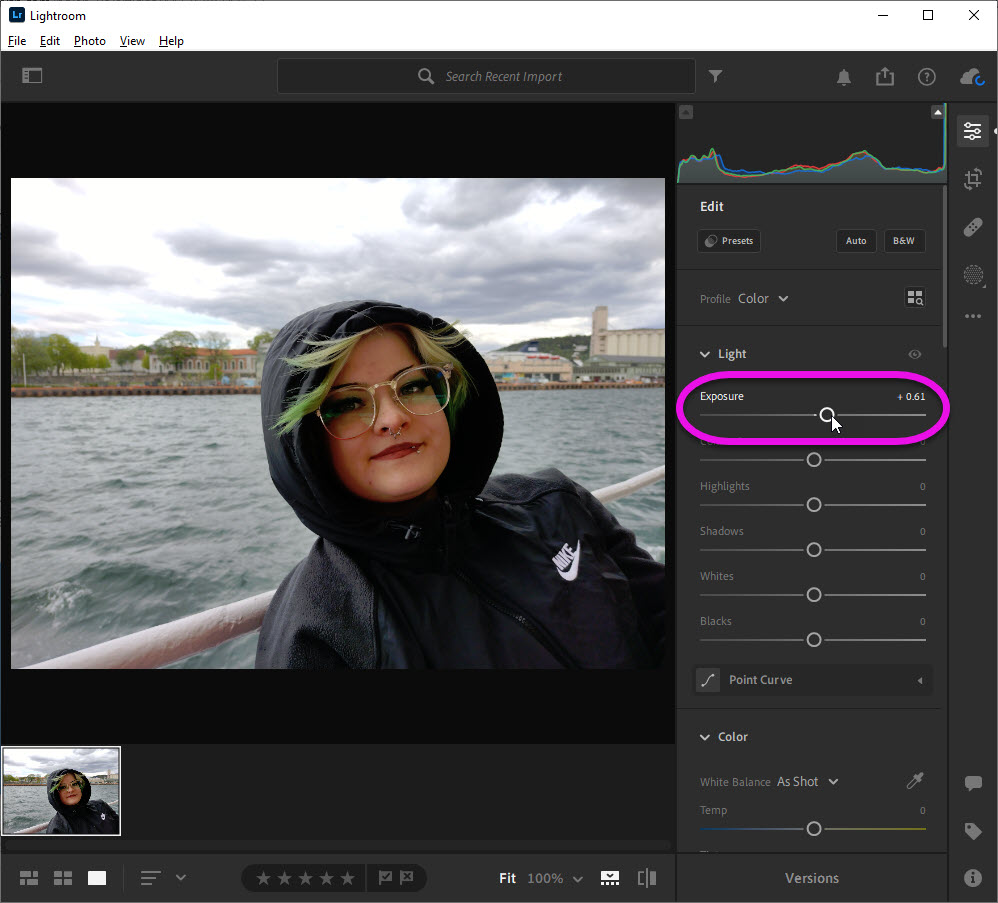
- Click & hold to slide the Exposure setting to the right.
- Right is bright
- Left is not-bright, or dark
- Be careful not to over expose
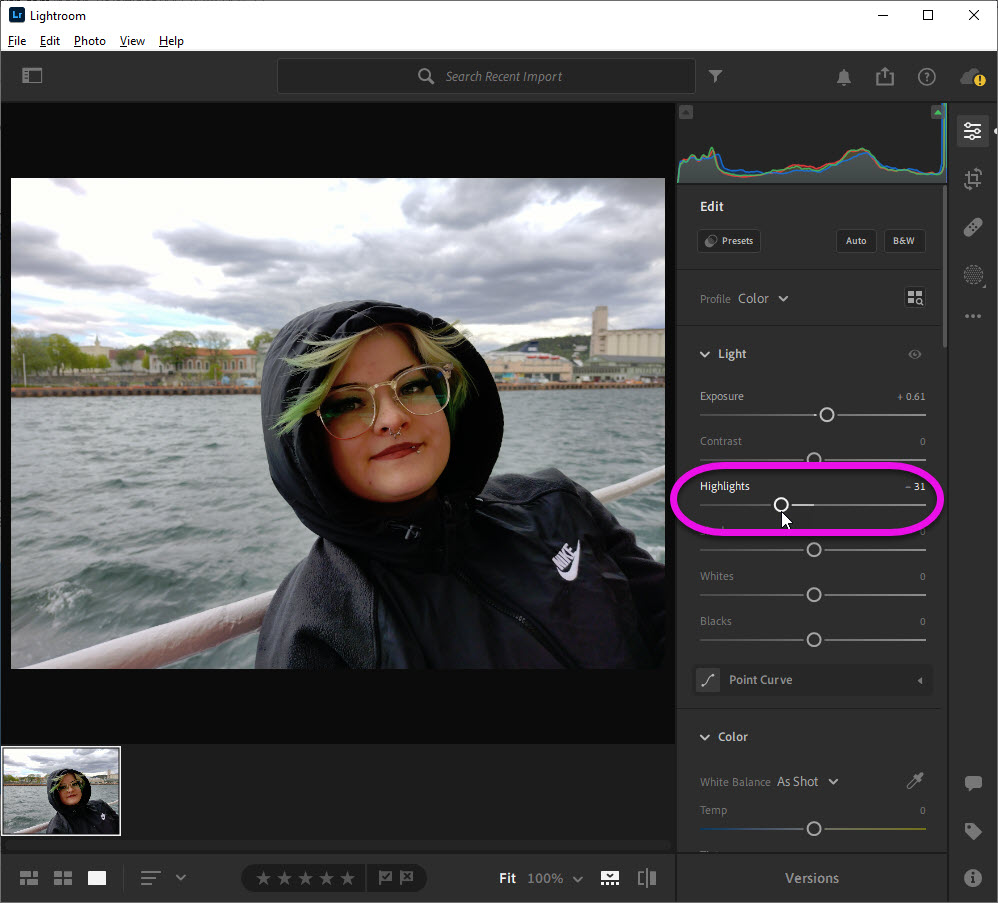
One part of my photo is not dark & shadowy, those are my clouds. I can fix the over exposure on the clouds alone by adjusting my Highlights.
- Click & hold to select the Highlight slider, slide to the left to recover the over exposed clouds
- You cannot recover what you never had, so there is still a white, blown section in my photo
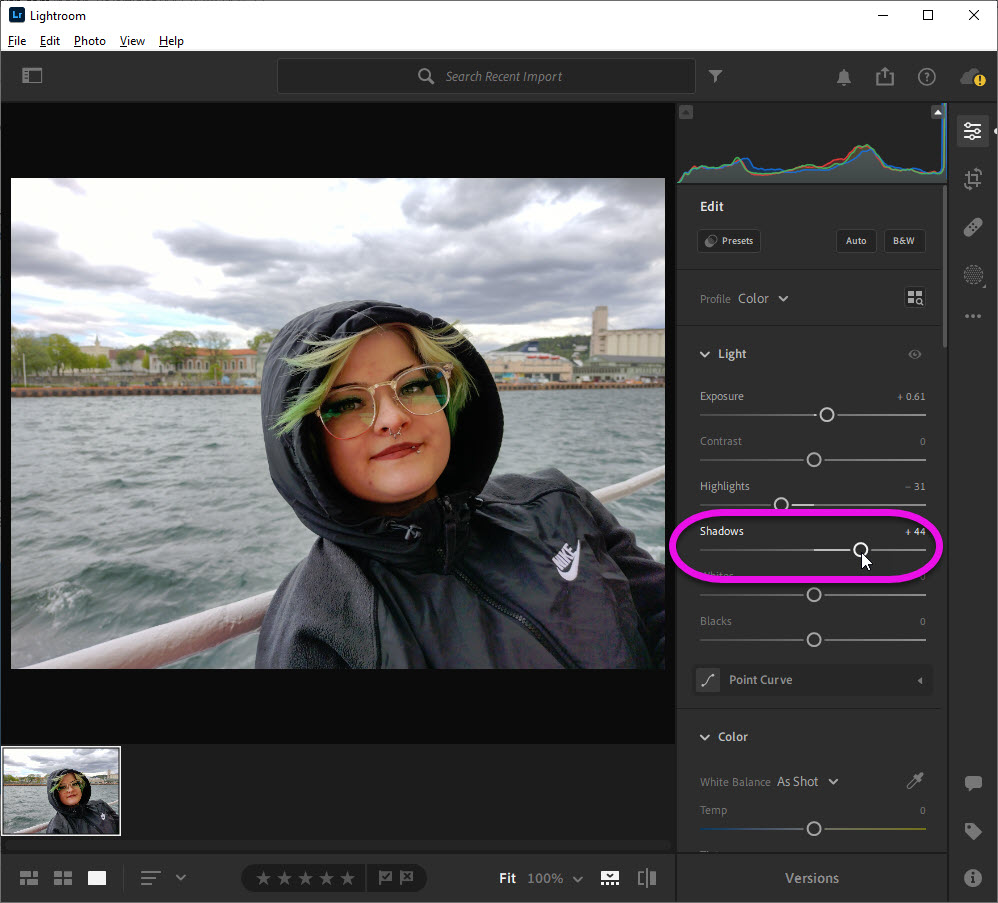
My main goal is to get more light on Tess’ face, between the backlit and her hood, it’s barely visible. By brightening the Shadows I can start to see her better.
- Click & hold to select the Shadows slider, slide to the right to brighten dark areas
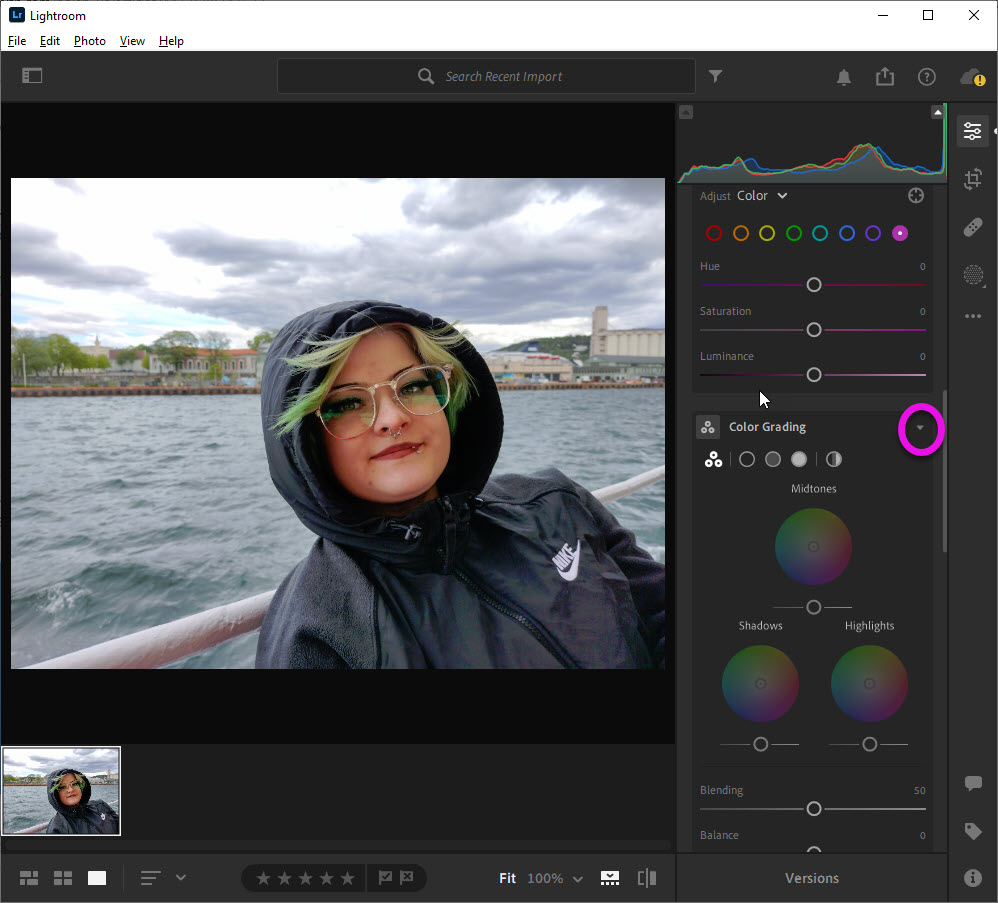
Now it’s time to scroll down our Edit Menu and get a little more out of Lightroom. Click & select the scroll bar on the left and drag it down until you see Adjust Color and Color Grading.
- You may need to click on the teeny, tiny DropDown Arrows to expand these panels.
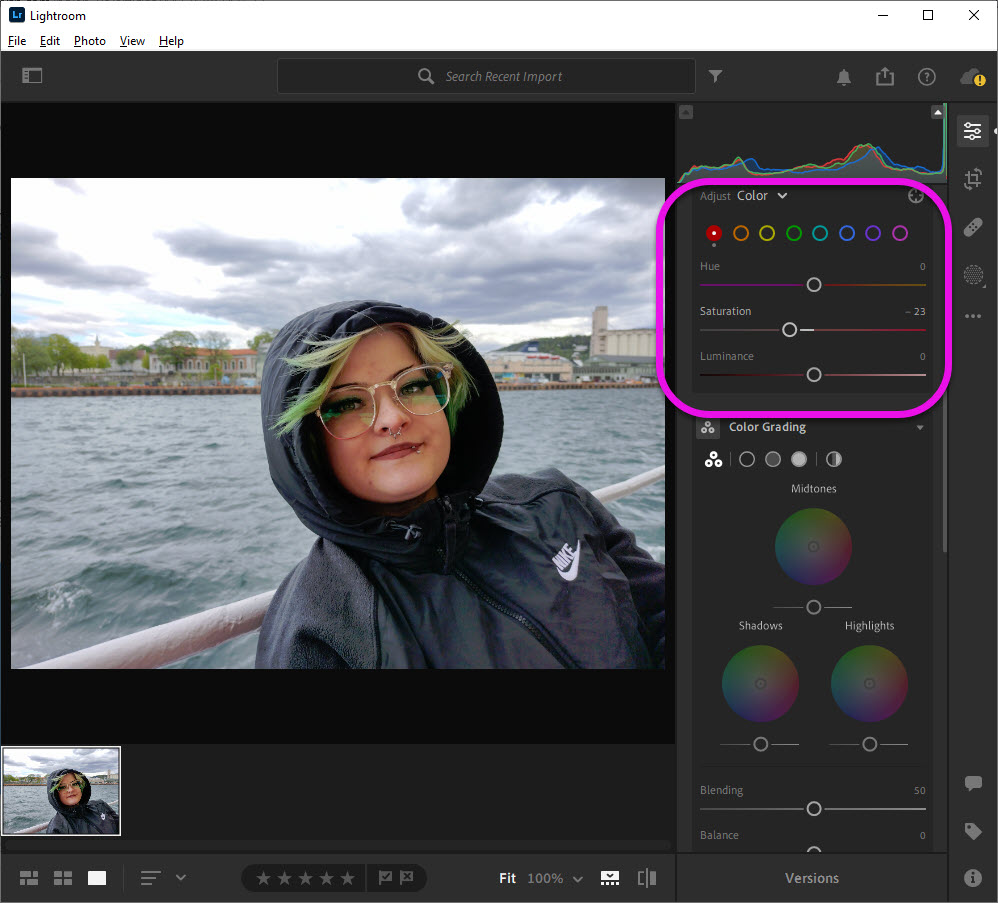
I did a quick Adjust Color on Tess’ face. By brightening it, it was also turning very red. I reduced the Saturation on only the red color.
- Click on the Red Circle in the Adjust Color Panel
- Slide Saturation to the left to reduce the red color
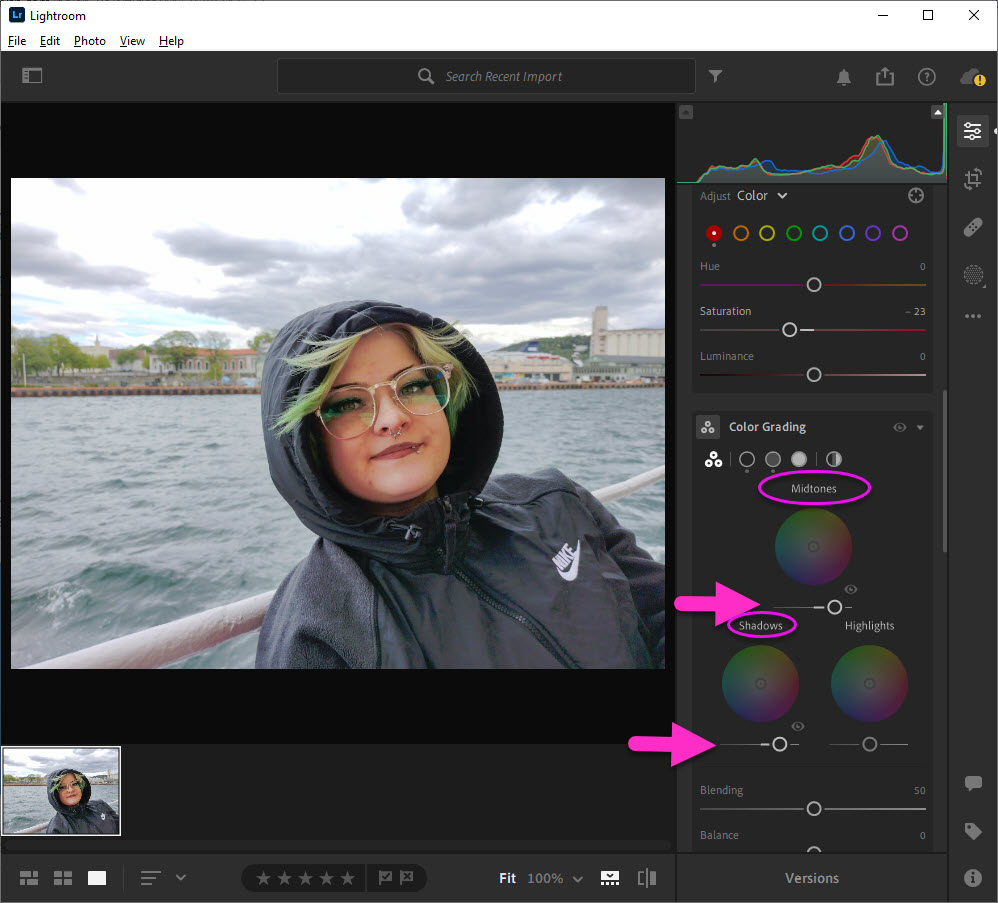
There is only so much brightening you can do with the Shadow (and the Black) sliders. Too much brightening, and you lose detail. Instead, use the Color Grading Panel to get a little more brightening on color photo’s.
- For brightening, do not adjust the Highlights
- Click on the Midtones slider and drag right to brighten
- Click on the Shadows slider and drag right to brighten
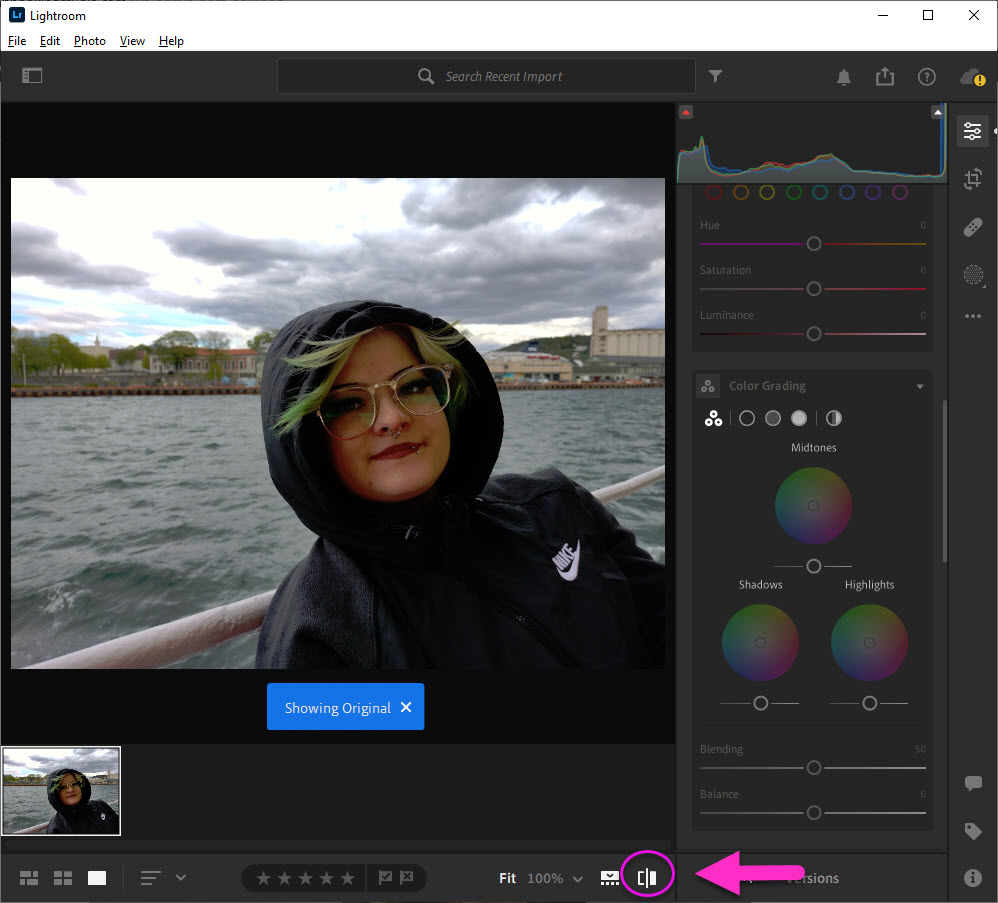
As you are editing, you can always take a look at your photo “before” you applied edits. Simply click on the Show Original icon to see the difference you’ve already made.
- Click on the Show Original icon to toggle between Original Photo (before) and Edited Photo (after).
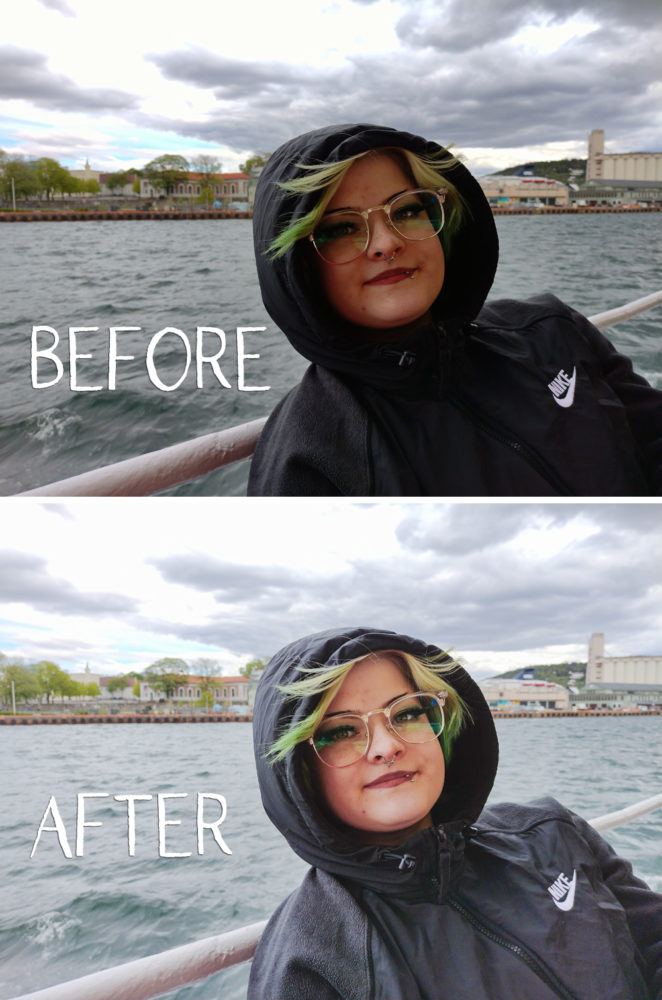
And here is my photo after applying a couple of quick, simple edits:


Thank you Toiny, this is very helpful. Looking forward to the next part.
Hi Toiny, I decided to get the phone version… There were choices, not sure I chose the correct one or if they really were different? Not at all the same interface your desktop model used… Could not see how to save to an album or how to create one… on today’s lesson, I had to ask the ? mark where the adjustment sliders were. No clue where to find the saved to cloud image…. Not in my cloud folder, and the special small cloud storage thing says they are saved there, but when I went to CC it said I had nothing in the cloud…. Does not take much to confuse me these days… I wanted to be able to post what I ended up with… My friend’s face is still very pale… none of the sliders seemed to make much difference, which was what I was looking for. So how do we save and import for posting???? Going to check out the CC version on the computer.
@toiny Me again… Found the photo in LR in CC… The one I corrected is saved in the corrected format… but cannot be opened because it is saved with some weird extension I have never heard of… no idea why it is not some recognizable photo format????? LR is beyond confusing… I remember before when I tried it saving was an issue.. like you did not save it… it just was…???/