In my last blog post (How Smart ARE Smart Filters?), I confessed to the fact that it’s not uncommon for me to change my mind… a lot. Smart Filters let me do that. But so does the History Panel… and that is what I would like to talk about today.
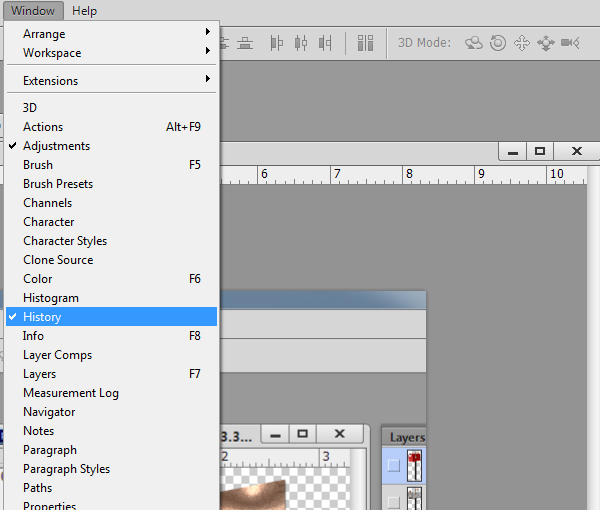
If your History Panel is not visible in your Panels, in the top Menu Bar, go to Windows > History, and be sure History is checked.
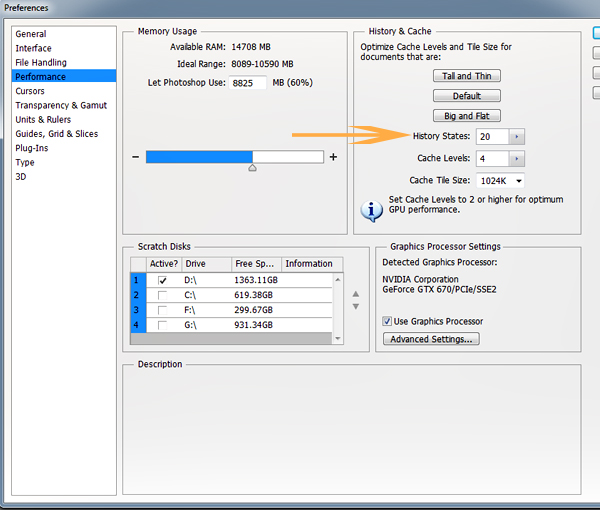
As you work on a document, the History Panel records each step you take. The number of steps that the History Panel records for you can be increased or decreased, in the Edit > Preference > Performance Panel in both Photoshop and Photoshop Elements.
The default History State allowance in Photoshop is 20, and in Photoshop Elements 11 it is 50.
Graphics applications are very memory intensive, so keeping your History States at default levels is a reasonable thing to do. If your program is running slow, however, or you are consistently receiving “Out of Memory” error messages, try lowering the number of History States available to you.
By using the History Panel, you can return to any particular layer by simply clicking on that layer in the History Panel. The result is that you are technically performing multiple “un-dos” with just one click.
If you have just one, or even a few, “undo’s” that you wish to perform, Control+Z will handle that task for you nicely; but if you want to return to a previous state many steps back, the History Panel is a great tool to utilize.
Photoshop has one additional feature in the History Panel that is not available in Photoshop Elements, and that is the ability to create Snapshots. Snapshots are just what they sound like – a snapshot of your document – a recorded moment in time. As I work, I will often stop and take a Snapshot of my document. This will allow me to go back and look at different stages of my creation, for comparison purposes. Or I can just return to any Snapshot and start all over again, if I prefer. All I need to do is click on the Snapshot layer in the History Panel to activate the Snapshot.
Here is a screen shot of the mailbox I was working on for my Featured Designer Collaboration kit (Love is in the Air) with Maurine (Let Me Scrapbook).
You can see that I have 3 Snapshots available: The first Snapshot was of the template itself. The 2nd, when I had it about half finished, and the 3rd when I had just one more decision to make on it.
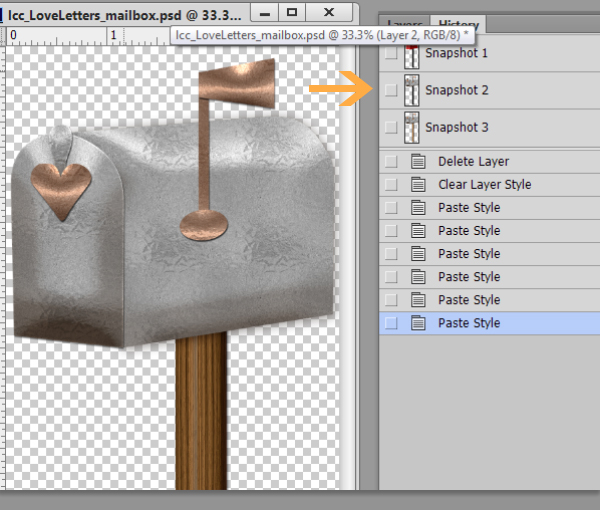
When I finished the mailbox, I liked it. However, if I hadn’t, I could easily have clicked on Snapshot 1 to be taken back to the original template, or Snapshot 2 or 3, depending upon which creation point I wished to revisit.
One final tip: The History Panel does not work the same way as the Layers Panel does. In the History Panel, you need to click on the Layer itself to make the Screen Shot visible, as opposed to ticking the little box to the left of the thumbnail image on a layer (as you do to make a layer visible in the Layers Panel).

I’m all for saving time and mouse clicks, and both the History Panel and Snapshots help me to that! I hope this works for you too!
Credits: Mailbox Template by LouCee Creations


Thanks so much — this was great to learn.
Thanks. I may have get PSE 11!!! 50 steps saved!
I use the history panel everytime I want to back up & see what changed something I didn’t end up liking later….plus if you forget to save! which I sometimes do…it has saved me by not having to start totally over!!
Best to you!
What a great post Karen! I love getting these “nuggets of gold” in the easy to absorb “bite size” pieces. Thank you for sharing your amazing PS wisdom.
[…] Using the History Panel in Photoshop – 1 freebie(s)? […]
I use the history a lot, however when I do multiple things without thinking the 20 steps isn’t enough, better start using layers more me thinks, thanks for a great tutorial.