Before I get into my Quick Tip, a quick shout-out to our LAD: Snowed IN event! We kicked things off with the first Prompt today and, well, we’d love to have you join us. It’s free & fun… and did I mention there’s a prize-a-day? Yep. A prize-a-day. All you need to do is show off your scrapping skills & post a layout-a-day. The best part? You can use any kit. Any Designer. Really.
Our prompt today is pretty simple, basically… journal. Pop into our forum for details, and don’t delay. Scrap today! Everyone that posts a layout today (ie before 6 am EST on January 9, 2020) gets a FREE mini! Play every day, get a free mini every day. Build yourself a big, beautiful mega. And build yourself a snowman! Really.
Because. Along with the mini’s, we are handing out pieces of a snowman (designed by the wonderfully kind & talented Jess of Antebellum Press). On this first day, on this first prompt, everyone that posts a brandnew layout will get the “meat” of the snowman. The three snowballs that make up his body.
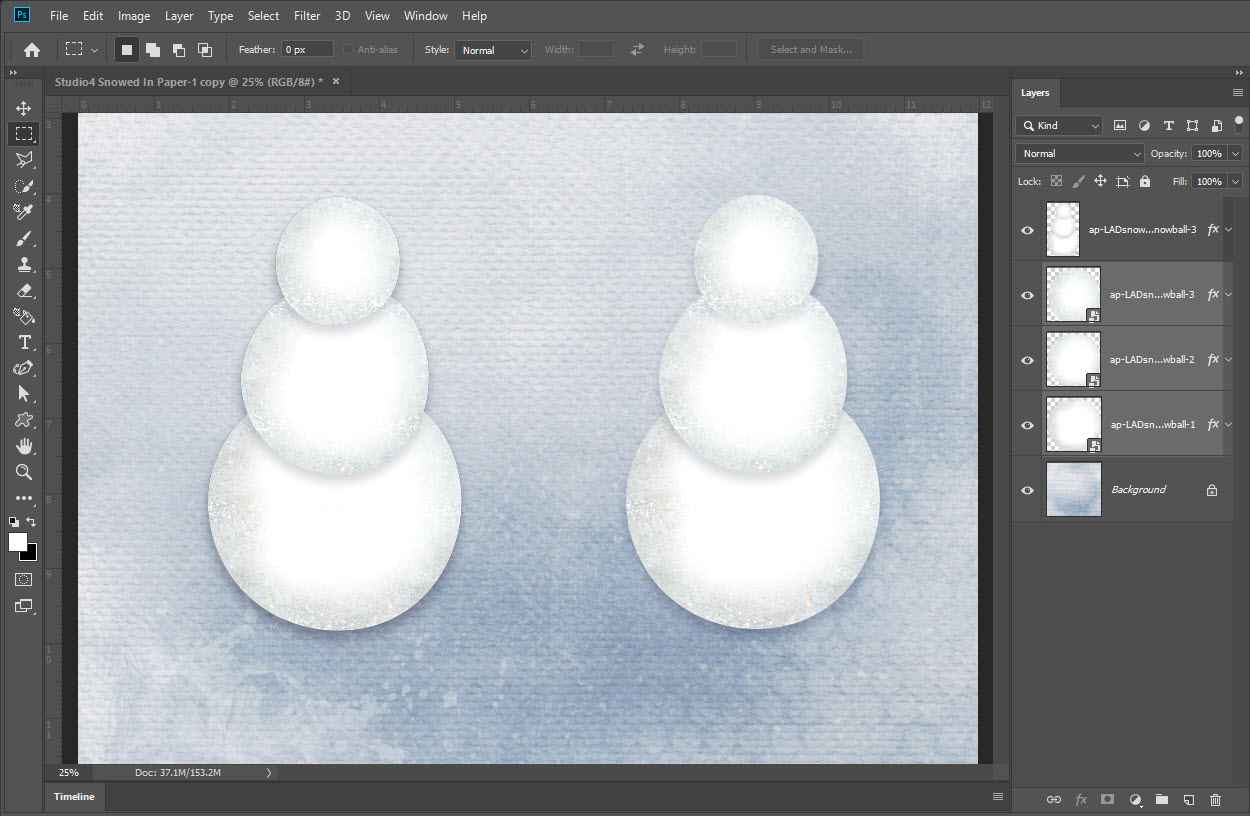
Not that I’m saying you have to have three snowballs for your snowman body. I am saying that you will receive three snowballs if you post a layout today. Once you have the snowballs, then what? This is where I come in. I’ve got a quick tip to make both aligning your snowballs & shadowing your snowman easy-peasy. Take a quick look at my two snowman-in-progress, which is better?

The one on the left is three separate balls shadowed, stacked, and shadowed again. It looks a little floaty (especially the head looks like it’s floating off the body) and a little dark. Stick around, and I’ll show you how to quickly shadow your snowballs to get a better start to your snowman.
Let’s start by dragging all three of the snowballs into photoshop (these are part of the PROMPT 01: Snowed IN, January 8, 2020 prize) that will be handed out tomorrow, Thursday January 9, 2020. You will also have a chance to make up this day & post a layout on Sunday January, 12, 19 or 26.
- Open a background or paper of your choice (I’m using a Snowed IN paper by Studio4 DesignWorks available as part of the January 13 prize)
- Open the Bonus File with the three snowballs
- Select all three
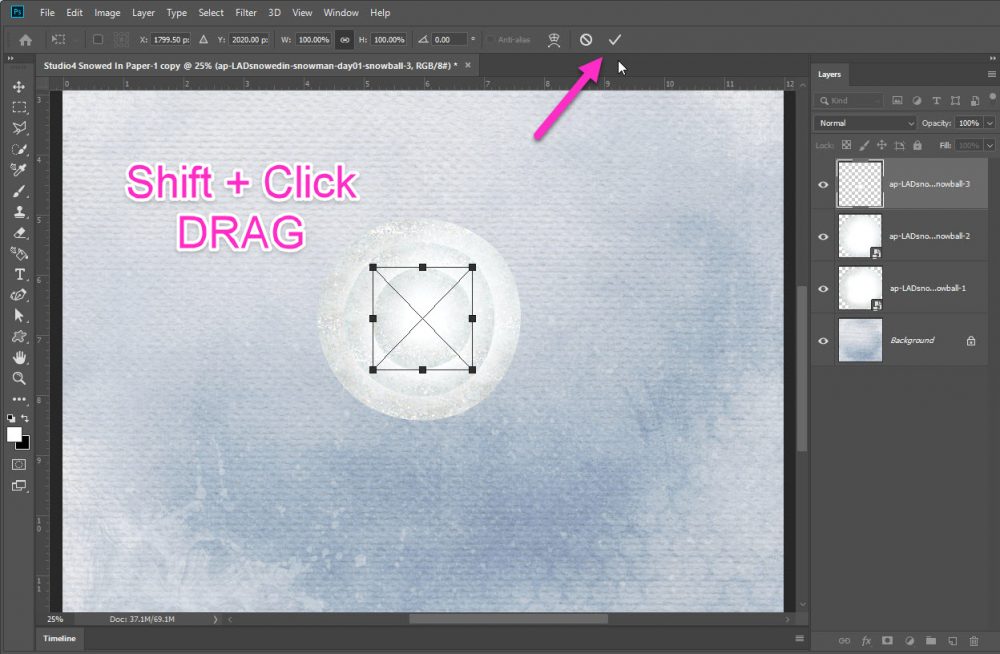
- Click on Shift (hold it down) and drag all three snowballs into your open document
Note: Clicking on Shift gets them centered all neat on your page. Be sure to click on √ to accept the addition!
You can now drag each snowball (layer) into place to make your three-snowball snowman. No judgement here if you only do two! Or one. Be you!
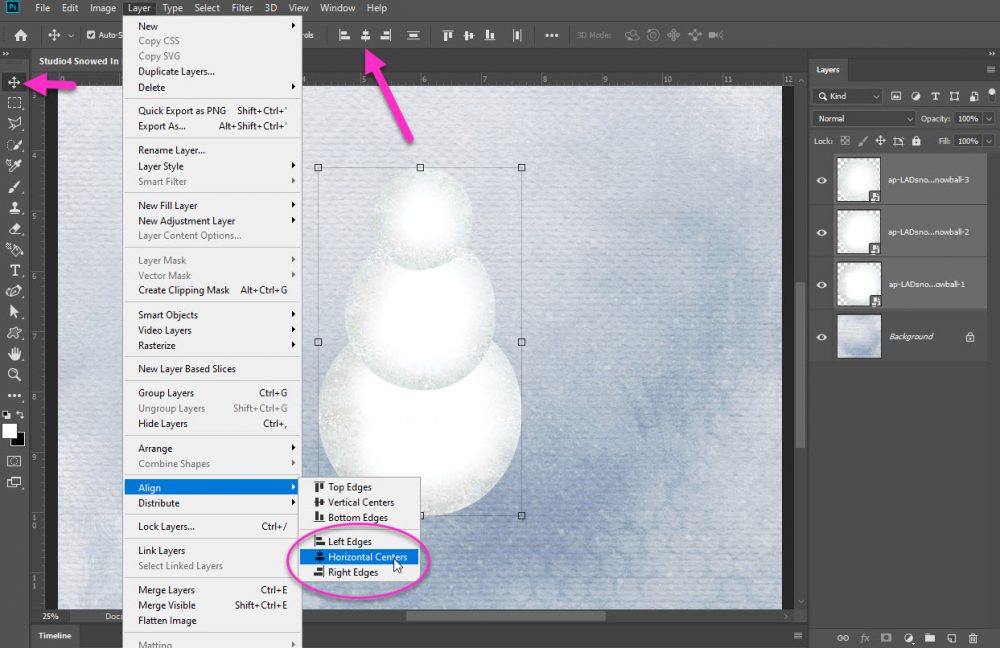
If you are a perfectionist, and I admit I did this, you can make sure they are horizontally aligned by selecting all three snowballs in your Layers Palette and either:
- Selecting Horizontal Align in the top menu (this appears when you select more than one layer and the Move Tool)
- Or choosing Layer -> Align -> Horizontal Centers from the top menu
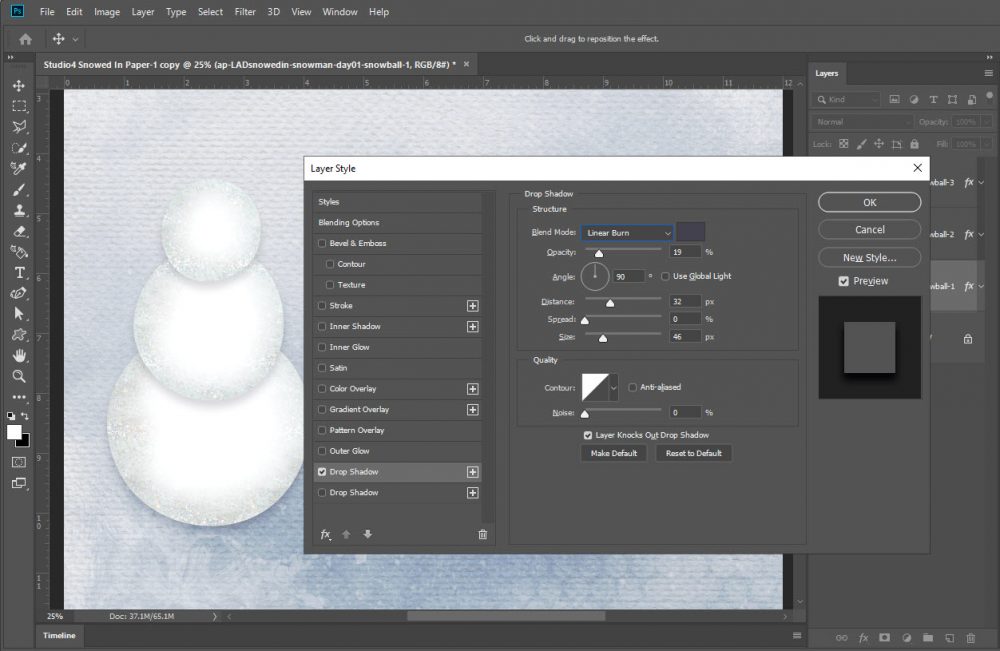
Now add the same shadow to every snowball layer. I like to choose a shadow within the same color range as my background, and especially on white elements, I like to use Linear Burn:
- Click on the teeny, tiny arrow next to the fx at the bottom of your Layers Palette & choose Drop Shadow
- Set Blend Mode to Linear Burn
- Angle 90°
- Hex #424053
- Opacity 19%
- Distance 32 px
- Spread 0%
- Size 46 px
- Change as necessary to your liking, background paper, etc.
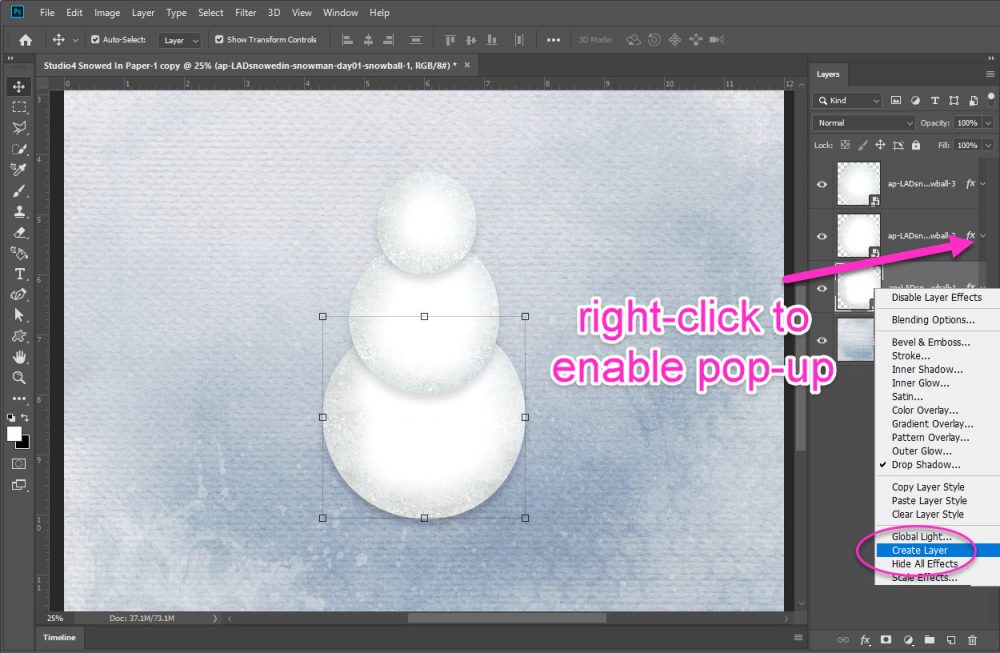
You can leave it like this. I like it to look a little more realistic so I turn off the bottom snowballs’ shadow. And I create new layers from the top two snowballs’ shadows. Here, let me show you:
- Right click on the teeny-tiny drop down arrow next to the fx on the snowball layer
- A pop-up box appears
- Scroll and click on Create Layer
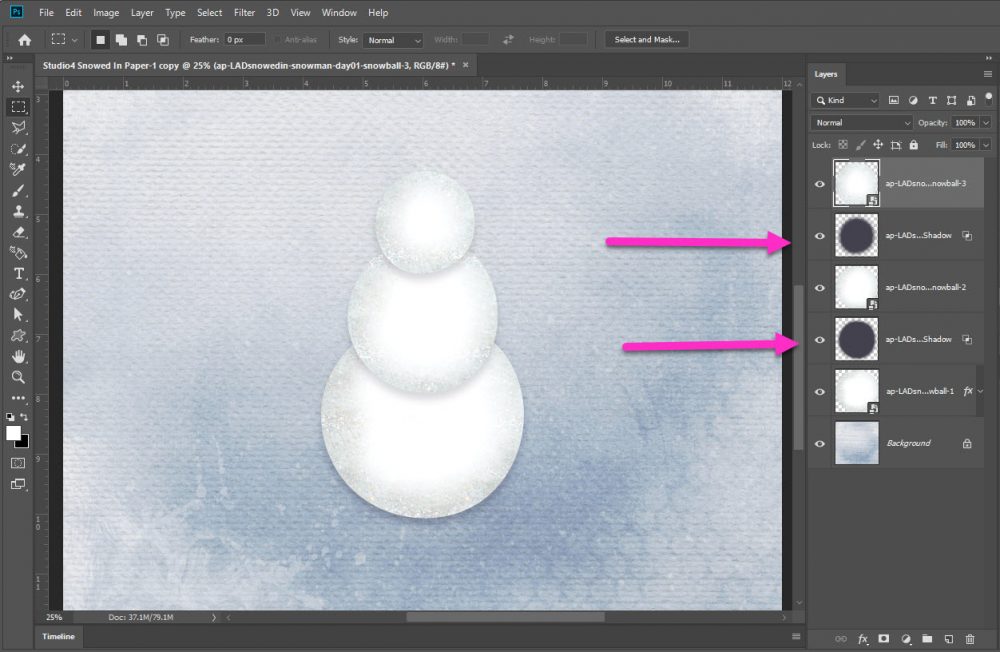
Repeat the above step for the top two snowball layers, until you see this in your layers palette:
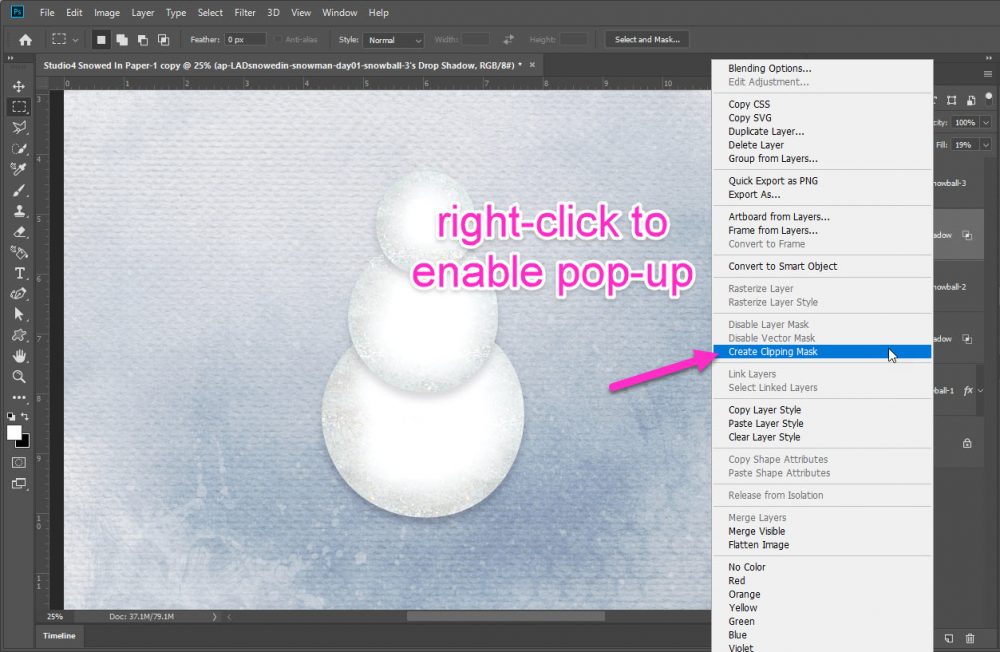
Now, right click on the first snowball shadow layer:
- Another pop-up box appears
- Click on Create Clipping Mask
Repeat this step on the second snowball layer, until both looks like this:
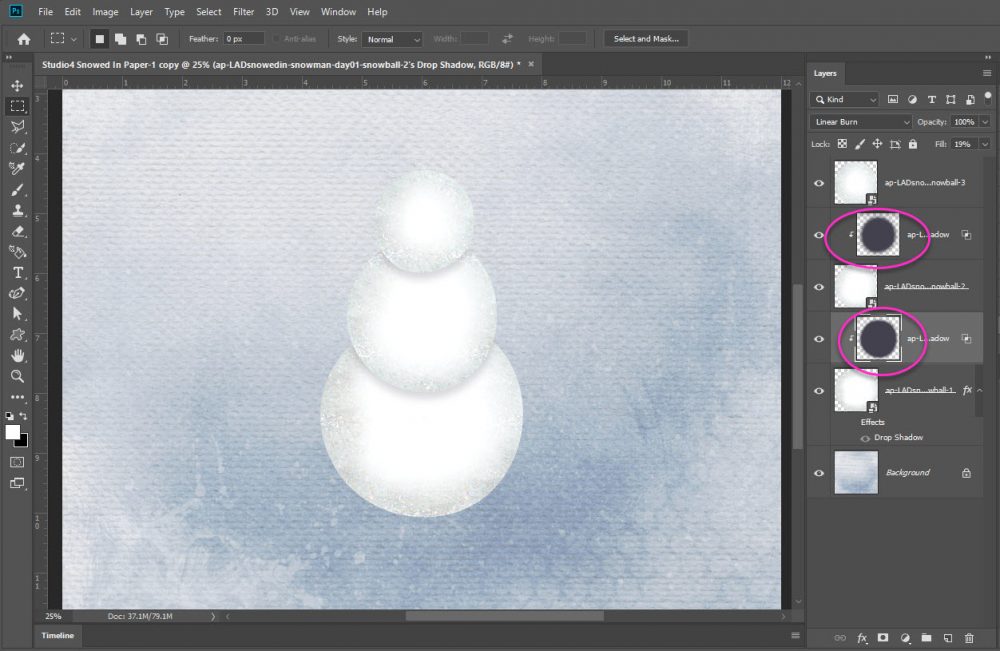
I turned down the Fill on my first snowballs shadow to 11%. I felt it looked more snowman-y. Feel free to ignore this step or make your own adjustments!
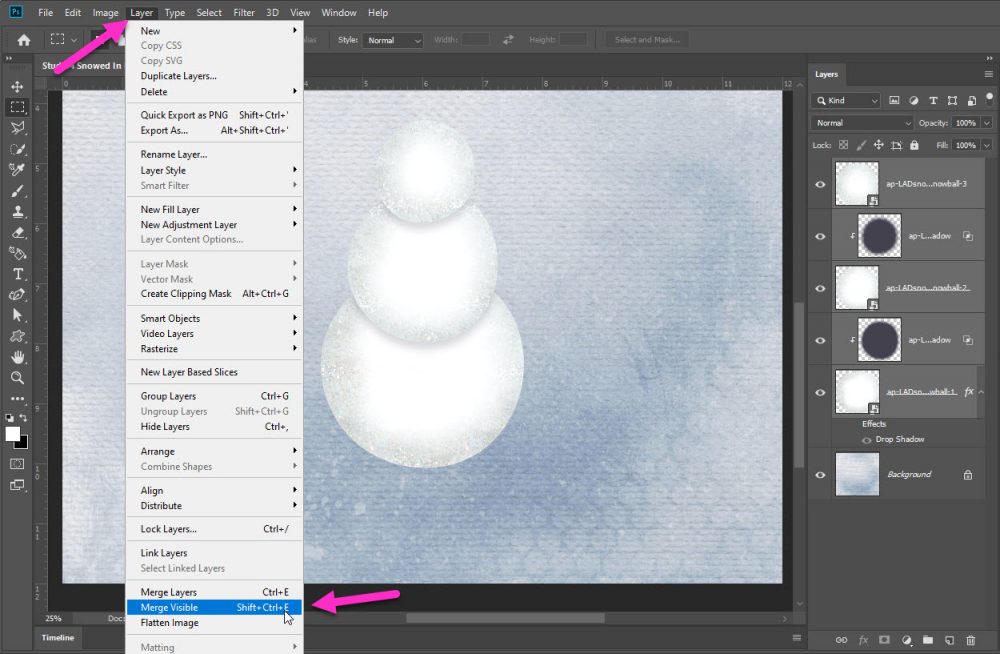
As the penultimate step I merged the three snowball layers, including the two shadow layers by selecting all five layers, and then:
- Either Shift + Click + E; or
- Right-click in the Layers Palette and choose Merge Visible; or
- Click in the top menu on Layer and choose Merge Visible
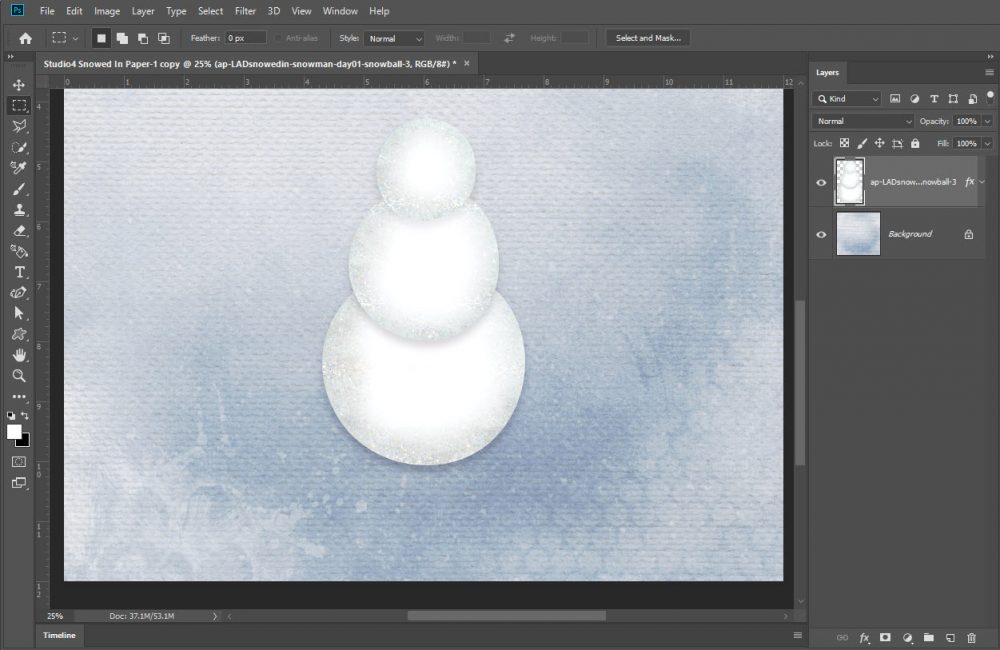
Finally I simply added the same Drop Shadow to my snowman body. Done! I’m ready for more parts. Are you?


Tysm! You have a typo, though, in the ‘penultimate step’. Instead of Shift>Click>E, it should be Shift>Ctrl/Command>E. Thanks for posting tutes for us, I always learn or am reminded of something. Fun!
[…] pieces so we could customize those snowmen to suit us. For this Quick Tip I’m revisiting my snowman I started at the beginning of our Layout-a-Day (LAD). So far all I’ve done is drag my […]