Tools: Adobe CS5; SweetMades Borders and trims NL-freebie
In today’s CU-only Newsletter Aneta, SweetMade, provides a wonderful three-part border and trim freebie. Besides making fabulous borders, trims, and frames with these files you can also quickly turn a plain paper into a patterned paper.
Let’s get started:
- Open photoshop
- Open Aneta’s border and trim freebie: sm_Borders_nd_trims_sample1 (1).png
- Click Edit –> Define Pattern

Now open your new paper document:
- Create a new document (12″X12″, 300dpi)
- Click the paint bucket icon & floodfill your background (I choose green #b0d588)
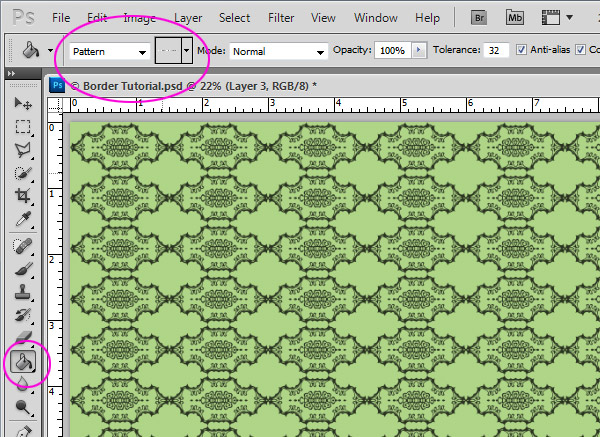
- Again click the paint bucket icon in your sidebar; then
- In your menu bar, change the mode from Foreground to Pattern
Note: Be sure to pick the very last pattern available - Add a new layer in your layer palette
- Fill the new layer with the paintbucket
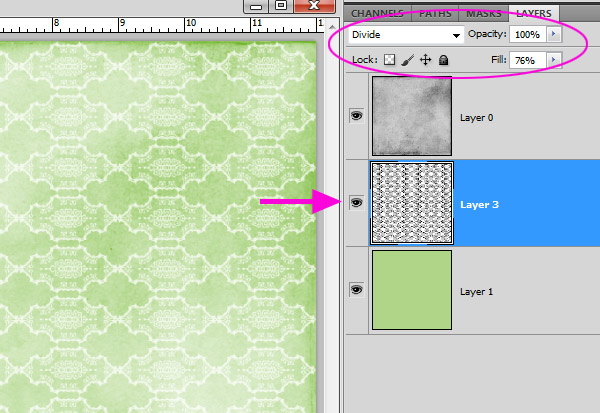
Adjust your blend modes in the Layer Palette to get a look unique to your paper. I again went simple:
- First, place a texture as your final layer
- For my texture I choose Blend Mode: Overlay
- For my new pattern created from Aneta’s border and trim freebie: sm_Borders_nd_trims_sample1 (1).png I choose Blend Mode: Divide
Note: I reduced the fill to 76% to get the subtle look I wanted - As always, be sure you are on the correct layer when changing your blend modes:
Smooches,
Toiny
theStudio Owner


Leave A Comment