
How to Create Patterns in Affinity Photo
Hi, it's Ann. Today I have a quick video tip [...]
Hi, it's Ann. Today I have a quick video tip [...]
Hi, Silke here. We are in the flower season, and [...]
Take your digital stamp use to another level when you [...]
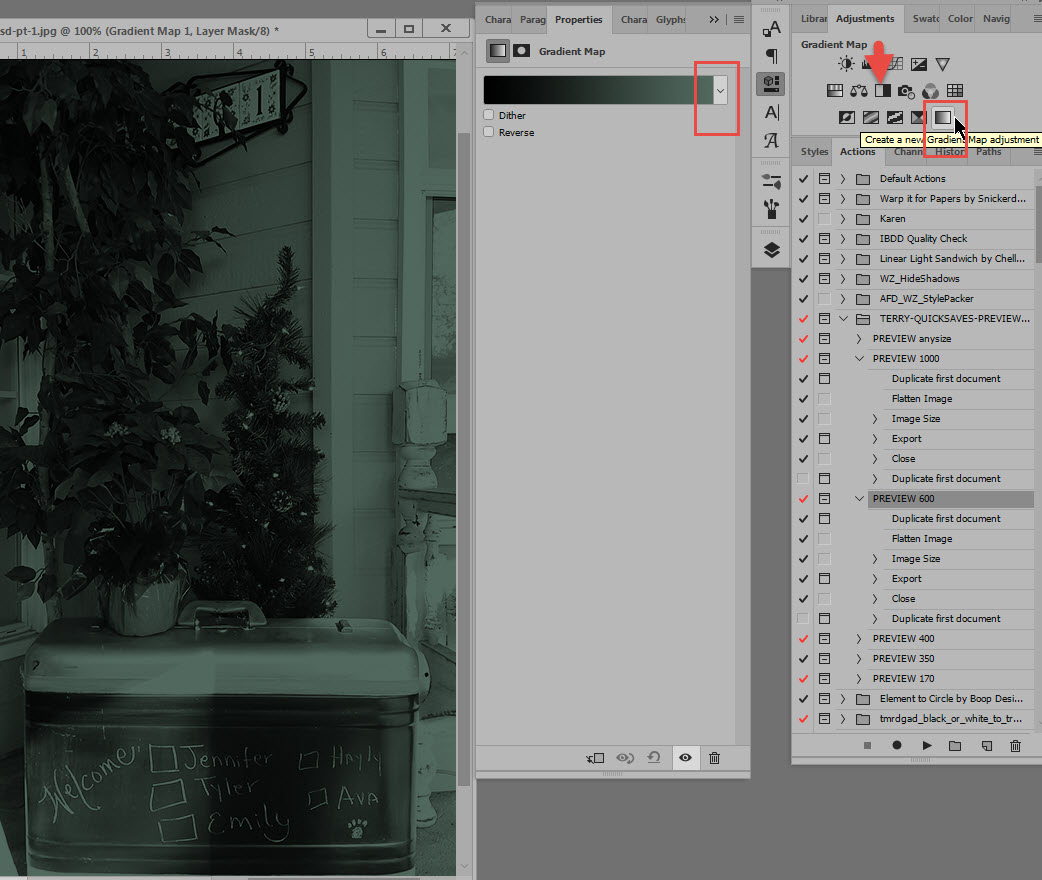
Easily add color or contrast to your images with the [...]
Jill here. Today I'm going to show you how to [...]
Photoshop has features we can't imagine! Silke here, and today [...]
I am always looking for new tricks, tips and ways [...]
I am all about things that make my life easier, [...]
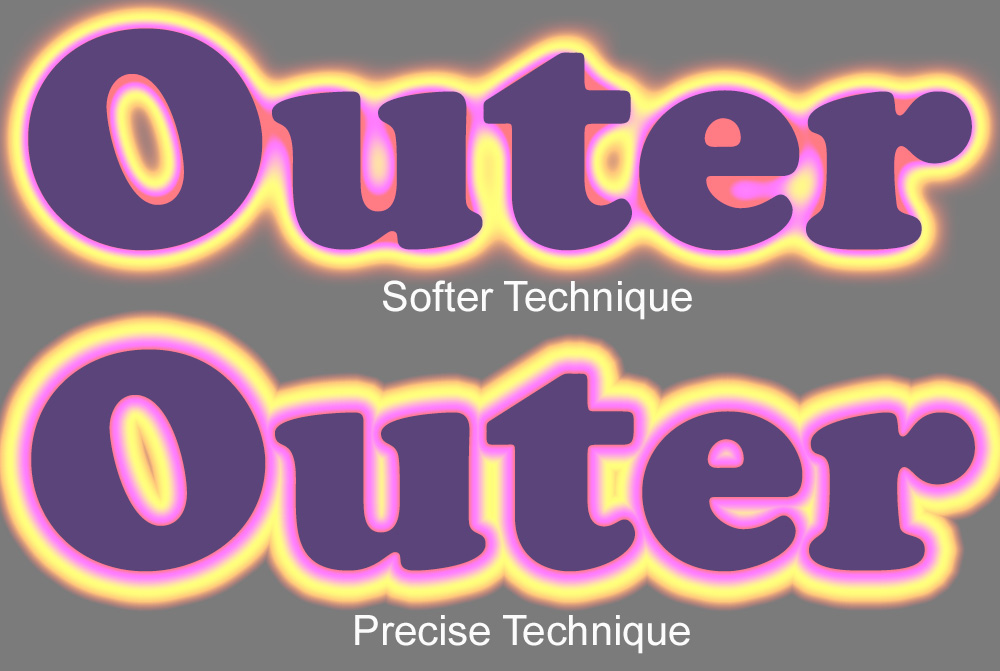
Over the past weeks, we've been exploring Photoshop Styles. Today let's take a quick look at Outer Glow, its options, and a few fun ways to use this Effect.
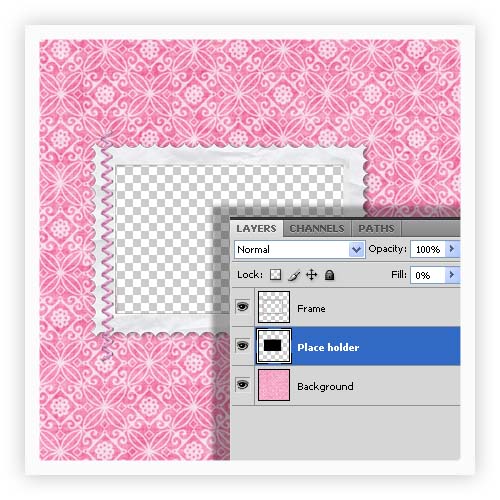
In "traditional" scrapbooking, we use glue, tape, or various other items to fasten our papers and elements to each other. We typically build our scrapbook page from the bottom up, securing our elements as we go. We can do the same thing in our digital scrapbook pages.
Over the past weeks, we have been exploring different Photoshop Layer Style Effects. (How to Load Layer Styles; Photoshop Styles 101: The Stroke; Photoshop Styles 101: Color Overlay); Photoshop Styles 101: Color Overlay, Part 2)
This month we are exploring Photoshop Layer Styles. (Photoshop Styles 101: The Stroke; How to Load Layer Styles; Photoshop Styles 101: Color Overlay). For this tutorial I am using Photoshop CC2015.5.
This month we are exploring Photoshop Layer Styles. (Photoshop Styles 101: The Stroke; How to Load Layer Styles) Today let's look at the Color Overlay effect.
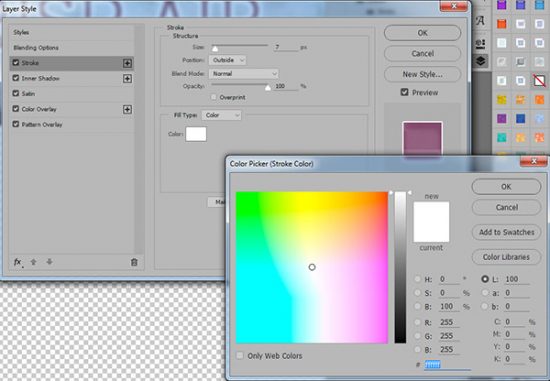
Today let's take a look at how to adjust a Stroke in Photoshop and Photoshop Elements.
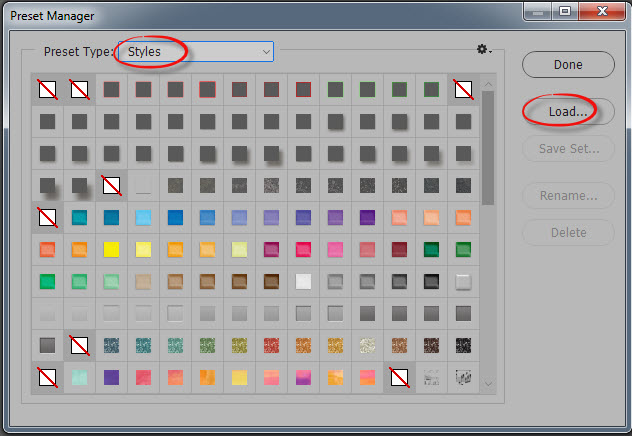
In today's tutorial, we will learn how to load Styles. This can be done in several different ways.
I am working in CC2015 today; however, this technique works in Adobe Photoshop Elements also. (Be sure you are working in Expert Mode in PSE). Instruction paths will be provided based upon CC2015 and PSE14.
For this tutorial I am working in CC2015. Photoshop Elements users, you have the option of creating Panoramas also.
This post was originally published by Toiny on September 20, [...]
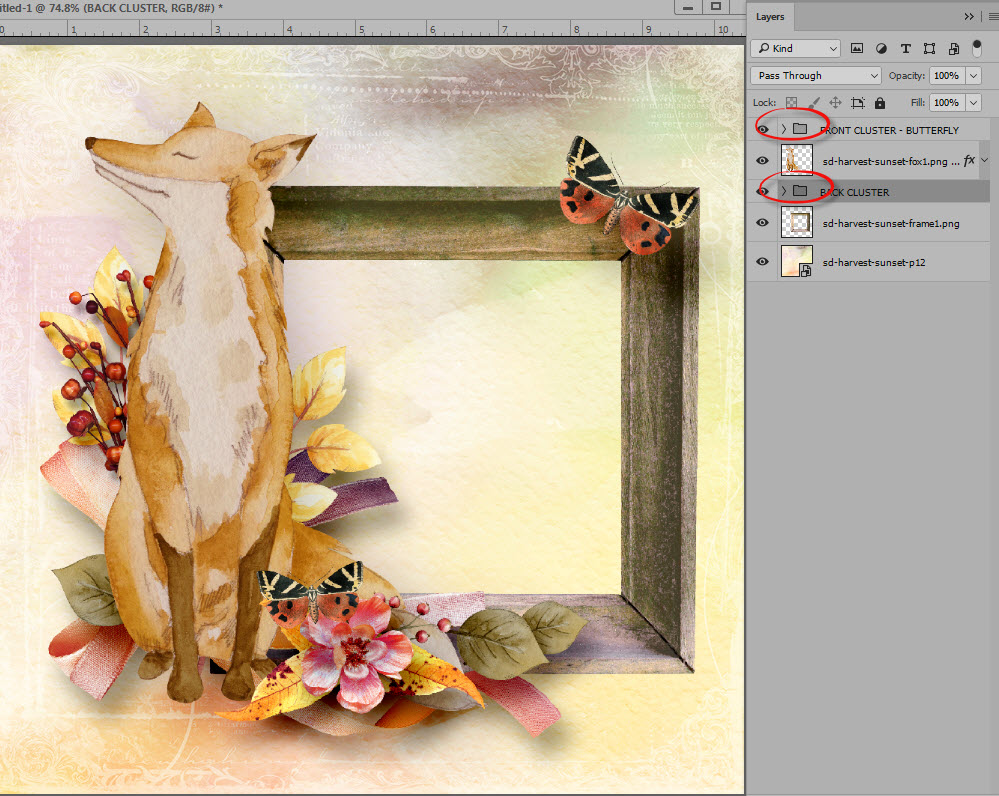
Think of a Layer Group as a "folder" within your Layers Panel. Once you create a Group, you will see a Folder Icon in your Layers Panel. Within that folder will be the images that you included when you created it.
Color tinting black and white photographs by hand is a [...]
A Layer Mask allows you to control the level of transparency on a layer. It differs from controlling the level of a layer's transparency by using the Opacity Slider, in that the Opacity Slider will raise or lower the opacity of the entire layer; while you may control the opacity of selected areas on a layer with the use of a Layer Mask
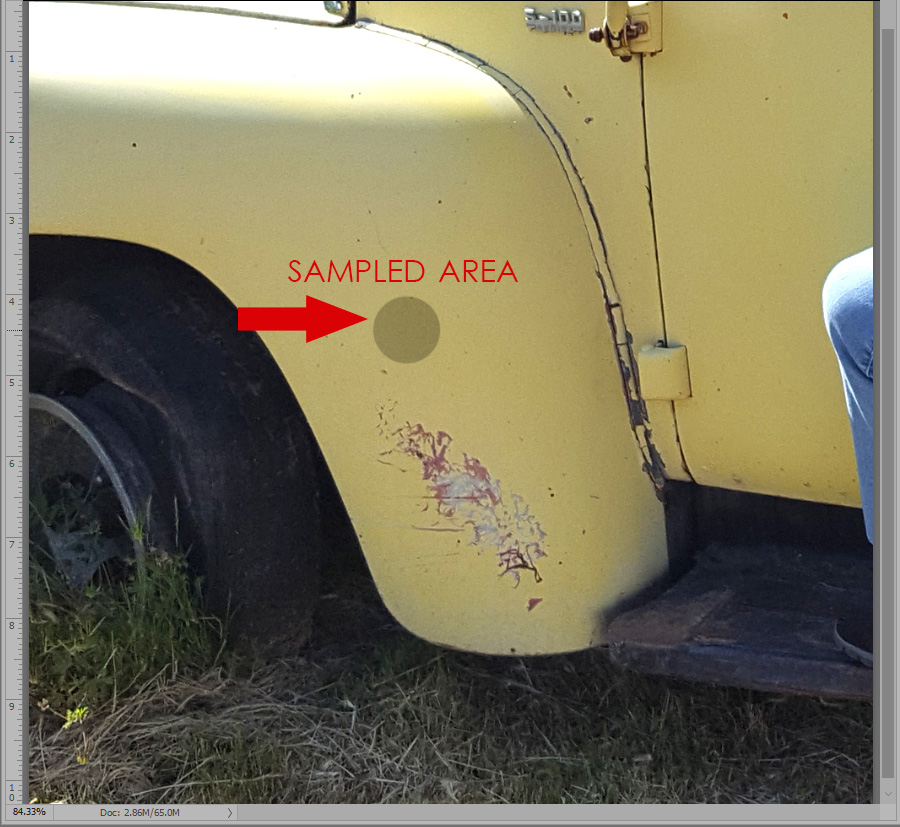
Last week we learned about the Spot Healing Brush. (Using the Spot Healing Brush). Today let's look at the Healing Brush Tool. With the Spot Healing Brush, you do not need to select a sampled area before using the brush. You just stamp down on the area you would like to repair. With the Healing Brush, a sampled area is required.
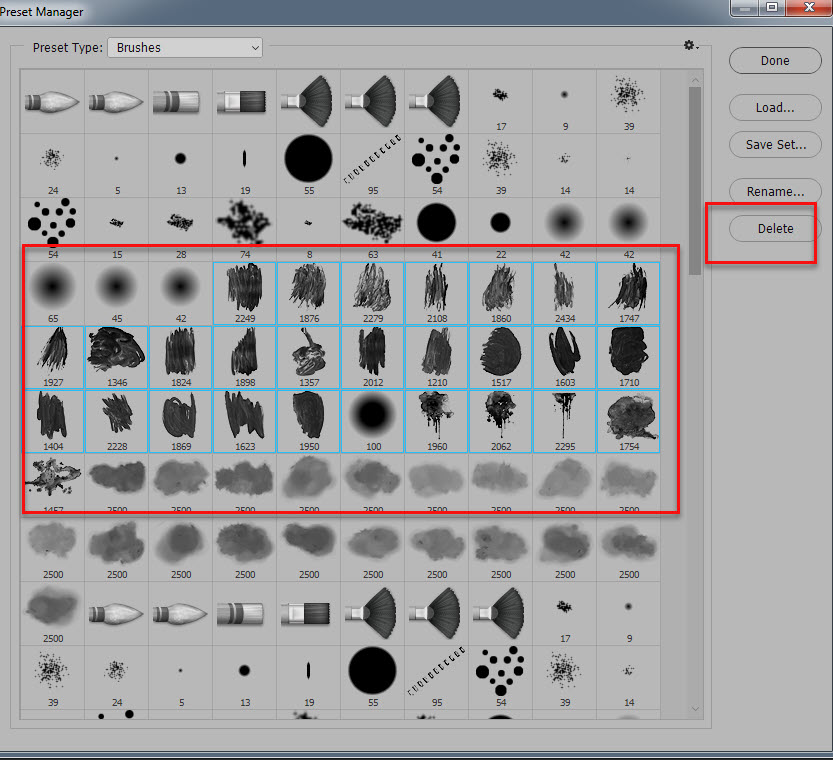
Two weeks ago, we talked about How to quickly Locate a Photoshop Brush. Faith A. left a comment asking, "Do you know if there (is) a way to clear the brush options? I have so many brushes it only goes up to the "s" named ones. "
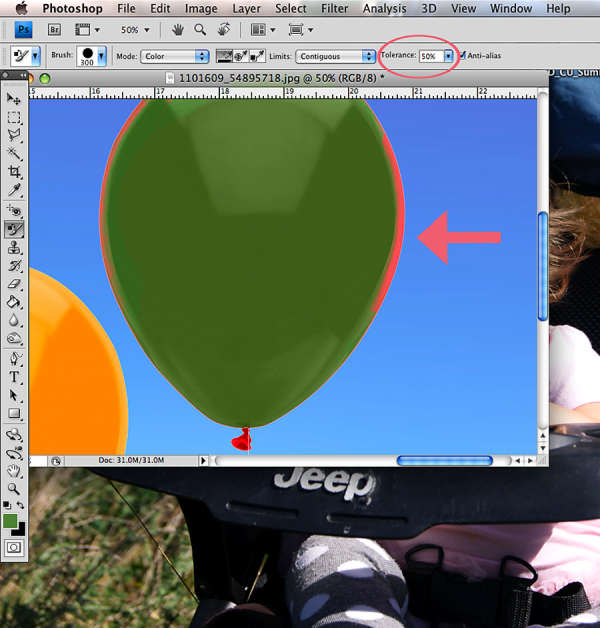
After my last tut on Selective Coloring, I thought a [...]


