Today we are continuing our look at Photoshop Layer Styles. In Photoshop Layer Style Effect: Bevel and Emboss, we focused on the “Style” and “Technique” options in the Bevel & Emboss Structure. Today we will look at the next four options in Bevel & Emboss.
Depending upon what version of Photoshop or Photoshop Elements you are using, all of the following options may not be available to you. For this tutorial I am using Photoshop CS6.
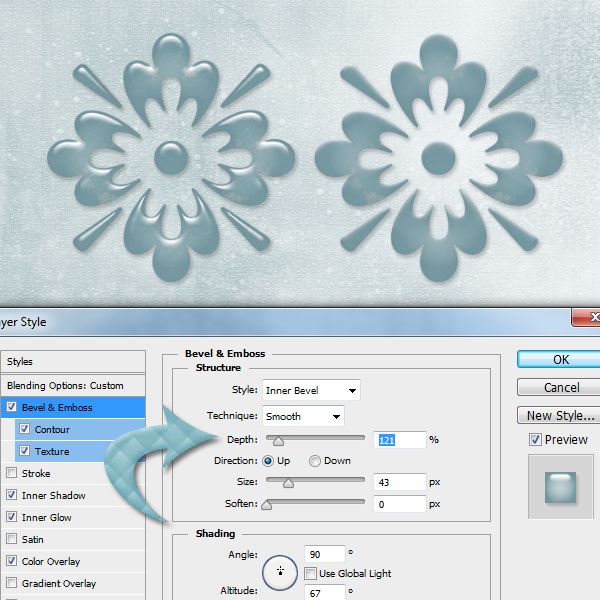
Depth: We control the depth of the Bevel by moving the slider to a higher or lower number. In the image below I have applied a Snowy Ice Style to 2 custom shapes. The shape on the left shows how I created this Style, with a Depth of 121%. On the shape on the right, I have lowered the Depth to 1. You can see how the lower Depth size affects the overall look of the Style. By adjusting the depth of your bevel, you will multiply the looks you can get from just one Style, making it more versatile for you.
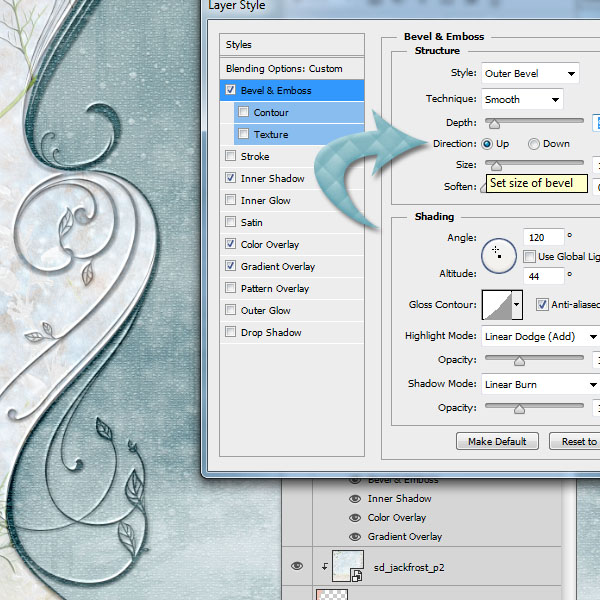
Direction: By clicking on the Up or Down options, we can reverse the highlights and shadows of the bevel or emboss, again, creating an entirely different look with some Styles.
In the image below I have layered Border Buddy Set 3-1 over Jack Frost Paper 6, and applied one of my new Imprint Styles to the Border Design. See how the Border Design is imprinted, or pressed, into the background paper?
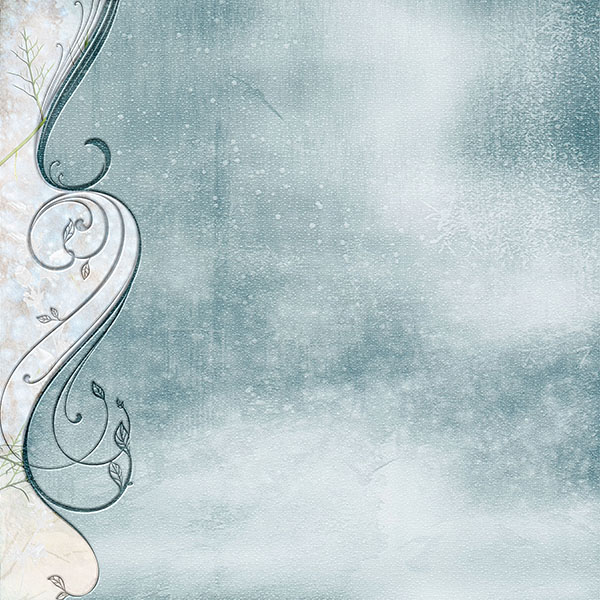
That’s a nice look, but let’s change the Down option to Up. By doing so, we now have changed the highlights and shadows, causing the Border Design to look like it is rising from the paper, rather than being imprinted into it. Another quick and easy way to get more mileage out of your Styles!
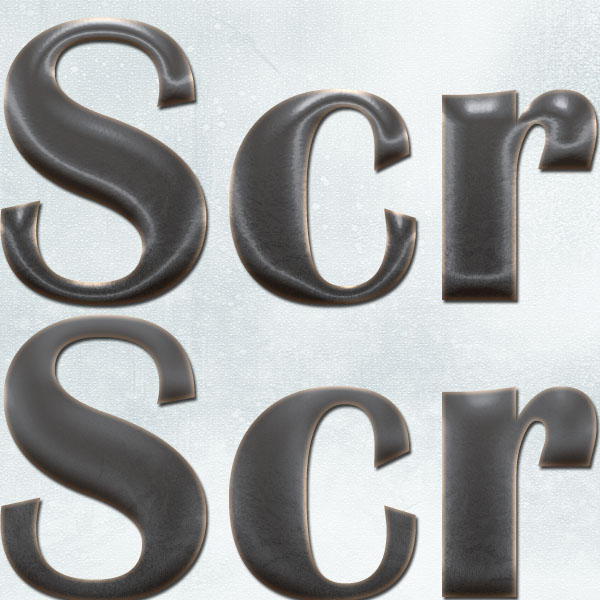
Size: We adjust the Size of the Bevel by moving the slider to the right or left. Size determines how much of the actual image is used in the creation of the bevel.
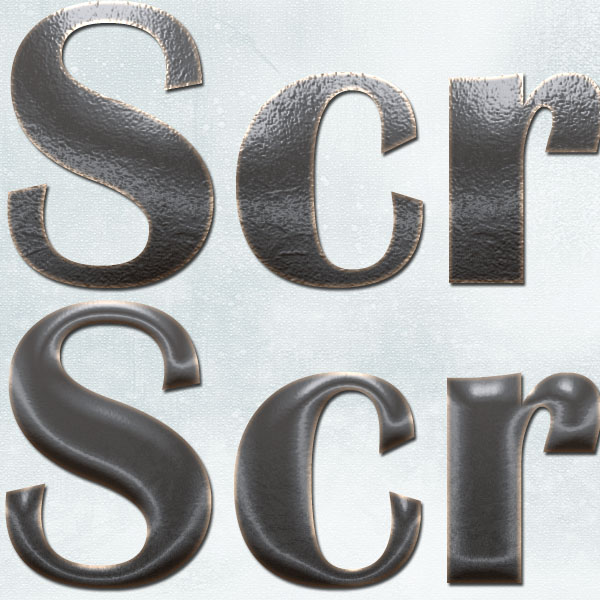
In the image below, (ABC Teach Me Metallic Styles), the top image is as it was designed, with a Size of 158. In the bottom image, I have adjusted the Size to 29. Both styles are nice. You would make your Size choice according to what look you are trying to achieve.
Soften: Once again we are able to use the slider to create the effect we want on the bevel. The higher the pixel rating, the softer the edge of the bevel. In the image below the Soften Level is set to 0, and in the bottom image it is set to 16.
Based on what shape you are using and what style you are applying to that shape, you will see greater or lesser differences in any adjustments that you make.
That’s one of the fun, (but, admittedly, sometimes frustrating) things about Photoshop Styles. There isn’t one formula that fits every single situation. But by experimenting with these options, you should be able to maximize the looks that you can get from just ONE Style, giving even more value to this great tool!
The Imprint Styles used in this tutorial are part of the DSD CU Grab Bag, offered to you by SnickerdoodleDesigns and Nibbles Skribbles. This bag contains 4 brand new products, and while valued at $14.97, can be purchased now through Nov. 15th for just $4.
Don’t forget that all of theStudio products are currently on sale for 50% off in celebration on DSD, so be sure to check out the shops of your favorite designers, and perhaps visit some shops that are new to you as well. This is a great time to try out new designers and get acquainted with their style!


You do such a nice job of explaining things! Thank you so much!
Thank you, Su. I appreciate your comment. 🙂
[…] Photoshop Layer Style Effect: Bevel and Emboss Continued – 1 freebie(s)? […]
[…] tutorial on using Styles on theStudio’s blog: Photoshop Layer Effects: Bevel and Emboss and Photoshop Layer Effects: Bevel and Emboss, Part 2. This is a great way to utilize those Styles you have in your […]