Last week we talked about Document Size vs. Canvas Size in Photoshop. We learned that our document size can be our canvas size, but our canvas size doesn’t necessarily always equal our document size. We also learned how to change our canvas size. I promised to share with you the ways in which I find this technique most helpful to me. So let’s get started.
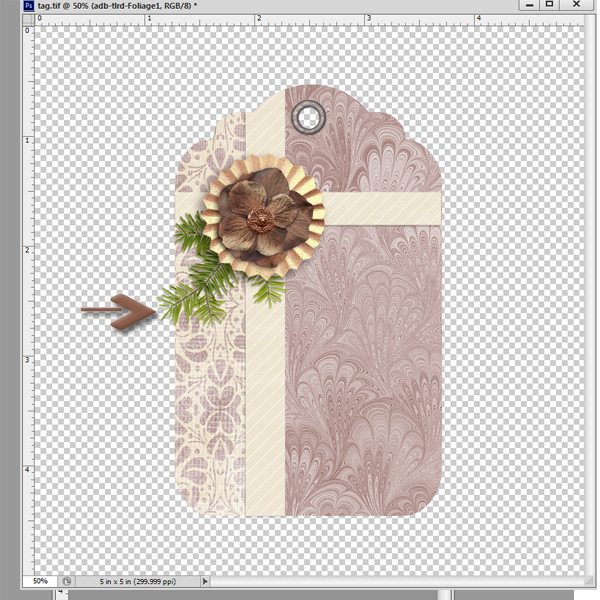
1. Designers will typically trim their papers and elements closely, in order to reduce the size of a file. This saves the designer upload time, the customer download time, and smaller files take up less space on the hard drives of everyone. In the image below, you will see a tag template, trimmed very closely to the edges.
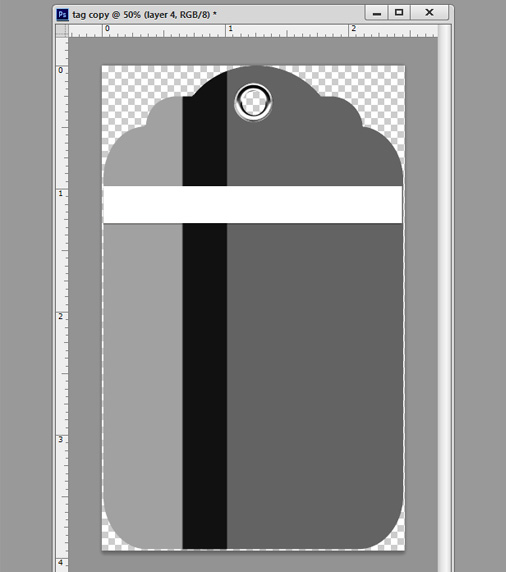
I wanted to use this tag template, but knew that I wanted part of my design to hang over the edges of the tag base. I increased the canvas size, to add extra transparency around the tag, giving me the room I needed to work. When I was finished with my tag, I trimmed the transparency to reduce the file size.
2. Have you ever tried to use a brush along the edge of a paper, only to have the brush keep “falling off” the edge of the paper? Or you might have had the same experience trying to erase something along the edge of your paper. In cases like this, you need more room to work. Increase your canvas size to give you extra space around your image, and you will be able to brush or erase without a problem.
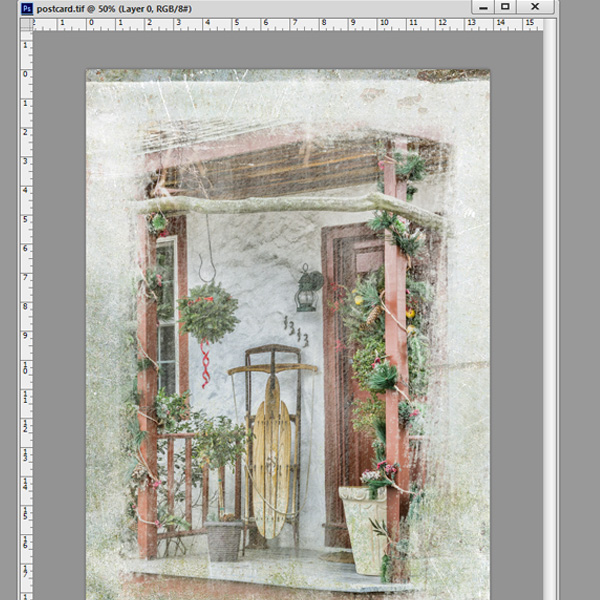
In the image below, you will see a postcard that I created for The Long Road Home. I was using a texture brush along the edges of the image, but the brush size that I wanted to use was too large for this document size, so the brush kept “falling off the edge of the card.” Decreasing the brush size made the brush usable here, but the smaller brush size changed the look of the brush, and that wasn’t what I wanted. Instead, I increased the canvas size and was able to use the brush at the larger size that I wanted it to be.
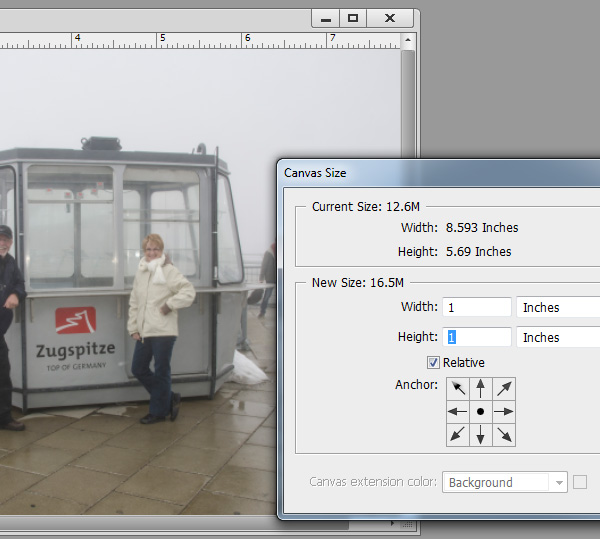
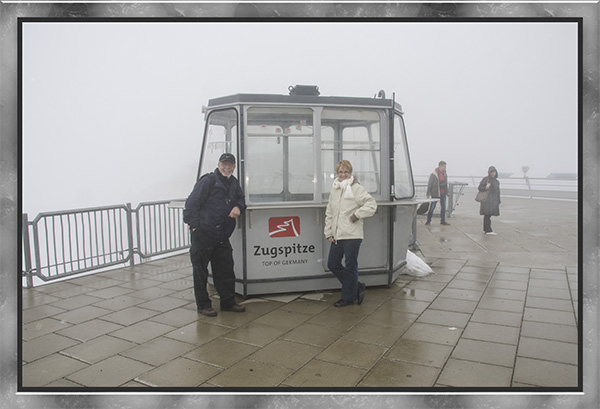
3. I will also increase my canvas size to quickly make a photo mat or frame.
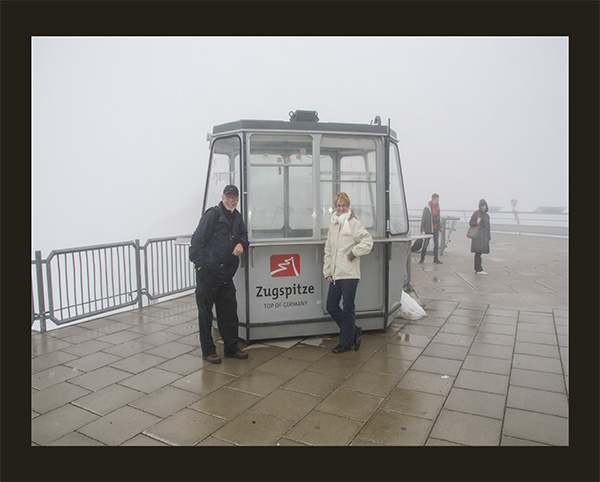
In the image below, you will see a picture of my husband and me at the Zugspitze. I wanted to add a black mat around this photo. There are multiple ways to do this, but one of the easiest ways is to just add a Stroke. When I added an outside stroke around this photo, the edges of the mat became curved. (If I had placed an inside stroke around the photo, the edges would have remained square; but I also would have lost the part of the photo that the stroke covered.)
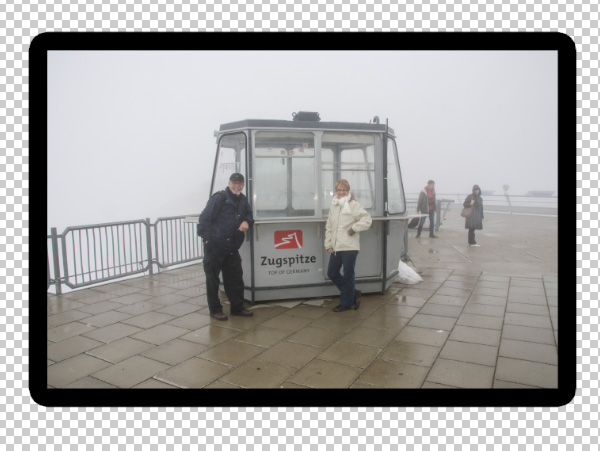
What I did was trim the transparency away from the photo, then increase the canvas size by 1 inch. (For a refresher on how to do this see: Document Size vs. Canvas Size in Photoshop.)
The new canvas area filled with black and I had a lovely mat, with square edges, around my photo.
Here’s at trick to create a quick frame:
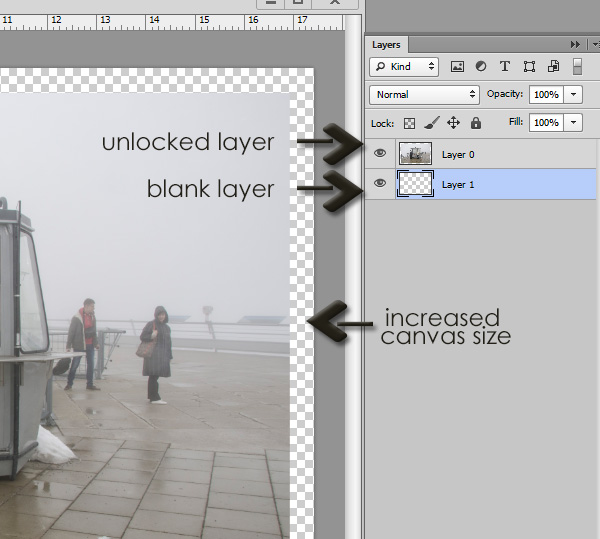
1. If your photograph is a locked Background, double-click on it to unlock it.
2. Create a blank layer below your photograph.
3. With the blank layer selected in your Layers Panel, increase the canvas size of your photograph.
4. Once you click Okay in the Canvas Size dialogue box, the blank layer will fill with color. Now, holding down the Control key, click on the thumbnail of your photograph to select it. You will know that it is selected because you will see marching ants around the photo. Go to the top Menu options in Photoshop, click on Select > Inverse.
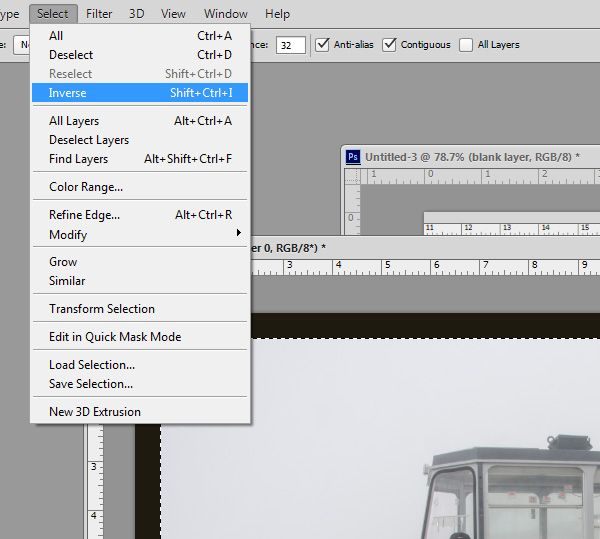
Next click on the layer that has been filled with color, and hit Delete. This will remove the size of the photograph from the color layer, leaving you with a nice frame around your image. Stylize this frame anyway you wish. Clip a paper to it, apply a style, or do anything you would like to make it your own.
In the image below, I have applied a Snowy Ice Style to the Frame, and then applied a small inner stroke to the photograph to create a mat.
Play around with increasing your canvas size and see if you can’t find even more ways to use this technique. If you have a favorite, please share with us!
Photoshop Elements users: These instructions are applicable for Photoshop Elements Users as well.
Credits: Photograph of the front porch taken by Norma Keevers


This has been a very informative piece, Karen! Thank you!
I’ve used the Canvas Size settings to increase the size of the image that isn’t the right size/shape. I do a lot of Photo-Manipulations, using several separate photos to create one image. Often, one photo is oriented longer and skinnier, or shorter and fatter, than the others. I can add area to that image by increasing the canvas size, then, use Content Aware to fill in the empty part. This works best on an image with edges that are continuous in design. You need to ‘select’ the empty area for the Content Aware to work there, but, also, be sure to make your selection a little larger, selecting a little of the actual photo for CA to know what you want added.
I found a visual tutorial for this. Go to GoToSnapShot.com
and scroll down to the images of the ‘skate’.
Hope this helps!
Su
[…] Document Size vs. Canvas Size in Photoshop, II – 1 freebie(s)? […]
Great information, Karen! I need to give this a try.
Thank you, Su, for this information. That’s a great use for this technique!
Thank you, Stephanie, for your comment. I hope you’ve had the time to play with this and that you are finding it helpful!