Today let’s explore the Invert Adjustment Layer option in Photoshop.
An Invert Adjustment Layer inverts the colors of a selected layer, causing those colors to become their opposites on the color wheel. For example, black will become white, white will become black, purple will become green, and red will become purple. The Invert Adjustment acts the same in Photoshop and Photoshop Elements.
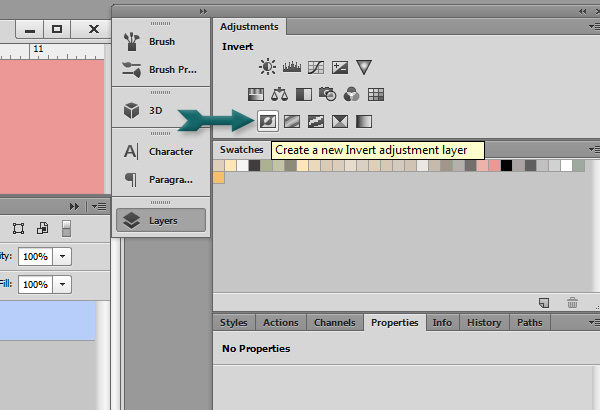
In Photoshop, the Invert Adjustment Layer option is in the Adjustments Panel. The icon looks like a rectangle, with a circle inside. This is a screenshot from CS6.
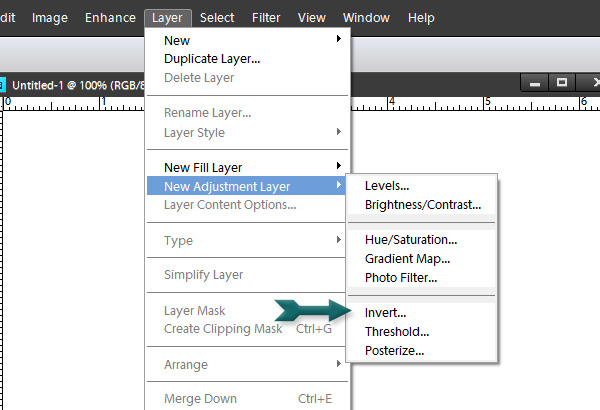
In Photoshop Elements, you will find it by going to Layer > New Adjustment Layer > Invert (Screenshot from PSE11).
I imagine you are like me and like to get as much “mileage” out of your digital scrapping supplies as possible. I am always looking for ways to increase their usage, and one of the ways I have found is with the use of an Invert Adjustment Layer. Let’s take a look at an overlay.
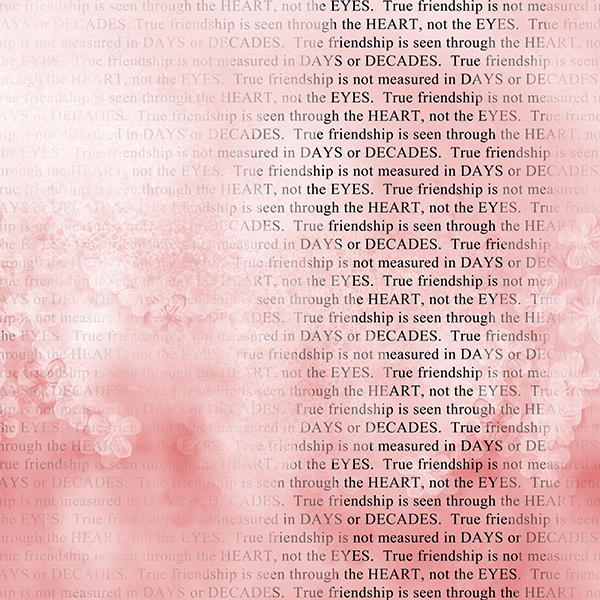
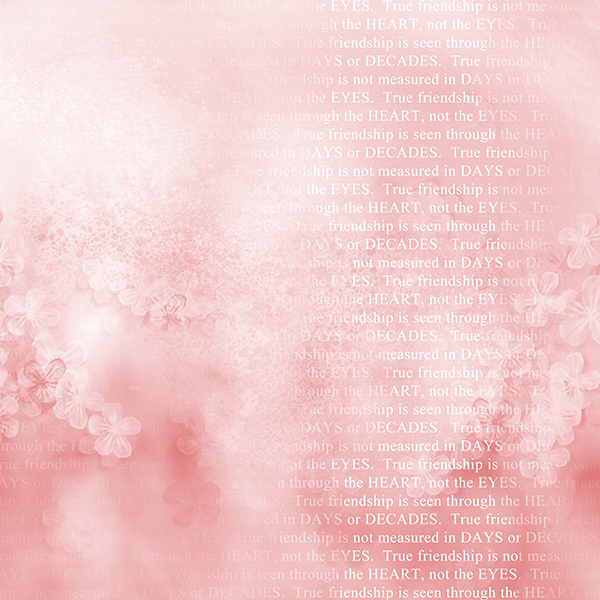
In the image below is a pink background paper, with a Friendship Quote Overlay placed on a layer above it. It’s not very attractive; the text is too dark for this paper for the look I am going for. We can fix this easily with an Invert Adjustment layer.
Click on the Invert Adjustment Layer icon to create a new adjustment layer. Because the Invert layer causes colors to become their opposite, you will see something like this: the black text became white, and the pink became a blue/green color.
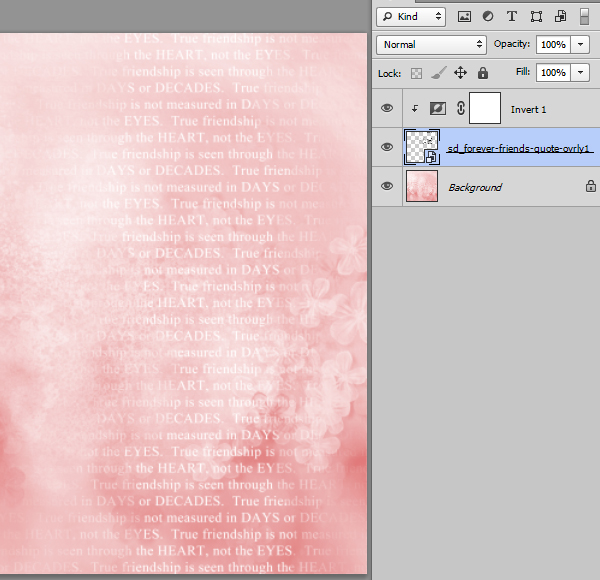
Yikes! That’s not what we want. Let’s just clip that Invert Mask to the Overlay! (To do this hold down ALT, hover your mouse between the Overlay and the Background, and click.)
Ahhh, that’s much better.
Now, if you like, you can play with the opacity of the text overlay (not the Invert layer) to make it even more “gentle” on the page.
Try using an Invert Adjustment Layer on any type of overlays that you have in your stash, to see if you can’t get even more usage out of your supplies!
And for those of you who are interested in Art Journaling or just enjoy altering your photographs in usual ways, here’s something to try.
This is the picture I started with:
And here is the end result:
To get this look:
1. I first duplicated my photograph, just for safety (and then made the original photo invisible).
2. I used the Magic Wand Tool to select the hikers in the photograph. I duplicated that selection, which placed the hikers on their own layer. (This isn’t necessary. It was just a personal preference. I wanted the hikers to stand out a bit from the unusual background.)
3. I placed a Color Balance Adjustment layer above the photo.
5. I placed an Invert Adjustment layer above the Color Balance Adjustment.
6. Once all was in place, it was simply a matter of playing with the sliders on the Color Balance Level to get the look I wanted. If you would like to play even further, add a Levels Adjustment. The whole process can be quite addicting after a while!
This look probably isn’t want on every layout, but it’s fun to play around with and can work well for those artsy pages you have in mind!
Credits: The paper and Friendship Quote Overlay pictured in this tutorial are from my new kit, Forever Friends. The photograph was taken by me on a hike in the gorgeous mountains of Germany, May 2013.
Now here’s a Pattern Sample for you to experiment with. Just click on the image below to download!






Thank you so much for this tutorial as well as for the overlay. I look forward to trying this. Think I’d better copy the instructions, paste and save in Word so I have it on my computer to pull up to refresh my memory. These tutorials are so great. I really do appreciate each one and sincerely thank you.
Oh Golly me! I never played with invert (though I knew about it). One of those things that just never got a chance! LOL. Karen thank you for this tutorial, and this amazing tool.
I love your tutorials and I have learned a lot from you. Thanks for sharing your knowledge and talent.
Sherry
Thanks Karen – this is a great tutorial! I tried the Invert Adjustment Layer tool the other night, and when I got that black/blue b/g I thought I had done something wrong and quickly deleted it!! Now I know the next step – thank you so much.
[…] Invert Adjustment Layer in Photoshop – 2 freebie(s) […]
Thank you so much for both the overlay and the tutorial. I just tried it an love the effect. I will find this very useful! Again, thank you for sharing this.
I can get the overlay to work really well with the Invert Adjustment Layer but am having trouble getting my photos to look anything like yours. Mine just look like negatives. I am wondering if you could do a separate step by step (showing results of each step) tutorial of using the adjustment layers on photos. I love trying to create “artsy” effects on photos.
I’m so glad you are trying this and having success! Thanks for letting me know about your successes and follow-up questions. Lois, I am currently out of town, but when we get home, I’ll put together a tutorial as you have requested and let you know when it’s up.
Thank you, I look forward to the photo tutorial 🙂
I work with inverted overlays a lot …. always try it before I’m finished a page to see what it will give me …. In elements 11 you can also get the invert by using Filter …. adjustments or simply use ctrl+I
SuCanDo
[…] week I wrote a blog post for theStudio on Invert Adjustment Layers in Photoshop. I focused on using that technique on overlays, and touched briefly on one way to use it to get […]
Lois, as you requested, and for anyone else who is interested, I have posted a tutorial with additional screen shots on this technique for you on my SnickerdoodleDesigns blog. http://bit.ly/1iS2B82
I hope this helps!
Thank you, I am going to see if I can get my photo to do what you got yours to do now.
BTW the link you gave did not take me to the tutorial but I did find it here:
http://snickerdoodledesignsbykaren.com
I just tried your method on a couple of photos with great success! Thank you for the more detailed tutorial. I can see where this will be a fun skill to have when creating “artsy” looking layouts.
I really love learning what “off the beaten track” gems in photoshop can do 🙂
Great! Glad to hear it, Lois. Thanks for letting me know! The correct blog link is:
http://tinyurl.com/mosk9ne
[…] 4. If you would like white text, add an Invert Adjustment Over on a layer above the Text Overlay, then clip the Invert Layer to the Text Layer. You can read more about Invert Adjustment Layers in my tutorials on: Invert Adjustment Layers in Photoshop […]