I usually write tutorials with Photoshop in mind, and add a short paragraph on how to accomplish the same thing in Photoshop Elements. Today I would like to reverse that, and focus on Photoshop Elements (PSE).
For the purposes of this tutorial I am using Photoshop Elements 12, but I believe this tip will be applicable in most, if not all, versions of PSE.
Pictured in the image below is a nice tan paper. I would like to place a stamp on that paper, and would like the stamp color to be a darker shade of that same color.
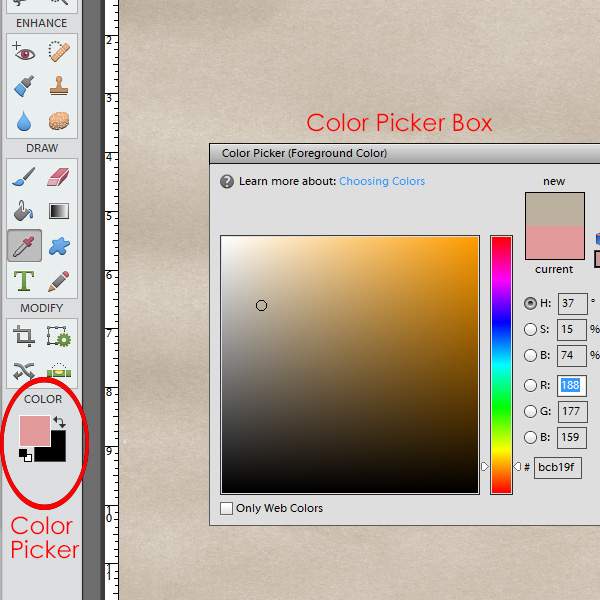
Currently my foreground color is pink, and my background color is black. You will know this by looking at the Color Picker, which is the very last tool in my Tool Bar on the left.
When I click on the Color Picker Tool in the Tool Bar, my cursor will change to the Eye Dropper Tool, and the Color Picker Box will open.
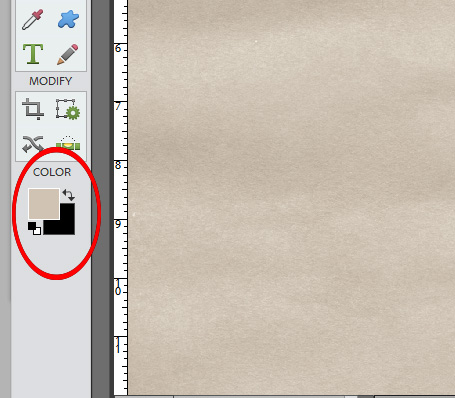
Next, I will take the Eye Dropper Tool and click on the tan paper. This will select the tan color, and that color will become my Foreground Color. The Color Picker Box will close automatically, and the new foreground color will be reflected in the Color Picker.
Now I will select the Brush Tool, and choose which brush I would like to use. I am going to stamp one of my Vintage Scripts on this paper.
Then I will go back and click on the Color Picker again, to once more bring up the Color Picker Box.
Notice the Color Options on the right. The H/S/B options are for Hue, Saturation, and Brightness. the R/G/B options are for Red, Green, Blue. If you know exactly what color you want to use, you can type in the color code in the box at the bottom of that list. Notice, also the slider on the color bar to the immediate left of these options. That is what we are going to focus on right now.
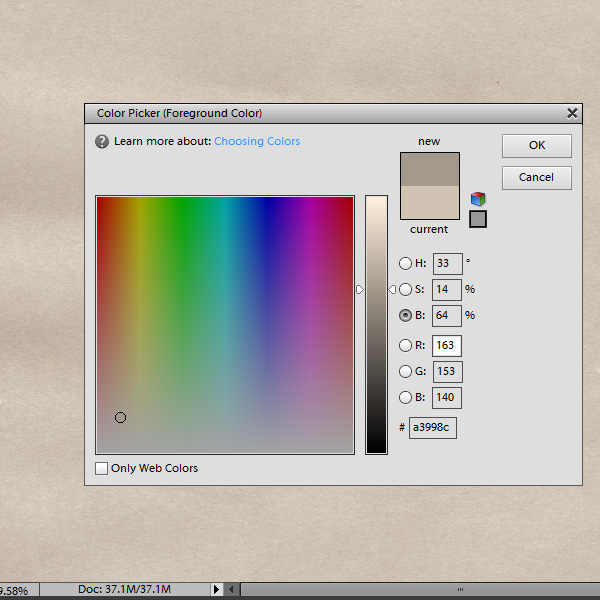
Since my foreground color is already the color of my paper, I ticked the circle in front of the “B,” to adjust the brightness of the color. I moved the slider down, since I wanted a darker shade of the same color. The new color that I decided upon is reflected in the small box at the top, right: the darker tan is on the top and is labeled “new,” and the original color is on the bottom and is labeled “current.” Once I click OK, the darker color will become the new foreground color, and this is the color I will use for my stamp.

I love using this method in PSE. It assures me that I have stayed true to the color of my background, and for the look that I wanted, this is perfect!
On Saturday, I will explore the Color Picker in Photoshop. Hope to see you there.


Thanks for this great tut.
This is such a fantastic tip Karen! I love it!
Great info. I use the color picker all the time but didn’t know about using the H/S/B slider to get a true shade of the same color. Thank you so much!
Thank you for the feedback, ladies. I’ve glad it’s helpful for you!
Thank you Karen! Great tut!
Thanks also for pointing out where you put the color code!
😀
I just purchased PSE12 & when I view a tutorial using the older versions, or even using just PS, I have to search all over to find the menu item or tools that are described in the tutorial. This makes it so easy to follow along; especially since this is very new to me! Thank you!
Thanks Karen for another very informative tutorial. I always wondered how to stay within the same true color hue. I learn so much from your tutorials 🙂