Good morning! Today I would like to share with you how easy it is to create your own inspirational stones!
Last week, I released Rocky Mountain Dreams, a personal-use scrapbook kit.

One of the kit extras was Inspirational Stones.

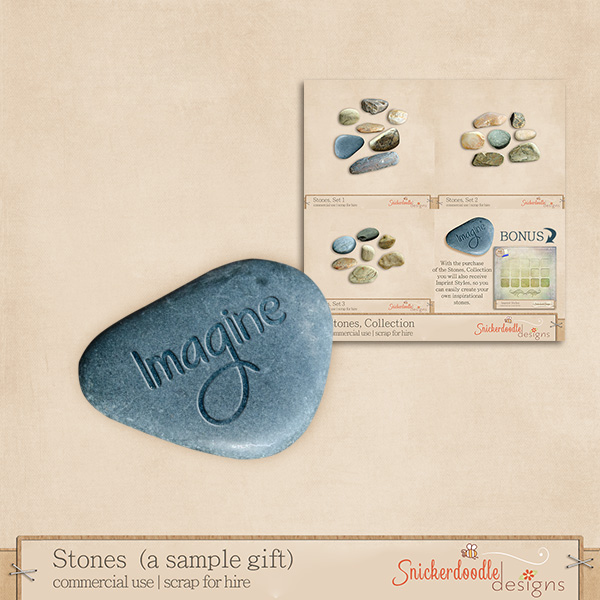
As I was choosing which words I wanted to use for this project, I kept thinking that the words which were important for me to use might not be the words that YOU want for your own scrapbook pages. So I went out into my yard, found some of the most interesting stones I could find, photographed, extracted them, and put together 3 sets of Stones.
Using the Stones in combination with my (or any) Imprint Styles will allow you to create stones to personalize your scrapbook layouts, or make unique elements for scrapbook kits. (These products are CU friendly, in case you are a designer.)


Stones are available as individual products, (Stones, Set 1, Set 2, Set 3) but are also offered as a Collection with the Imprint Styles as a free bonus.
Okay, now let’s get to work! I am going to assume that you are familiar with getting Styles loaded or installed into Photoshop. If you would like a refresher, here are 2 previous tutorials that will help:
How to Load Photoshop Styles in Photoshop Elements
Here is a stone from Set 2 (stone 7), with a layer of text on top of it. It doesn’t matter what color text you use, as it will not be detectable after you apply the Imprint Style to it.

Here is a copy of my Styles Panel, with the Imprint Styles outlined in red for you to see:

There are 15 Styles available for you to choose from. The fun part is simply applying each style to your chosen text to see what works best with the color stone you are using, the font you are using, and the look you are going for.
I have applied 4 different Styles to the word “explore.”

I like the first style best on this stone color, so let’s work with that one (Style #11).
You have 2 method options now:
Method #1:
1. Rasterize your text (right-click on the Text layer and choose Rasterize Type). (PSE users will “simplify” their text.)
2. Right-click on either your Text or Stone layer and select Merge Visible (assuming these are the only 2 layers on your document). That’s it. You’re finished!

Method 2 (and my preferred method because it offers more flexibility):
1. Rasterize your text (right-click on the Text layer and choose Rasterize Type). (Again, PSE users will “simplify” their text.)
2. Rasterize the Imprint Style that has been applied to your text. This will merge all of the effects. To do this, right click on your Text layer and choose “Rasterize Layer Style.”
3. Having a rasterized text file to work with will give you increased flexibility as you search for the perfect look for your Stone. It will allow you to play with Blending Modes and Opacity Levels of the text layer, as well as duplicate that layer if you like for even more blending/opacity options.
In the image below, I duplicated the flattened text layer and changed the blending mode of the duplicated layer to Linear Dodge. I like how it gave a lighter edge to the left of the letters. I’m happy with either of these results.
If I wanted to, I could duplicate the text layer yet another time for even more options, such as applying a 2nd Imprint Style to just that one duplicated layer.

Method 2 is really important when using lighter colored stones. In the image below, you will see 2 samples. In the top sample, I have created the stone using Option #1. When the Style is rasterized, due to the nature of the style, you will see the gray tint in it. On darker stones, we don’t notice that; on lighter stones, we do.
In the bottom sample, I created the stone using Method #2. Because I had a rasterized text layer on it’s own layer, I could change the blend mode of the Text to Overlay – which looks better on the light colored Stones.

I absolutely love this layout created by Norma, a member of my Creative Team, and also a member of the Studio CT. She did use a Rocky Mountain Dreams Inspirational Stone – but if that stone hadn’t been perfect for her layout, she would have been able to create her own!

The key – and the fun – is just to experiment until you are happy with your results!
Here is a stone to add to your own stash! I hope you find the perfect layout for it. Just click on the image below to download!
(For the purposes of this tutorial I was using Adobe Photoshop CS6; however, this technique also works in Photoshop Elements.)


And all with one hand! LOL
Stones a Styles are so much fun to play with. Thanks for putting them together. Of course you have a most pleasing collection of stones and styles in your bundle!
Karen,
I use PSE12 and I do not have the option to Rasterize or Simplify the Imprint Style in Method #2. So I do not see any difference if I apply Blending Modes. Is there another option for PSE?
Thanks for the gift of the stone. Love the color – so this is from your new front yard? Nice! You are going to become quite the Nature Girl now!
Hi Steph, Thank you for pointing this out. In PSE you are not able to Rasterize the Style. However, I was just playing around with it and if you use any of the first 8 (of the 15 styles), you get a good result with just the style itself (no gray visible, even on the lighter colored stones.)
I just played with PSE11 with a darker stone and a lighter stone. I simplified the text layer, as you said, then applied the style. Then I played with the settings on the style for bevel and for inner glow colors to get the desired result. You can then simplify the style and use blending modes, but I liked what I got with just a few tweaks of the setting for color glow. When I simplified the style, it went gray, but some of the blending modes brought back the color in combination, like color burn with soft light over it.
By the way, thank you for the free one and the tutorial! Your imprint styles are very flexible.
Thanks for doing more research on this Peggy!
These are a nice addition to a layout! Thank you for the tut and the free gift!
Su
[…] Create your own Inspirational Stones – 2 freebie(s) […]
[…] her Blog Post you’ll find a tutorial on how to Create Your Own Inspirational Stones. When you’re there you can pick up a Stones […]
Thanks for the free stone! Now I have to go and buy your “Rocky Mountain Dreams” Collection, so I can play some more with your awesome stones. I love the fact that some come from a necklace you used to wear. I so can relate to “too heavy necklaces,” but mine just hang in my dressing room, unused. What an awesome idea to photograph and extract them! 🙂