Thank you for once again letting me know that you are enjoying exploring Filters in Photoshop. Based upon your feedback and interest, I will take the next few weeks to explore a few more filters that I think you will find useful in your scrapbooking layouts. Today let’s look at the Lens Flare Filter.
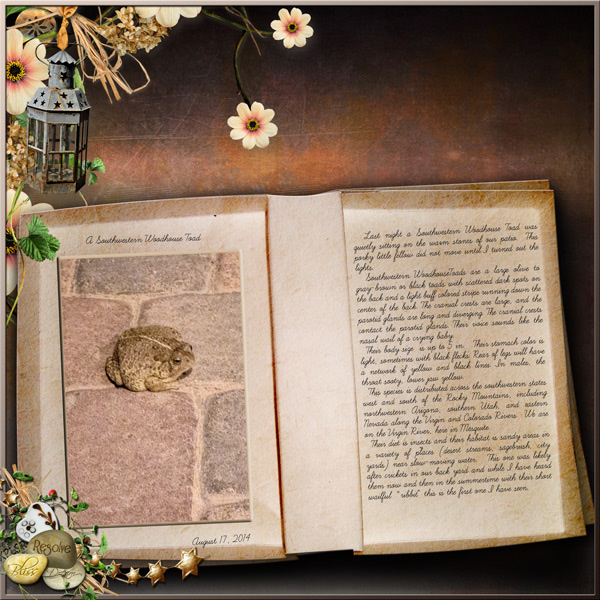
This beautiful layout was created by Priss (forum name pssequimages), using Rocky Mountain Dreams.
I asked her to create a layout for me with this tutorial in mind, so she did not include any light in the lantern. Perfect for our needs! Let’s add our own light using the Lens Flare Filter. But first, let’s convert the layout to a Smart Object. (Right click on the layer > Convert to Smart Object. Doing so will allow Photoshop to place the filter on it’s own layer, giving us the opportunity to adjust it if we like. For more about Smart Filters: How Smart ARE Smart Filters.)
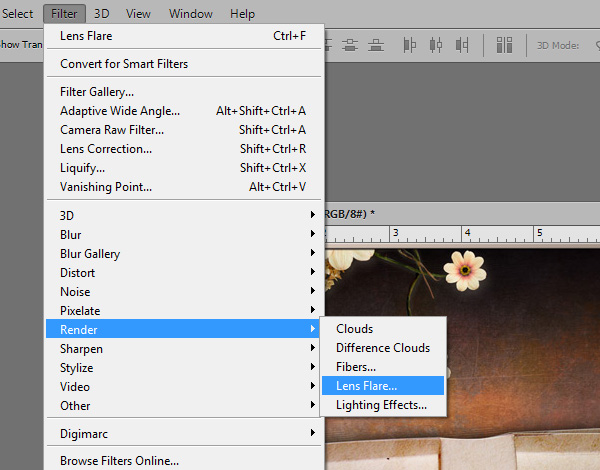
1. Go to the top Menu Bar and follow the path: Filter > Render > Lens Flare
2. The Lens Flare Dialogue box will open. At the bottom of the box you will see 4 lens Type choices. Tick one of the circles to change the options. Watch the preview box for changes in your document as you switch lenses. I chose to use the 35mm Prime for this layout.
3. Adjust the Brightness of the lens flare by moving the Brightness Slider to the right for more intensity and to the left for less intensity.
4. Left click on the “plus sign” in the preview and without releasing the button, drag the light to where you would like it to be in your layout. In this example, I dragged it to the bottom of the lantern.
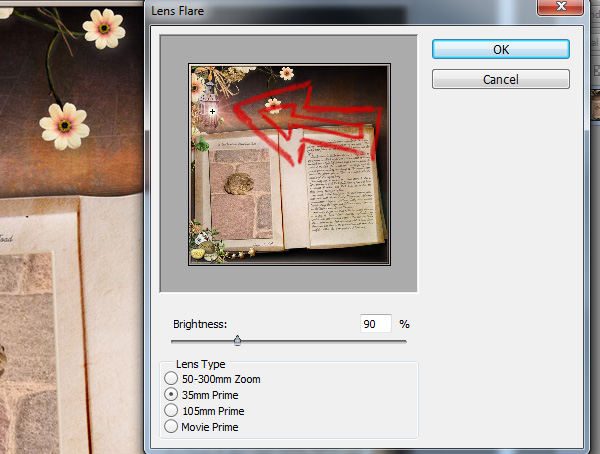
5. Click OK when you are happy with your positioning, and your choice will be reflected in your layout.
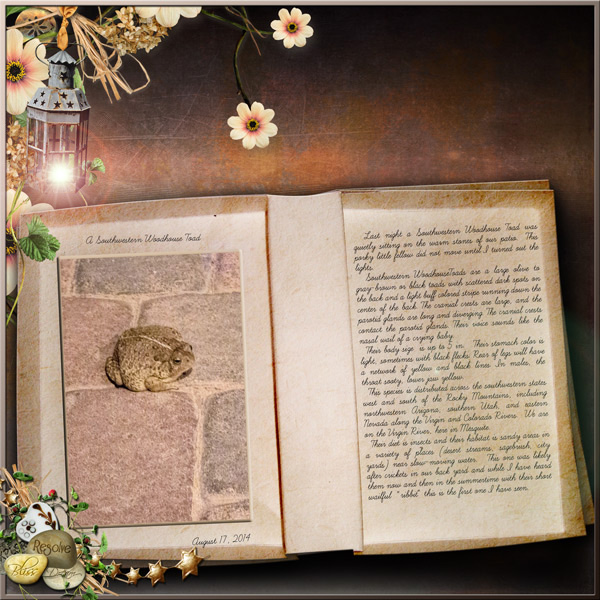
In the image below, I have chosen to have a strong lighting effect, for easy viewing here. On a personal layout, I would probably decrease the light intensity so that the light was not so prominent. But the choice is personal… and it’s yours!
Experiment with all of the lens choices to see what works best for your layout. Be sure to drag the light around to get a variety of different looks.
For the purposes of this tutorial, I am using Photoshop CS6. The Lens Flare Filter is available in many (most?) versions of Photoshop Elements as well.
Priss not only agreed to allow me to share her layout with you, but she also created some wonderful recipe cards for you using Cool Beans. You may download them here: Cool Beans Recipe Cards. Thank you, Priss, for sharing with us all!


I need to practice converting to smart object first. I didn’t know there was a way to get the filter to show up on its own layer. I never seem to get a lens flare right the first time. There sure are some fun effects with the splash and the reflections the lens flare filter offers. Thank you for this tut and for illuminating that interesting fat toad on my patio.
Great tutorial, thanks – have never used this filter a lot but love this idea with a lantern and on its own layer!!!!!
Wow! I love this!
Thanks for the tut. It was just what I needed to finish off a birthday candle pic of my granddaughter!
[…] Using the Lens Flare Filter in Photoshop – 2 freebie(s) […]
So exciting to be learning all these cool effects offered right in my own program. Thanks Karen. Beautiful LO Priss 🙂
Karen thanks for all the great tuts you give us!
I am learning so much!
I use PSE 11. Is there a Smart Filter option there?
Right clicking didn’t work.
Thanks for your feedback, ladies. I’m glad you found this helpful. It it such a fun filter! Cathy, in PSE, you cannot convert an image to a smart object as you can in CS – you are right. Use the “Place” command to bring an element into your document, and it will be “placed” as a Smart Object. Thanks for pointing that out.
I have never used the Lens Flare for lighting like this. I didn’t know it would do that. I’ve been stamping, with a brush, a circle and adding effects to it, like Outer Glow and Inner Glow. I will try this next time I need a glow on something! Thank you!!!
Su
Couldn’t figure out how to do this in PSE13. There is not an option to:
But first, let’s convert the layout to a Smart Object. (Right click on the layer > Convert to Smart Object.
You’re welcome, Sue.
Karen, you are correct. See the Comment right above that of Su Hall to see how to do this in PSE. Thanks for your comment and interest!
I’m just learning PSE12 and digital journaling. I couldn’t figure out how to do a smart filter — “placed” my element – but when I add a filter layer it says I have no pixels selected. If I try to do it on the element layer, it says I have to simplify the layer. So I remembered another tutorial about putting white effects (such as snow) on a black layer then changing the blend mode on that layer to screen. Worked beautifully and can easily move the lens flare to where I want it. Thanks for all the tutorials; learning something new every day.