Today let’s take a look at Smart Objects in Photoshop, and how they can help us in our digital layouts and projects.
So just what IS a Smart Object?
“A Smart Object is a container in which you can embed raster (e.g. PSD, JPEG, TIFF) or vector (e.g. AI, PDF, EPS) image data from another Photoshop or Adobe Illustrator file that retains all its original characteristics and remains fully editable. A Smart Object can be scaled, rotated, and warped non-destructively without losing original image data.” (ref: Steven Johnson)
And what does that mean for us as digital scrapbookers?
It means that we can work non-destructively, when we work with Smart Objects.
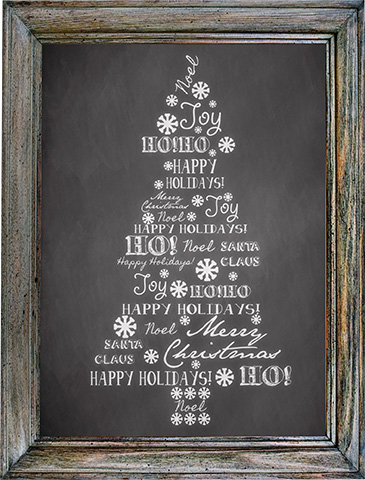
Here is an absolutely stunning layout created by Robyn (credits: Border Buddie Set 14, Deck the Halls Kit, Deck the Halls Word Art, Deck the Halls Glitter)

Here is the original paper and original-sized word art:

The original word art is quite large, and needed to be resized to look best with the photographs and embellishments. When starting this layout, we might not know exactly what final size we would like the word art to be. Working with it non-destructively, as a Smart Object, will give us the option of changing our minds without concern over degrading the quality of the graphic.
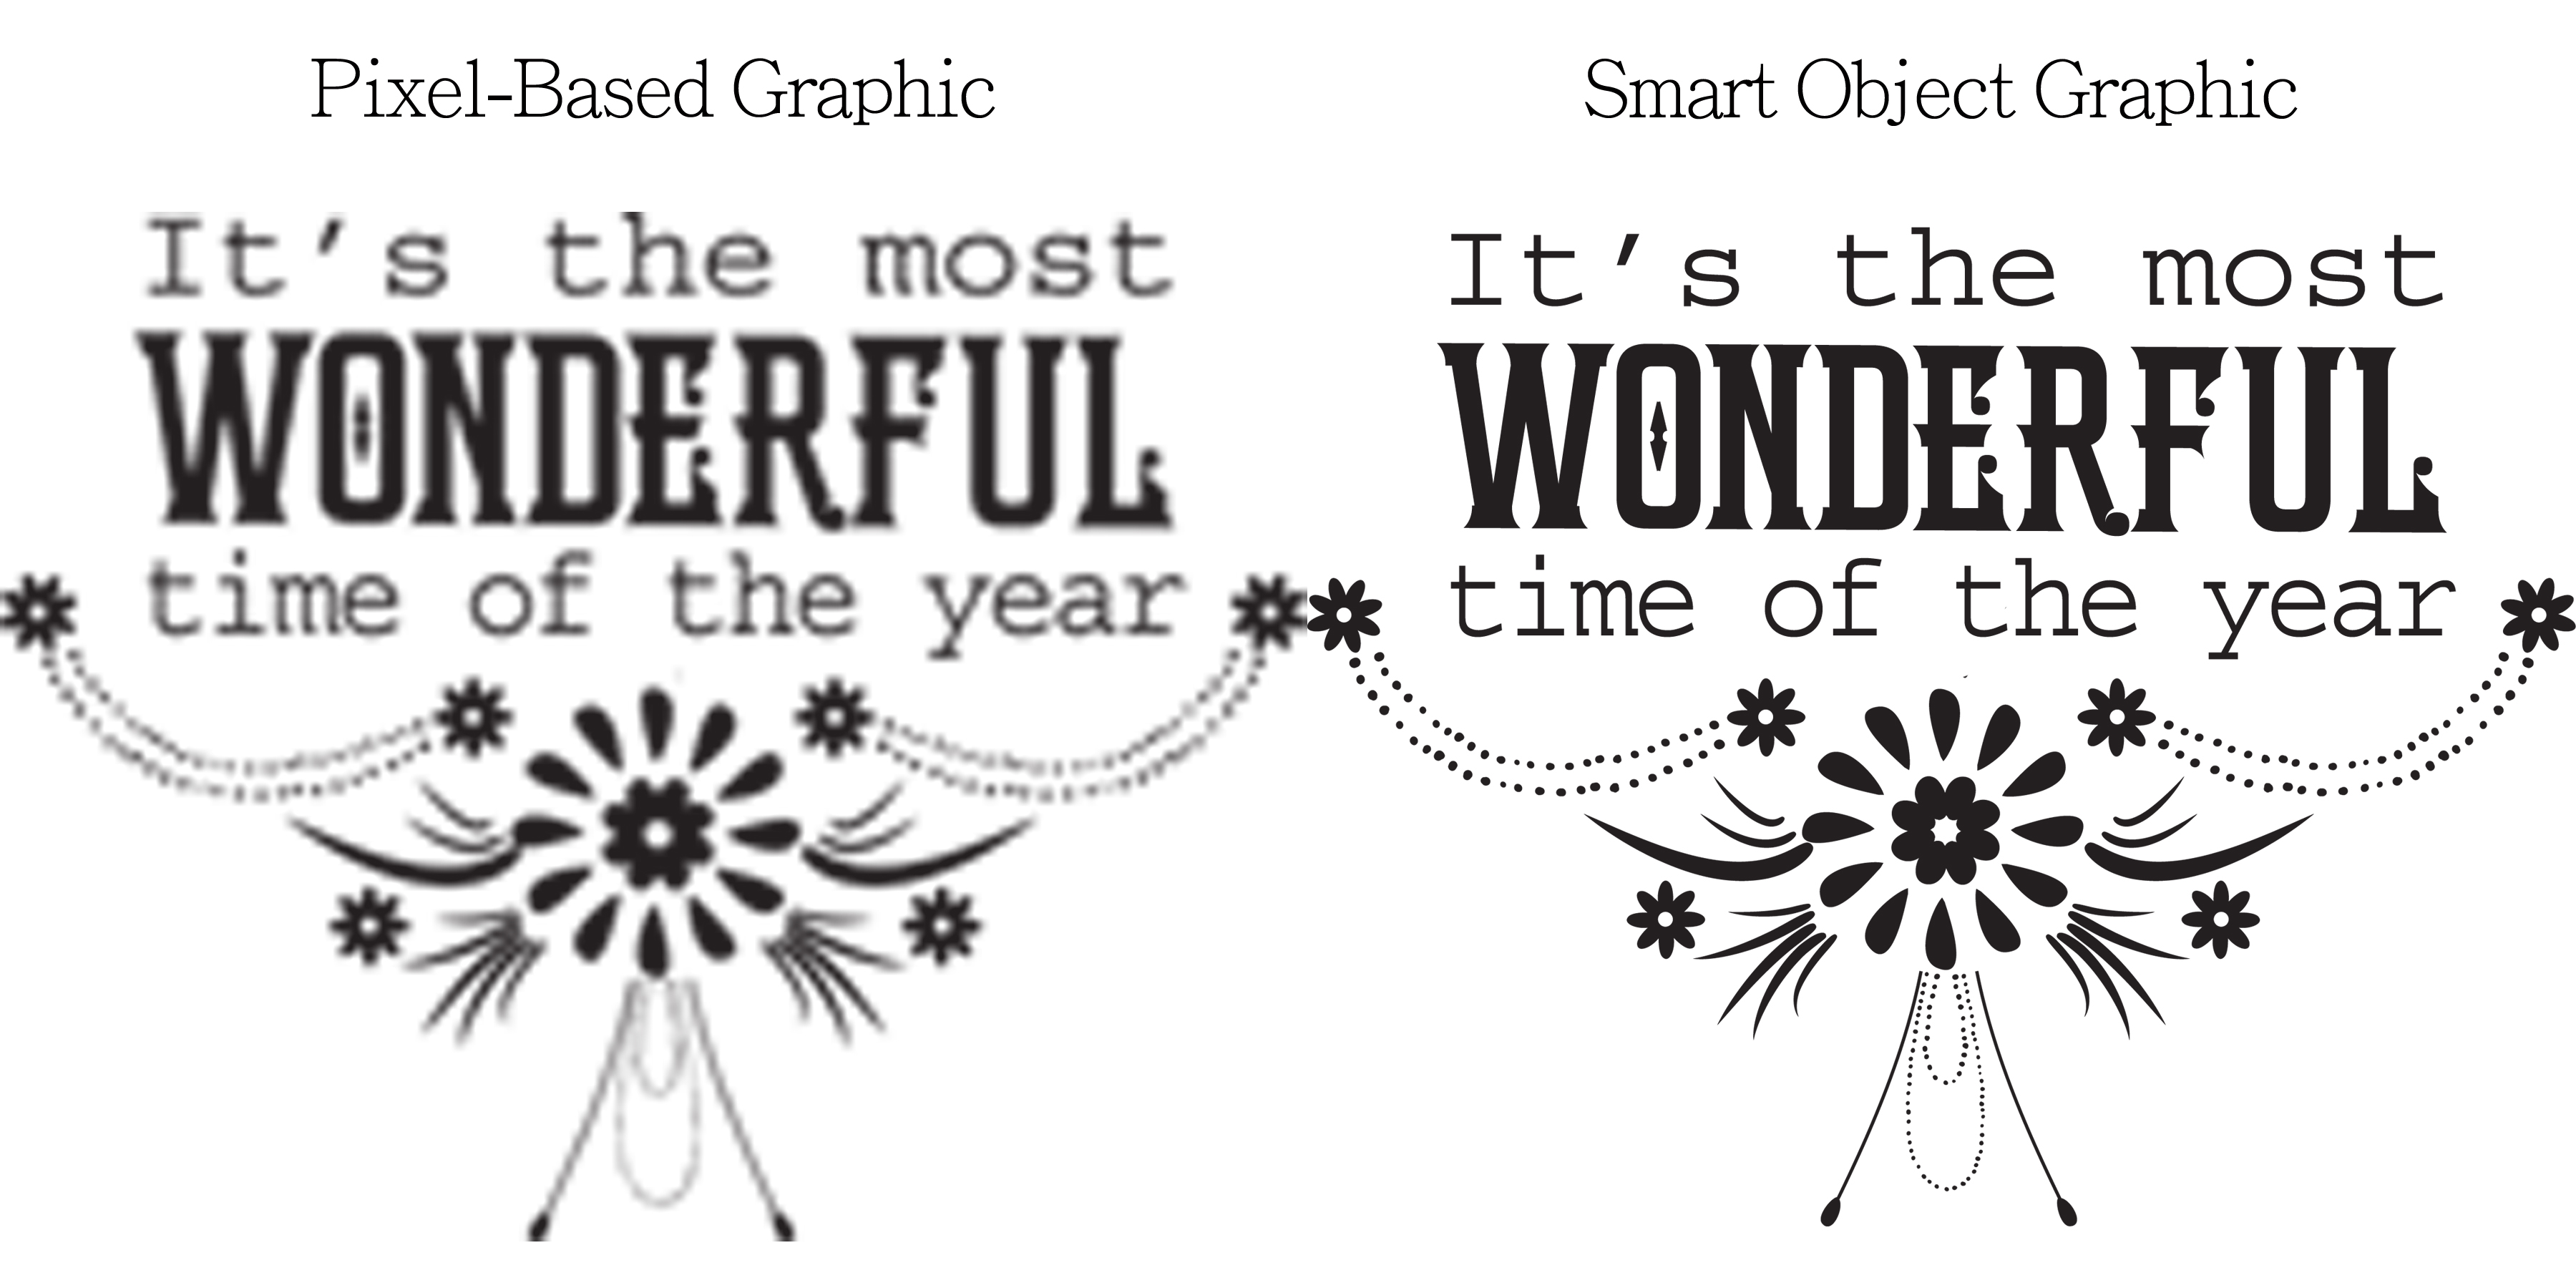
Here is a visual reference:
On the left: I resized the pixel-based word art, making it very small, then sized it back up to its original dimensions.
On the right: I converted the word art into a Smart Object, resized it to make it very small, then sized it back up to its original dimensions.
The pixel-based word art has lost resolution, while the Smart Object graphics has retained its clarity.
There are several ways to convert pixel-based graphics into Smart Objects (dependent upon which version of Photoshop you are using):
1. Use the Place command, instead of the Open command, when accessing your word art (or any pixel-based object). (Top Menu Bar: File > Place.)
2. If your pixel-based object is already in your Layers Panel, right click on its layer and choose: Convert to Smart Object
3. In the top Menu Bar: Layer > Smart Objects > Convert to Smart Object
(Photoshop Elements Users: Use the Place command to put a graphic on your page as a Smart Object.)
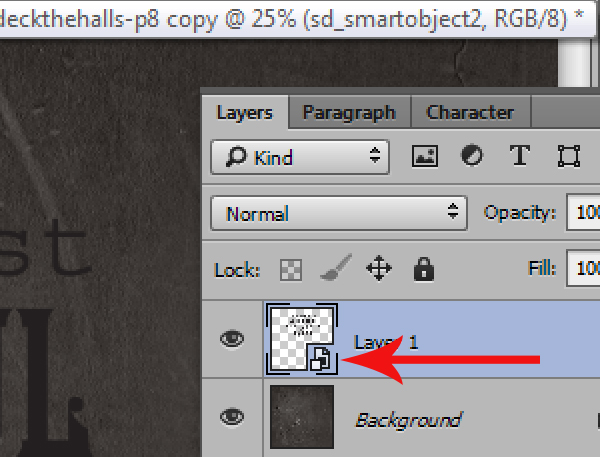
A small square box located in the lower right corner of your graphics thumbnail indicates that your object is now a Smart Object.
Now you can begin working on your layout, changing the size of the word art as many times as you like without losing any image quality!
Smart Objects are very smart! This is just one of the things they do that make life for us, as digital artists, easy! We’ll take a look at a few other ways Smart Objects can be helpful over the next few weeks. In the meantime, if you missed my other tutorials on Smart Objects, you can read them here:
Editing Images on the Fly Utilizing Smart Objects
If you would like to keep this tutorial on your computer for easy reference, you may download a PDF here: What is a Smart Object?
If you are a visual learner, you can view this tutorial on SnickerdoodleDesigns YouTube Channel and on theStudio’s YouTube Channel.
Please head over to YouTube and take a minute to Follow both channels. Each Channel will have some exclusive videos, so by following both channels, you will be sure not to miss a thing! Thank you!!
Here is a graphic from Deck the Halls, for you to enjoy! Click on the image below to download!


Thanks so much for the tutorial on Smart Objects. PSE13 now has Smart Object – so I was wondering how they differ from others. This tut help so much.
Yes, since working in PSE13, I have been seeing pop-up about smart objects. Had no idea what I was working with. What great information. Thanks so much.
Thank you Karen……….yet another great tutorial from you!
Thank you for all the great tutorials that you post. It takes me a while to figure out some of these (I work in PSE), but when I do — YAY! Thanks for the beautiful word art — or is this considered subway art? Anyway, it’s gorgeous! Hoping I have time to play with this after the holiday. Merry Christmas, Karen!
Smart Objects make it possible for you to do much more to a layer and still be able to tweek it! That is all it took for me to go into Smart Objects use! Filters appear beneath the SO in the layers palette. They can be turned off, changed and/or the opacity lowered, if need be, without messing up the original layer image.
I also open my image as SO’s. Then, if I want to slightly enlarge it, I do so in percentages and don’t lose any of the resolution. Though enlarging can cost some loss in resolution, there is much less if it is a SO.
I’m just sold on them and glad I am! LOL
Thank you for this tut!
Su
Thank you so much, it is so wonderful.
I am SO GLAD to have this PSE13 tutorial. I’ve worked with and LOVED smart objects in PS from the day they launched them, but NOW I have PSE13 on my laptop and NOT PS—and so it’s GREAT to know that I can have them now too, and THANKS for showing me how to make them work in Elements. GREAT Tutorial, Karen, thank you!
Excellent info, Karen. I really like the new PDF’s and you tube videos. They make it so easy to refresh ideas from your tutorials. Thank you.
I love smart objects and was first introduced to their use in PSP years ago. I also use PSE13 and always use the place instead of open whenever possible when doing layouts. I so enjoy your tutorials. You won’t remember, but I have kits, etc., from you before I entered the hospital the end of 07. Thank you for this interesting and re-enforcing smart object tutorial. I really appreciate both the visual and complementing written PDF. So glad to be back. 🙂
Thank you so much, explained in such a way even I understood.
I also have PSE13 and noticed that if I “throw” my object up to the workspace from the photo bin, it automatically becomes a smart object.
[…] If you are not familiar with Smart Objects, this post will introduce you to them: What is a Smart Object? […]