Today let’s take a look at working with Shapes: how to create them and the fun things we can do with them.
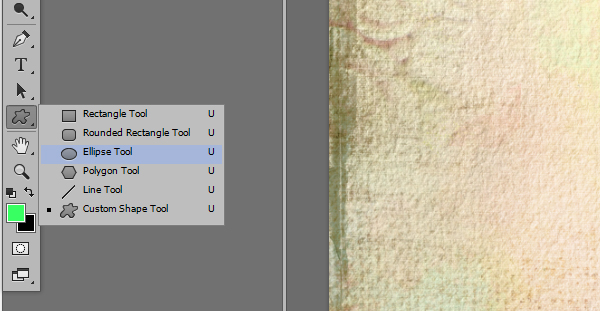
For the purposes of this tutorial, I am working in Photoshop CC. The Shape Tool can be found in the Tool Box on the left, and this is the same in all versions of Photoshop. Click on the little triangle in the lower right corner of the Shape Tool to bring up all your options. In the image below, I have the Ellipse Tool selected. Click on your choice to make it active.
Once you click on the Shape Tool, the Tool Mode options will become available to you at the top of the screen.

Be sure that “Shape” is selected. If it is not, use the drop-down arrow to open the options, then select Shape.
Next is where the fun happens! You have lots of options to choose from now!
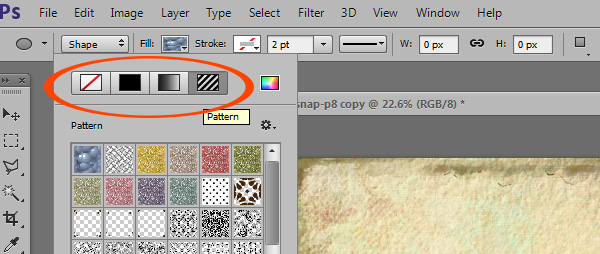
FILL: Click on the drop-down arrow to see your options: 1) no fill; 2) color fill; 3) gradient fill; 4) pattern fill
In the image below, I have clicked on Pattern Fill, and the patterns that I have loaded are now available for me to choose from.
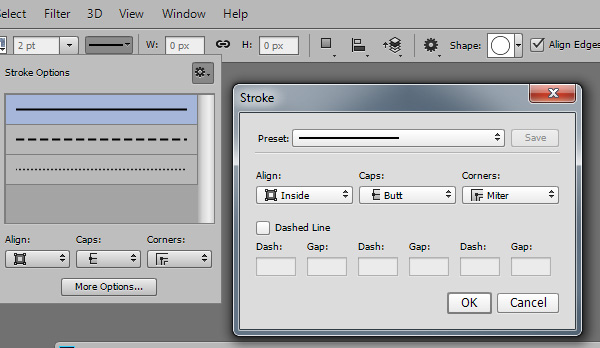
STROKE: Click on the down-pointing arrow to access your Stroke options. They are the same as the Fill options: 1) no stroke; 2) color stroke; 3) gradient stroke; 4) pattern stroke
STROKE WIDTH: Here you may select the width of the stroke you wish to apply by using the slider. (New in CS6 I believe.)
STROKE TYPE: You may choose what type of Stroke you would like. You may choose from dashed or dotted lines; but you can also click on the gear in the upper right corner to open the Stroke options box. Here you can made additional choices, creating your own favorite stroke, and then saving it as a Preset. I love that!
Once you have made choices on how you want your shape to look, create a blank layer to place your shape on, then click and drag to make your shape.
Here are a few shortcuts:
1. To constrain proportionally, hold down the Shift key while you drag.
2. To draw from the center, press and hold the Alt key, then drag.
3. To set the exact size and position of your shape, with the shape tool selected, click on your document. The Create Custom Shape box will open. Here you may make exact choices. Once you have done so, drag on your blank layer to create your shape.
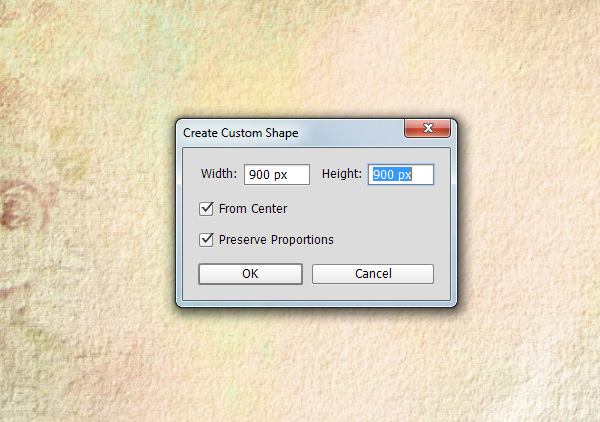
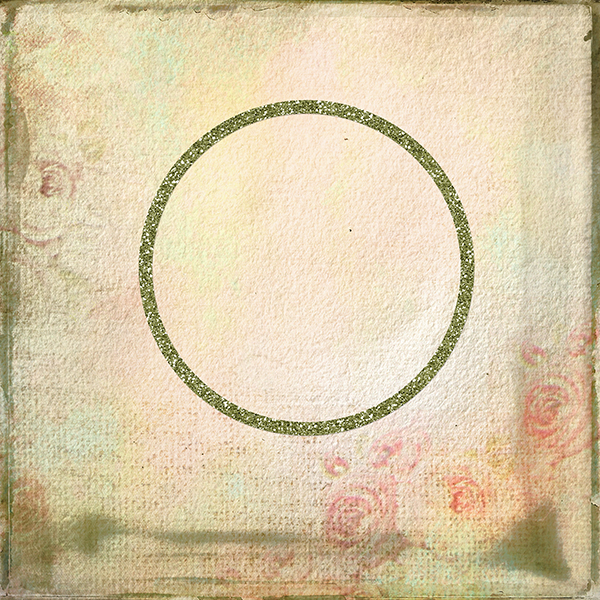
I selected a 900 x 900 px size, with a Pattern fill (Follow Your Heart Glitter), no stroke, from the Center, Preserve proportions.
Once I dragged out my shape, I realized I wanted it a little larger. Because shapes are vector-based, as opposed to pixel-based, I can select the shape and use the Transform Tool to make it larger without losing any quality. The larger shape is pictured below.
Now what? So you can make these neat shapes. What can you do with them?
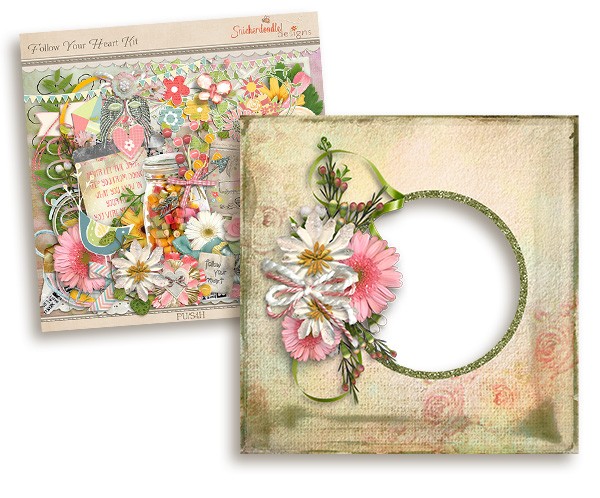
I decided to use this as a frame. I used the Magic Wand to select the inside of the circle and then deleted that from the background paper. Since the paper is from Follow Your Heart, I placed one of the Follow Your Heart Clusters on the page, and had a Quick page in seconds!

This is just one example of how Shapes can be handy. Paper Strips are very popular on scrapbook pages. Create your favorite shape, clip papers to them, and you have custom Paper Strips that match your layout perfectly. I am awed by the creative ideas I see in our challenges, and I know that you will all find awesome ways to use Shapes in your own work!
Toiny has created a new Tutorial Gallery for us! When you experiment with this technique, or any technique you learn through our tutorials, we encourage you to upload your results to the new gallery! Show off your hard work! Please include the name of the tutorial and provide a link to it, in case some of our readers missed it!
If you would like to have this Follow Your Heart Quick Page for your personal use, you may download it by clicking on the image below.
If you would like to keep this tutorial on your computer for easy reference, you may download a PDF here.
See you next week!


I tried this with Photoshop Elements 13 and found that it works with a few modifications. Using the style picker in the tool bar located with the custom shapes, I could choose only one style. Then after the shape was on my page, I added other styles like drop shadows, outer glows, and bevels. To remove the center of my shape (to use as a frame), I had to simplify the shape first. (PSE popped up with a warning box telling that my shape layer needed to be simplified before proceeding.) So, with a few extra steps, I was able to apply this tutorial to Elements. Thank you, Karen. I learned something new this morning.
Thank you for this! I have been frustrated with the shape tool and your tutorial resolved my problem. I see that in PSE12, you can click an option for a circle or fixed size oval, for instance, then just click on the document and it appears. I used the steps Patti outlines above to get the style I want. Cool! Now I have control!
Oh, I forgot to thank you for the beautiful quick page!! How easy was that to use a beautiful cluster.
Thank you Peggy and Patti for providing the additional information for Photoshop Elements. I’m glad you both found this tutorial helpful!
[…] Working with Shapes – 3 freebie(s) […]
Thank you for this tutorial and again a big thanks for the pdf file. Love the QP–thanks so much.
A big thank you to Patti for how to do this in PSE 13.
[…] week we talked about Working With Shapes in Photoshop. Today let’s look at another thing we can do with Shapes, and that is creating […]
Thanks so much for the tutorial and for making it available in PDF format. And thanks so much for the QP. All is much appreciated
[…] week we talked about Working With Shapes in Photoshop. Today let’s look at another thing we can do with Shapes, and that is creating […]
[…] week we talked about Working With Shapes in Photoshop. Today let’s look at another thing we can do with Shapes, and that is creating […]
[…] the rest of this tutorial on theStudio’s blog. You may also download the freebie pictured below there […]