There’s a lot to learn in Photoshop. We need to learn new terminology, understand how to use different tools, and learn time-saving shortcuts. That can be a lot of work! But Photoshop can, and should be, fun too!
Today I want to share with you one of my very favorite techniques to colorize grayscale textures. It’s simple, it’s fast, and it’s fun!
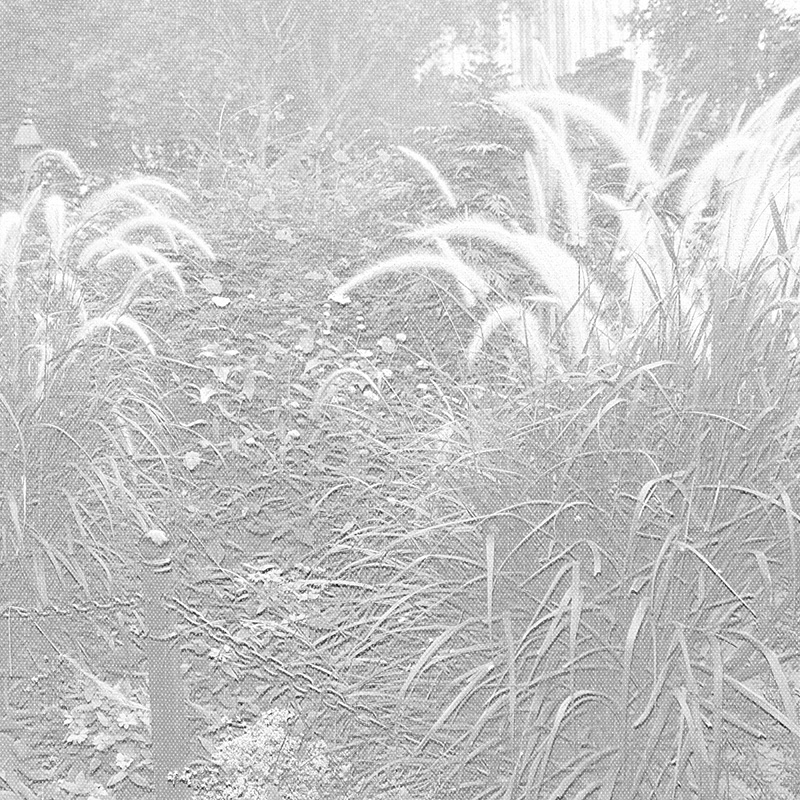
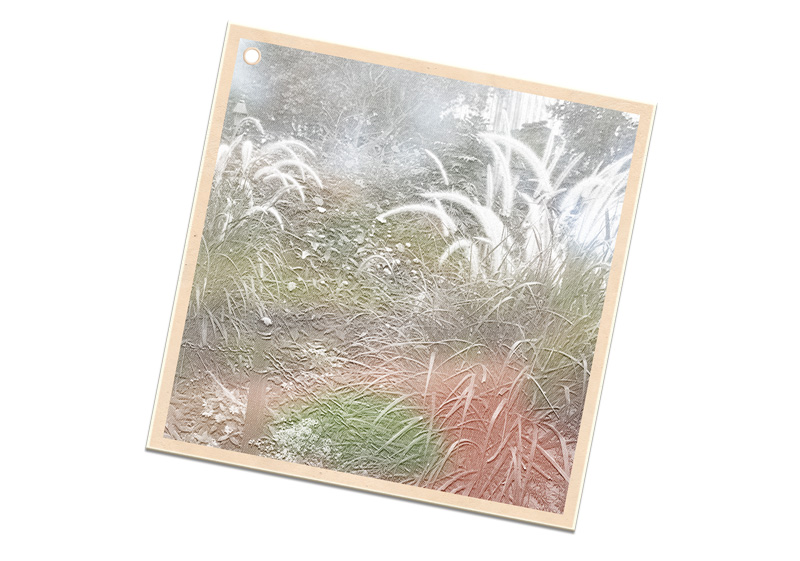
Let’s start with this Textured Floral Overlay (#3)
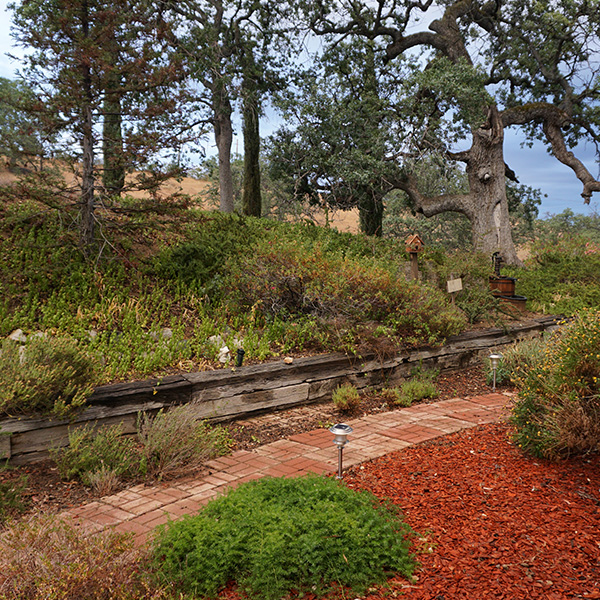
And this photo:
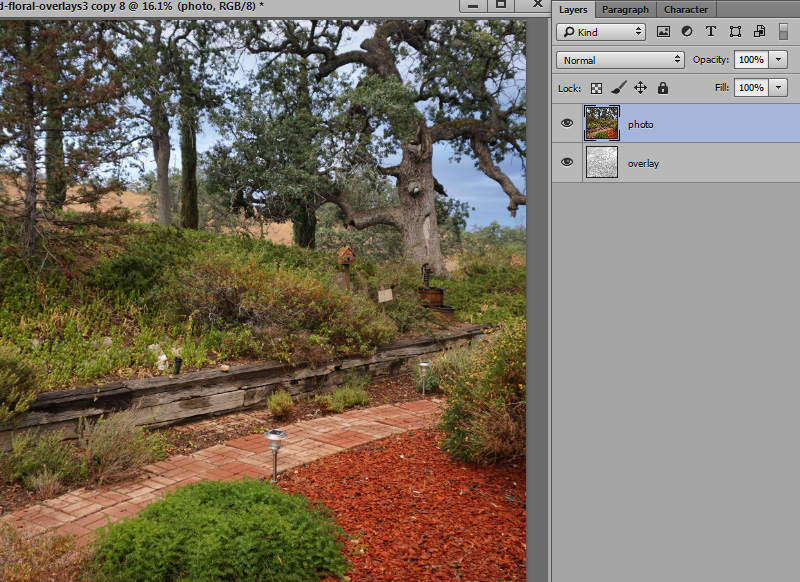
1. Open the Overlay.
2. Place the photograph on a layer above the Overlay.
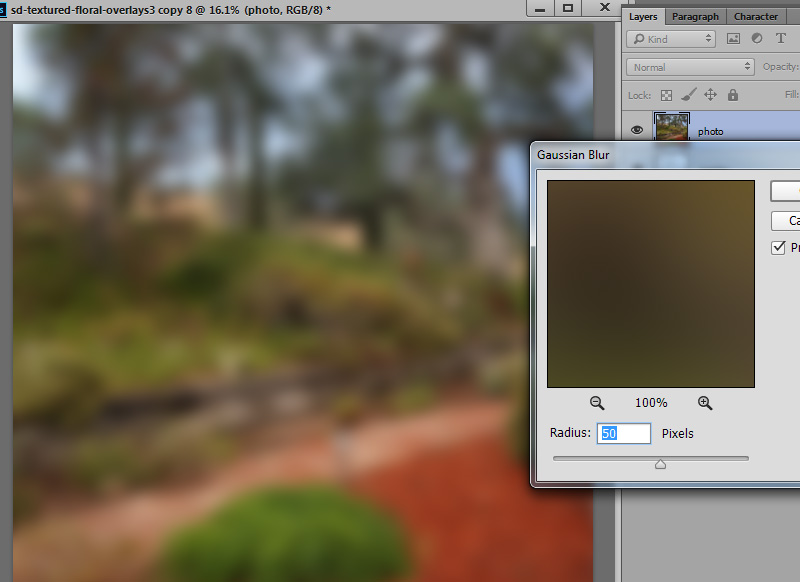
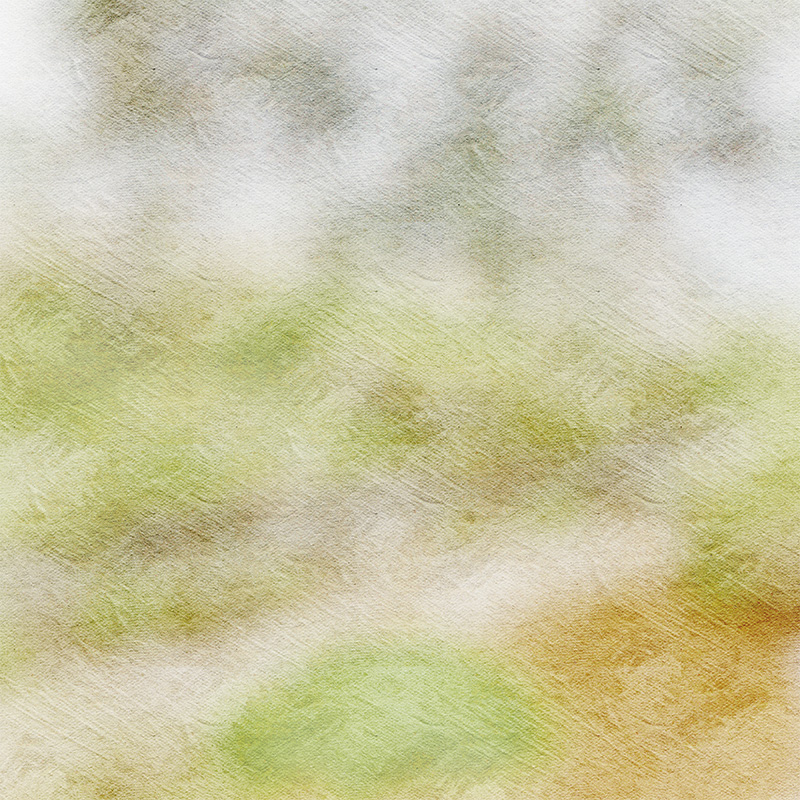
3. With the photo layer active, go to the top Menu Bar and choose: Filter > Blur > Gaussian Blur. The Gaussian Blur dialog box will open. Move the slider to the right to blur your photo until it looks something like what I have below. 50% usually works well, but it depends upon the photo you are using. After you try this several times, you will get a feel for how much blur to add.
4. Change the Blend Mode of the blurred photo to Soft Light or Overlay. And that’s it! I added a slight Levels adjustment to bring out the color just a little bit more, but it’s really personal taste.

This is a heavily textured overlay. You can get more subtle effects on different textures.
Below is the same blurred photo placed over JanetB Designs CUWhite4_Art Papers, with the Blend Mode of the photo set to Color Burn.
The next time you go out on a photoshoot, capture images of color. The photo doesn’t have to be professional quality, since you are going to be apply a blur filter to it anyway! Just focus on color, and color changes. In the meantime, just go through your photo stash and choose any picture with color in it… and just PLAY! (Don’t forget to duplicate your photo and work with the copy, so you don’t lose your original!)
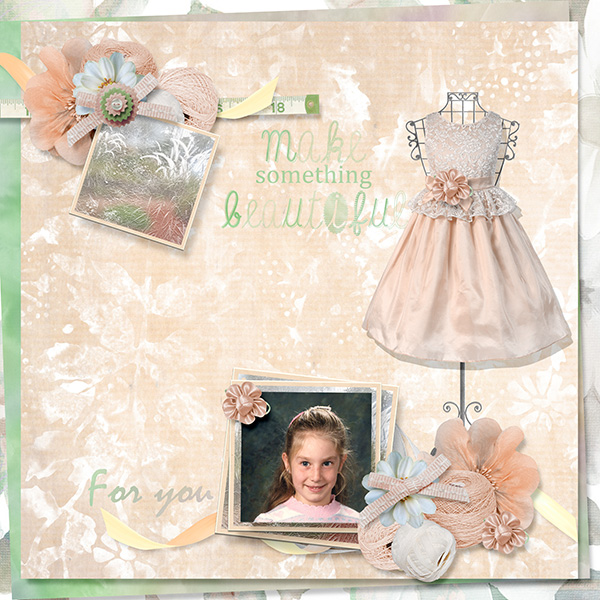
We have many grayscale overlays in our commercial-use store; but these are great fun for the personal-use scrapper as well! I especially love scenic papers, but sometimes they can be difficult to scrap with. If you find one you just love, but are having a hard time scrapping with it, consider turning it in journal card, a charm, or anything else that works with your layout. I’ve turned my heavily textured background into a wooden tag.
I sent the tag to Renee, a member of my Creative Team, and she created this beautiful layout as an example for us!
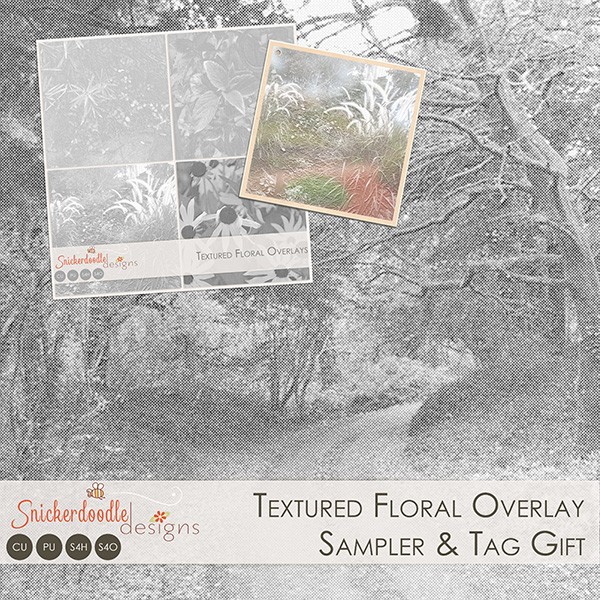
I’ve created a Textured Floral Overlay for you to practice with. I would love to see what you do with it! When you experiment with this sampler, or ANY of the tutorials samplers you have downloaded in the past, just upload them to the Tutorial Gallery, and reference the tutorial (with a link if you can), so others can enjoy your work!
Click on the image below to download!
(I’ve included the tag for you too!)
If you would like to keep this tutorial on your computer for easy reference, you may download a PDF here.
Thank you for visiting our blog! We hope to see you next week!


I love using overlays, but hadn’t thought about using one this way. Thanks for the simple and informative tutorial.
Very interesting. Thank you for the tutorial and the beautiful overlay.
What a great technique! Thank you, Karen, for the tut and the gift.
thank you !
I wondered how one was to use those overlays. That is awesome! Imagine the possibilities! Wow! Thank you for such a great tut!
Su
Thanks, ladies! I’m glad you found this informative!
Thank you so much for your very interesting tutorials, I have had such fun following that I have now ordered my own photoshop, Thank you so very much for all your hard work.
[…] If you are looking for a perhaps-new-to-you way to color gray-scale overlays, check out my tutorial: Coloring Textured Grayscale Overlays! […]
Looks like fun, however the download is not working for me.
Hi Margaret, Can you try again? I just tried and it is working for me. I clicked on the PDF download link and it opened, and also right-clicked on “PDF here” and the link worked both times. Let me know if you still have trouble and we’ll try to figure it out. (Perhaps use another browser?)
[…] If you are looking for a perhaps-new-to-you way to color gray-scale overlays, check out my tutorial: Coloring Textured Grayscale Overlays! […]