Creative titles can be just the perfect finishing touch on a layout. Today let’s look at how to create a text reflection.
For today’s tutorial I am working in CC2015. This technique will work in other versions of Photoshop and Photoshop Elements, although the instructions may be slightly different, depending upon what version of software you are using.
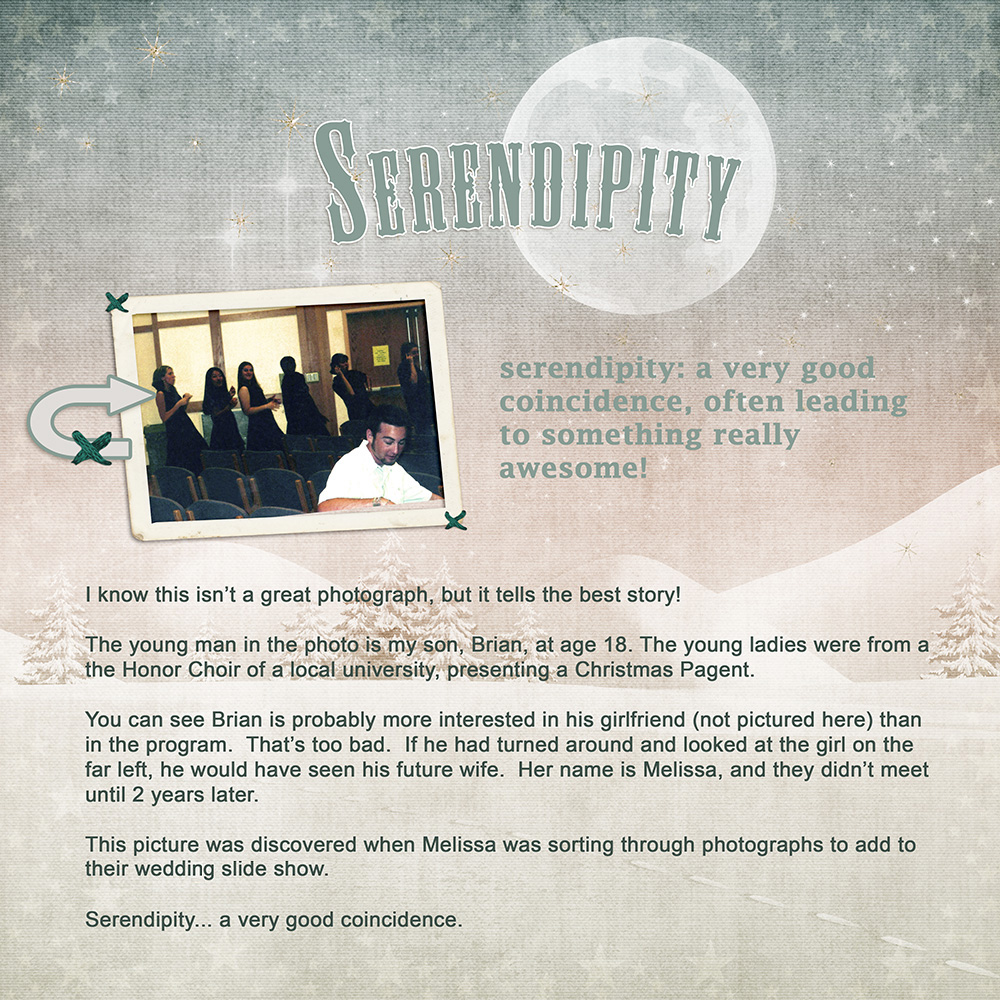
Here is a layout I created for Jilbert’s Bits of Bytes Christmas in July Journaling Challenge.
For the title, I added a small white stroke to the text and created a slight Arc, using the Warp Text Tool. I also added a very slight shadow to make the title stand out.
Let’s change the look of that title by creating some reflected text. I removed the Arc, so we are starting with just a straight text line.

Let’s get started:
1. Duplicate your title, either by going to the top Menu Bar: Layer > Duplicate Layer or by using the shortcut Control + J.
2. Right click on the duplicated layer to Rasterize the type (Simplify in Photoshop Elements).
3. With the duplicated layer still active, go to Edit > Transform > Flip Vertical.
4. Click on the Move Tool to make it active, and use the arrow keys to move the duplicated layer below the original text layer.

5. Add a Layer Mask to the duplicated text layer by clicking on the Mask icon at the bottom of the Layers Panel. (If you need a review of this: Using Layer Masks in Photoshop.)
6. Click on the Gradient Tool to make it active. (The Gradient Tool is nested with the Paint Bucket Tool.)
7. Make sure your Foreground / Background colors are set to Black / White.
8. Click on the Gradient Edit tool in the top Menu Bar, and choose Foreground to Transparent.

9. Click on the mask you applied to the duplicated text to make it active, then apply the gradient by clicking at the bottom of the duplicated text and dragging up to the top of the duplicated text, then release your mouse.

10. You may do this several times if you wish, depending upon the amount of reflection you like. If repeating the action twice gives too strong of an effect, lower the opacity of the Gradient Tool in the top menu bar for your second pass.
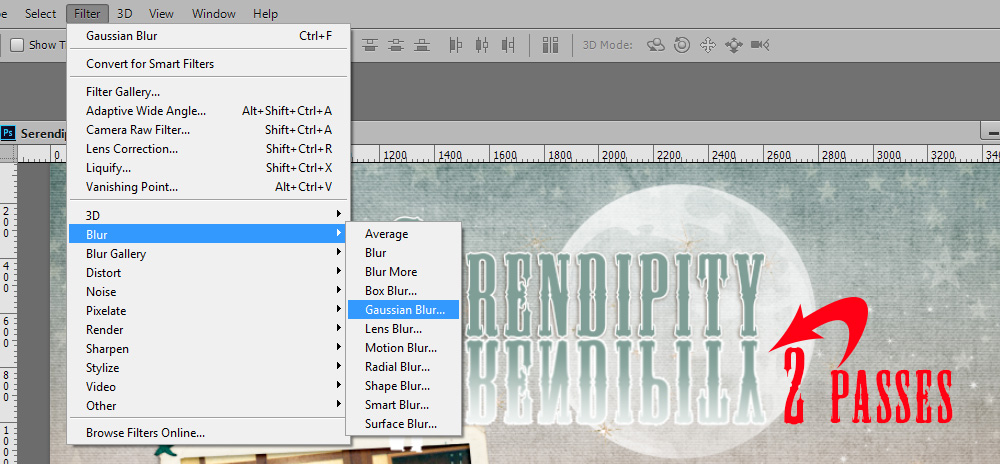
11. Click on the thumbnail of the duplicated text to make it active. Soften this layer by going to the top Menu Bar: Filter > Blur > Gaussian Blur. The amount of blur will be dependent upon your title. For this title I selected a blur of 2.5 pixels.
12. Now you could stop here if you wanted. In certain layouts this would look nice, but for this title I want to add another dimension. Click on the duplicated text layer to make it active; right-click to Apply Layer Mask. Go to the top Menu Bar and choose: Edit > Transform > Perspective; or use the Shortcut Control + T, then right-click and choose Perspective.
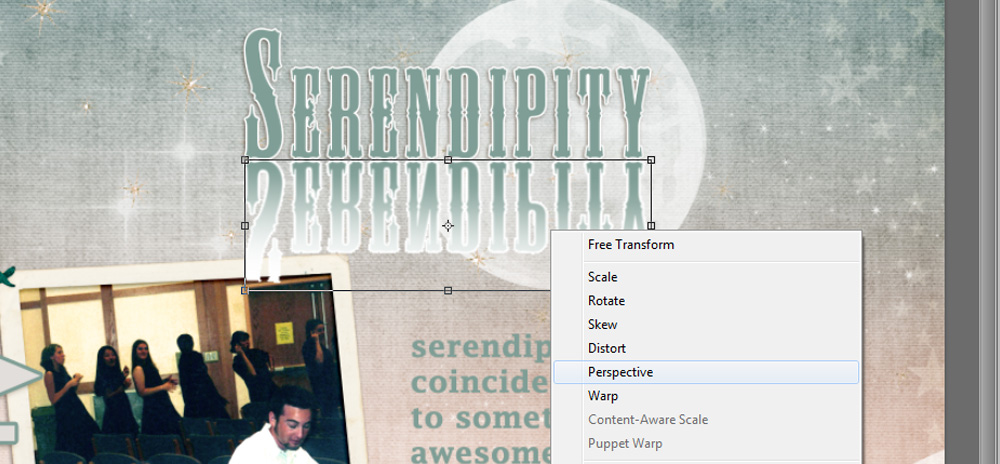
13. Click on the lower left handle of the Transform Box and pull to the left, until you see the result that you like.
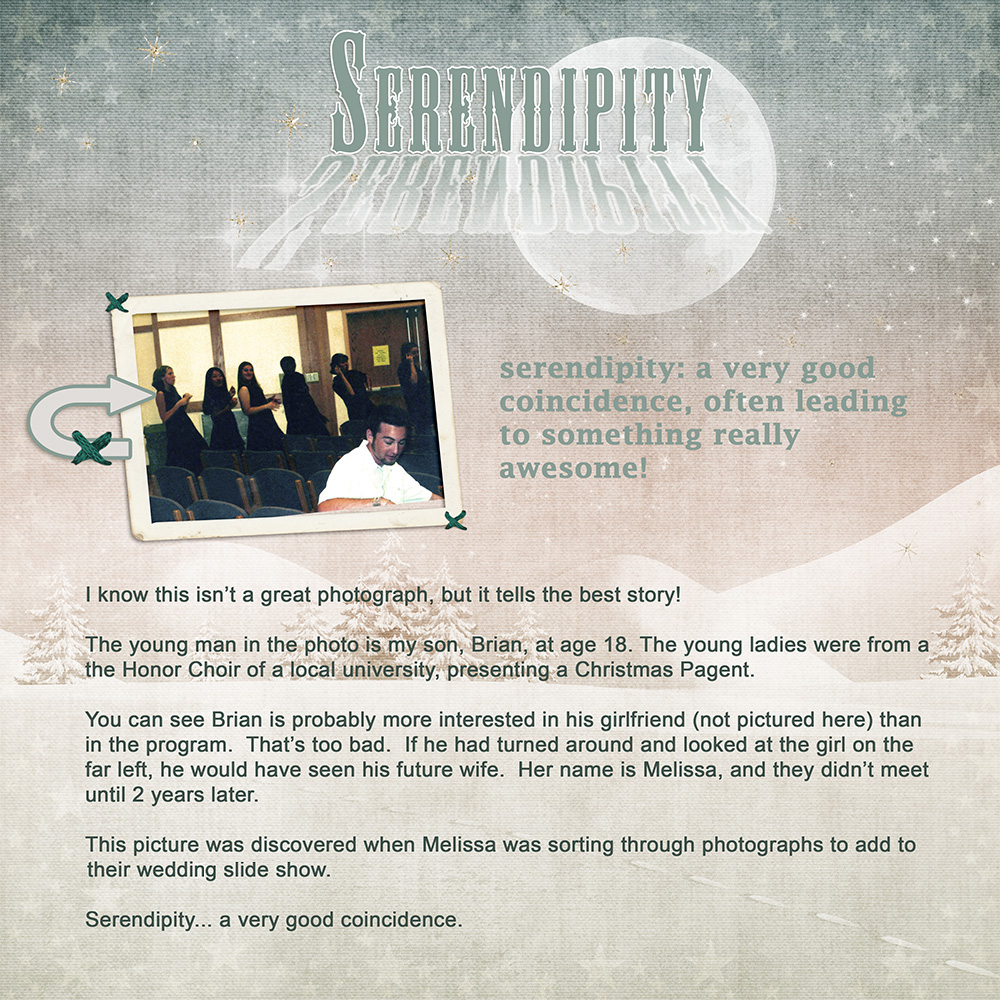
14. You may also lower the opacity of the duplicated layer, if you like. I lowered the opacity of my duplicated layer to 52% and here is the result.
Alternative: If you wanted more of a shadow look, you could fill your duplicated layer, at this point, with 50% gray. Here’s what that would look like:

That’s it! Experiment with this technique and see what amazing things you can do with it!
The paper in this tutorial is from Holiday Hoopla, which is included in our Christmas in July Sale, where you can save 50% on all Christmas-related products! This includes Personal Use and Commercial Use! Sale ends July 31st!
If you would like to keep this tutorial on your computer for easy reference, you may download a PDF here.
See you next week!


Love this tutorial. Thanks so very much and another great big thank you for the PDF file. Now I just have to try it out.
Thank you, Carol! I’ll be watching for your layout!
[…] Creating a Text Reflection in Photoshop – 1 freebie(s) […]
THAT looks very nice! I like it! Thank you for sharing the know-how!
Su
[…] Creating a Text Reflection […]
[…] Creating a Text Reflection […]
[…] Creating a Text Reflection […]