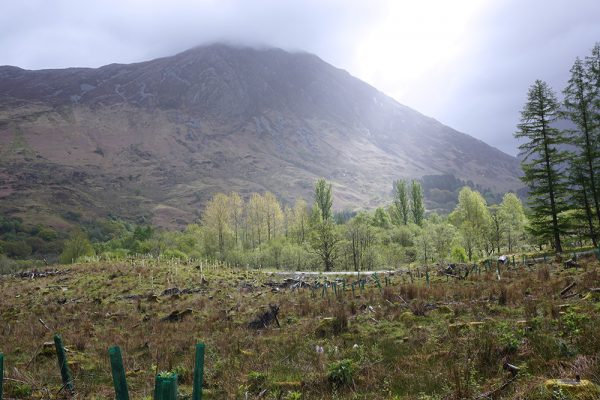
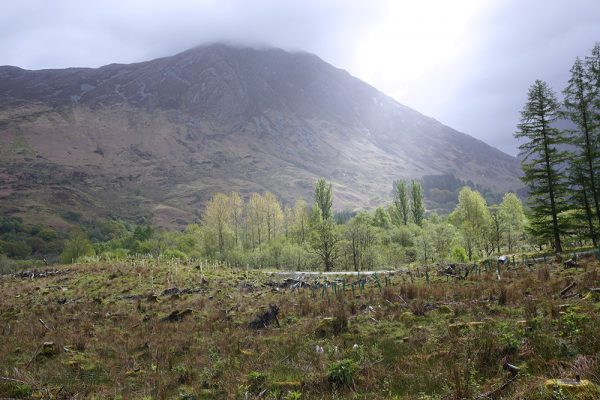
 The Spot Healing Brush is a tool that can be very useful in removing unwanted objects from a photograph. This brush works the same in both Photoshop and Photoshop Elements. Let’s remove those distracting green poles in the lower left corner of this image.
The Spot Healing Brush is the default healing tool in Photoshop. There are also 3 options that we can choose from in the top options bar: Content-Aware, Create Texture, and Proximity Match.
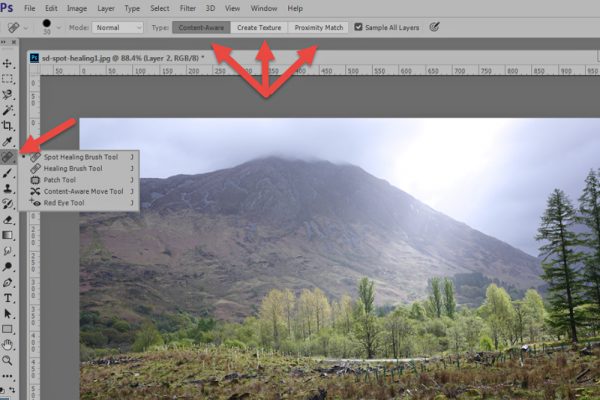
To use the Spot Healing Brush, we just need to select it. As opposed to the Healing Brush Tool, we do not need to select a Source Point.
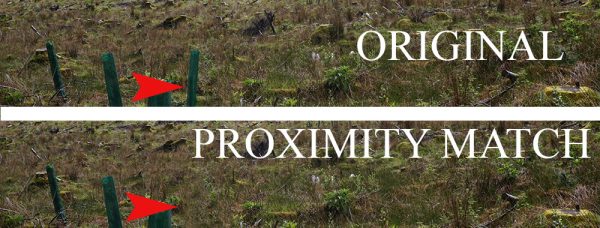
PROXIMITY MATCH looks at the pixels surrounding the area that you are painting over. It tries to replace the painted-over pixels with the best match of surrounding pixels, blending them into your image. When using this option, it is best to use a brush that is smaller than the object you are trying to replace, and to drag the brush from the side of the object that has the best pixel choices. For example, in the image below, I dragged my brush from the right into the pole, rather than from the left into the pole, because there were more “ground pixels” on the right. Sometimes you might have to “undo” and try again to get the best result.
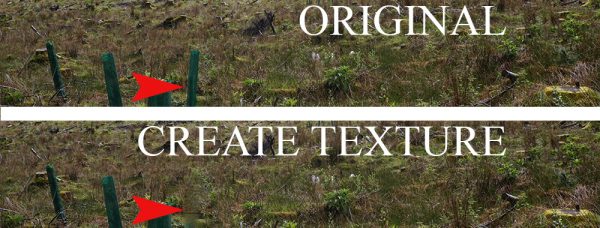
CREATE TEXTURE will try to blend surrounding pixels in the same fashion as Proximity Match; but, in addition, it will add texture that it creates during the process. This option doesn’t work well with the photo I am using. I’ve yet to find a photo where I have been able to use this option effectively. If any readers do use this option, please let us know what type of photo you’ve experienced success with.
CONTENT AWARE is my favorite option because it tries to determine the best pixel replacement without as much work on my part. When using this option; however, there can still be times when trial and error comes into play. If you don’t like the initial result, just Undo and try again.
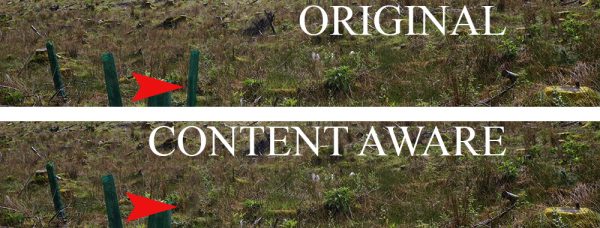
In addition to the Content-Aware, Create Texture, and Proximity Match options, we also can explore the Blend Modes that are available in the top options bar. When using the Content Aware tool, I used the “Replace” blend mode. Experiment to see which Mode works best with your photo and the other options are you are using.
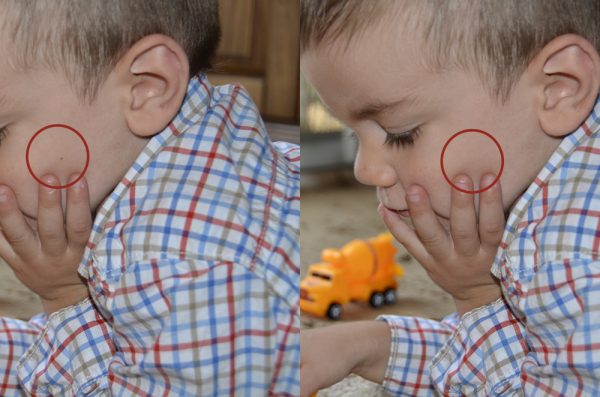
Another way I like to use the Spot Healing Brush is to remove unwanted spots of blemishes on faces. I actually like this tiny little freckle on my grandson, Owen’s face; but if I did want to remove it, one click with the Spot Healing Brush and it’s gone. (Content Aware).
I hope you have found this tutorial helpful!
If you would like to keep this tutorial on your computer for easy reference, you may download a PDF here: Using the Spot Healing Brush


Thanks for this, I do use this tool sometimes, however I haven’t noticed the Content-Aware, Create Texture, and Proximity Match. Perhaps this will make a difference to what I do. Thank you.
It’s also important to do the “healing” in a separate layer do you don’t ruin your original or use smart objects.
I usually use Content Aware but have varied results. Sometimes things don’t work at all for me. I always wonder what I am doing wrong. I picked up 2 great tips from your tut.
1. With proximity match, I had no idea the direction of your brush was significant.
2. Using blend mode with Content Aware – did you create a new layer for you “healing” as suggested by Harriett? I don’t see a Blend mode option in PSE within the Spot Healing tool box.
I’m glad this was helpful, Faith. Sometimes it’s a matter of trial and error to see which works best.
Harriett, thank you for bringing that point up. Yes, in CS2015 (I haven’t tested in other Photoshop versions) you can use the Spot Healing Brush on a blank layer above your photograph. This worth whether the layer is a smart-object or not. In Photoshop Elements neither of these options are available. (If you attempt to use the tool on a Smart Object, PSE will ask you to rasterize it; placing a blank layer above the photograph yields no results).
Steph – there is no blend mode for the Spot Healing Brush in PSE.