 The Healing Tools in Photoshop can do amazing things! Over the next few weeks, let’s take a look at them. Today we will start with the Spot Healing Brush.
For this tutorial, I am using CC2015; however, the Spot Healing Brush is available in both Photoshop and Photoshop Elements.
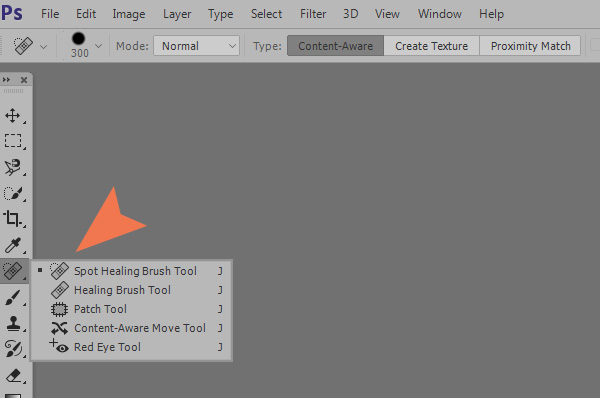
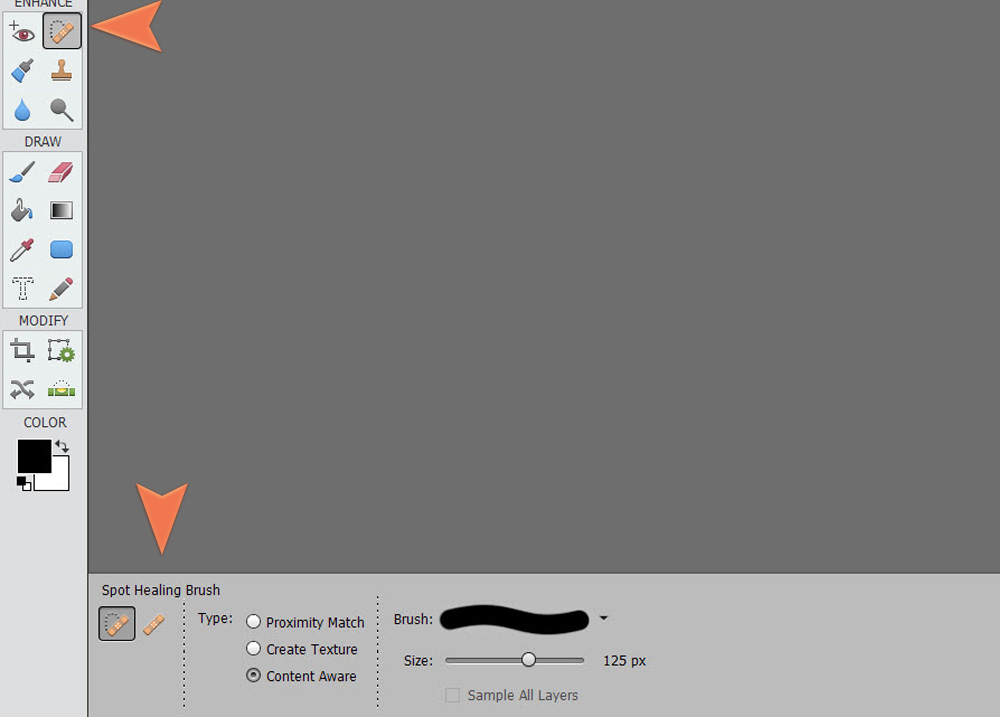
Where to find the Spot Healing Brush: This brush is the default brush in the Healing Tool Section.
Screenshot from CC2015:
Screenshot from Photoshop Elements 14:
The Purpose of the Spot Healing Brush: This brush can be used to seamlessly blend pixels, matching textures and colors; thereby removing unwanted pixels in your image.
Options with the Spot Healing Brush:
- Content Aware: This options allows Photoshop to determine how best to fix the areas you would like to retouch.
- Create Texture: Photoshop will look at the pixels surrounding the area you would like to fix and creates a texture pattern.
- Proximity Match: This mode looks at the pixels around the targeted area and uses that data to replace the area you would like to fix.
Some options work better than another, depending upon your image and what you are trying to replace. Experiment to find which option works best for your particular image.
Example #1:
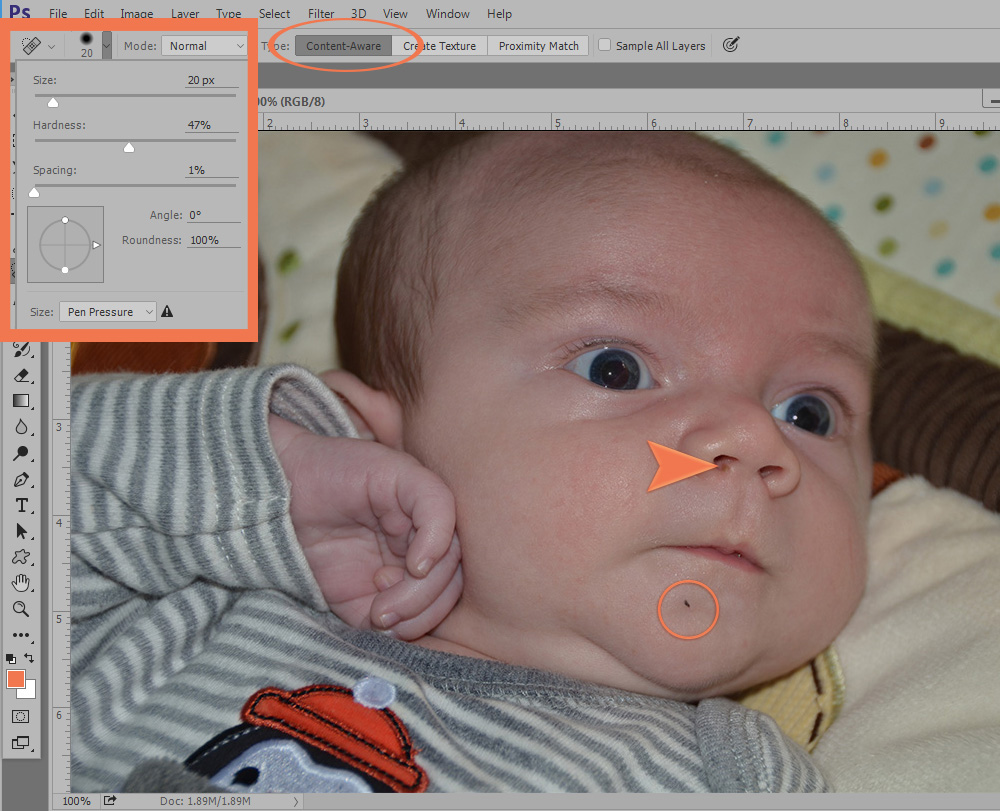
I would like to remove the little brown spot on this baby’s nose and chin.
Once I selected the Spot Healing Brush, I clicked on the Brush icon in the top menu bar and selected a 20 px brush (just slightly larger than the chin blemish). I chose a mid-range Hardness (47%) because I am working on a face. A 100% Hardness would give too harsh of an edge, while 0% Hardness would create a little bit of a blur around the edges. For this image, I chose Content-Aware.

To use the Spot Healing Brush, we just need move the tool over the area we would like to remove, and left click once.
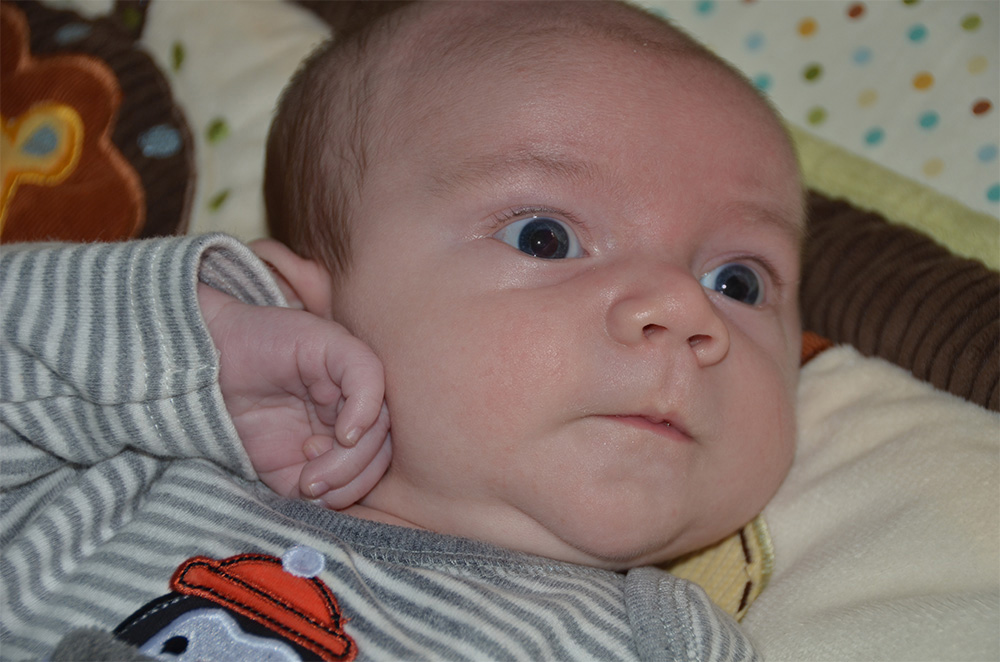
Here is the amazing result!
Example #2:
I use the Spot Healing Brush in many ways, not just on photographs.
Here is one of my brand new Artsy Textures (Artsy Texture 07, #1). I really like the bit of paper at the top left of the image; but I realize not everyone might.
You can remove that using the Spot Healing Brush, as described above.
For this image, Content Aware worked best. When removing larger areas like this, it is best to use a brush slightly smaller than the area you wish to remove and to drag the brush into the area you want to remove, orienting the beginning of the drag from the side of the area that has the best pixel data. I dragged from the left to the right in this example.
I find the Spot Healing Brush to be like “magic.” I hope you do too!
I think we probably all have plenty of photos we can experiment with; but here is an Artsy Texture Sampler for you to experiment with,in case you don’t have one. Just click on the image below to download!
(Find my new Artsy Textures, Volumes 5, 6, 7, and 8, along with their sister transparencies in my Artsy Texture Collection of my Commercial Use shop. Perfect for the Personal Use scrapper too!)
If you would like to download a PDF of this tutorial, you may do so here: Using the Spot Healing Brush
Save
Save


Another wonderful tutorial, I didn’t think of using the tool on other images, you are so enlightening.
Thank you
Faith
x
[…] week we learned about the Spot Healing Brush. (Using the Spot Healing Brush). Today let’s look at the Healing Brush […]
[…] week we learned about the Spot Healing Brush. (Using the Spot Healing Brush). Today let’s look at the Healing Brush […]
I LOVE that texture! Thank you!
I seldom think of the Spot Healing brush, myself. I tend to clone on a new layer more, but, I should do this more often! Thank you for an excellent tut!
Su
[…] have been looking at how to restore or remove unwanted areas in photographs. (Healing Brush Tool, Using the Spot Healing Brush). Today let’s take a look at the Patch Tool, which provides yet another way of accomplishing […]