Hi, it’s Ann here again, and today’s post is all about getting started with your first iPad layout. It’s a nuts and bolts topic: downloads and file management. This is a big topic, and there are a lot of ways to handle files on the iPad platform, but today I will restrict it to downloading images onto your device and using them locally. Later on, I plan to take a deeper look at file management on a mobile device. In the meantime, Apple has some good info here.
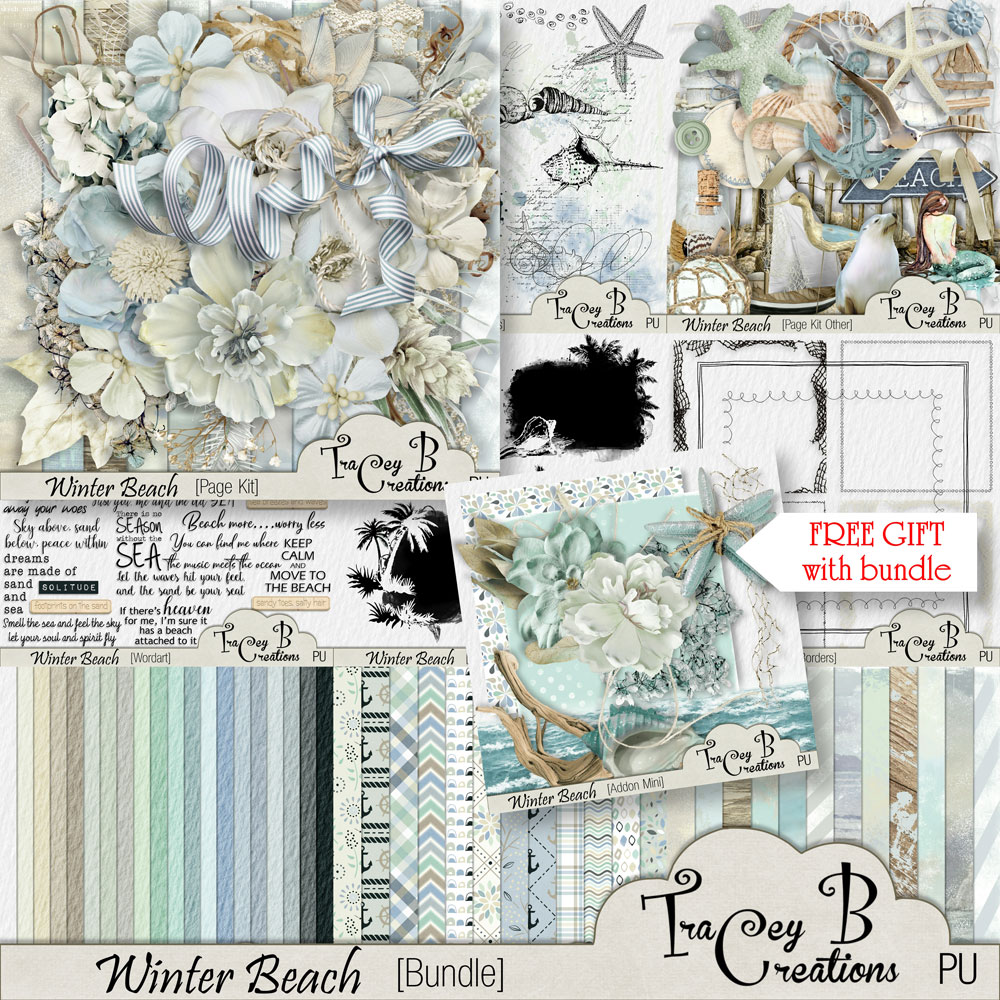
Step One: let’s go shopping! Find a great kit in The Studio store (not a difficult task). I chose Winter Beach by Tracey B Creations.
Finish your transaction in the store and download the files to your device. Safari will download the file to a Downloads folder (under Favorites). Firefox will place it in a Firefox folder (On My iPad). Either folder is accessible in the Files app (available on iOS 11+).
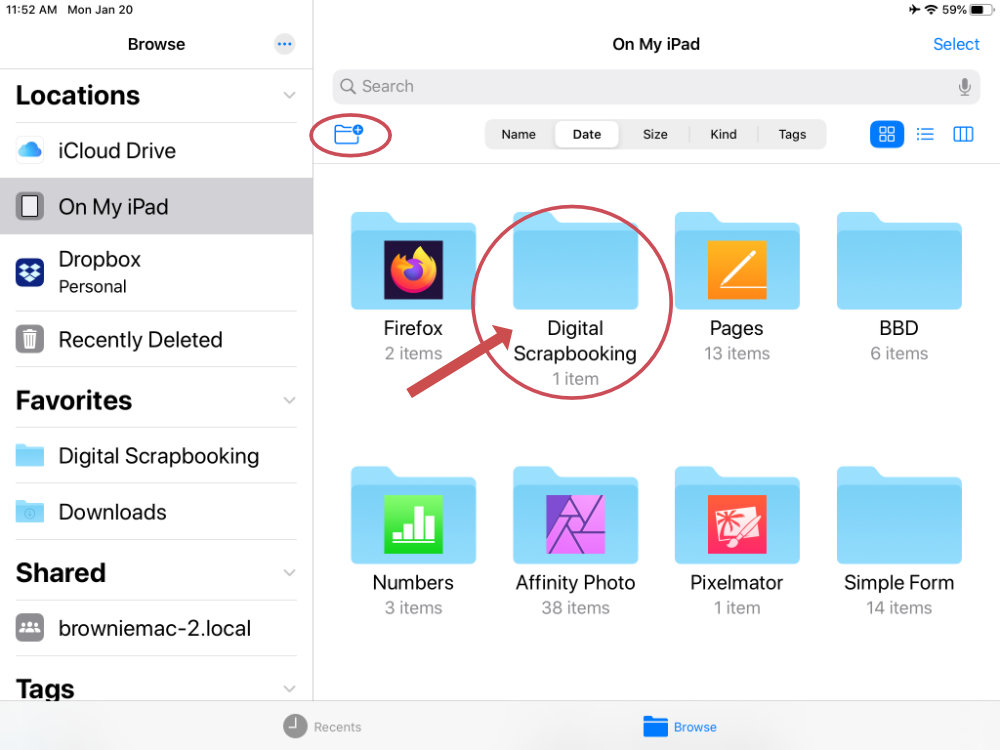
Open up the Files app, and we’ll get a bit more organized. Make sure Browse is selected at the bottom. Under Locations in the left hand pane, tap On My iPad. Tap the New Folder icon to create a folder to keep your scrapping supplies in.
Quick tip: Sometimes this little menu row at the top is hidden. If you don’t see it, scroll to the top of the right pane, then swipe down once; it should appear. I made a folder called Digital Scrapbooking. I’ll create another folder inside that one with the designer and kit name, too.
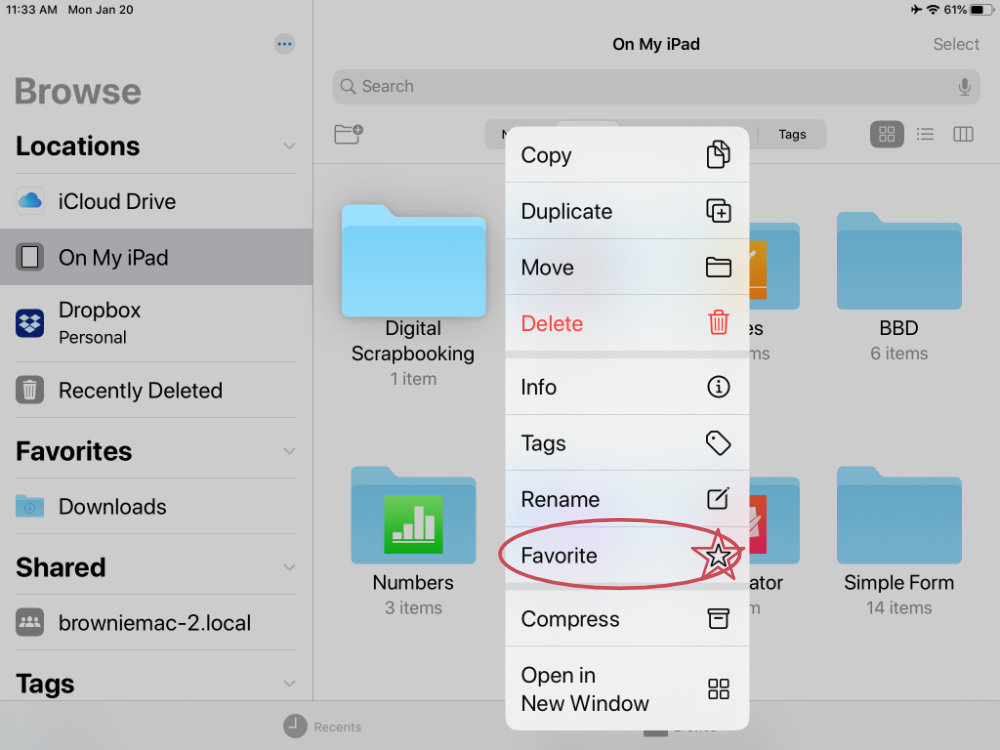
Another Quick tip: Favorite your folder to get back to it quickly! Tap and hold on the new folder you created, and select Favorite. There are other handy action items in this menu, too.
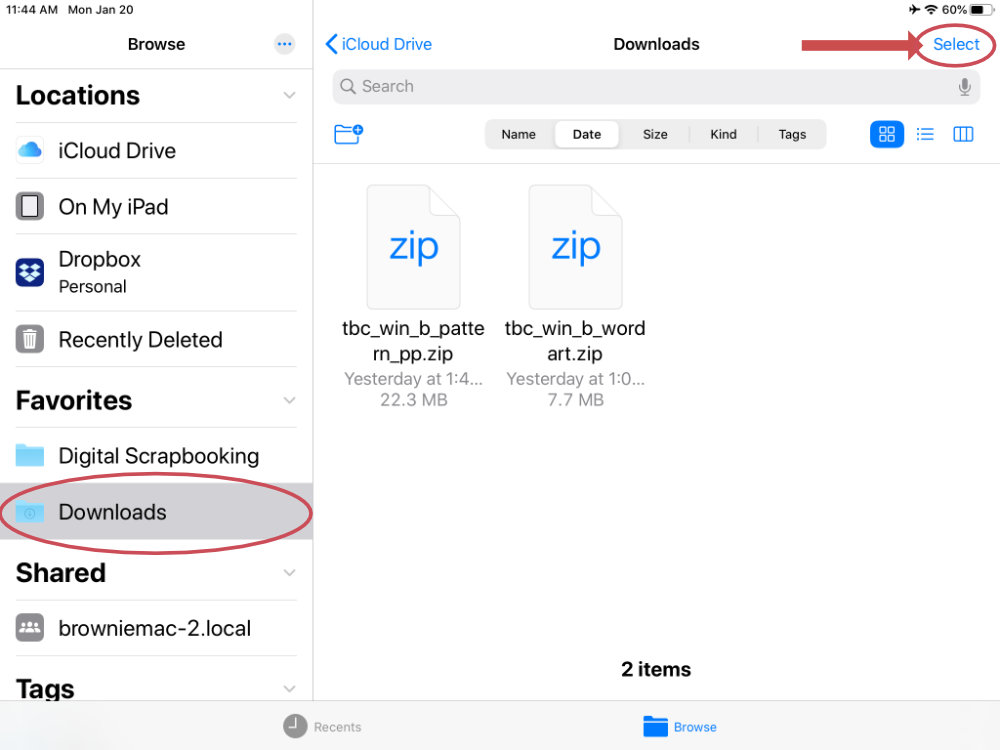
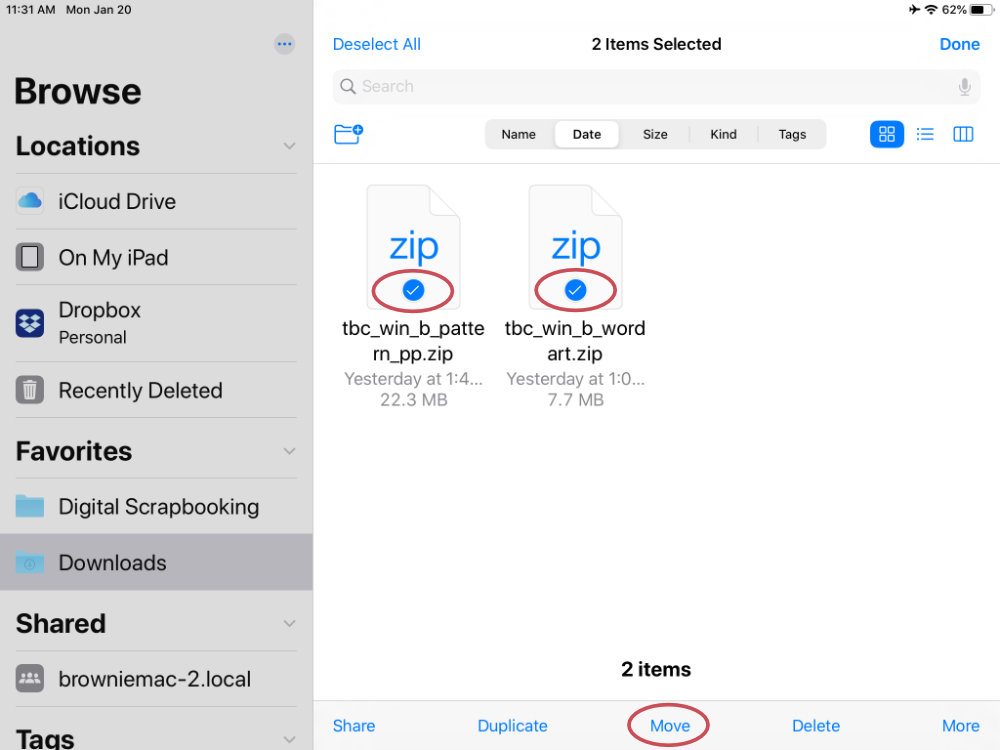
Now, let’s move the downloaded zip files into your new folder. Head back to your Downloads (from Safari) or Firefox folder (On My iPad) on your device. In right pane, tap Select.
Next, tap to select each zip file, then tap Move at the bottom of the display.
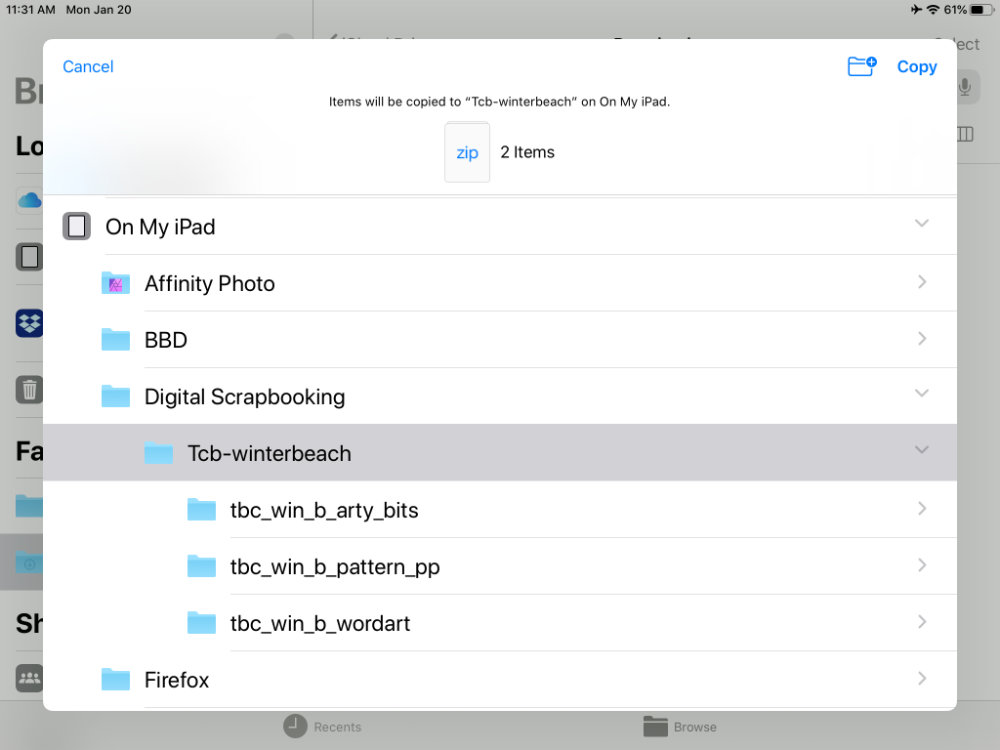
Choose your newly-created folder as the destination. I already had some folders extracted in here.
After the files are copied, open your folder and tap each file to unzip. Once that’s done, swipe the zip file to delete. Keeping free storage space can be a consideration on iPad.
Ok, here we go! First, we’ll create a document. For the next few tutorials, we will stick with Pixelmator for demonstration purposes, but soon we will move into my favorite app, my workhorse, Affinity Photo for iPad (stay tuned).
Note: One drawback of Pixelmator is that you cannot separately set the DPI for printing a document (as of v2.4). In other words, you’ll have to scale up the pixel dimensions to get closer to 12×12 inches, or keep 3600px but print smaller than 12×12 inches. 🙁 But, for keeping a digital-only image or getting your feet wet scrapping on iPad, it’s an easy-to-use tool.
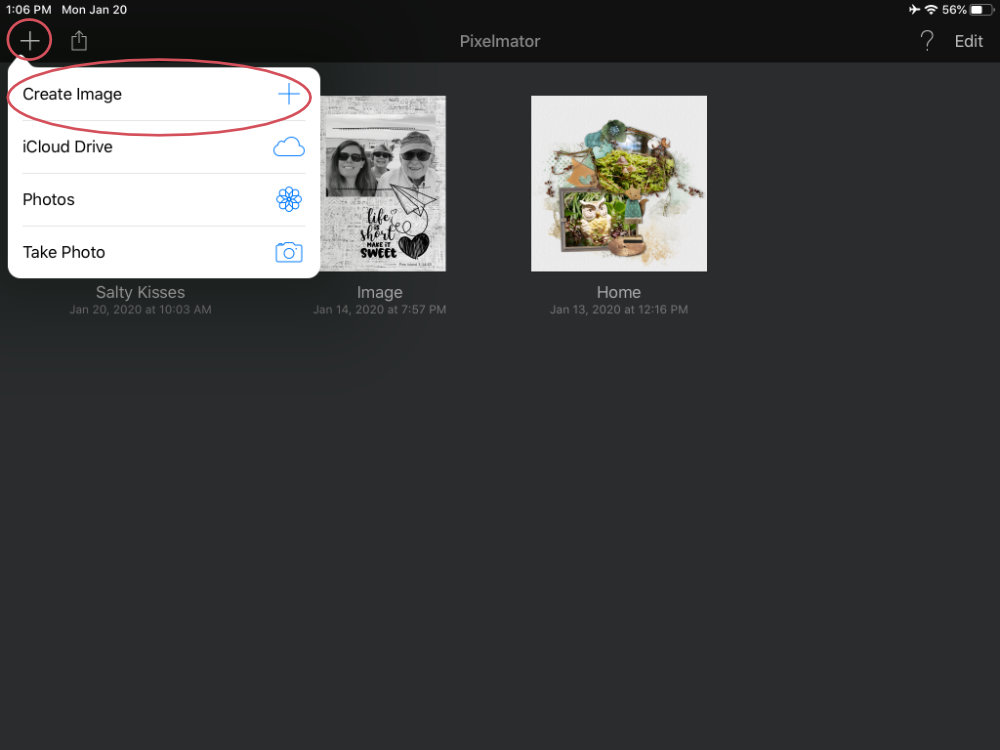
Open Pixelmator, and tap + to create a new document.
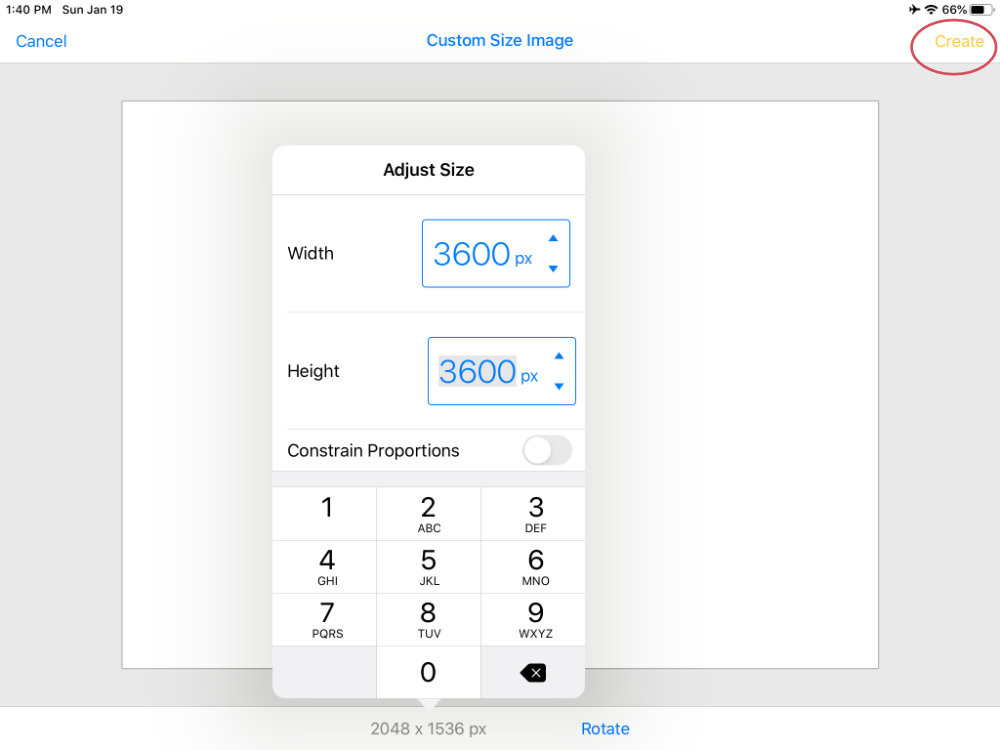
We will change the image dimensions from the default to 3600 x 3600 pixels. Tap off of the popover, then tap Create.
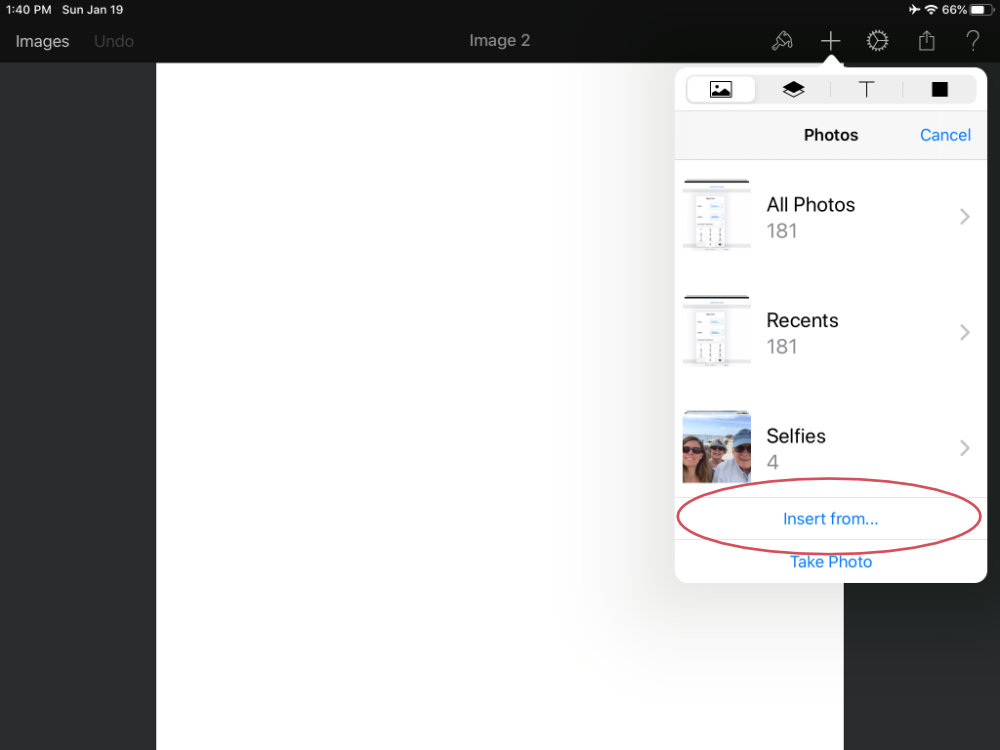
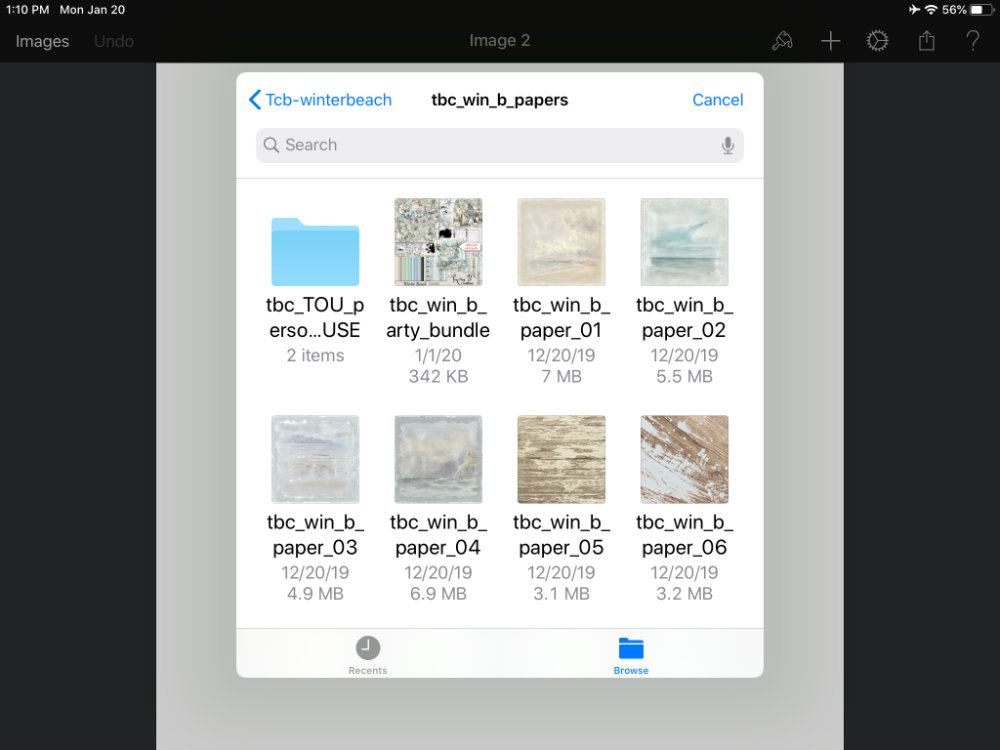
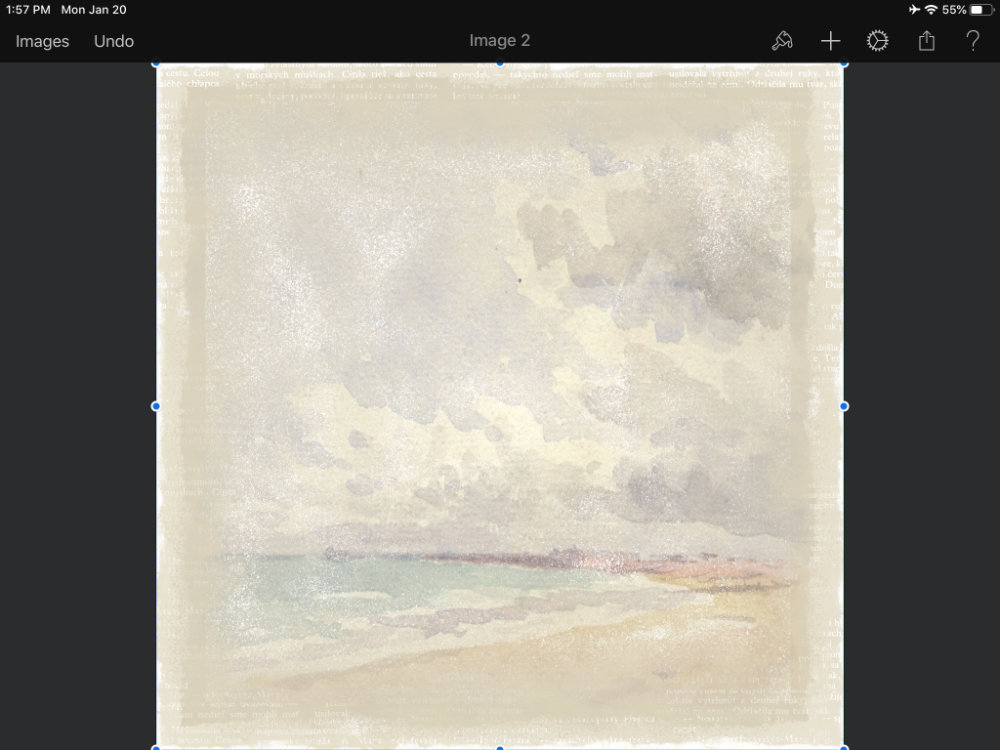
Now, tap the + in the upper right menu, and select Insert From. Navigate to your new folder, and choose a background paper. Tap on the one you want to select, and Pixelmator puts it right into place in your document.
And, with only a few more elements added, including Tracey’s wordart for Prompt 11 in the Layout-a-Day challenge, I created a page in Pixelmator. Here’s the finished piece:

It may seem like a lot of steps, but it’s pretty simple to get going. Next time, we’ll start adding photos and elements. Stay tuned!


[…] there! It’s Ann with another post about Scrapping on the iPad. Last time, we covered getting access to your files, creating a document, and adding a background. Now, […]
Wow. Serenely stunning. THANK YOU for sharing.
[…] Ann here for another post on digital scrapbooking using an iPad. So far, we’ve covered getting to your files, and adding photos and elements to a layout. Today, we’ll look at two tools: Selections and […]
[…] created a 3600×3600 document, and imported my photo layer into it. I played with arrangement of the image by moving, resizing, […]