Do you like things centered and lined up neatly, or do you have an out-of-the-lines personality?
I find myself vacillating between these two characteristics, depending upon the situation.
One thing I definitely want centered and lined up neatly is my background paper before I start working on a scrapbook page. Whether that is just one paper, or a composite of papers, I want it centered.
A while back, Steph (Scrappy Cocoa) wrote a tutorial for us on aligning multiple objects. If you missed that, you can read it here: Line it Up Today I want to talk about centering just one layer on your work canvas.
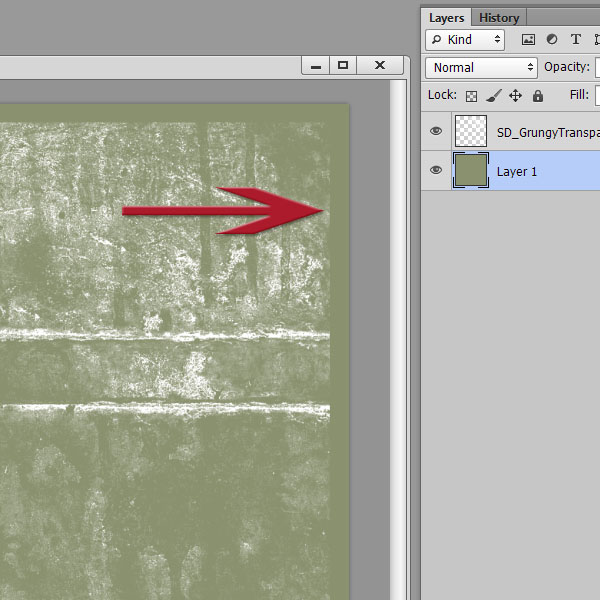
In the image below I have flood-filled the first layer with green, just for easy viewing. I next dragged a transparency onto the green layer, but you can see that it is not centered.
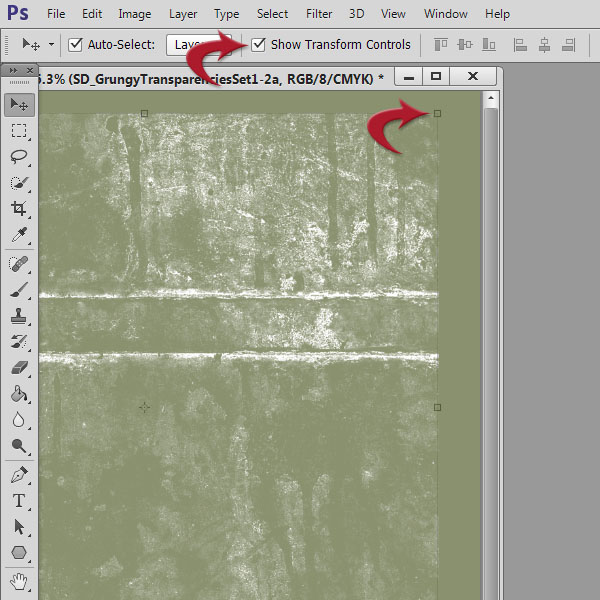
With the Selection Tool active, I clicked on the Show Transform Controls in the top Menu Bar. A selection is created around the active layer. You can see that the selection has little squares in the corner, as well as in the middle of each document side. I need to click on one of the corner squares now.
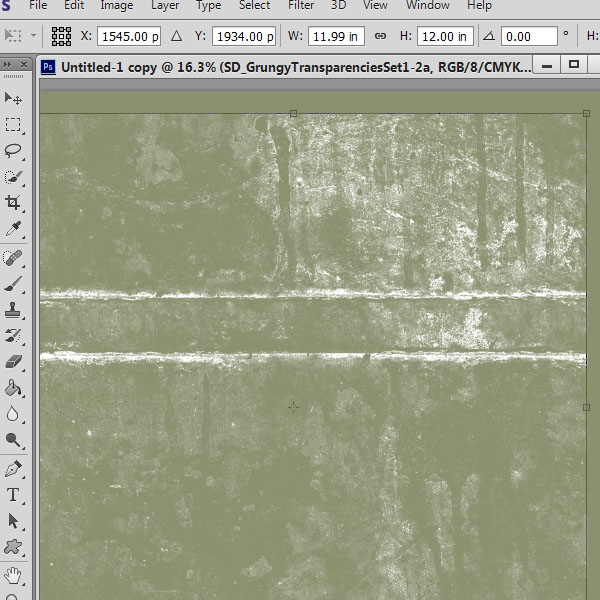
When I click on one of the little squares, the options in the Menu Bar will change, giving me the exact “X” and “Y” coordinates of my layer. In the image below you will see that my X coordinate is 1545.00 pixels and the Y coordinate is 1934.00 pixels.
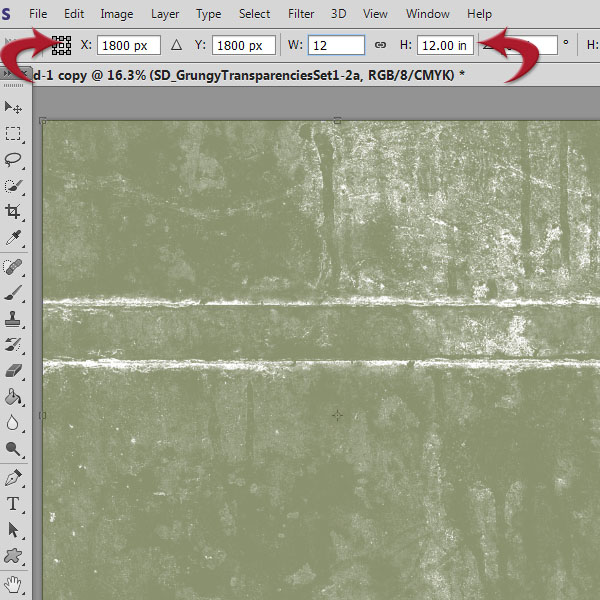
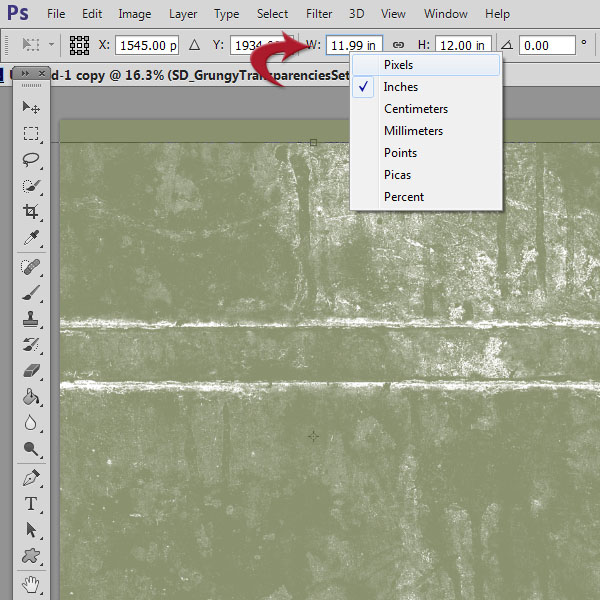
Since my background (flood filled green) layer is 3600 x 3600 pixels, in order for the transparency to be perfectly centered, the coordinates need to be 1800 x 1800. (Your X and Y coordinates will be half of your document size.) So I type in 1800 in the X coordinates box, and 1800 in the Y coordinates box. Then a quick double-check that the transparency is 12 inches by 12 inches, and I know that my transparency is perfectly centered!
Click the check mark (menu bar, far right), to accept the change, and you’re done. (Uncheck Show Transform Controls if you prefer not to have those visible at this point.)
Tip: if you are not seeing the Inches measurement in the W and H boxes, right click on the box to access a drop-down box where you can change the measurement options.
Here is a keyboard shortcut: Control+ T will bring up the X and Y coordinates menu options immediately.
This technique can be helpful in so many instances, but especially helpful when you are working with transparent or semi-transparent items that are difficult to see. I used it without fail when creating my new Grungy Transparencies! You can find them in in my Commercial Use store at SnickerdoodleDesigns.
Thanks to Tracy (Ambowife) for teaching this to me and to Jill Schwegel for telling me about the Keyboard Shortcut.
To my knowledge, this feature is not available in Photoshop Elements. A work-around would be to flood fill a layer, place the layer you want to center on a layer above the flood fill, use the Align and Distribute tools to center both layers, then just delete the flood fill layer when you are finished centering.


To center a paper especially, but other elements too, in Photoshop Elements vv 9-11, I either drag it up from the photo bin, which makes it exactly in the center, or I shift drag it from a floating window onto my canvas. Easy peasy.
Yes, thanks, Peggy! That’s another option, and one I use very frequently too, especially for elements.
Thank you so very much for this tut. I had to try it to see how it worked and loved it.
[…] Centering just one Layer in Photoshop – 1 freebie(s)? […]