Over the past few weeks, we have been focusing on “color,” in Photoshop and Photoshop Elements. In case you have missed any posts, here is a quick reference for you:
Creating a Custom Color Palette in Photoshop and Photoshop Elements
How to Easily Recolor an Object in Photoshop and Photoshop Elements
Selective Recoloring in Photoshop
Creating Color Variations in Photoshop and Photoshop Elements
Last week we covered creating color variations. Now let’s look at how to save those new luscious colors we have chosen. It’s very simple and works the same in both Photoshop and Photoshop Elements.
Option 1:
- Click on the Foreground Color to open the Color Picker.
- Select the color you would like to add to the Swatches Panel.
- Click on the “Add to Swatches” button in the Color Picker.
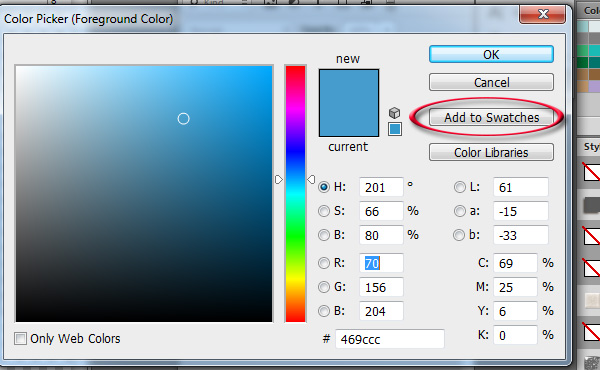
- The Color Swatch Name box will open. Give your color a name; click OK.
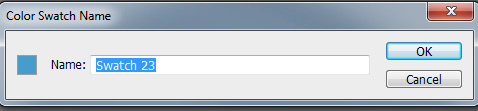
- Your new color will be added to your Swatches Panel.

Option 2:
- Click on the Foreground Color to open the Color Picker.
- Select the color you would like to add to the Swatches Panel.
- Hover your cursor in the blank area of the Swatches Panel. Your cursor will change to the paint bucket tool. Click anywhere in that blank space to create a new swatch.
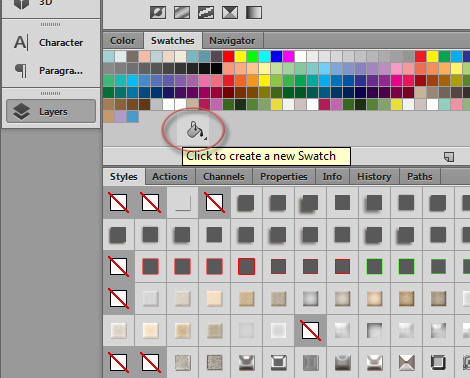
Tip: You may drag the lower right corner of the Swatches Panel to expand its size. This will be helpful if you do not have a visible blank space in your Swatches Panel.
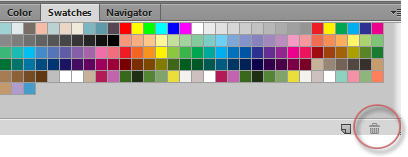
To delete a color, click on it, and drag it to the Swatches Panel Trash Can. Alternatively, you may delete swatches in the Preset Manager.
Photoshop Path: Edit > Presets > Preset Manager
Photoshop Elements Path: Edit > Preset Manager
That’s how easy it is to save your favorite colors, and how to delete colors you don’t want appearing in your Swatches Panel.


[…] Adding Colors to the Swatches Panel in Photoshop and Photoshop Elements – 1 freebie(s)? […]
[…] 2. And here is a tutorial on”Adding Colors to the Swatches Panel in Photoshop and Photoshop Elements.” […]