This week I was asked by a new digital scrapbooking enthusiast to explain the Marquee Tools in Photoshop. Those of us who have been using Photoshop for any length of time use these tools routinely and, most likely, without much thought. But as I reflected upon my beginning experience with Photoshop, I recall being confused by the different options that are available once a Marquee Tool is selected. So let’s take a look at what Photoshop offers us with this simple but powerful tool. Hopefully, this will be a reminder for frequent PS users, and helpful for new users.
For the purposes of this tutorial I am using Photoshop CS6; however, what I will cover today should be the same in all versions of CS and most, if not all, versions of Photoshop Elements (PSE). (Please note that PSE does not offer the Single Row or the Single Column Marquee Tool.)
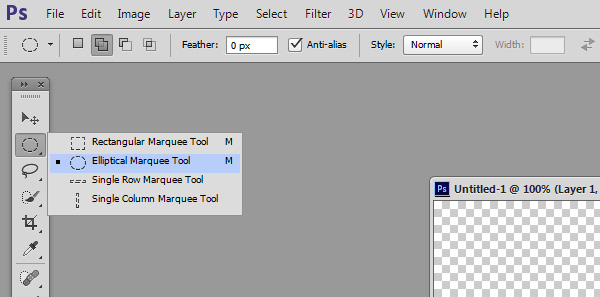
The Marquee Tools are located in the vertical tool bar. Notice the small black triangle in the lower right corner of the tool icon, which indicates that this is a grouping of similar tools. We can click on or hover over the triangle to see what tools are available within a group. Once a specific tool is selected, its icon will be reflected in the toolbar. That icon will change when another Marquee Tool is selected. In the image below, you will see that the last Marquee Tool I used was the Elliptical Marquee. You will know that because the Elliptical Marquee Tool icon is visible in the toolbar. You will also note that with the Marquee Tool Group (in CS), there are 4 Marquee Tools available: Rectangular, Elliptical, Single Row, and Single Column.
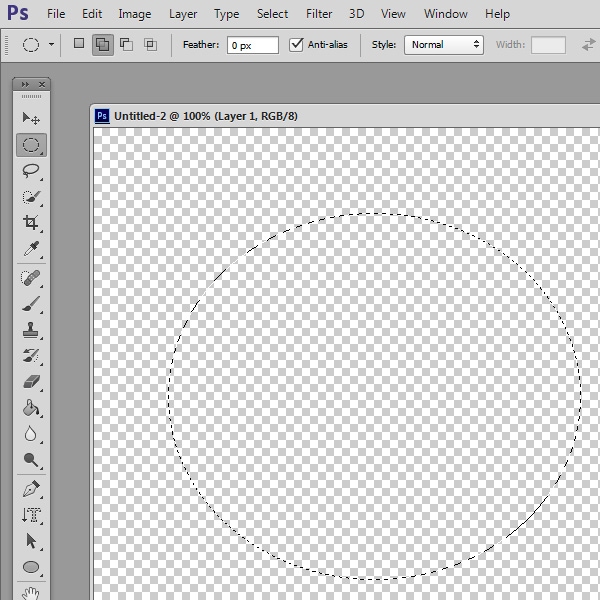
To use a Marquee Tool after it is chosen, you simply need to click on an open document, and while holding the mouse button down, drag out the shape you would like to have as a selection. Once the selection is made, release the mouse, and you will see “marching ants,” which indicate the area that has become a selection.
When using the Rectangular and Elliptical Tools, we are not constrained to any particular size. We can create the height and/or width of our selection according to our needs.
However, if you would like to constrain the proportions of your Rectangular or Elliptical selections, there’s an easy way to do it. Once you have selected the tool you wish to use, click on your document. While holding your mouse button down, depress and hold down Shift + Alt at the same time. Drag out your shape, then release all keys and mouse button. (Be sure to click on the document first, before clicking/holding Shift + Alt, or this will not work.)
The Single Row and the Single Column Marquee Tools will give you a selection, just one pixel in width. Personally, I rarely use either of these Tools.
Now let’s take a look at the options we have in the top Options Bar. We can add to, subtract from, or intersect our selections. This is what I recall was most confusing for me as a new Photoshop user.
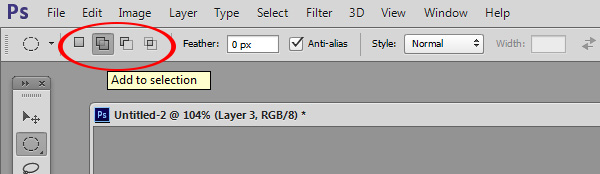
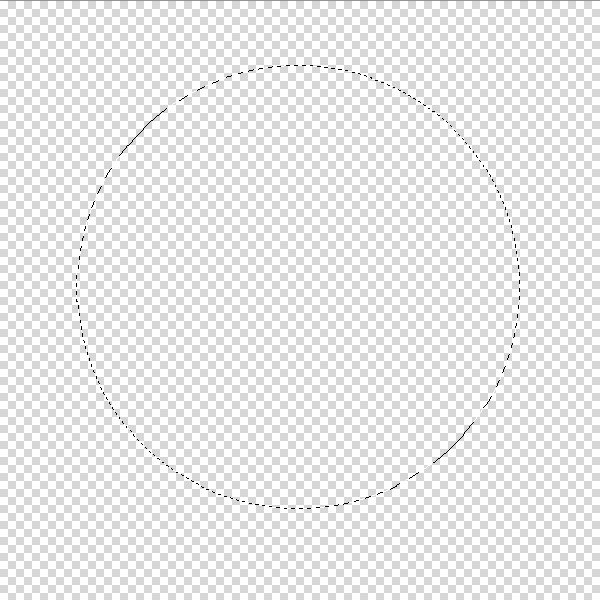
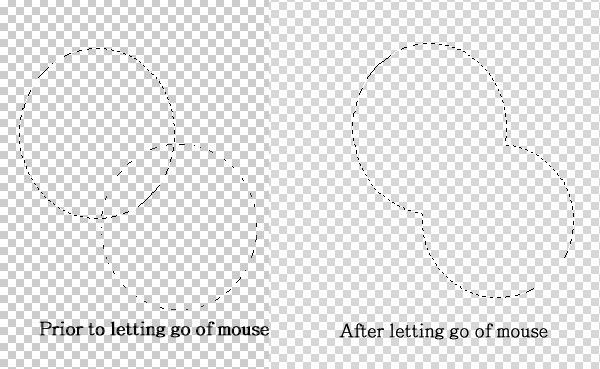
The first icon in the red circle above indicates a New Selection. When we hover over the second icon, we see that the description is “Add to selection.” To use this option, create your first selection; next click on the “Add to selection” icon; then click on your working document and drag out your second selection (overlapping your selections). Once you release the mouse, after making your second selection, the two selections will be joined. Here’s an example:
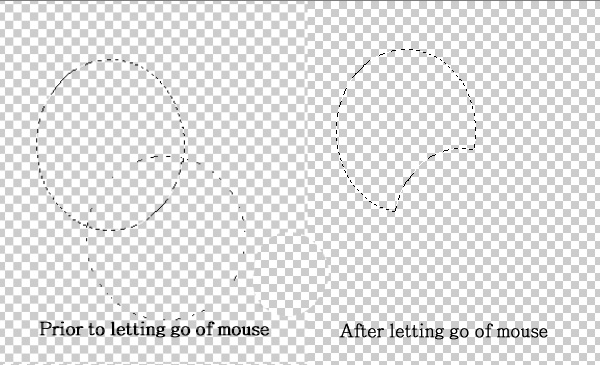
The same principle is true of the next option, which is “Subtract from selection.” If we had chosen that option in the above example, the result would look like this:
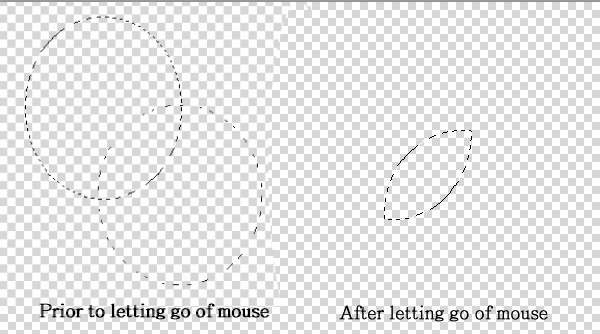
The final option is “Intersect with selection,” and the result of choosing that option would look like this (the portion of the circles that overlapped, or intersected, becoming the active selection):
Using the options in the Options Bar can be really helpful to create specific or unusual shapes. It is also helpful if you create a section and then decide to add to or subtract from it. Rather than deselecting, and starting all over, just choose the add-to or subtract-from options and finish your selection.
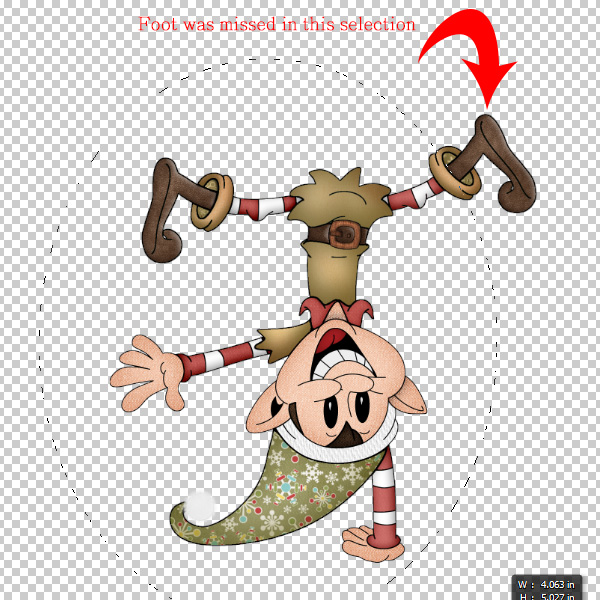
In the image below, I missed selecting the elf’s foot, so I would chose the “add to selection” to select it and make the selection of my elf complete.
There are a few other choices we can make in the Options Bar, and we will cover those next week. I hope this tutorial has been helpful for those who are new to Photoshop, and a good review for those of us who have been using Photoshop for a while.
Credit: The elf in the image above is from Holiday Hoopla, a collaboration between Kimberkatt Scraps and SnickerdoodleDesigns. Visit theStudio’s Christmas in July category to pick up this and other Christmas kits at a savings of 50% thru July 31st!


THANK YOU!!!!
Great review. I know that it will be helpful for many. Thank you!
[…] (this weekend only) or pick up any of our amazing Christmas kits for 50% off! Latest Blog Post: The Marquee Tools in Photoshop, Part 1Hot Topics in our Forum: New from The Urban Fairy!New Products: Personal Use and Commercial […]
Though I knew about adding and subtracting from a selection, I haven’t ever used it. Guess I will have to try to implement it into some of my work. That is the only way it will ‘stick’ in my mind. LOL
Thank you so very much! I really look forward to your tuts!
Su
I’m on a mac and use just use the Shift key + Marquee tool to add to a selection, and the Option/alt key to subtract. Personally, I find this keyboard shortcut easier.
There’s another keyboard shortcut that I haven’t seen mentioned in any PS classes, and that is the Zoom tool. With any tool selected, I temporarily toggle into the Zoom tool by simultaneously pressing the Space bar + Command keys to zoom in, and Space bar + Command + Option/alt to zoom out. And if I want to zoom into a particular area, I use those key combos while pressing the left mouse button and dragging over the desired area. This saves me lots of time over the traditional way of changing tools.
[…] The Marquee Tools in Photoshop, Part 1 […]
Great little tutorial …. are you going to be covering how to apply a stroke to the outline? It’s a great way to create your own shapes and fun to play with.
Thank you for your feedback, ladies. Sue, no, I won’t be covering adding strokes in this tutorial session on the Marquee Tool. That would definitely be something to cover when we talk about Styles again though.
[…] The Marquee Tools in Photoshop, Part 1 […]