In your scrapbooking layouts or photo editing, have you ever wished you could either hide or repeat an element for artistic purposes? Photoshop has given us a tool to easily accommodate that wish, and that tool is the Clone Stamp. Today, let’s take a look at this tool and see how it can help us.
The purpose of the Clone Stamp:
The Clone Stamp allows us to take a sample of our image, and then replicate that sample elsewhere in the same image, or even in another open document.
How to use the Clone Stamp:
1. Select the Clone Stamp tool in the toolbox.
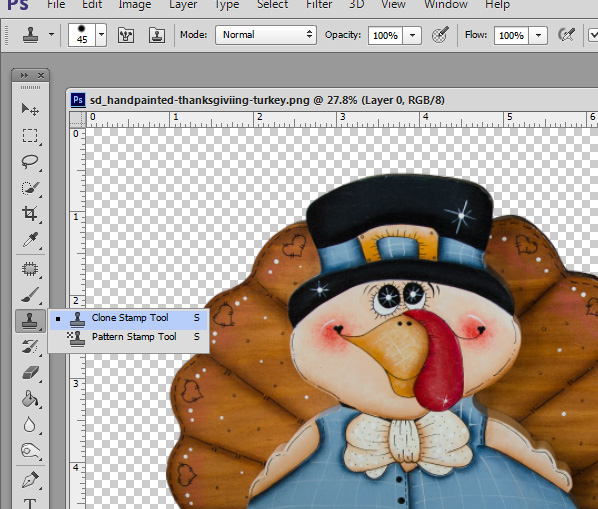
2. Select a brush tip. You may make a Blending Mode selection in the top menu bar, select your desired opacity, and/or set a Flow percentage.
3. Uncheck the Aligned checkbox, if you would like to use the SAME sample every time you click in your image. Leave it checked if you would like your sampled point to change, according to where your cursor is. (This will make more sense as you work with the tool.) You may also select whether or not you want to sample on the Current Layer that you are on, or other Layers.
(My typical settings: Mode: Normal; Opacity: varies depending upon the image, but typically 100%; Flow: 100%; Aligned is Checked; Sample: Current layer)
4. Now here is the fun part! Hold down the Alt key and click on the area you would like to sample. Another way to look at this is to click on the area that you would like to “copy.” and and paste somewhere else.
5. Click or drag over the area of the image that you wish to modify.
Here is an example of this technique in practice:
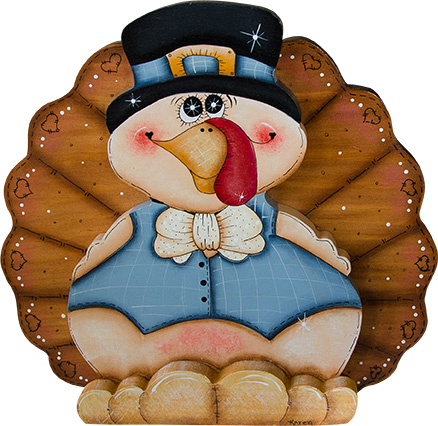
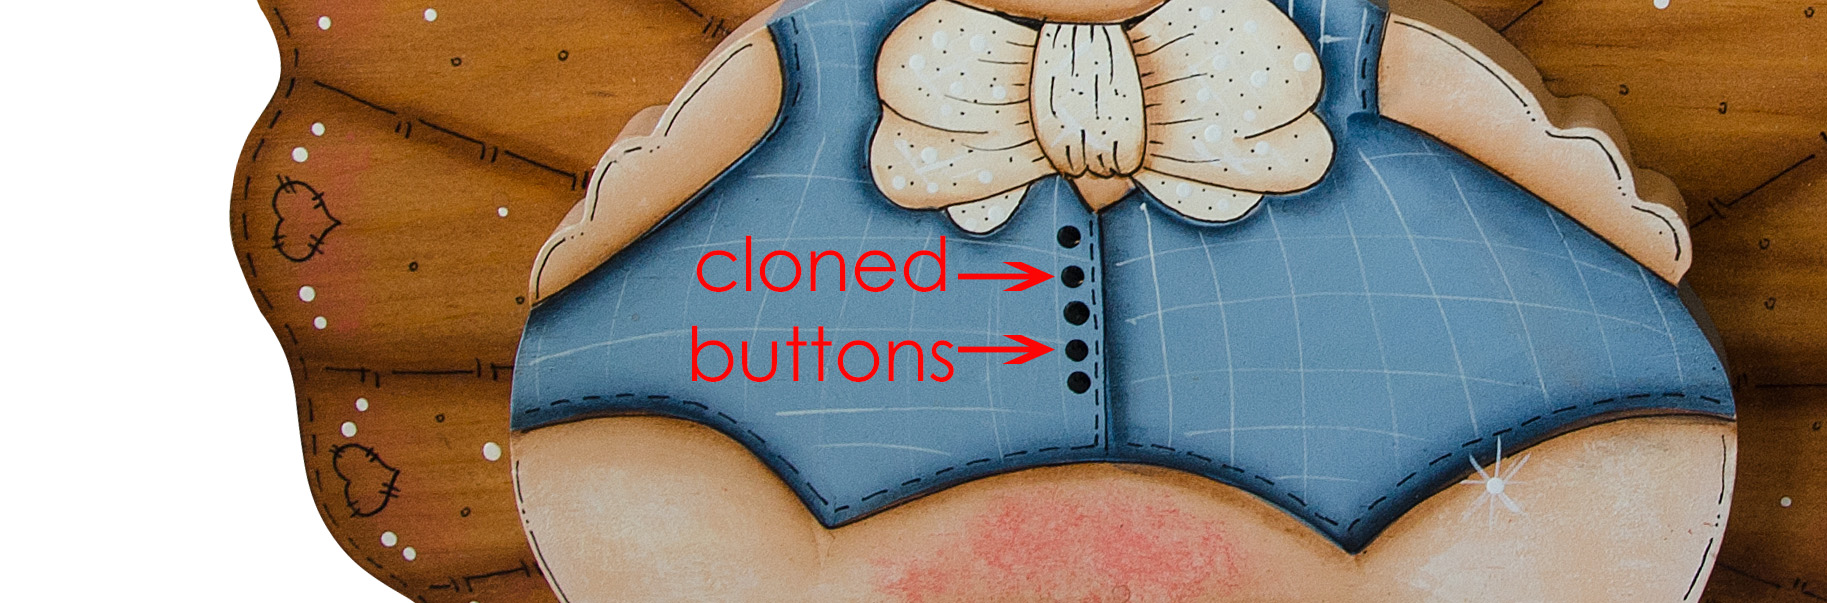
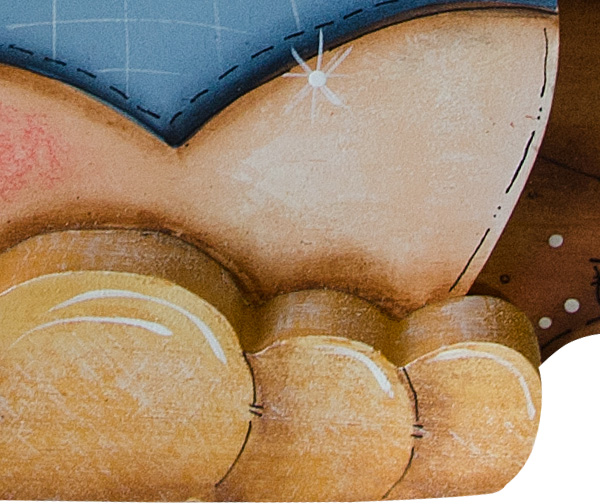
This is a turkey that I painted years ago when I did a lot of tole painting. He has 3 buttons on his shirt. Let’s give him 2 more buttons.
I first selected a small hard round brush, just slightly bigger than one of his buttons. I double-checked the tool bar options to be sure they were set as I liked. I held down the ALT button, and clicked with my mouse right on top of the top button (to clone it). Next I clicked in the two spots where I wanted additional buttons. Because I had kept my brush size so close to the size of the buttons, only the buttons were cloned, and not any of the adjacent areas. (In this situation, I would have been concerned about picking up/cloning some of the white lines.)
The Clone Stamp Tool worked perfectly for us here. But there are times when we need to take one additional step to get a perfect result.
My painting teacher ingrained in her students that we MUST sign our work. You will see my signature in the lower right corner of this cute little turkey.
I wanted to remove my name from his foot, and wanted to use the clone stamp to do that.
I first selected my brush, and set it’s size to the approximate height of the letters in my signature. I held down the ALT key and selected a point right above the letter “k.” I selected that area, because that is the paint color I wanted to replicate.
I next clicked right on top of the “k” to paste my selected sample on top of it.
My brush was round, so the sampled area was also round, naturally. However, because I was cloning close to the end of the piece, the round sample was pasted over the “k” but also hung over onto the transparent area.
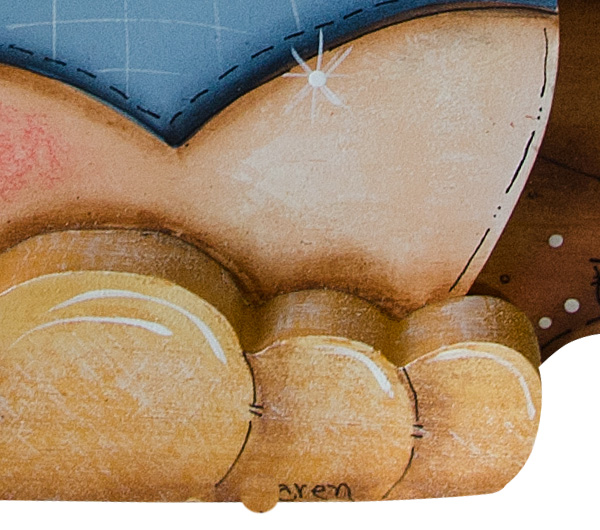
I could play with my brush size to make it smaller, but here’s an easier way when cloning along the edge of a piece:
- Click on the thumbnail of the image in your Layers Panel. This will select your image (You will see “matching ants” around your image on your document, confirming it is selected.)
- Follow the same steps above, to sample and then clone the area of interest. While doing so, you will still see the sampled image hanging over into the transparent area; however, when you let go of your mouse, you will see that the cloned area will only be applied to the selected image, and not the transparency.
Photoshop Elements Users: You have the same options as Photoshop, with the exception of the Flow option.
The cute turkey model used in today’s tutorial is from “Handpainted Thanksgiving,” new to my Commercial Use shop here at theStudio. (SnickerdoodleDesigns).
Did you know that theStudio is having an AMAZING CU Sale this weekend? Pop on over to the Commercial Use Store for a 30% Storewide CU sale. Increase your savings by using special coupon codes!
Commercial Use items are not just for designers! They are perfect for the Personal Use scrapper too! Sit down, rest your feet, and take a look around!

I hope this tutorial has been helpful! See you next week!


This is great! I’ve done some cloning, but I learned some new things that will make it go much better! Thank you for sharing your knowledge with us!!
Thanks, Anita! I’m glad you found it helpful. Thank you for letting me know.
This little turkey is so ADORABLE….Love the element, and thank you for showing us how to modify an element to do exactly what we need it to do WHERE we need it to do it! Great tut!
Thanks, Priss. I appreciate your comments.