Several weeks ago, Su, one of our blog readers commented on a post and mentioned the Stroke Command. Today let’s take a look at how the Stroke Command works.
The Stroke Command works in conjunction with Selection Tools. In order to place a Stroke around an object, that object must first be selected.
The Stroke Command is located in the top Menu Bar: Edit > Stroke

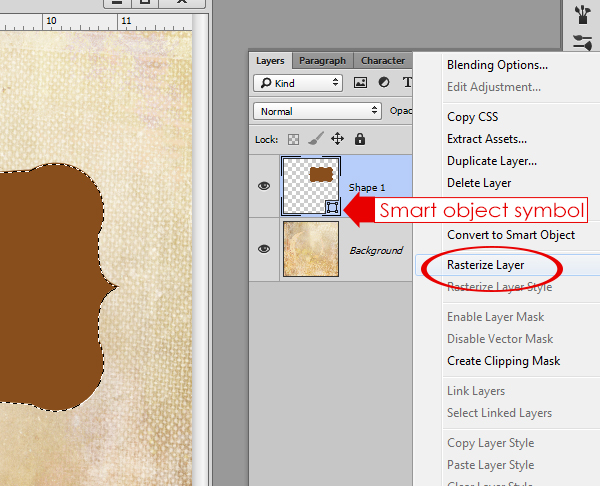
Let’s first create a shape, using the Custom Shape Tool. I have chosen to create a label. Shapes are created as Smart Objects. The Stroke Command is not available for Smart Objects, so I needed to rasterize my label. I did that by right-clicking on the Shape layer and choosing “Rasterize Layer.”
Now I am ready to work with the label.
A common way to use the Stroke Command is to Control + Click on the shape layer icon to select it; go to Edit > Stroke, select the options that we would like to use, and then press OK. In the image below I selected a bright yellow color and set the Stroke at 25px to get this look. Now we could go ahead and embellish that in any way we like.

I think this method is the way that most of us are first introduced to the Stroke Command, but let’s look at another way to use it that gives us greater flexibility.
1. Create a selection using any Photoshop tool (shapes, brushes, a drawing tool) or use an embellishment that you particularly like. (To select the object, Control + Click on the layer thumbnail).
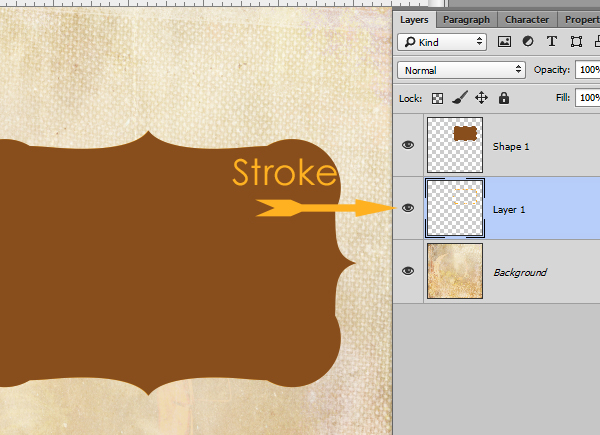
2. Create a blank layer below your selection: Control + New Layer icon (This will create your layer beneath your active layer, as opposed to above it.) Making sure that your Shape is selected (it will have marching ants around it), click on the blank layer to make it the active layer.
3. Edit > Stroke
4. The Stroke dialogue box will open. Choose your preferred Stroke width and color.
5. Choose whether you want the Stroke on the Inside, Center, or Outside of your selection. (Tip: When working with an object that has points, choosing Inside will result in nice sharp points, while Center and especially Outside will result in blunted points. I used Center in the above above, and Inside in the image below for your reference.)
6. You may also set Blending Modes and Opacity levels here if you wish.
7. The Preserve Transparency check box will not be enabled if there are no transparent areas in your image. If you do have transparent areas in your image, check this box to protect those areas.
8. Click OK.
You should now see the Stroke on its own layer. Don’t forget – if you put the Stroke on the Inside of the Shape as I did, you won’t be able to see it until you move the Stroke layer on top of the Shape layer. If you put the Stroke on the Center or Outside, it will be visible immediately.
Because the Stroke is on its own layer, you now have a lot of versatility. You can save your Shape and Stroke as a template, and easily change colors as needed. You can clip a paper to the Shape, and clip a different paper to the Stroke – or leave it a color, if you like. Try applying a Photoshop Style to Stroke (maybe a glitter, to give the Shape a nice look), or Bevel or Emboss the Stroke for a different look. You can make the Shape invisible, and use the Stroke only as a unique element. This would be fun to do with a font, creating a unique title on your scrapbook page. You could even apply a Stroke to your Stroke if you wanted to!
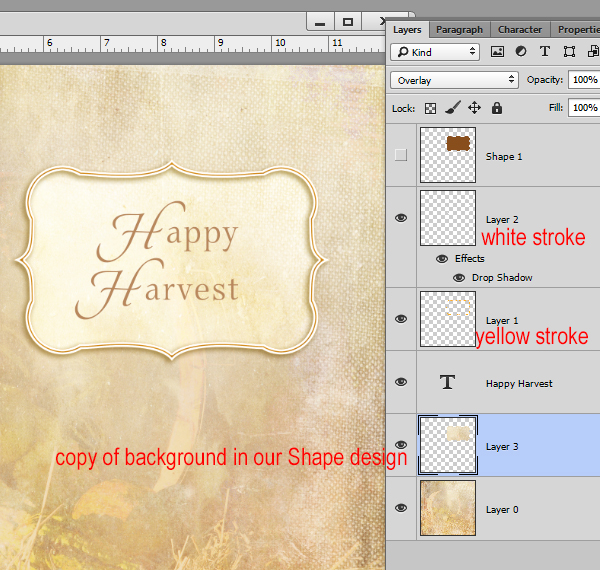
To create the look below, I followed these steps:
1. Turn the visibility of the Shape off.
2. Select the Stroke that was previously created (see above).
3. Apply a 10 px white Stroke with the Center option chosen to the yellow Stroke.
4. Apply a slight drop shadow to the Stroke.
5. Control + click on the Shape thumbnail, still keeping the Shape itself invisible.
6. Click on the Background paper (in this image it is labeled “Layer O”) to make it the active layer.
7. Control + J to duplicate the part of the background. This duplicate will be in the shape of your selection.
8. Change the blend mode of the duplicated background piece to Overlay.
9. Include text on your Shape as you like.
And that’s how easy it is to get creative with the Stroke Command! I hope this tutorial has given you some new ideas on how to use this versatile tool!
For the purposes of this tutorial, I have been using Photoshop CS6. These options are also available in Photoshop Elements 12, and most likely previous versions as well.
The paper used in this tutorial is from Misty Autumn, a collaboration between Fancy Bird Design and SnickerdoodleDesigns. Today, Monday, November 3rd, is the last day the Misty Autumn Page Kit will be offered at a savings of 50%, in celebration of Digital Scrapbooking Day. The Misty Autumn Collection, however, is always available at a 60% savings.


Another super tutorial!!! Adding another stroke and duplicating the background with an overlay is a great tip. Thanks so much for continuing to educate me! 🙂
This is a great tutorial, thanks…love how you created that tag …. since the stroke is on a separate layer you can also add an effect or style to it …. like a glitter outline. You can get it in PSE 11 as well, not sure of the lower ones. It is a very versatile command.
A great tutorial! I love the options you shared, a way to really spruce up a common stroke outline! Thanks.
Very well explained! I sure thank you!
Su