
I have been asked multiple times what the difference is between a Clipping Mask and an Adjustment Mask. Today let’s take a look at Clipping Masks and next week we’ll talk about Adjustment Masks.
This method works the same in both Photoshop and Photoshop Elements.
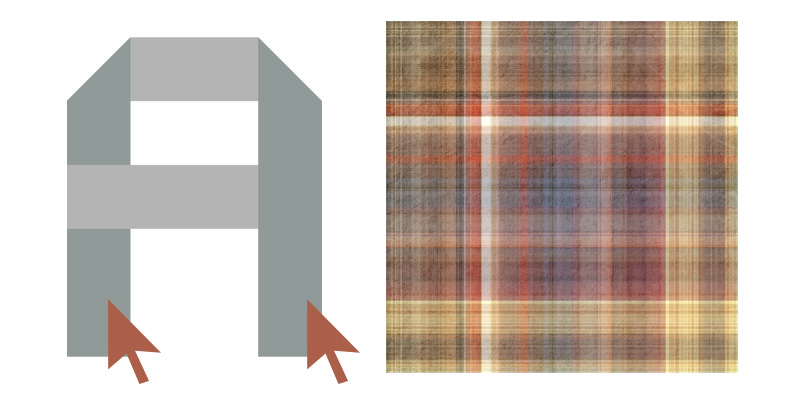
We use a Clipping Mask when we want one layer to take on the shape of another layer.
Here is a capital letter “A” template. I would like the plaid paper to take the shape of the dark gray areas in the template.
In Photoshop, with the template as the active document, all of the template layers are visible in the Layers Panel. I placed the plaid paper above the right “leg” of the “A”. (I resized the paper to my liking.)
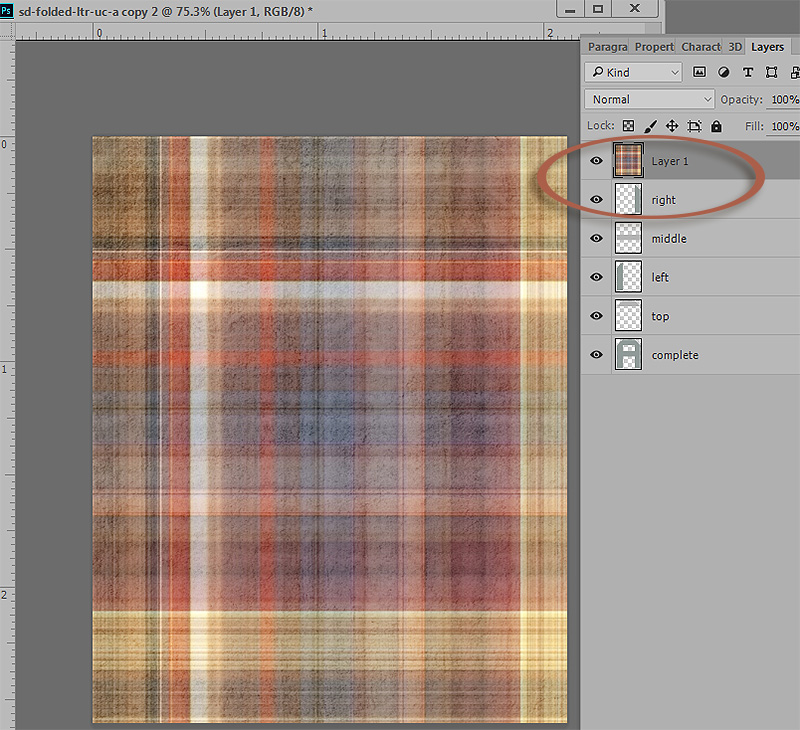
To create a Clipping Mask:
- While holding down the ALT key, hover your cursor between the paper layer (“Layer 1” in image above) and the layer below it (“right” in image above). Your cursor will change to a down-pointing arrow.
- Click with your mouse. Release the ALT button. Your paper will now be clipped to the layer below, taking on the shape of that layer. You will also notice that the paper layer is now indented in the Layers Panel, and a down-pointing arrow is visible, which indicates it is a clipping mask.

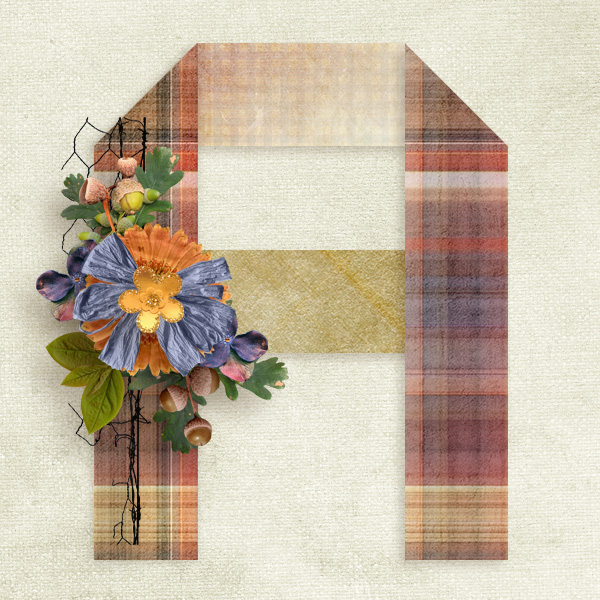
To complete the use of this template, continue the process of clipping papers to each layer, until you are happy with the result.
Once we have clipped papers to all of the template layers, we can embellish further if we like. (This is a great way to use the Clusters that come in some Collections.)
A few things to remember when using clipping masks:
- You can stack clipping masks if you like. Here I have 2 papers clipped to the right leg of the “A,” but there is no limit to how many layers you can clip together.
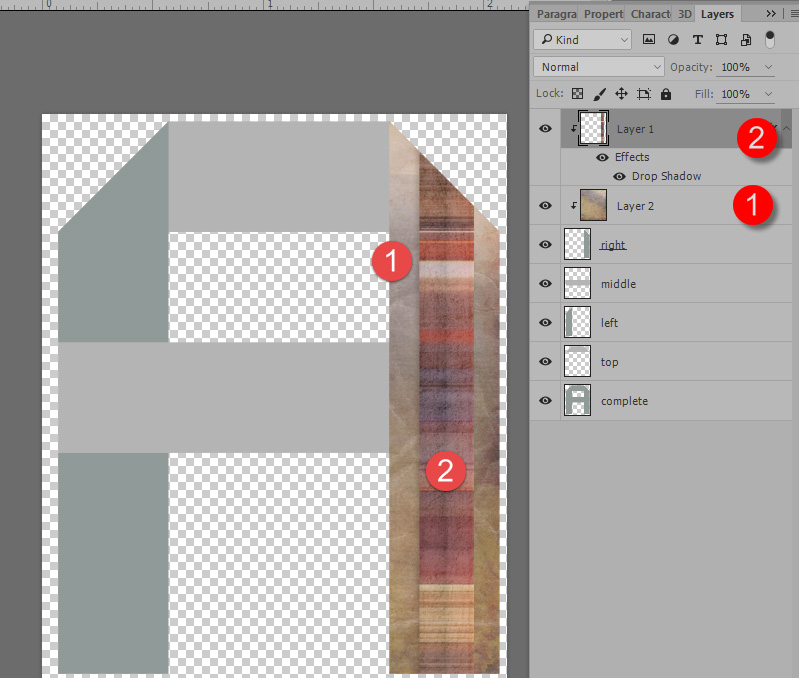
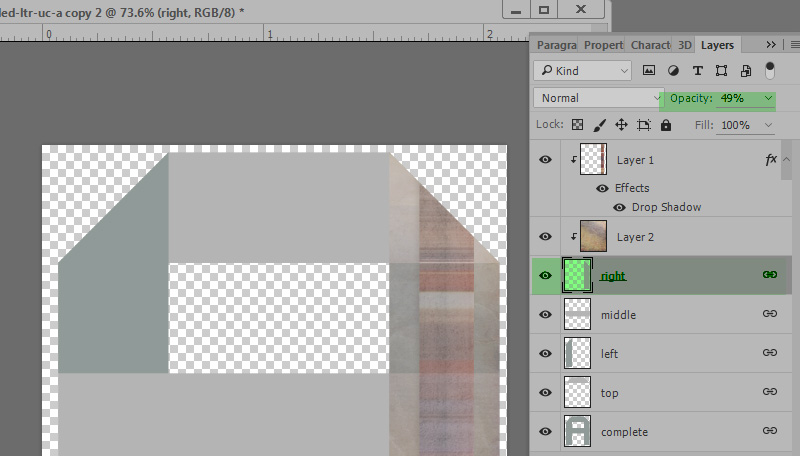
- When you clip an item to an existing layer, the clipped item will take on the opacity and blend modes of the layer you are clipping to. Here I have lowered the opacity of the template layer “right” to 49%. You can see how the papers that are clipped to that layer now also have lowered opacity levels.
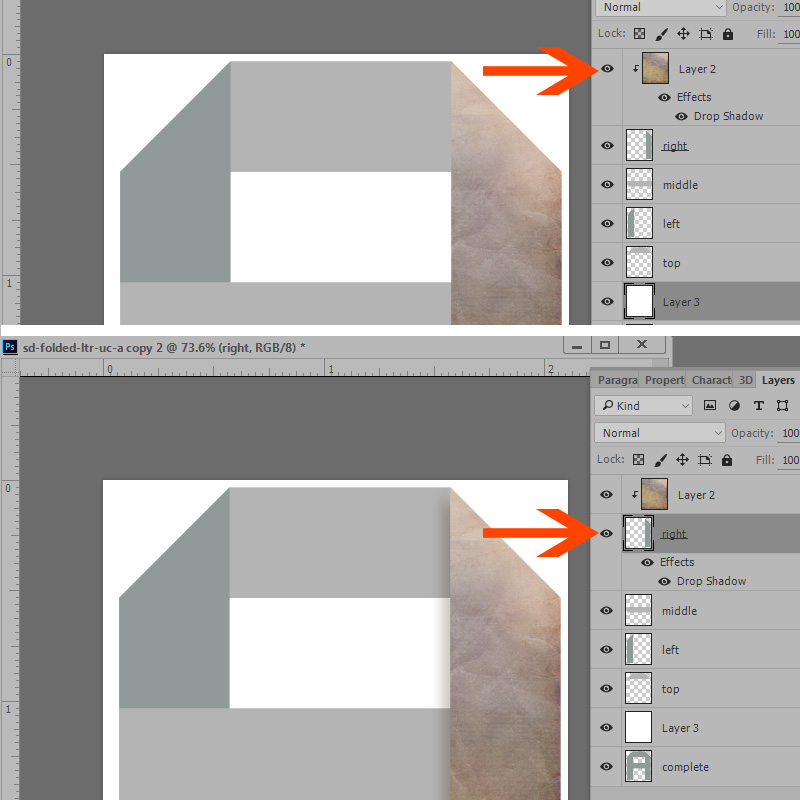
- If you want to add a shadow when using a clipping mask, the shadow must be applied to the shape (or template) layer, not the clipped layer. The top image below shows the Drop Shadow applied to the paper (clipped layer), and you can see that the shadow is not visible on the document. In the bottom image, the shadow is applied to the shape (template) layer, and it is visible on the document.
- Unclip a mask using the same method you used to clip it: While holding down the ALT key, hover your cursor between the paper layer and the layer below it. Click your mouse, and the layers will unclip. Alternatively, you can right-click on the clipped layer to access an options box, then choose “Release Clipping Mask.”
That’s how easy it is to use a Clipping Mask!


[…] How to Create a Clipping Mask – 1 freebie(s)? […]
Thank you so much, you have explained it so even I can understand.
Thanks, Kay. I remember when I started using Clipping Masks I was so confused by them! I’m glad this makes sense to you!
Karen,
thanks for another awesome tutorial. I did know how to use clipping masks, but have never heard of adjustment masks, so looking forward to that one.
[…] that I am frequently asked the difference between Clippings Masks and Adjustment Masks. In How to Create a Clipping Mask, we talked about… well, clipping masks! Today’s let’s take a look at Adjustment […]
[…] that I am frequently asked the difference between Clippings Masks and Adjustment Masks. In How to Create a Clipping Mask, we talked about… well, clipping masks! Today’s let’s take a look at Adjustment […]
Thanks, Karen, for another great tutorial. I had never thought about stacking clipping masks. Something new to try. I love the folded alpha — can’t wait to try it.
[…] I liked the angle better, but thought that the rain effect was a little too harsh for this particular photo. I added a Levels Adjustment on top of the Overlay (Image>Adjustments>Levels or click on the Levels Adjustment in the Adjustment Panel. If you use the 2nd method, which will add the Levels Adjustment as a separate layer, be sure to clip the Levels Adjustment to the Overlay). (If you need help with Clipping Masks, here is a quick tutorial for you: How to Create a Clipping Mask.) […]
[…] I simply dragged in a paper to replace the Background placeholder. Then I dragged in a 2nd paper above the Paper Strip layer, and created a clipping mask (see How to Create a Clipping Mask) […]
[…] I liked the angle better, but thought that the rain effect was a little too harsh for this particular photo. I added a Levels Adjustment on top of the Overlay (Image>Adjustments>Levels or click on the Levels Adjustment in the Adjustment Panel. If you use the 2nd method, which will add the Levels Adjustment as a separate layer, be sure to clip the Levels Adjustment to the Overlay). (If you need help with Clipping Masks, here is a quick tutorial for you: How to Create a Clipping Mask.) […]
[…] I liked the angle better, but thought that the rain effect was a little too harsh for this particular photo. I added a Levels Adjustment on top of the Overlay (Image>Adjustments>Levels or click on the Levels Adjustment in the Adjustment Panel. If you use the 2nd method, which will add the Levels Adjustment as a separate layer, be sure to clip the Levels Adjustment to the Overlay). (If you need help with Clipping Masks, here is a quick tutorial for you: How to Create a Clipping Mask.) […]
[…] We have a tutorial on the blog to refresh your memory on How to Create a Clipping Mask. […]
[…] I liked the angle better, but thought that the rain effect was a little too harsh for this particular photo. I added a Levels Adjustment on top of the Overlay (Image>Adjustments>Levels or click on the Levels Adjustment in the Adjustment Panel. If you use the 2nd method, which will add the Levels Adjustment as a separate layer, be sure to clip the Levels Adjustment to the Overlay). (If you need help with Clipping Masks, here is a quick tutorial for you: How to Create a Clipping Mask.) […]