I had the pleasure of taking care of my 2 youngest grandchildren for 3 days over the holiday weekend. Owen is 2-years-old and Ella is 11- months-old. Their mom asked me if I would dress them in the patriotic clothing she purchased for them and take their picture on July 4th.
I tried. I tried really hard. But photographing 2 squirming children, who would much rather be playing than posing for photos, is quite a challenge.
Two minutes into the photo session, Ella started crying. As my husband tried to comfort her, I turned my attention to Owen. Surely I could get at least one good shot of him? I asked him to sit on a little stool nearby. He agreed, but was determined to keep his eyes closed and not smile. The bright sunlight was behind him, and I knew the photo foreground would be dark. But I also knew this was the only chance I was going to have. This split second in time.
More importantly, I knew I could post-process the photo in Photoshop…. so I snapped.
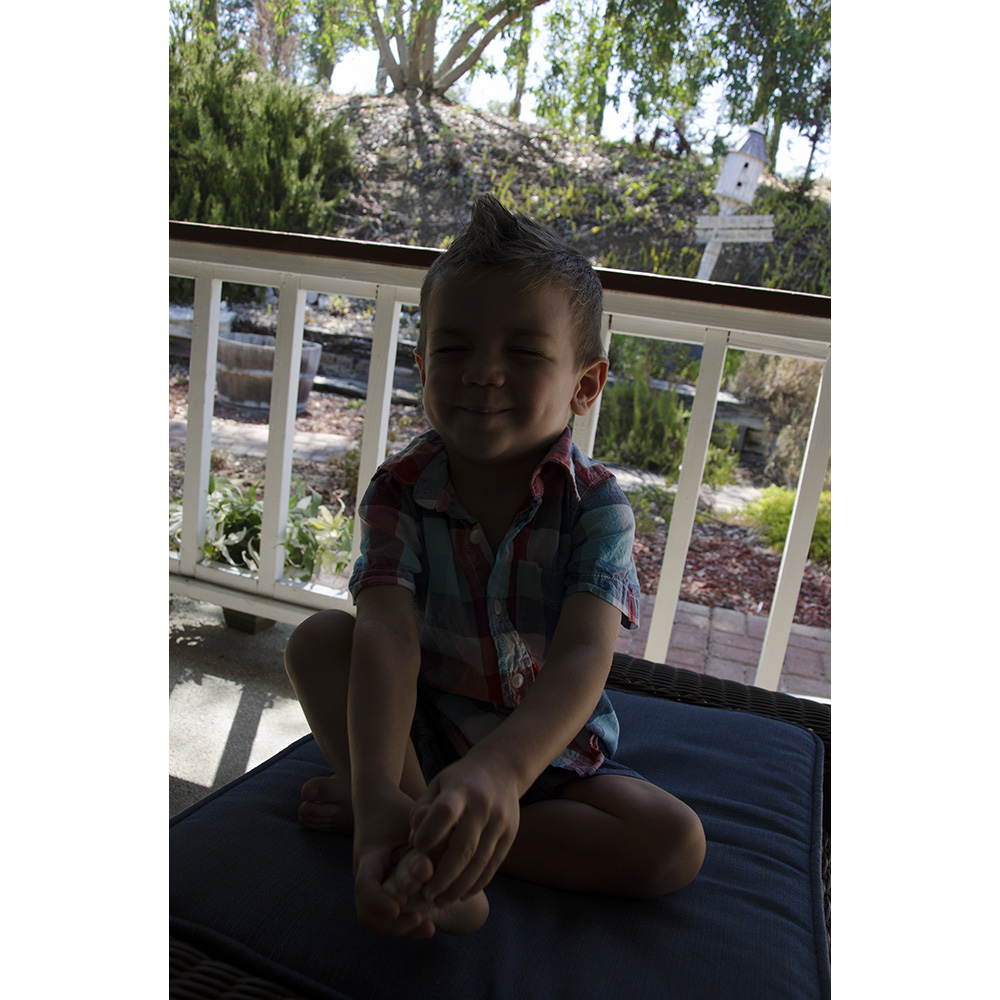
Before.
Here’s how I corrected this photo:
- I shoot in RAW format. When I opened the photo in Photoshop CC2015.5, it automatically opened in Camera Raw. If you shoot in JPG format, navigate to your photo in Adobe Bridge. Right click on the photo, and choose to open it in Camera Raw. Photoshop Elements users: File > Open in Camera Raw (I am looking at PSE14. I’m not sure how many versions of PSE have this option.)
- I clicked on the AUTO option. Owen looks better, but the background is now blown out.
- I dragged the Highlights Slider all the way to the left. This helped the background, but it still needs some work.
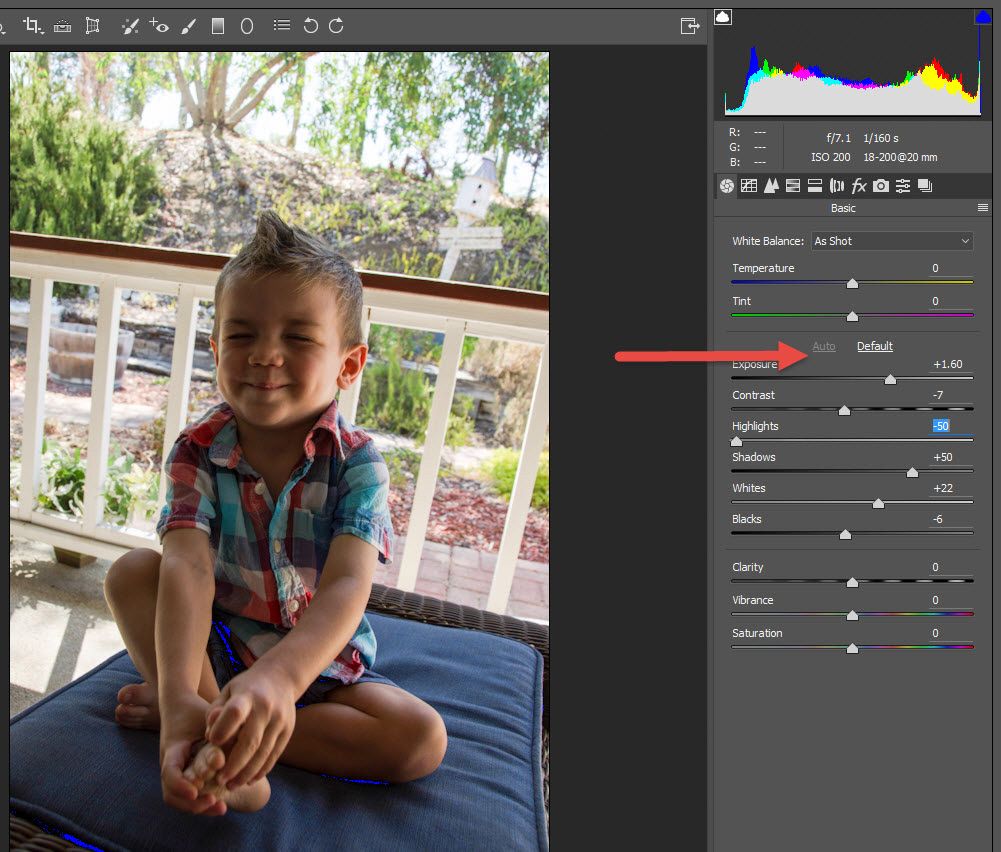
Using the highlight sliders to brighten the photo.
- I clicked OPEN IMAGE to open the image in Photoshop. (Your Photoshop version may use different terminology for this.)
- I added a blank layer above the photo.
- I set the Foreground color to Black and Background color to white.
- I choose the Gradient Tool, and selected the Foreground to Transparent gradient.
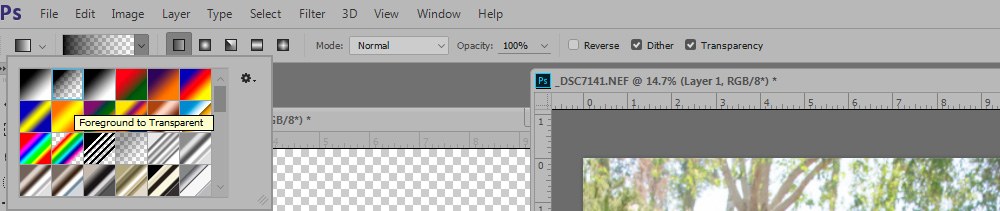
Using the gradient tool to select transparency.
- On this photo I only want to darken the background area where the trees are. I clicked at the top of the photo and dragged the gradient about 3/4’s of the way down the photo.
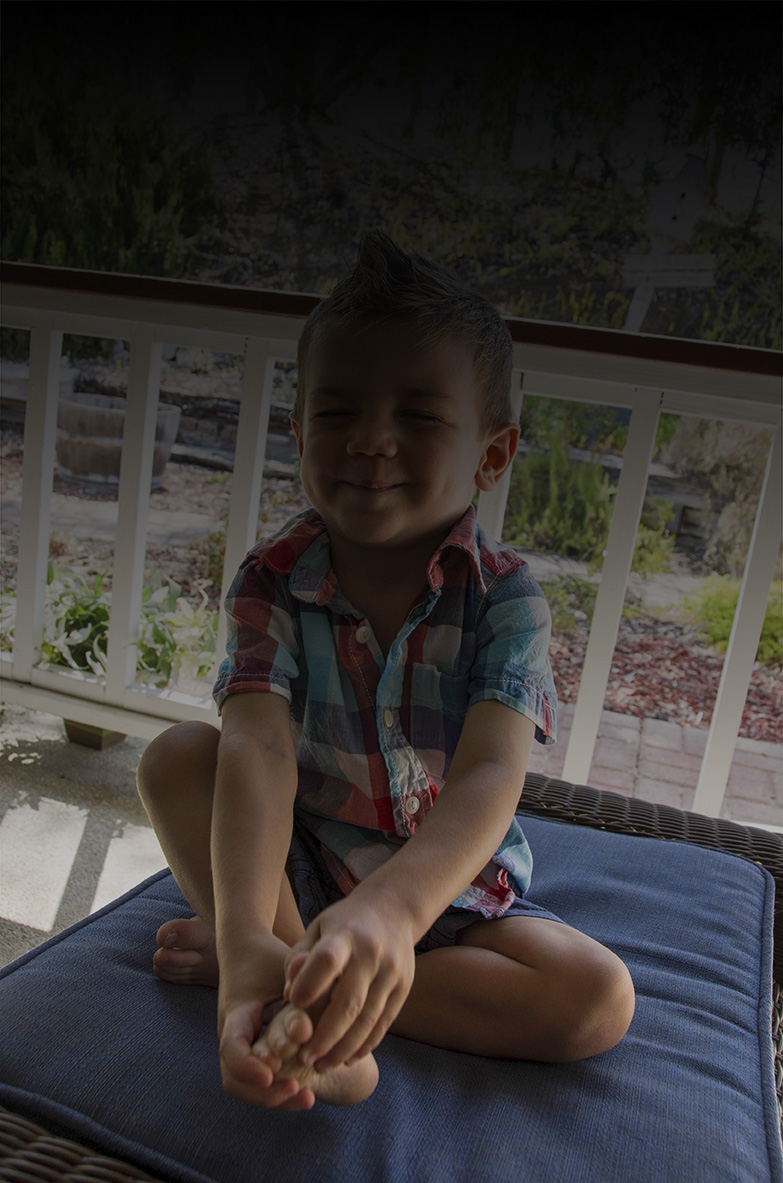
Using a gradient to darken part of a photo.
- I changed the Gradient Layer to the Soft Light Blend Mode and decreased the opacity of the layer to 80%.
- I applied a mask to the gradient, made sure my foreground color was black, and, with a soft brush, brushed away the gradient on Owen’s face.
This is the final result.
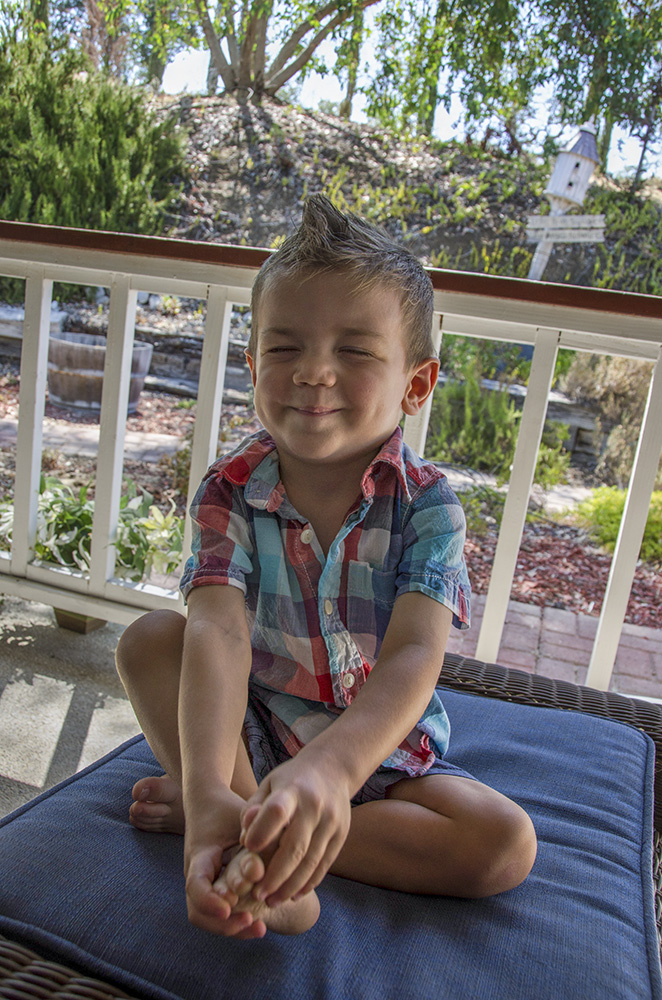
After
I’m so glad I took this photo. THIS is Owen, right now at the age of 2.
If you are not familiar with using Masks, here is a previous tutorial that should help: Using Layer Masks in Photoshop.
I hope you have found this tip helpful!
If you would like to keep a PDF copy of this tutorial, you may download it here: Editing a Photo with a Dark Foreground.
Save
Save


I tried using the link to download the PDF copy but it wasn’t working.
Thank you for the tutorials. So helpful.
I’ve fixed the link, Margaret. Thanks for letting me know it wasn’t working!
Thank you. The download worked great!
You could just use the local adjustment brush in Lightroom/ACR and just work on the boy and/or the background. Then you wouldn’t have to go into Photoshop.