Over the past weeks, we’ve been exploring Photoshop Styles. Today let’s take a quick look at Outer Glow, its options, and a few fun ways to use this Effect.
In the past weeks, we have learned how to access the options for an Effect. (For review, if needed: Photoshop Styles 101: The Stroke)
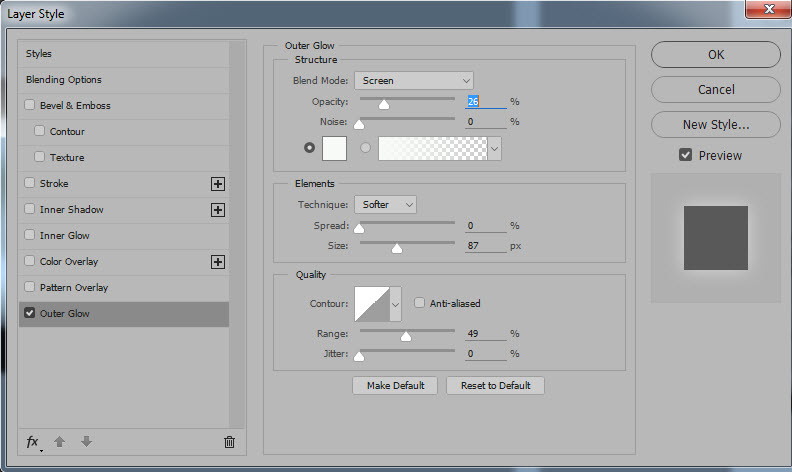
Here is a screen shot from Photoshop CC2015.5, which shows the options available for Outer Glow:
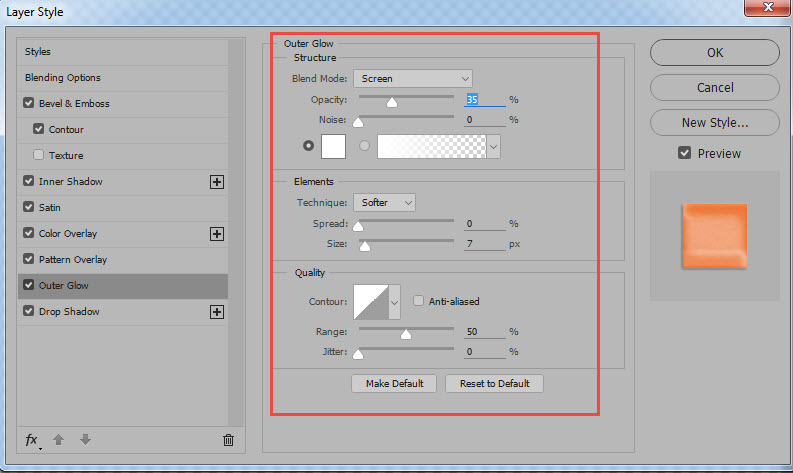
Outer Glow Structure:
- The Blend Mode option works the same in the Styles Effects Structure as it does on a Layer. Click on the down-pointing arrow to change Blend Modes. If you would like to create a glowing effect, Screen or Linear Dodge are usually the best choices.
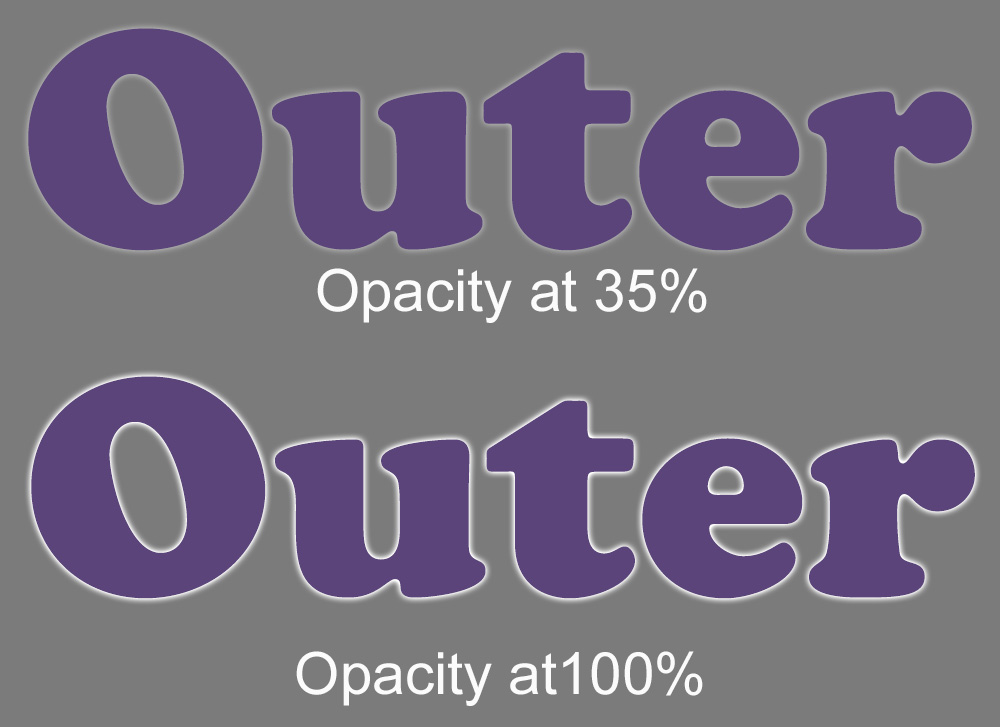
- Opacity: Drag the slider or type in the opacity percentage you would like. The higher the percentage, the opaquer the effect.
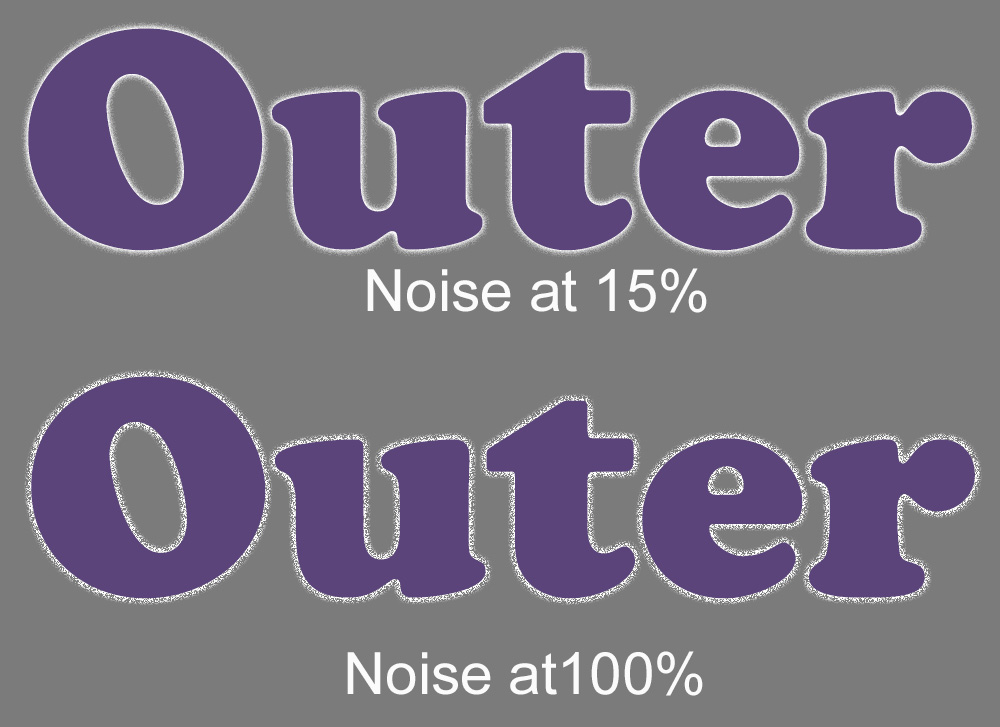
- Noise: Adjusting the noise slider will allow you to create a different type of glow effect, like a scattering of dust.
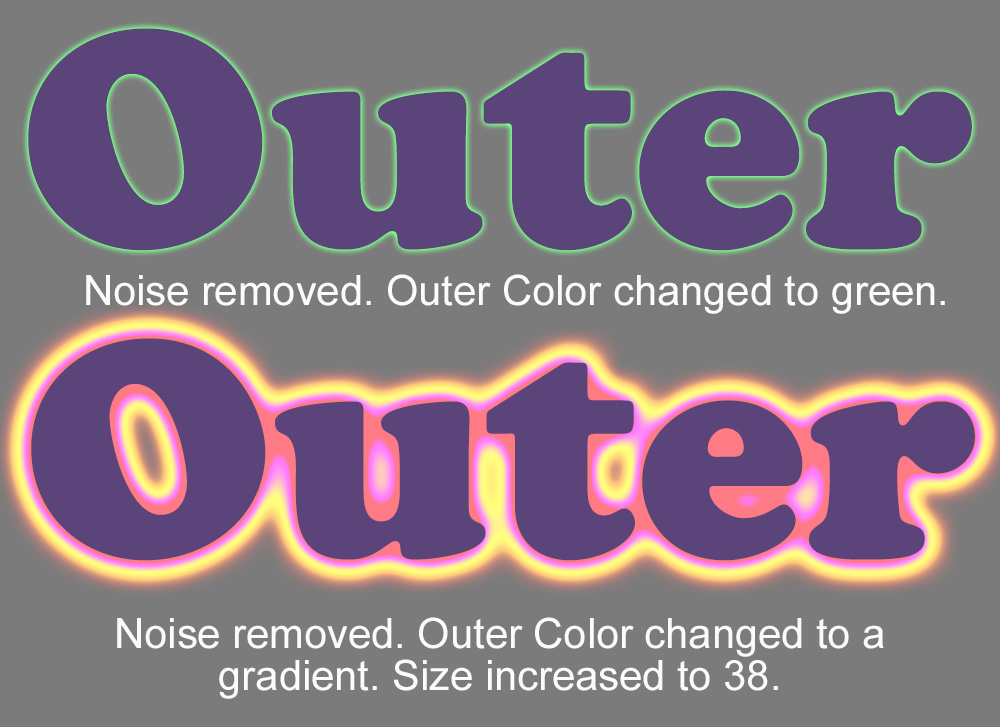
- Color/Gradient: Change the Color or select a Gradient here to create different fun effects. Tick the button to select Color or the Gradient, and make your choices.
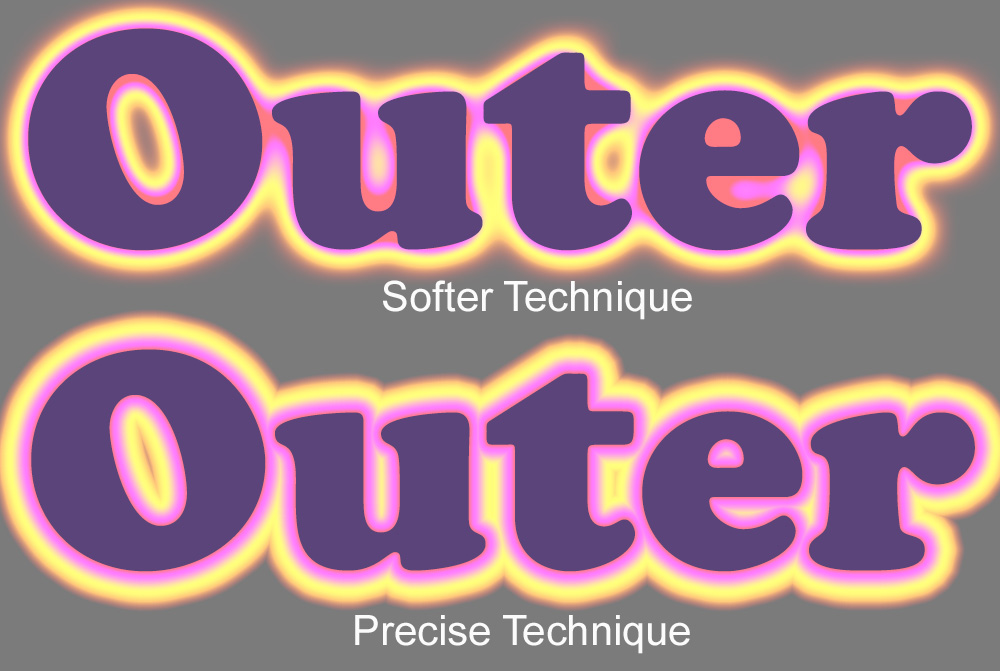
- Technique: We have 2 Technique options: Softer and Precise. The Softer Technique should give a more natural look, while the Precise Technique should have more defined edges.
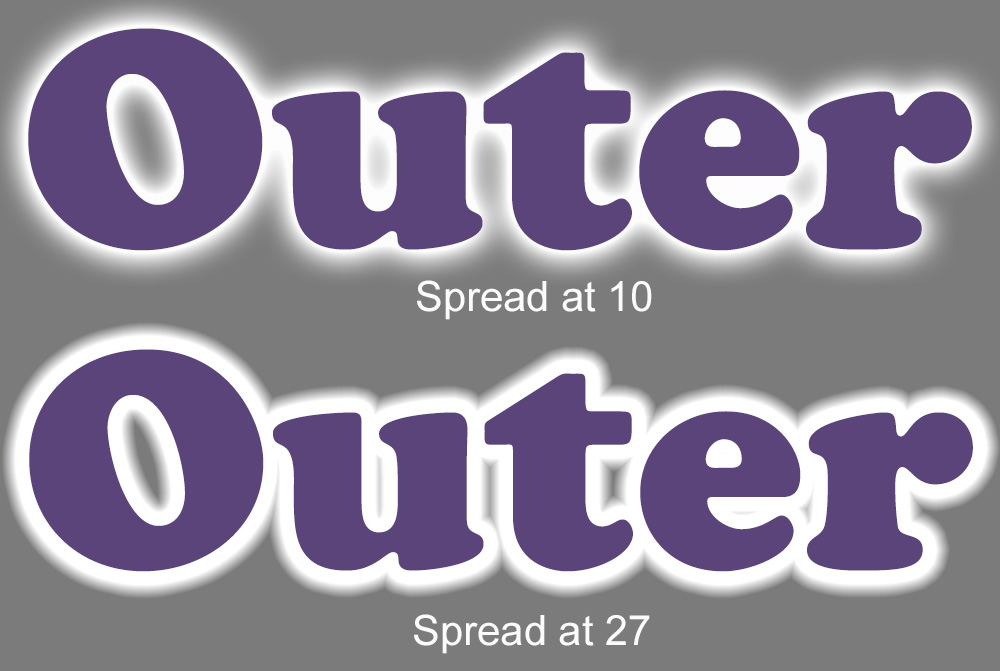
- Spread: This changes how gradually the glow fades from the outer edges of your object.
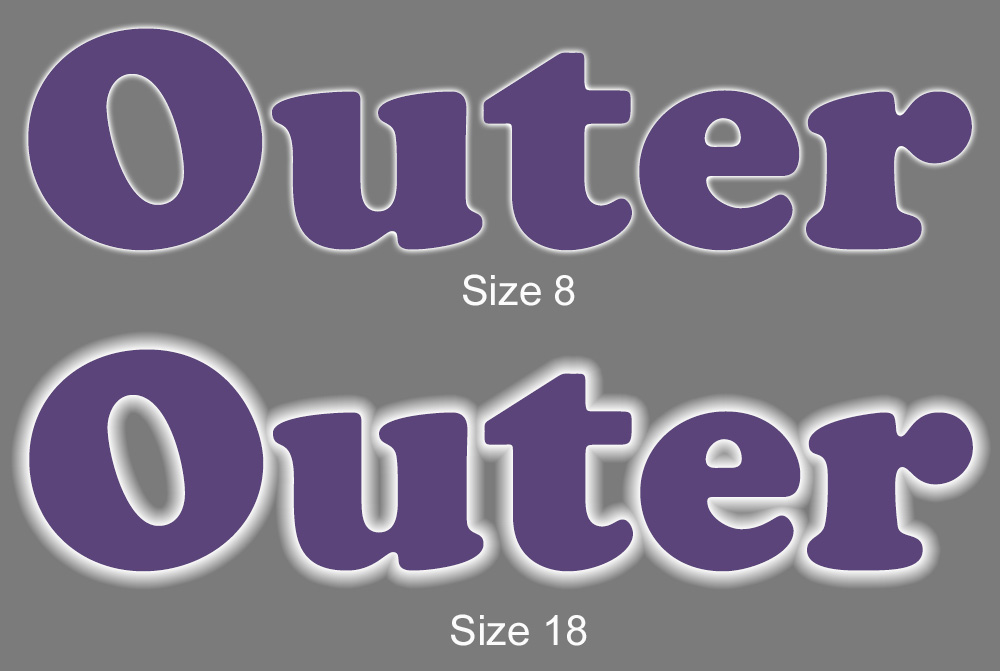
- Size: This lets you increase the size of your Outer Glow. Just drag the slider to the right or left, to get the size you desire.
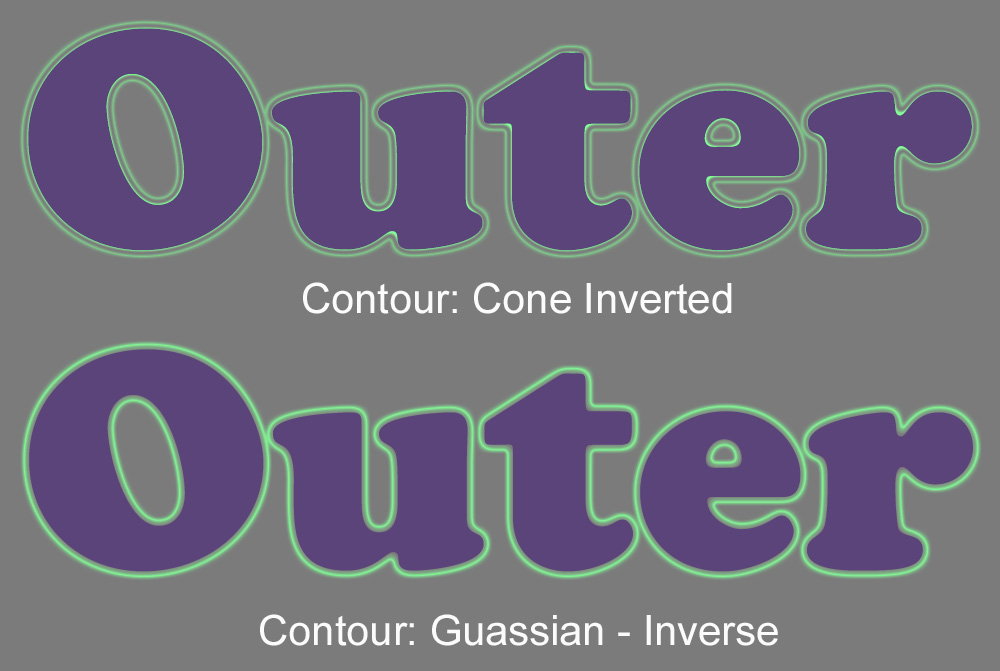
- Contour: Click on the down-pointing arrow next to “Contour” to access different contour shapes. This will give your Outer Glow some really interesting looks. Just click on one and see the effect immediately reflected in your document. Keep clicking on contours until you find one you like. Contours will look different on different objects, shapes, and sizes.
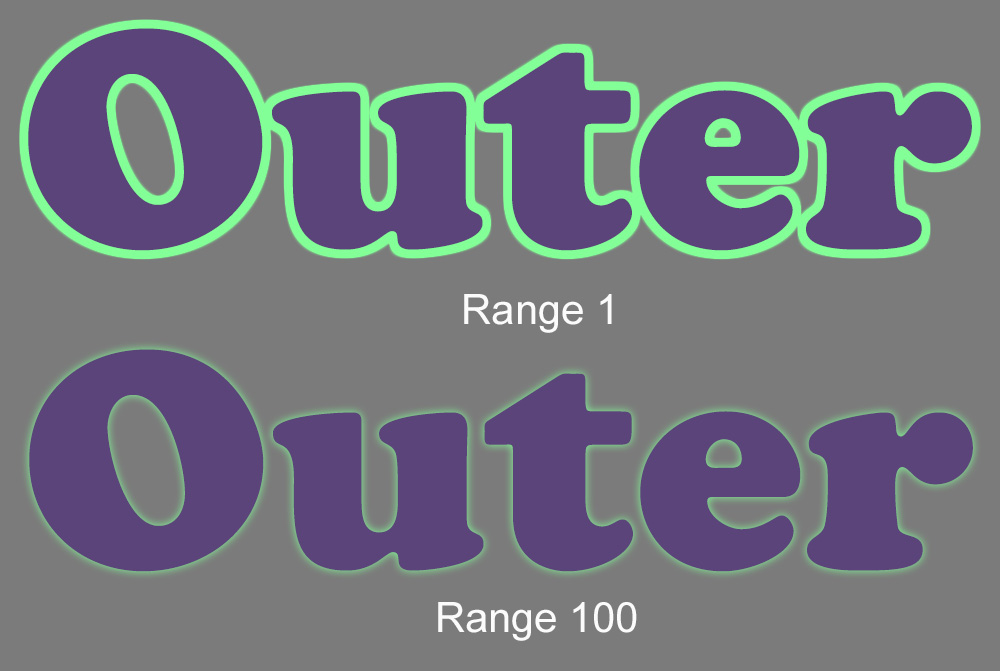
- Range: This is very similar to Spread. The lower Range percentage will give a harder line to your glow, while the higher percentages will give a softer edge.
- Jitter: This is similar to Noise. Adjust the slider to your needs. The different adjusts the “softness” of the glow next to the object edge. Jitter and Noise give extremely similar results.

We’ve seen, in some of the above examples, how some Effect options would be helpful when creating fun title work! Especially the Gradient options!
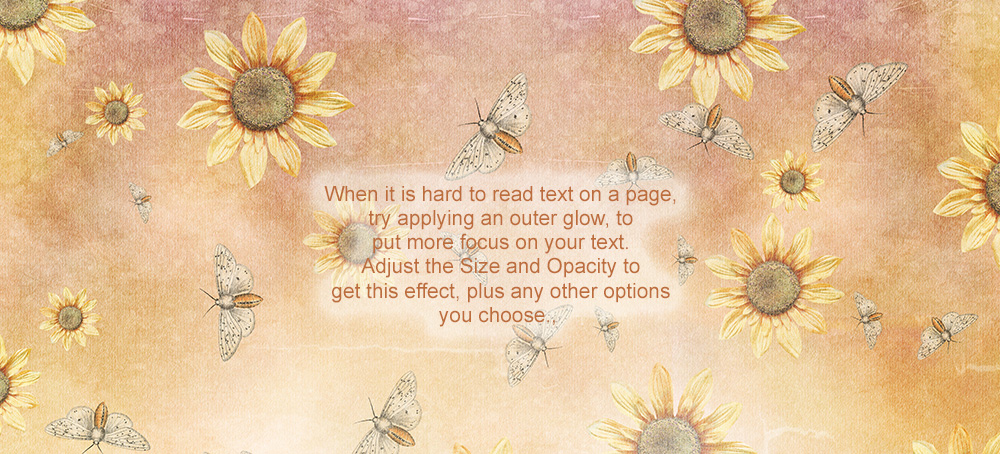
When writing text on a patterned paper, add a glow to your text to help it stand out.
Outer Glows can be used to create ethereal effects on objects as well.
Pictured below is a moon that I created for one of my elements in theStudio’s new Coordinated Collection, Harvest Sunset. On the left is the moon as I created it, but it needed something more. I used Outer Glow to get the moon’s glow, which you see in the image on the right.

Photoshop Elements Users:
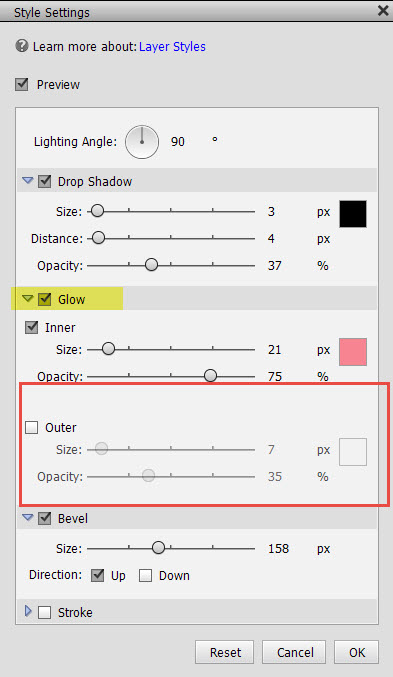
While you PSE does not offer all of the options that CC offers, you do have the option of changing both your Outer Glow Size, Opacity, and Color.
How many fun ways can YOU think to use Outer Glow? Leave your suggestions in the comment section below so we can all gain from your experience and creativity!
Be sure to visit our Harvest Sunset Coordinated Collection! Each pack is just $1!
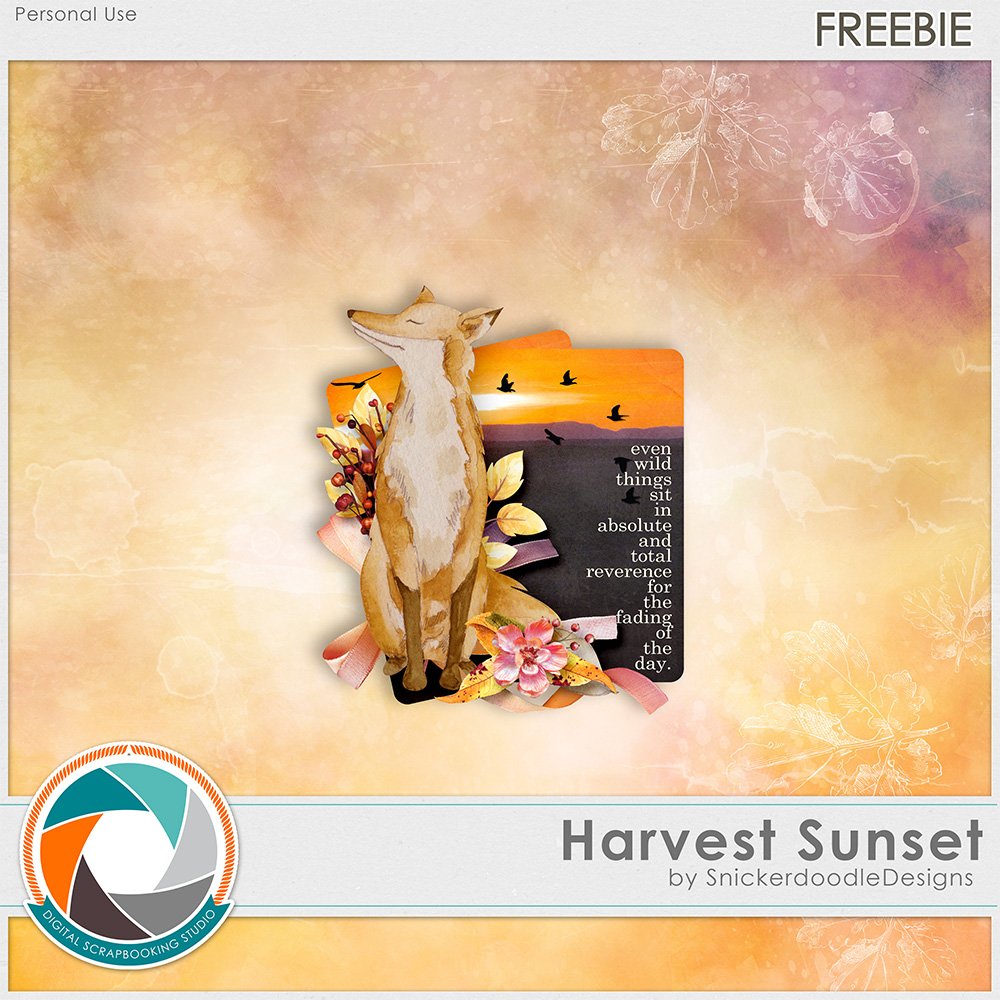
Here is a Harvest Sunset Freebie from my collection to help you get started! Just click on the image below to download!
If you would like to download a copy of this tutorial in PDF format, you may do so here: Photoshop Styles 101: Outer Glow


Oh love that fox freebie – unfortunately link doesn’t seem to be working? I will try again later. Thank you 🙂
Thanks, Leanne. I’ve fixed the link.
Thank you so much for this tutorial. I have learnt a great deal today. As I am relatively new to PS, I did not know you can do so much with the outer glow. I love your tutorials and learn a great deal from them. Thank you for sharing your knowledge with us and thank you for the gift. Going to play now!!
Thanks for fixing the link – it is as gorgeous as I thought. 🙂
You’re welcome, Leanne; and thank you, Ann, for letting me know this tutorial was helpful for you! I appreciate your comment!
Love this effect and have used it a lot, it’s so handy, as you say for the not so easy to read text. Thank you so much for the delightful page.
Faith
x
[…] On Karen’s Blog you can get a sweet coordinating Freebie! Harvest Sunset Freebie […]
Thank you for this great instruction! I love the examples you presented and suggestions.
Thanks so much for this tutorial. I have never used the glow this way — so great to see how nice it looks. Thanks a lot for the cute cluster — love it.
You’re welcome, Carol!
[…] glow on your moon looks good to you. (Experiment with Opacity, Spread, and Size, especially.) (Photoshop 101: Outer Glow) These are the setting I used for my moon, which is on a 3600 x 3600 px […]
[…] glow on your moon looks good to you. (Experiment with Opacity, Spread, and Size, especially.) (Photoshop 101: Outer Glow) These are the setting I used for my moon, which is on a 3600 x 3600 px […]