I was browsing through our gallery yesterday and noticed how many pages incorporate blending. Let’s take some time today to review the basics of Layer Masks, and see how they can help us with blending on our scrapbook pages.
What are Layer Masks?
A Layer Mask allows you to control the level of transparency on a layer. It differs from controlling the level of a layer’s transparency by using the Opacity Slider, in that the Opacity Slider will raise or lower the opacity of the entire layer; while you may control the opacity of selected areas on a layer with the use of a Layer Mask
What do I need to know about using Layer Masks?
The basic information to keep in mind when using a Layer Mask is that the color white reveals what is on a layer, and the color black conceals what is on a layer. (This will make sense in a minute!)
When will I want to use a Layer Mask?
You can use a Layer Mask to remove something from an image that you do not wish to be there. Using a Layer Mask will allow you to work in a non-destructive manner, as opposed to using the eraser or the clone tool, which are destructive.
How do I add a Layer Mask?
You can add a Layer Mask by doing one of the following:
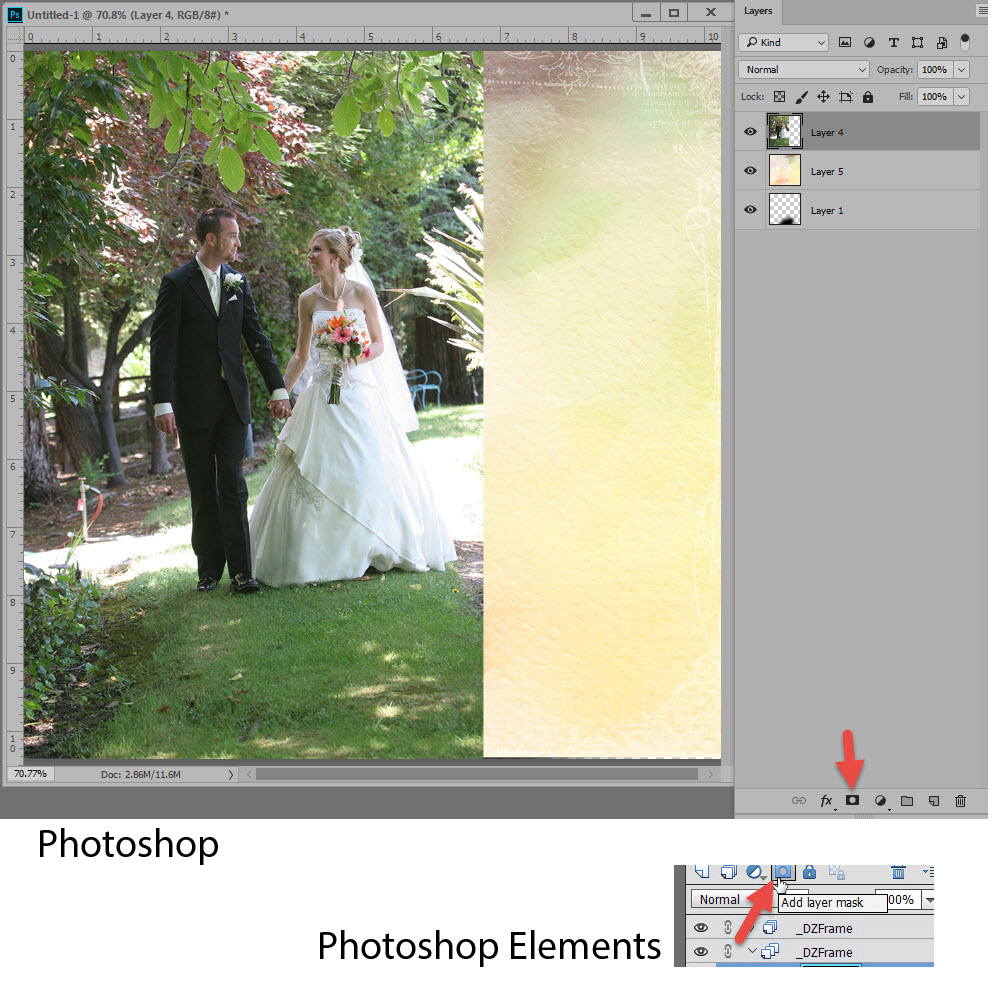
- Click on the layer to which you would like to add the mask. In Photoshop, click on the Add Layer Mask icon at the bottom of the Layers Panel. In Photoshop Elements, click on the Add Layer Mask icon at the top of the Layers Panel.
- In the top Menu Bar choose Layer > Layer Mask > Reveal All
Putting it all together:
Below is a photograph, on top of a 12 X 12 paper.

I would like to blend the edges of this photograph into the background paper.
Technique:
- Click on the photograph to make it active.
- Add a Layer Mask.
- Choose a soft-edged round brush; set your pixel size according to your preference and needs. For this image, I chose a soft-edged 500 px brush.
- Set your foreground color to black and background color to white.
- Click on the MASK to make it active.
- Drag your brush along the edges of the photograph
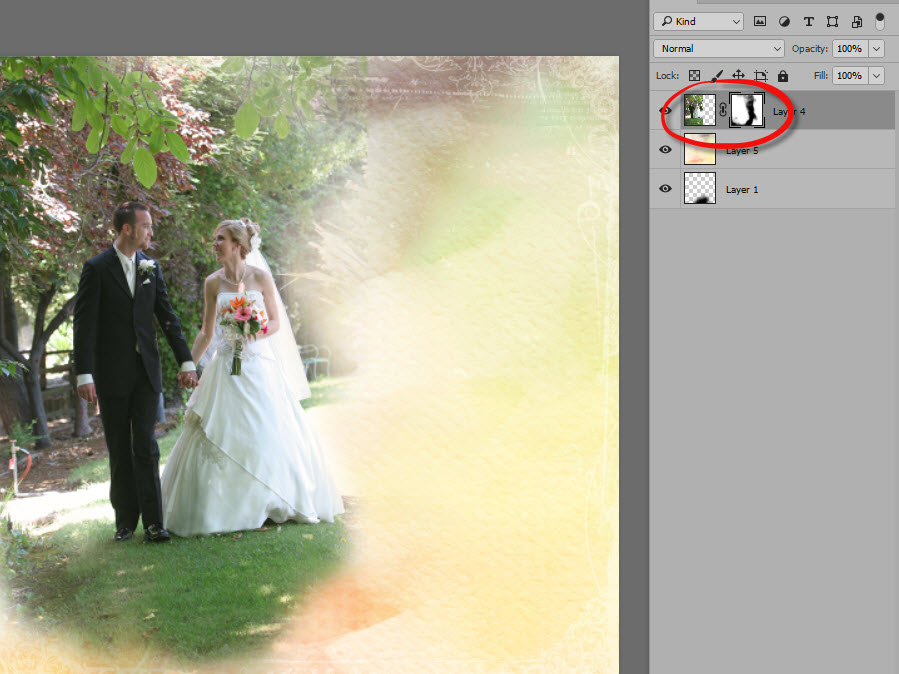
The area of the photograph that you paint with black will become invisible, revealing the paper underneath.
If you make a mistake, perhaps removing too much of the photo, change your foreground color to white, and paint over the mistake to bring back the visibility of the photograph. Once you’ve corrected your mistake, change the foreground color to black and continue.
If you decide you want to start all over again, right click on the mask itself and choose Delete Layer Mask. You may also Disable Layer Mask, if you would like to see the original photo without your masking. If you choose Apply Mask, the Mask will be applied to your photo, and you will not have the option of changing it in the future.
You can see the areas of the photograph that I have painted away by viewing the photo, of course, but also by looking at the mask. The painted-away areas are now black (revealing the paper underneath).
You can use masks on as many layers as you like. You can also play with the normal brush options, such as Blend Modes and Opacity of your brush.
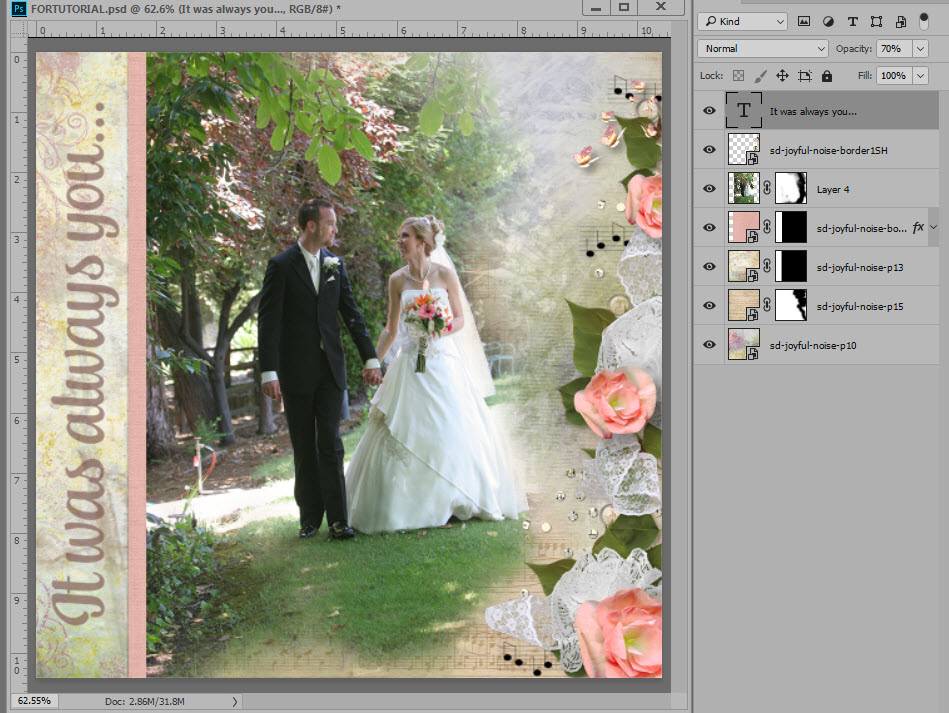
I’ve completed this layout using 4 papers, and I have applied masks to 3 of the papers. I experimented more with the masking of the photo, varying the opacity of the brush. (You may also vary the opacity of the brush by painting with gray, instead of black.)
And that’s it! Once you start using masks, I’m sure you will love the flexibility and creativity they give you!
Credits:
Kit used in this layout: Joyful Noise by SnickerdoodleDesigns
Photograph: Goodman Films (Photos of my son and his bride)
If you would like to download a PDF of this tutorial, you may do so here: How to use Layer Masks
If you would like to download a Joyful Noise Cluster, you may do so by clicking on the image below.


Gorgeous! Thank you so much!
Gorgeous result and thank you.
Faith
You are very welcome, Lea and Faith!
[…] Caution: When using Option #2, if the exact color you are desaturating is found elsewhere in your image, it will also be desaturated. An easy fix for this is to click on the Hue/Saturation Mask, select a soft, round-edged brush, and painting with black, brush away the areas of desaturation you do not want. (How to Use Layer Masks) […]