Do you use the Sharpen Tool in Photoshop? Prior to CS5, this tool was likely to create artifacts when used; however, improvements in CS5 reduced this likelihood. Available in both Photoshop and Photoshop Elements, the Sharpen Tool can be quite useful at times, enhancing details and sharpening areas selectively without having to use a mask.
Here’s how:
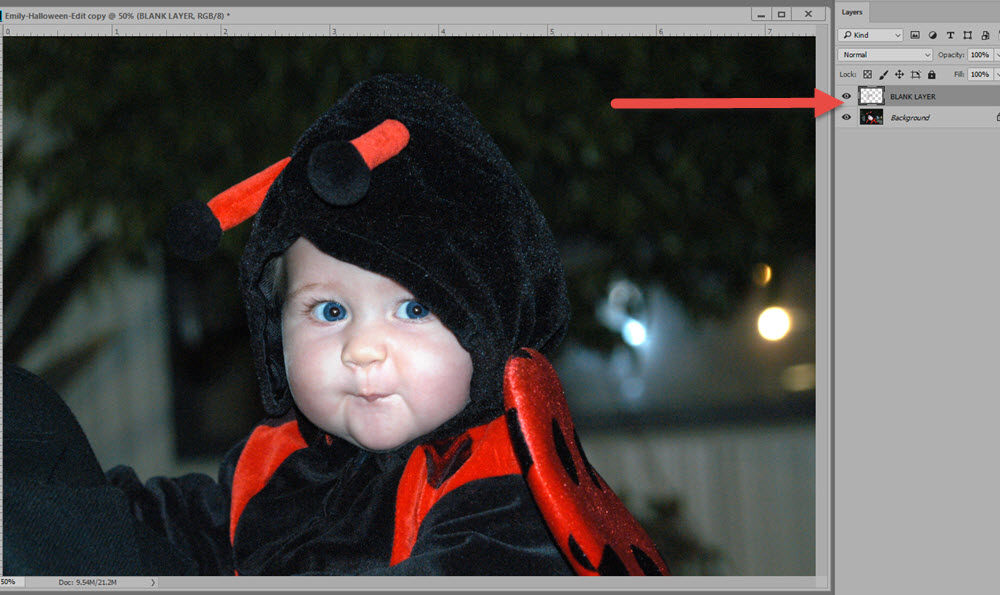
- Create a new blank layer above the object you would like to sharpen. Make sure to keep that blank layer selected as the active layer.
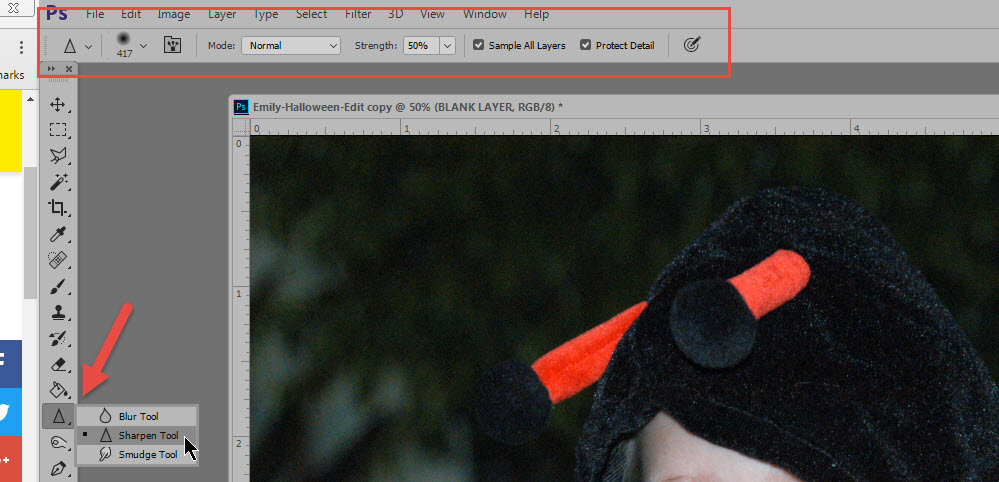
- Select the Sharpen Tool. This Tool is on the Left Menu Bar, nested with the Blur Tool.
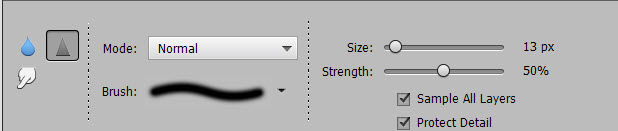
- In the Options Bar (top of the screen), choose a Strength, and check “Protect Detail” and “Sample All Layers.”
Screenshot from CC2017:
Screenshot from PSE15:
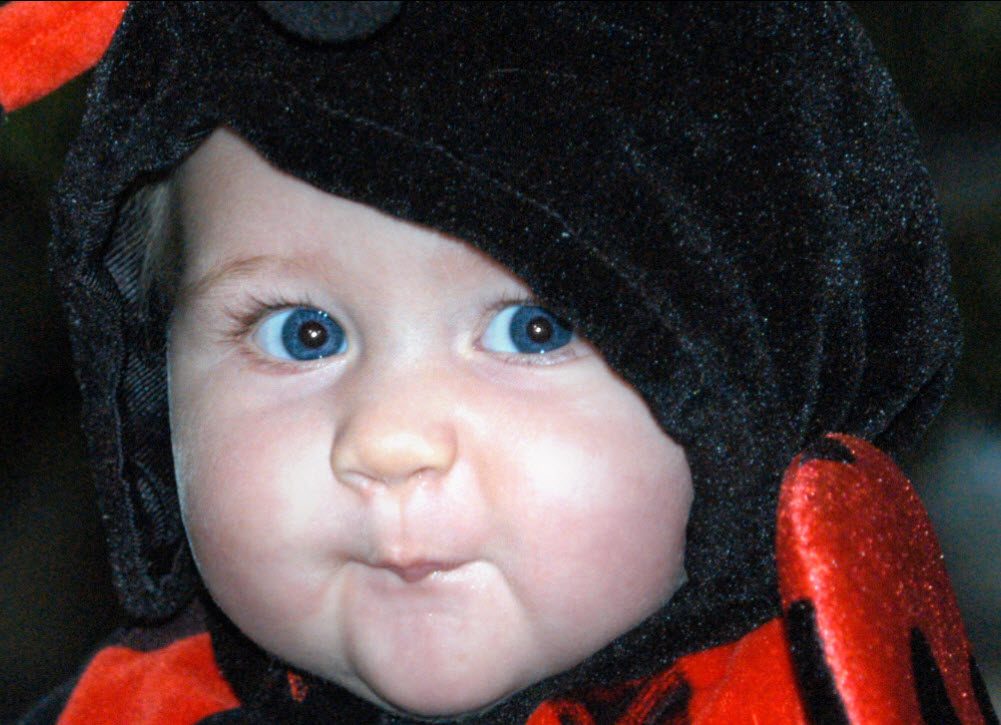
I would like to sharpen the eyes in this photo of my granddaughter.
- Adjust the size of the brush relative to the size of the area you would like to sharpen. I would like to sharpen Emily’s eyes and have adjusted the brush size accordingly.

- Now click or drag with your mouse over the area you would like to sharpen. Repeat, if more sharpening is desired. I clicked 3 times on Emily’s eyes.


Control the sharpening by changing the Strength Value or lowering the opacity of the Blank Layer, if desired.
Such an easy way to do a Quick Fix!
If you would like to download a PDF of this tutorial, you may do so here: Using the Sharpen Tool in Photoshop


I love this tool. I use this for sharpening the eyes on almost all people pictures. It really does make a difference. I never knew about using the blank layer with sample all layers selected though. Thank you!
Yes, it’s a great tool. The blank layer lets you work non-destructively, Peggy.
What a great tutorial. I had never heard of this one before and have tried various ways to enhance the eyes. Also, never tried doing so with a new layer. Thanks so very much.
I have always used the high pass, I didn’t know about this tool, THANK YOU. Isn’t Photoshop awesome, especially when you have GREAT tutorials like this one (and the others LOL)
Had to try this using my PSE 13 and Wow! Maybe it doesn’t work as well as what you used but I am still impressed and happy.
Thank you for the tutorials. Wonderful.
[…] week we looked at how to sharpen parts of an image using the Sharpen Tool. (Using the Sharpen Tool in Photoshop). This week, let’s look at how to blur parts of an image using the Field Blur Filter. This […]
[…] week we looked at how to sharpen parts of an image using the Sharpen Tool. (Using the Sharpen Tool in Photoshop). This week, let’s look at how to blur parts of an image using the Field Blur Filter. This […]
Thank you for your comments, ladies. I’m always happy to hear when something works for you or is new to you. It helps me when thinking about other tutorial subjects!
[…] weeks ago we looked at using the Sharpen Tool to sharpen parts of an image. Another way to sharpen images is by using the High Pass […]
[…] week we looked at how to sharpen parts of an image using the Sharpen Tool. (Using the Sharpen Tool in Photoshop). This week, let’s look at how to blur parts of an image using the Field Blur Filter. This […]
[…] week we looked at how to sharpen parts of an image using the Sharpen Tool. (Using the Sharpen Tool in Photoshop). This week, let’s look at how to blur parts of an image using the Field Blur Filter. This […]