Color tinting black and white photographs by hand is a tedious process, but the result is beautiful. With the power of Photoshop, we are able to achieve similar results, with much less work.
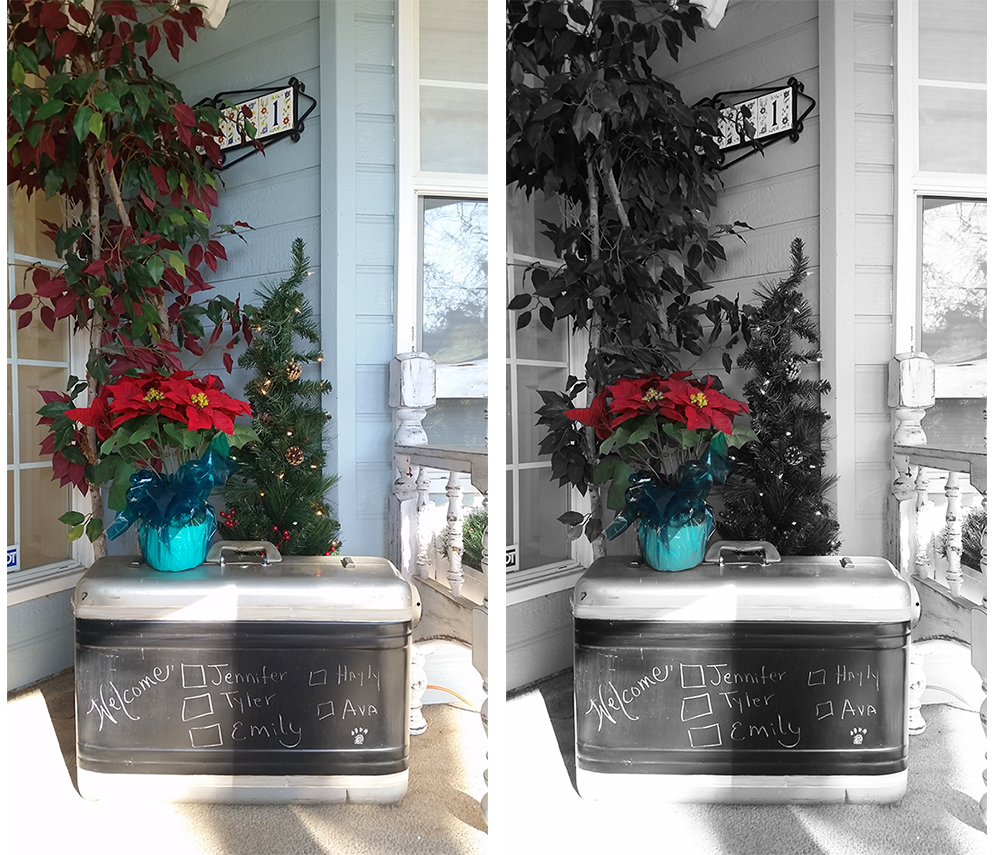
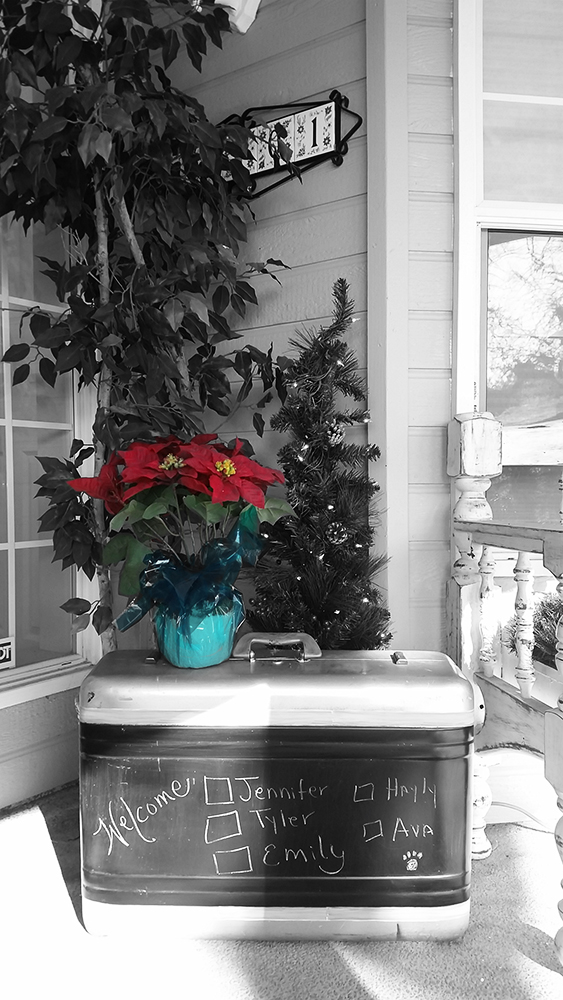
Original photo on left; Color tinted black and white photo on the right
It’s really a simple process. Here’s how:
- Open your photo in Photoshop or Photoshop Elements. (For this tutorial. I am using CC2017 and PSE15 for screenshots.)
- Convert your photo to Black and White
- Add a Black and White Adjustment Layer, OR
- Add a Gradient Map Adjustment Layer
When converting color images to Black and White, my preference is to use a Gradient Map Adjustment Layer, because it offers more contrast. Here is a comparison between the 2 options:
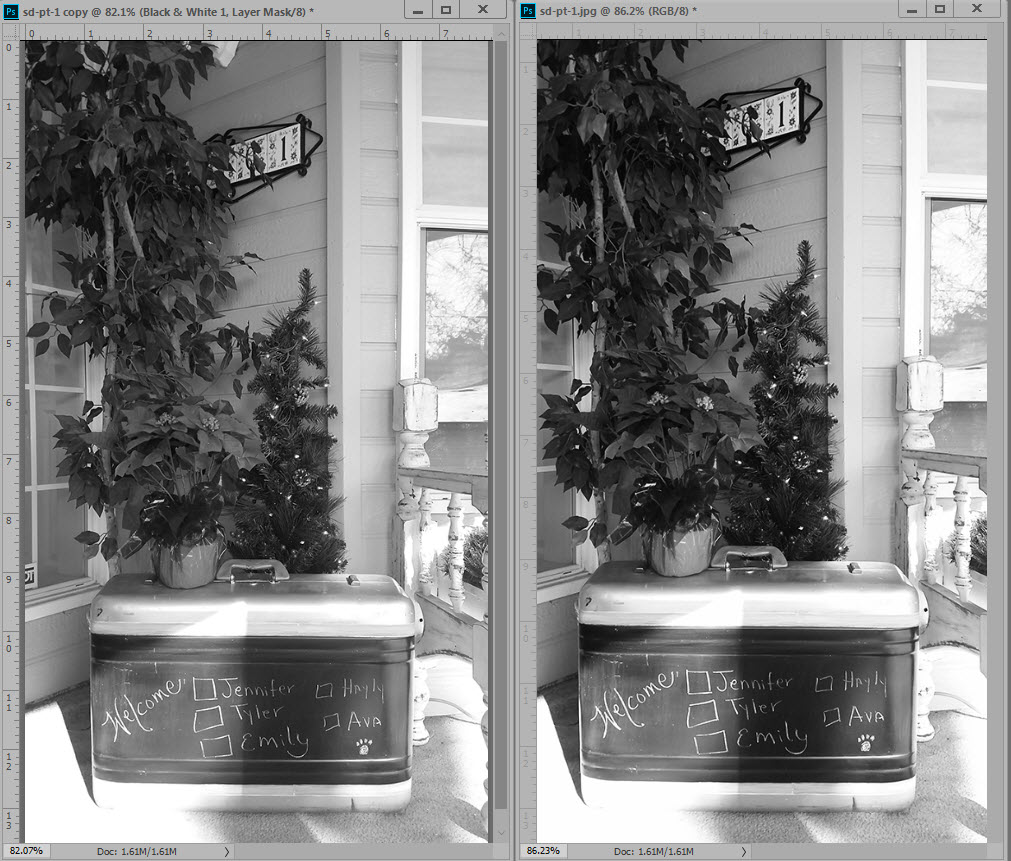
Black and White Adjustment Layer on left; Gradient Map Adjustment layer on the right
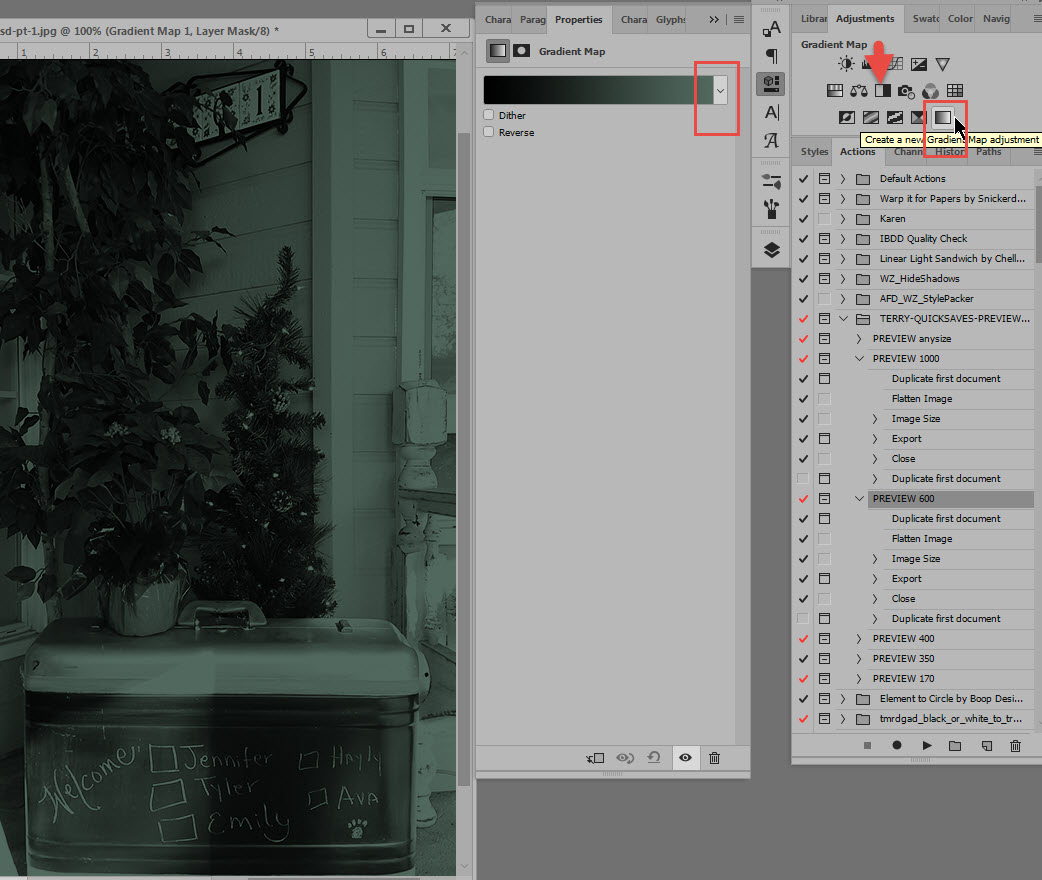
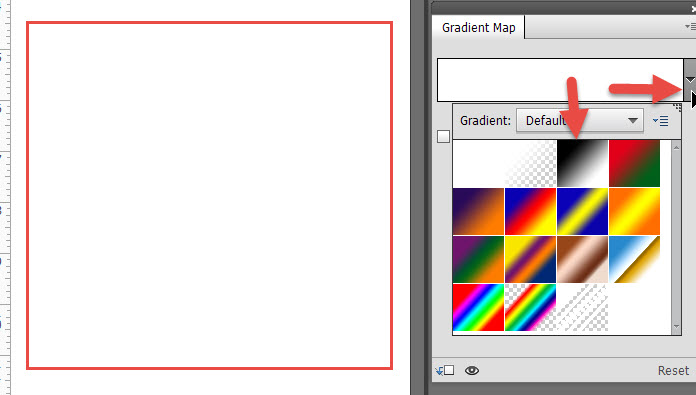
In the screenshot below (CC2017), the arrow indicates the Black and White Adjustment; the rectangle indicates the Gradient Map adjustment. Click on the icon to apply whichever adjustment layer you would like to use. In CC2017 the default is set to black/green. Click on the down-pointing arrow to change this to black/white.

In the screenshot below (PSE15): (1) Path for Adding a Black and White Adjustment Layer; (2) Adding a Gradient Map adjustment
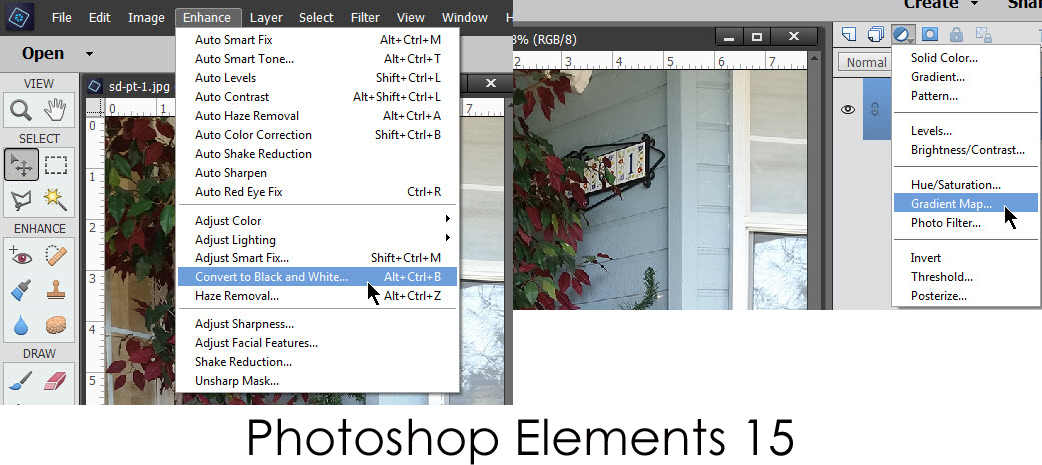
In Elements 15, the default Gradient map is White. Click on the down-pointing arrow to change it to Black/ White
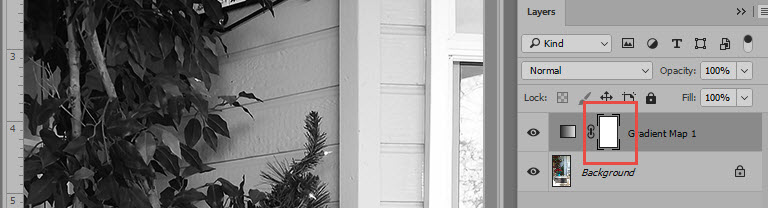
3. From this point on, the instructions are the same for both Photoshop and Photoshop Elements. When you look at the Layers Panel, you will see the Gradient Map or Black and White Adjustment layer added, with a mask.
4. Choose a small round, hard-edged brush, and lower the opacity of the brush in the top menu bar. I chose to use a 33% opacity.
5. Set the Foreground Color to Black
6. Click on the Mask (white rectangle) on the Gradient Map or Black and White Adjustment layer to make it active, and start “painting” the part of the photo that you would like to be in color. By doing so, you will remove the adjustment layer on that item, revealing the color beneath.
TIP: If you are having a hard time judging what to paint away, lower the opacity of the adjustment layer in the Layers Panel to make it easier to see your original image.
7. Adjust the size of your brush using the bracket keys (left bracket makes brush smaller, right bracket makes brush larger) as you paint, making is easier to reach smaller or larger areas.
TIP: If you have set your brush opacity at a low setting, and want to reveal more of the original color, you can (1) raise the opacity of the brush, or (2) leave the brush opacity as it is and paint over the same area again.
Continue this process until you are happy with the result.
I hope you enjoy experimenting with color tinting in Photoshop!


Leave A Comment