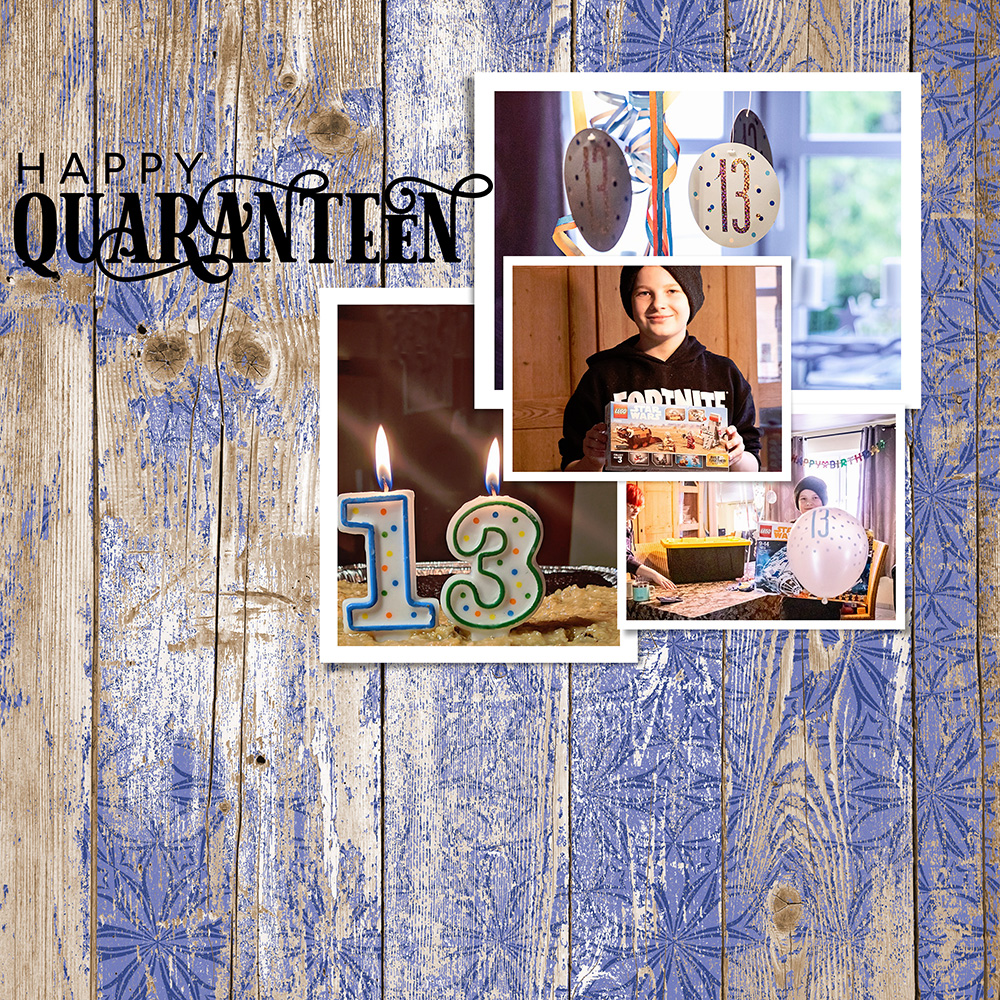
I’m taking advantage of our LAD: Christmas in July and getting pages of my yearly scrapbook done. I’m on the page for Dane’s 13th “Quaranteen” birthday and I *need* confetti. Oddly, there’s no digital confetti in my stash.
No worries! Photoshop to the rescue. This is truly quick & easy, but for those of you without Photoshop (or Elements) I’ve include a free Confetti Template, including an .abr brush, down below.
I’m using Photoshop CC, but this is a very basic technique & should translate to Elements and other digital scrapbooking programs.
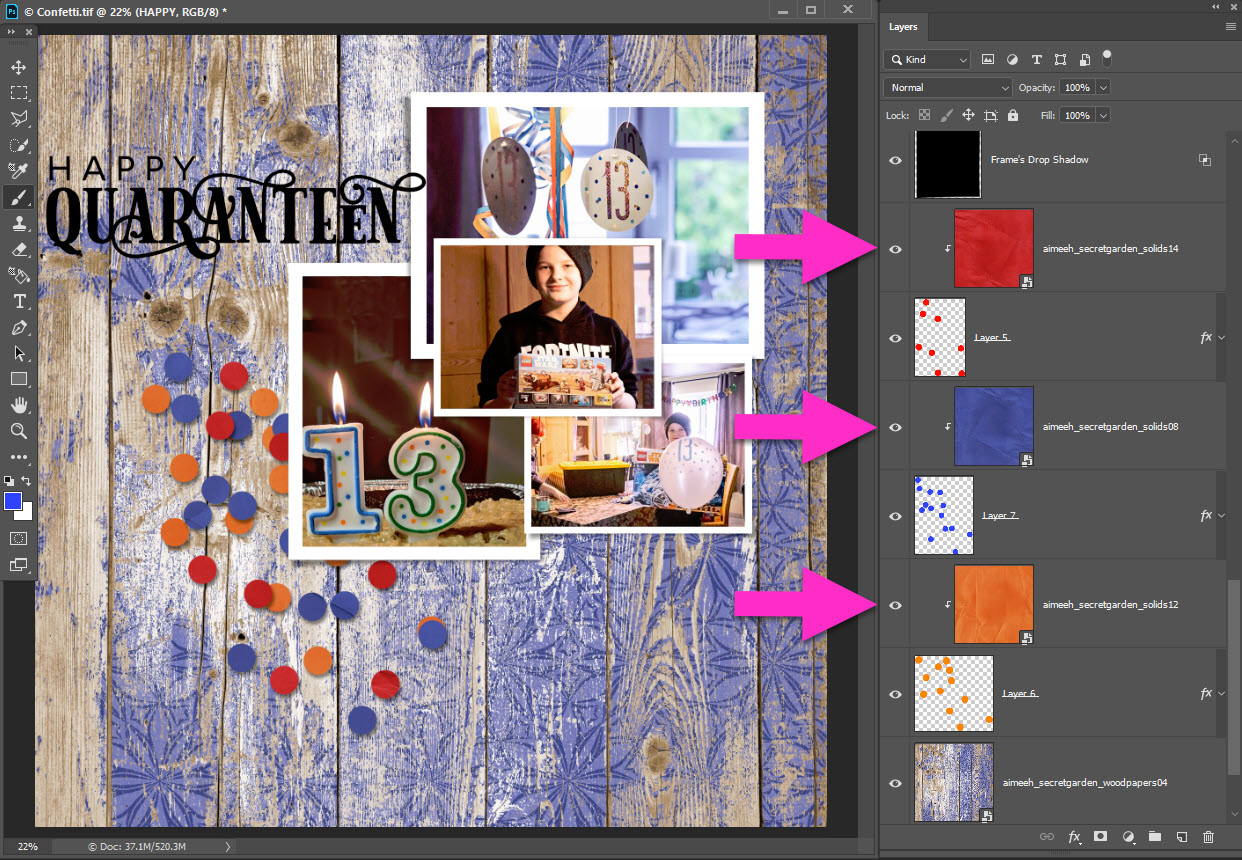
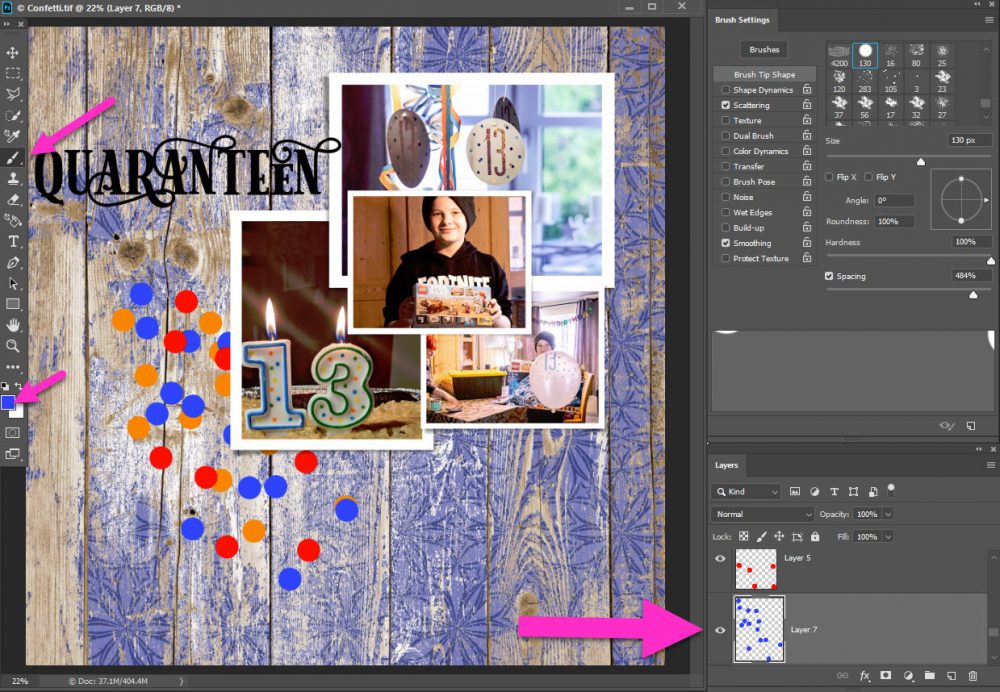
I’m starting with a 3600X3600 px page @300 dpi. As always. I’ve already slipped in Dane’s birthday photos & a background from Aimee Harrison Designs Secret Garden.
To add the first layer of confetti:
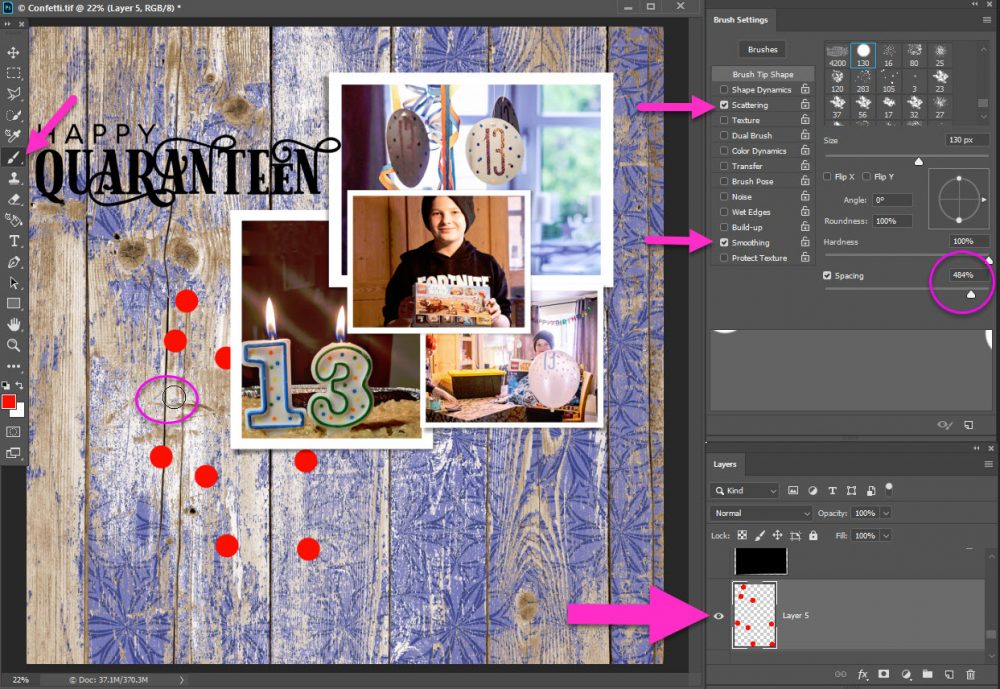
- Create a New Layer under your photo’s & frames.
- Choose the Brush Tool.
- Either load the free Confetti Brush (included in free download); or
- Create your own Confetti Brush with these settings:
- Choose a hard, round brush
- Set size to 130 px
- Spacing to 484%
- Scattering to 343% (check both Axes)
- Check Smoothing
- Set your Foreground Color to red, or really any color
- Click your brush on the New Layer & watch confetti appear.
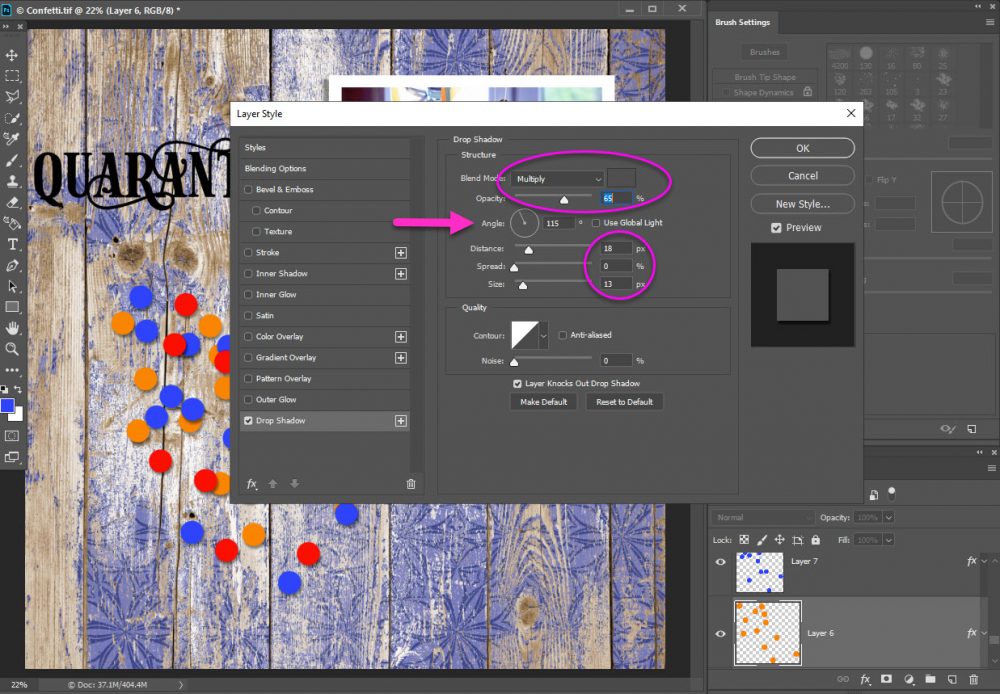
Repeat your steps to add another layer of confetti. You can use the same brush, same settings. The scattering will ensure that you get a different scatter on your new confetti. This avoids having the exact same pattern.
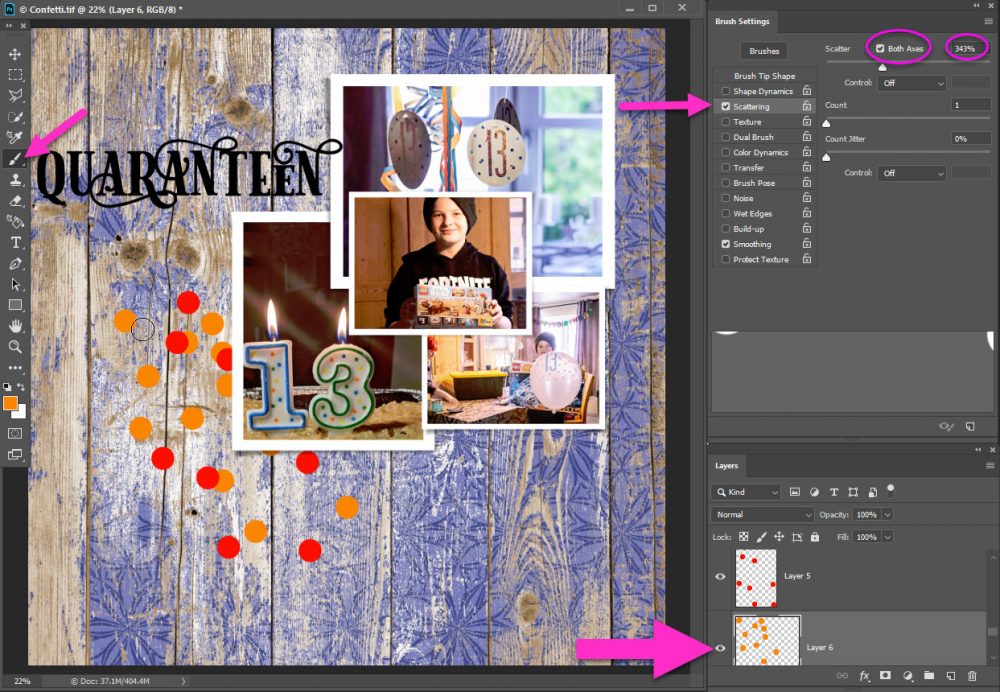
I repeated the steps one more time. This time I used the same brush, same settings & in blue. I moved the New Layer in between the orange & the red layers.
I added a quick drop shadow style to my confetti layers. This is included in the free Confetti Template. You may need to adjust the opacity to fit your background paper. My Drop Shadow settings:
- Color: #545454
- Blend Mode: Multiply
- Opacity: 65%
- Angle: 115°
- Distance: 18 px
- Size: 13 px
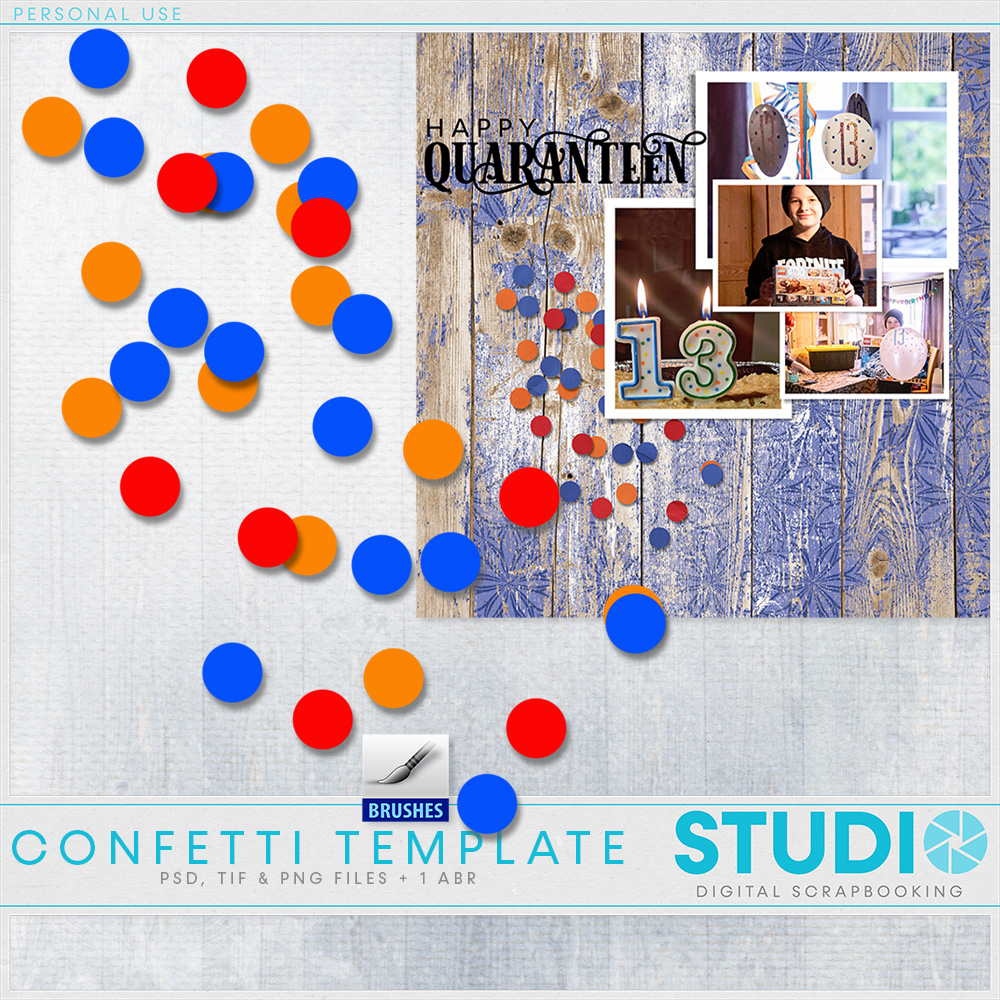
The confetti is fine as-is. But. I decided to clip some of Aimee’s wrinkled solid papers to each confetti layer. I like the texture & dimension it gives my confetti.
We have a tutorial on the blog to refresh your memory on How to Create a Clipping Mask.

That’s it! You have some quick, easy, fun, digital confetti! Give it a whirl? You can create your own or use the free Confetti Template & Confetti Brush by clicking the image:


Thank you very much <3
Thank you!
thanks!
Thank you Toiny.
Thank you very much
Thanks for the template and the tut!
fun!