I love Adobe Photoshop! I love that there is always something new to learn – whether it is a complicated technique or a simple shortcut. A few days ago, I was working in a different software program. Without even realizing what I was doing, I kept trying to use Photoshop shortcuts. It was then that I realized how many shortcuts I use on a daily basis with no thought at all. I want to share with you some of my favorite Photoshop shortcuts, and today will start with Quick Tip #1.
Even when I am wearing my computer glasses, I still find myself, at times, leaning forward to take a closer look at the thumbnail in the layers palette. The day I learned I could change the thumbnail size, I was so excited! No more hunched shoulders or back aches! This is how you do it!
Simply right click on the layer thumbnail that you would like to see larger, and a drop-down menu will appear. You will have four options: No Thumbnail, Small Thumbnail, Medium Thumbnail, and Large Thumbnail.
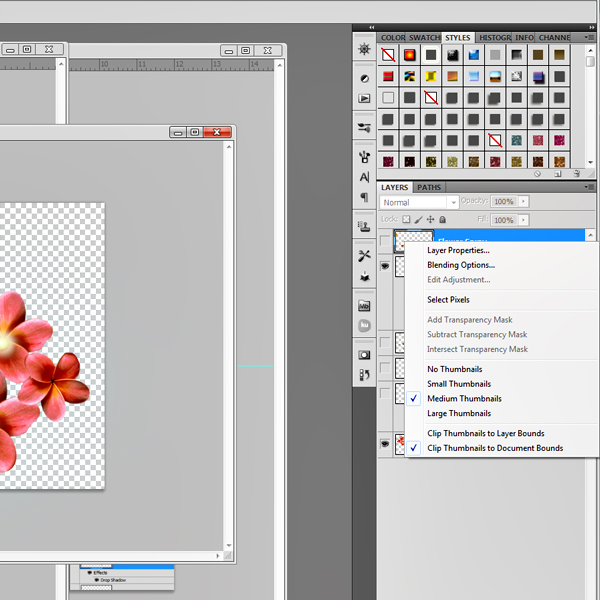
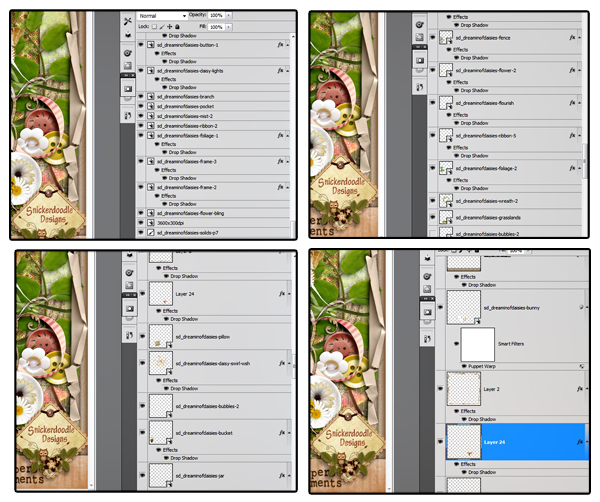
The first image below is with No Thumbnail. Images 2,3,4 show the different thumbnail sizes for Small, Medium, and Large.
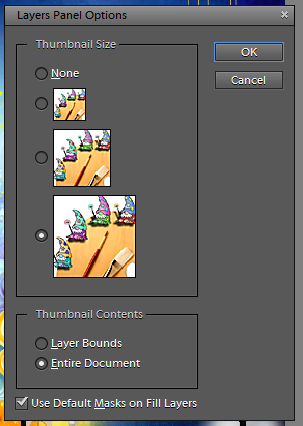
There is more good news! This works in Photoshop Elements too! I’ve only checked it out in PSE 9 and 10, but my guess is it works in other versions as well. In Elements, you will simply look to the right of the word “LAYERS,” which is at the top of your Layers Palette. See the tiny down-pointing arrow and the 4 tiny horizontal lines to the far right? Click on that arrow and you will see the options available to you! Simply tick the circle that you want to apply, hit OK, and you’re done.
Now sit back in your chair, and enjoy your new view!


Melanie here! I absolutely loved this piece, please email me–I have a question about your blog 🙂 MelanieLBowen[at]gmail[dot]com
Thanks for this tip!! Using PSE is very, very painful for my body…whether it’s my shoulders or my back…it’s not very “user friendly” (because I keep hunching forward). I’ll try this today! I love getting all these tips from you gals…can’t tell you how much they help!
Such a great and useful tutorial. I hope I can do this on my PSE. These tutorials are so good. Thanks very much for sharing with us — especially me — I need all the help I can get and appreciate this very much.
[…] Quick Tip #1 – Adjusting Thumbnail Images – 1 freebie(s)? […]
Thank you for your comments, ladies! I’m glad to know that you are finding these tips helpful!
Great tip! Thank so much for sharing!
There is so much buried in PS and PSE that these little tips really help a lot!
Another tip, so useful, thanks