Two weeks ago, we learned how to add a drop shadow to translucent elements in Photoshop. Today I will show you how to achieve the same result using Photoshop Elements.
Start by placing your translucent element on the background of your choice.
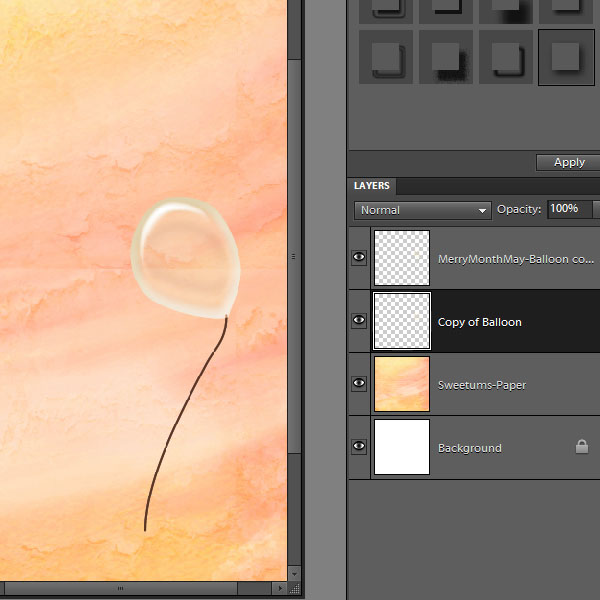
Duplicate the balloon using the shortcut Control + J. A duplicate of the balloon will be placed on it’s own layer above the balloon layer. To keep things clear for this tutorial, I have renamed the duplicate layer “Copy of Balloon” and dragged it below the original balloon layer.
Next set your foreground color to the color that you would like your shadow to be. You do this by clicking on the Color Picker, and selecting the color you want from the Color Picker window that will open up. I have chosen the darkest orange in my background paper, to keep the shadow on my balloon looking as natural as possible.
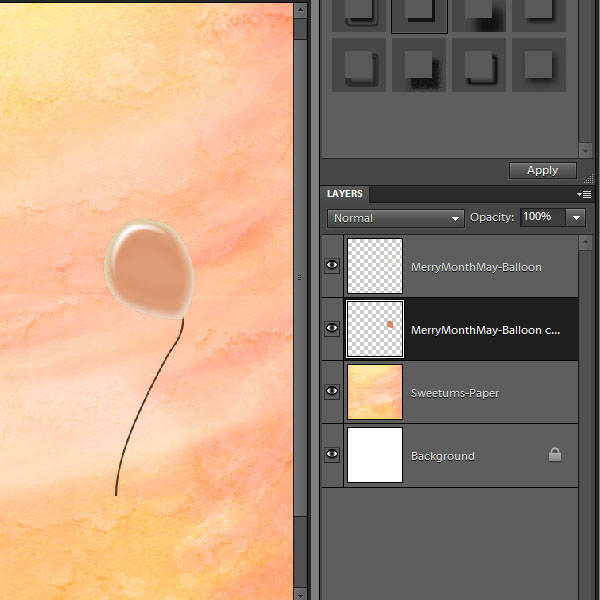
While holding down Control, click on the Balloon Copy thumbnail. You see marching ants around the balloon, confirming you have selected it.
Next go to the top Options bar and click on Edit > Fill Section > Foreground Color. Your balloon will now look like this:
While remaining on the Balloon Copy layer, use the keyboard shortcut “V” to select the move tool. Gently nudge the Balloon copy (which will be your shadow) into the position that you would like it to be. I have moved mine slightly to the right and down.
Go to the top Options Bar once more and click on Filter > Blur > Gaussian Blur. In the pop-up window, choose the amount of blur that looks good to you. I have chosen 10 pixels.
In the Layers palette, reduce the opacity of the shadow according to your taste. I have set the opacity of my shadow to 51%.
Now that we have your shadow looking good, let’s get rid of it in the translucent area! Click on the original balloon layer. While holding down the Control key, click on the thumbnail of the Balloon to select it.
Next click on the Balloon Copy layer, and hit Delete. This will remove the shadow from the translucent area of the balloon, but leave you a nice shadow outside the balloon.
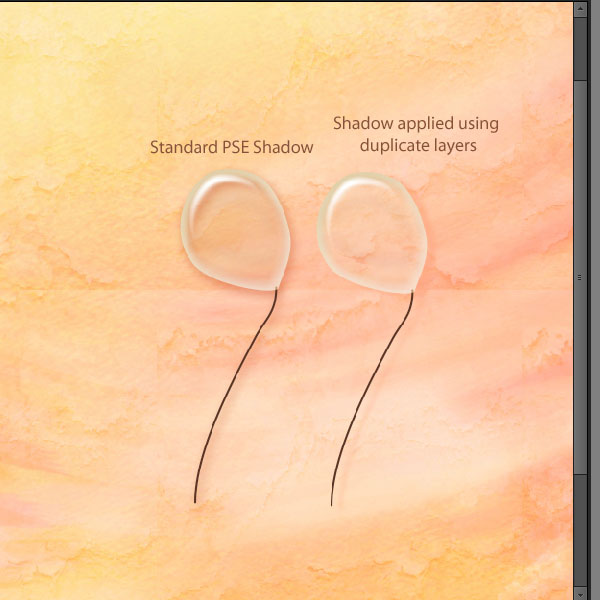
In the image below, you will see 2 shadowed balloons. The shadow on the left balloon was achieved by applying one of the shadows that comes with Photoshop Elements. The shadowing on the right balloon is the result of the technique that I have just demonstrated.
I hope you have enjoyed this tutorial and that you will find it helpful!


[…] Quick Tip #6 – Translucent Elements: How to add a Drop Shadow in Photoshop Elements – 1 freebie(s)? […]
awesome tutorial. i always wanted to know how to do this. thanks for sharing it.
I’m so glad you found it to be helpful! Thank you for letting me know.