The first time I heard the term “Smart Filters” I had been working in Photoshop for just a few days. My frustration level was rather high, and I remember thinking…”Oh, good! “Smart” filters! Hopefully they will make this learning curve a little easier!”
I’ve learned to love Smart Filters! Why? Because I change my mind…. a lot!
When a filter is applied to a Smart Object, that filter becomes “smart” too! That means that it becomes non-destructive. And THAT means I can change my mind just as much as I want! Let me show you what I mean.
To begin with, you must be working with a Smart Object. You can get a Smart Object in two ways:
1. Go to File > Open as Smart Object > then open the item that you wish to work with.
2. If you already have your item on your canvas, right click the layer that contains the element, and choose “Convert to Smart Object.”
Here’s of a screenshot of the first method:
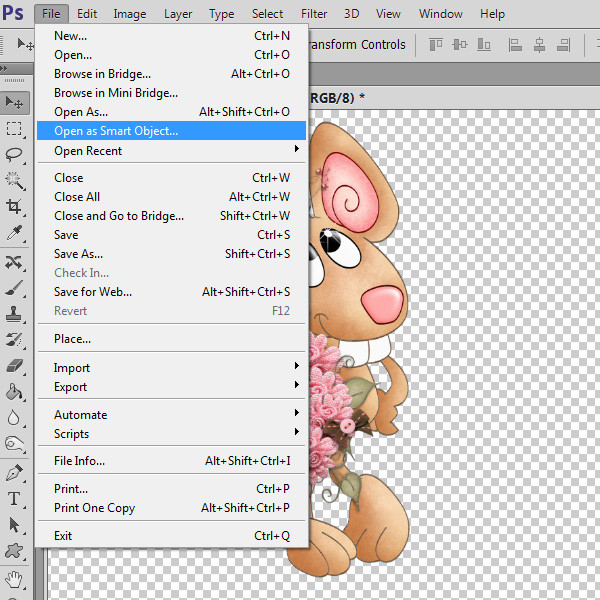
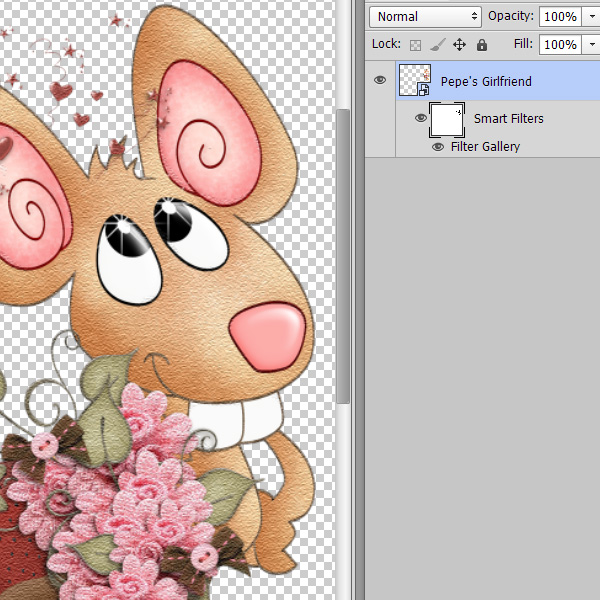
I have opened Pepe’s Girlfriend as a Smart Object, and she is now ready for me to play with. I would like to see what she looks like with a texture on her.
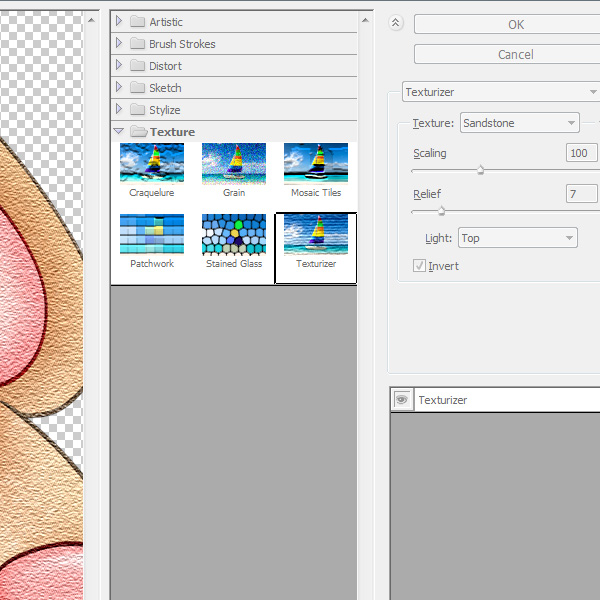
I apply the texture as I normally would: Filter > Filter Gallery > Texture > Texturizer. I chose a Sandstone Texture, just to see what it would look like, then clicked OK.
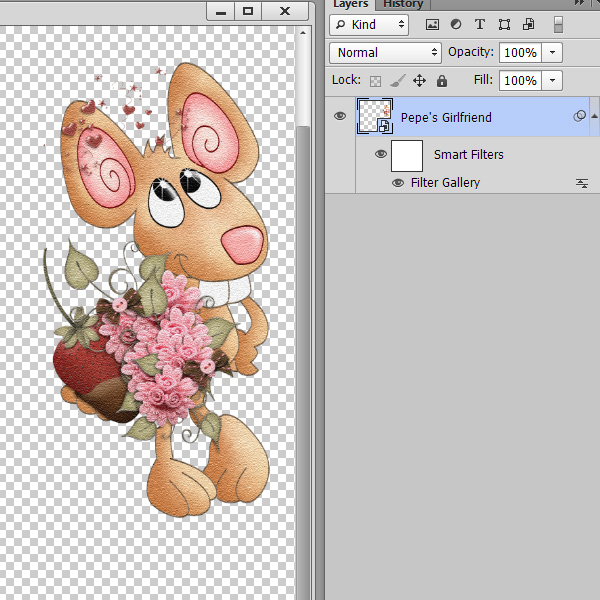
The Filter Gallery will close, and I will next see that the Smart Filter has been applied… as a Smart Filter! You will notice that the filter is underneath the layer, and is called……. “Smart Filters.” (I love it when Photoshop makes something easy for us!)
Typically when a filter is applied to an object, you are not able to adjust that filter. You are “stuck” with the choices you made in the Filter Gallery. But with Smart Filters, you can make changes!
Here are a few things that you are now very easily able to do:
1. Click on the eye icon next to “Filter Gallery” on your layer, and you will be able to see Before and After previews.
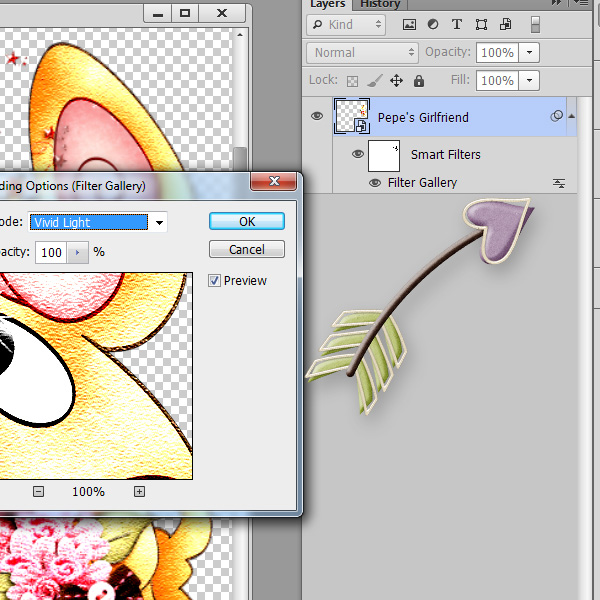
2. Click on the 2 little uploading arrowheads to the right of Filter Gallery (on the layer) and you can change blending options. Here is a Vivid Light blending mode. It looks terrible, but I wanted it to be dramatic, so you could easily see the change.
3. Click on the white box to activate it, and work with your object just as you would any mask.
I kind of liked the texture on Pepe’s Girlfriend, but I didn’t like it on her eyes, inner ears, teeth, or nose. So I just clicked on the mask, grabbed a soft brush, changed my foreground color to black, and erased the texture from those features.
If you find you don’t like a filter, you can simply drag it to the into the Trash at the bottom of the Layers Panel.
If you find you LOVE the filter you created, and want to apply it to another object, you can just drag the Smart Filter from one Smart Object to another. Now, THAT is smart!
So play around with Smart Filters, and see all the ways that you can make them work for you!
Credits: Pepe’s Girlfriend is from my Cheez the One kit. The texture applied to her in this tutorial is not on her image in the kit. It was applied here for demonstration purposes only. You will find Cheez the One on sale for a 30% savings thru February 14, 2013 in my SnickerdoodleDesigns shop.
The adorable purple and green arrow was created by Maurine (Let Me Scrapbook), and is included in our Featured Designer collaboration kit, “Love is in the Air.” (Release date February 1, 2013) Be sure to pop into the Featured Designer Challenge Thread on February 1st to see the adorable “Love is in the Air” mini kit that we have prepared for those who participate in the challenge!


[…] How smart ARE Smart Filters? – 1 freebie(s)? […]
Great Tut!!!! I probably should do more with Smart Filters … Thanks!!!
Wow—YOU MADE THAT SOOOO EASY, Karen! SMART SMART SMART-filters! TY very much. Love how they are non-destructive and how they can be so easily changed! WOW!
Thanks Karen, great tut!!
[…] my last blog post (How Smart ARE Smart Filters?), I confessed to the fact that it’s not uncommon for me to change my mind… a lot. […]
Thanks for the easy understanding of Smart Filters. I have been playing with them but didn’t even realize how easy it was to mask with them. Read about it but you made it easy to understand.
Awesome tip, never knew about this one…but I can see me using it heaps now. Thanks
Thanks for linking to this tut with the lens-flare filter tutorial. Sure simplifies using Photoshop’s filters.
[…] I asked her to create a layout for me with this tutorial in mind, so she did not include any light in the lantern. Perfect for our needs! Let’s add our own light using the Lens Flare Filter. But first, let’s convert the layout to a Smart Object. (Right click on the layer > Convert to Smart Object. Doing so will allow Photoshop to place the filter on it’s own layer, giving us the opportunity to adjust it if we like. For more about Smart Filters: How Smart ARE Smart Filters.) […]
[…] 2. Convert the image to a Smart Object by right-clicking on the layer in the Layers Panel and choosing “Convert to Smart Object.” This will enable us to add a filter as a Smart Filter, which will allow us to work in a non-destructive manner and also allow us flexibility. (How Smart ARE Smart Filters?) […]
[…] Right click on the duplicate and choose “Convert to Smart Object.” This will allow the filter to be applied as a Smart Filter so you can work non-destructively, and adjust the filter if you like. (How Smart are Smart Filters?) […]
[…] Right click on the duplicate and choose “Convert to Smart Object.” This will allow the filter to be applied as a Smart Filter so you can work non-destructively, and adjust the filter if you like. (How Smart are Smart Filters?) […]