A few weeks ago, one of our dear blog readers told us she was transitioning from Adobe Photoshop Elements to Adobe Photoshop and had a few questions. She wanted to know the best way to get paper(s) or element(s) onto her document, in order to begin creating her layouts. In addition, she asked how to keep paper(s) and element(s) from being renamed “layer 1,” layer 2,” and so forth when they were brought into her work space.
As with many tasks in Photoshop, there are several ways to accomplish one goal. So the “best” way is the way that you feel most comfortable with! Let’s look at a few of our choices.
One of the easiest ways to get a paper or element onto your work space is to head straight to the Menu Bar at the top Photoshop, then click on File > Open.
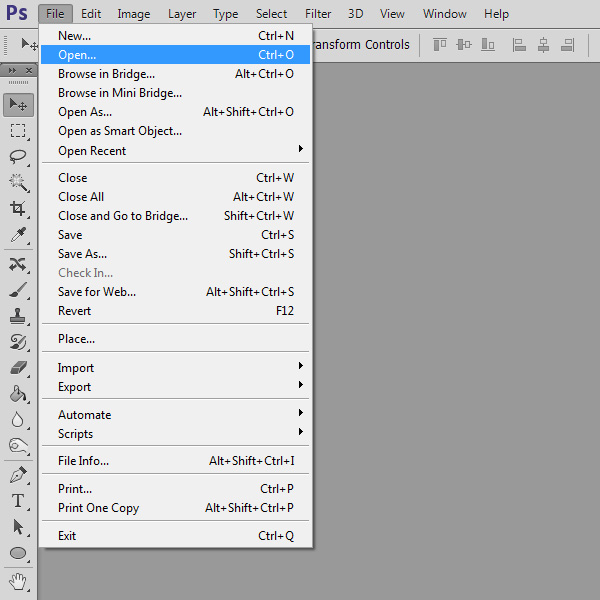
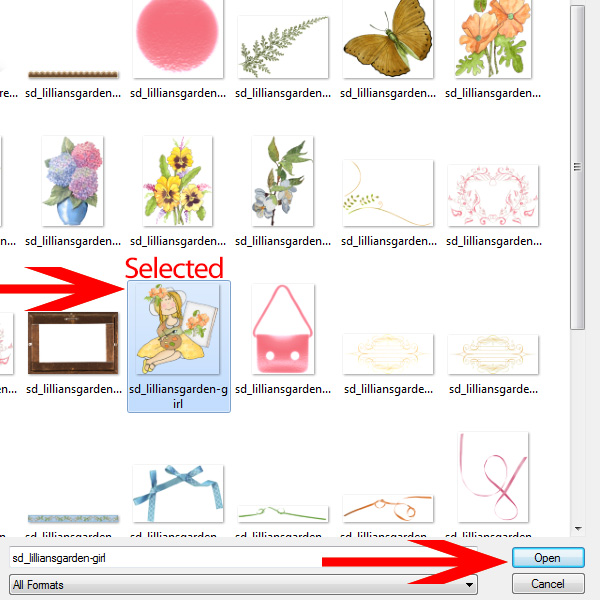
A window will open, showing you the documents and files you have on your computer. You will simply navigate to the item you want to use, click on it to select it, then click Open.
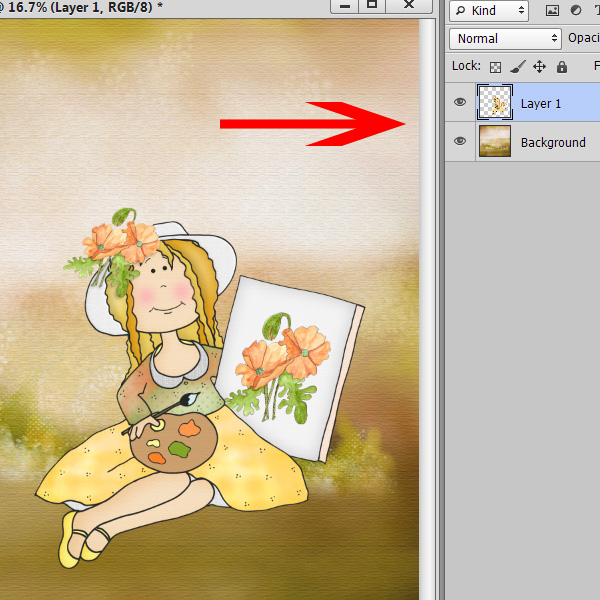
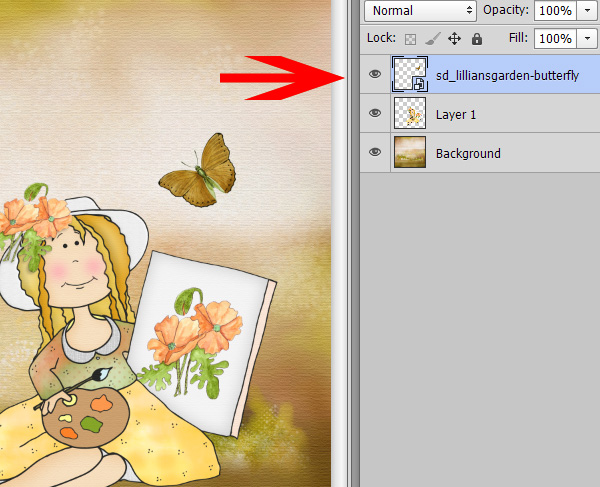
Here’s a little tip: If you want to open multiple items, click on the first item, then press and hold the Control key; click on the other items you want to open, release the Control key, and click Open. All the selected items will open in Photoshop! Using this method, the first item you place on a blank document will automatically be renamed “Background,” and subsequent items dragged onto the document will be renamed layer 1, layer 2, and so forth.
A second method of getting your files to your workspace is by clicking Control + O (the letter “O” not the number zero). This works in the same way as File > Open with one bonus! Control + O will open the very last folder that you were in. This is a great shortcut if you are working on a project and find yourself needing to return to the same folder multiple times.
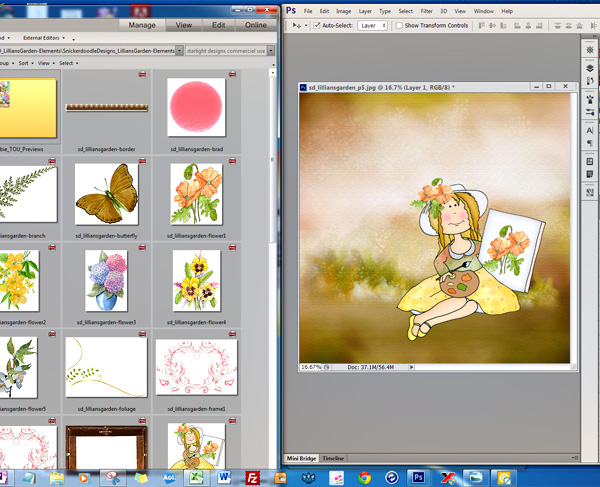
A third method is the Drag/Drop method. If you are working on multiple screens, this is very convenient. If you are working on one screen, you will just need to have two windows open. Here I have my kit folder open on the left of my screen and Photoshop open on the right. Then just click on the file that you want to use, and drag it from its folder onto the Photoshop workspace or document.
This is my favorite method. Not only because I just find it easier and faster, but also because…. when you drag/drop your files, they retain their original file names!
Another plus of this method is that the files are automatically converted to Smart Objects. We’ll talk about these another day, but they are a good thing!
A 4th method is to navigate to your files using Adobe Bridge or the Mini-Bridge in Photoshop. The blog reader who posted these questions stated that she was used to the Photo Bin in Photoshop Elements and missed it. Using the Mini-Bridge would be the method she might feel most comfortable with, because of it’s similar (and thus familiar) interface. With Bridge open, click on the Mini Bridge tab at the bottom left of your screen. This will open the Mini- Bridge in Photoshop, and you will be able to navigate to your working folder, and see the folder’s contents to the right. You may drag them up from the preview window to your document, just like in Photoshop Elements.
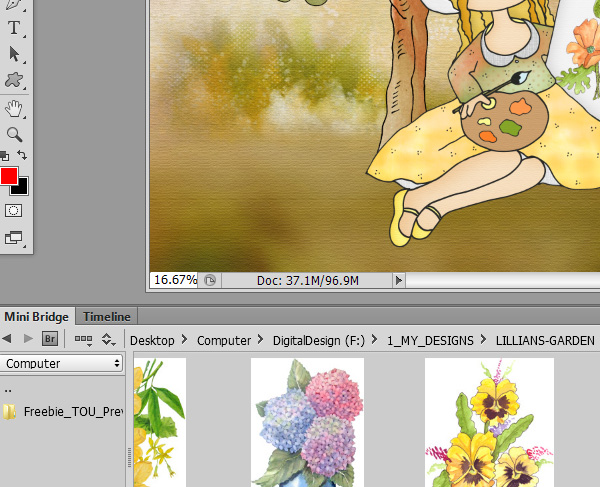
Using this method, the file that is brought into Photoshop will be converted to a Smart Object and will retain it’s original file name.
And finally, instead of heading to the Menu Bar and choosing File > Open, you may choose File > Place. Just as in the File > Open method, a window will open, which will let you navigate to the folder of your choice. Select your item, click on Place, and the item will be “placed” in your open Photoshop document as a Smart Object, without being renamed.
I hope this information has helped make the transition from Photoshop Elements to Photoshop easier for anyone who finds themselves facing that challenge!
Credits: The items shown in this tutorial are from SnickerdoodleDesigns new mini-kit, Lillian’s Garden.


Great tutorial!!! I’m with you on the drag and drop method … definitely the easiest way for me. Because you retain your file information, it makes it a lot easier when it comes time for credits!
Thanks for the nicely written reminders on opening documents in Photoshop. Since i started using the “Place” Method these other methods have slipped my mind.
the “Mini Bidge” method sounds like a good one to try agian using the second screen.
One way to open a document that I don’t see here is “Open Recent” which is really handy for the Progressive Scrap. “Open Recent” gives you a Fly Out List of the recent documents you have been working on. Making it easy to open your project each day without having to search for it. 😉
Yes! That is an awesome addition to this list! I totally forgot that one, and I can see how it would be very helpful when working on a Progressive Scrap. Thanks for adding it here!
[…] What is the best way to Open your files? – 1 freebie(s)? […]
Great Discussion! And I hope you know the easiest of all—just doubleclick in the (open) workspace, and that will take you to your directory’s file structure (like file>open) where you can pick out the file(s) you want. Many people don’t know that that’s “all there is to it” in shortcutting the Ctrl+O or the File>open commands.
Here’s MY very Fav when I am building a layout using a lot of papers and elements. from a designer’s kit. In Photoshop—File>Script>Load Files into a Stack>Browse>ctrl+Click to choose your files>Okay—and let the script run that loads them into layers in a single document for you. Reorder your layers, and resize the elements on their layers, and your layout is just about done!!!!! LOVE this PSCS feature. AND remember, it works too if you have already brought a bunch of stuff into the workspace! Just run the script and comand it to add open files just like you do if you are photomerging.
Thanks for these great ideas, Karen.
Oh my goodness! I did NOT know that, Priss (about the script)! That is awesome! Thank you for sharing your expertise!!!!!
Wonderful tutorials here and everyone adds something they know, great stuff.
[…] Several weeks ago, I answered a Studio Blog reader’s question about how to open files in Photoshop. In case you missed that, you can find it here: What is the best way to open your files? […]
Priss’ way is one I always forget! There is a ‘script’ you can download from SpeedScraps that will let you do much the same as the built-in script, but, it puts your open docs in one .PSD, then closes the docs. You are left with one .PSD with all of your docs/images centered. The script I refer to is “Copy/Close”. Check it out. Honestly, I have never used the built-in script for this, but, have used the SpeedScraps script a lot!