I like to be organized. I’m not always….. but when I am, it feels really good!
Adobe Photoshop offers a way for us to keep layers organized: Layer Groups. Here’s how they work:
This is a template, created by Toiny, for my Christmas Letter Challenge. (You must be signed into the Forum for this link to work. This Challenge is just one of the fun Christmas-in-July activities going on right now! Pop on over and join us!)
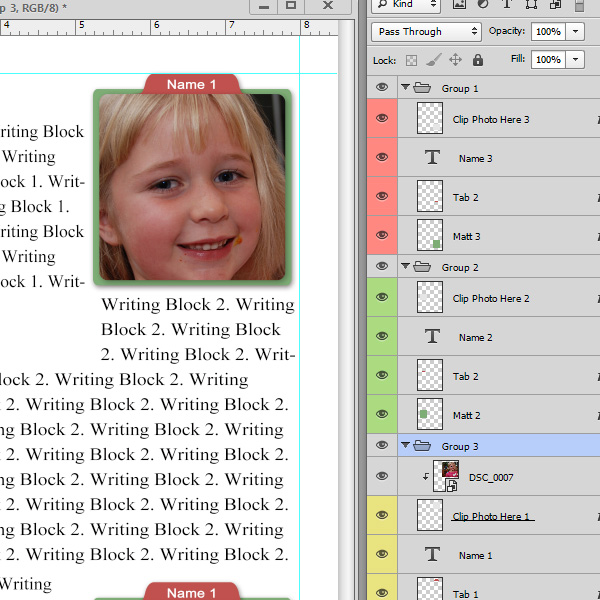
In the image above, you will see 3 Groups: Group 1, Group 2, and Group 3, each Group consisting of a mat, a tab, text, and a place to clip your photo.
In this template there are also journaling / text block layers. This template has multiple layers, and without Groups, we would be scrolling up and down through the layers to find what layer we want to work on. Here is how Groups can make our work easier for us!
It might help to think of a Group as a Folder. If you have lots of papers on your desk, your desk can appear messy and it can be hard to focus on what you are working on. Place the papers in a folder, close the folder, and your desk looks neat! The papers are still there. You can still access them by opening the folder. But the clutter is cleared away, making it easier to work. A group works the same way. You put your chosen layers into a Group, close the Group, and you’ve organized your Layers Palette, making it easier to focus on what is left to do.
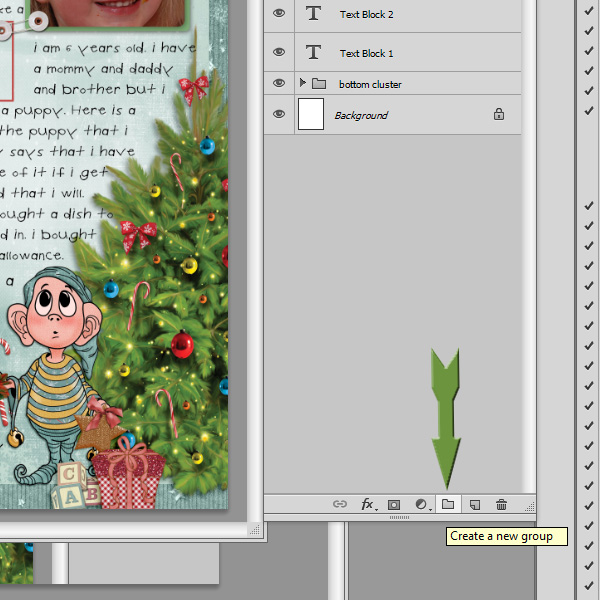
To create a new Group, click on the folder icon at the bottom of the Layers Panel: “Create a New Group.”
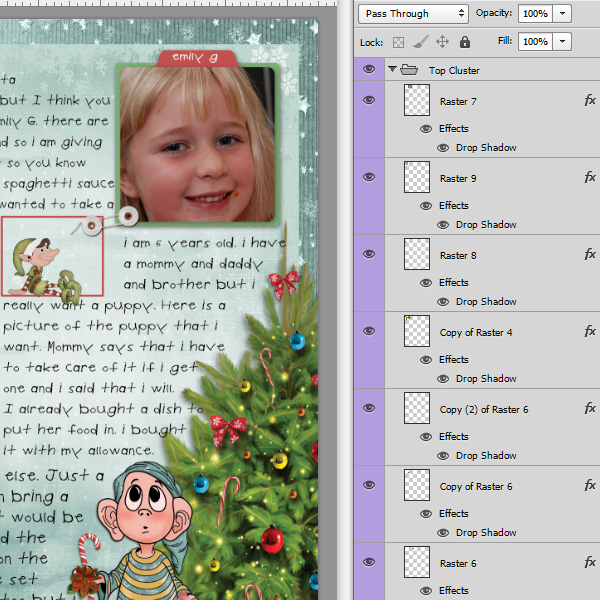
Next, drag the layers that you want to include in the group onto the folder icon of the group. This will nest the layers in that Group. In the image below you will see that I have created a Group which I named “Top Cluster” All of the layers below are nested in the Top Cluster Group. You can tell that the group is open because the Top Cluster folder looks open and because the arrow to the left of the folder is pointing downward.
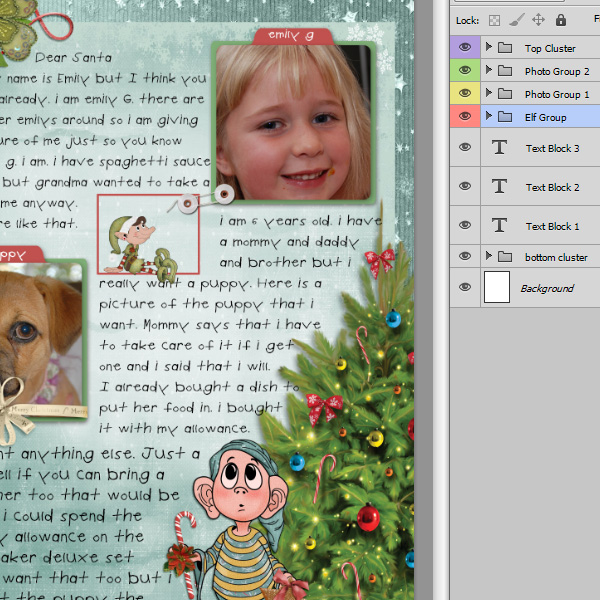
Once I was happy with the cluster, I clicked on the eyeball icon next to the Group name, to close the group. The image below shows my final layout, with all of my Groups closed. This made is very easy to find the text block layers and finish my layout with the journaling.
Here’s a timesaver tip: To quickly create a Layer Group, just hold down the Shift key, click the layers you want to include in the Group, then click the same Folder icon (as noted above). This will immediately group the selected layers, and close the Group.
Creating groups does not create the pretty colored labels. We’ll talk about how to do that next week!
If you want to see this entire layout and read Emily’s letter to Santa, meet me over at my Christmas Letter Challenge! This layout was created with Holiday Hoopla, a collaboration between SnickerdoodleDesigns and KimberKatt Scraps. Holiday Hoopla is currently on sale for 50%, along with other amazing Christmas kits by all of theStudio Designers, during our Christmas in July sale!


I’m always learning new stuff from you … NO idea about the shortcut to create a Layer Group … well, I do have my own shortcut, but that’s another story. Thanks for another great tut!!!
[…] week, we talked about Creating a Layer Group in Photoshop. Working with Layer Groups can help keep us […]