Unless you’ve been hiding away in some remote cabin without any internet access, you’ve read or seen the results of an action I released last month … the Paper Flower Action. I have been blown away with the response to what started out as a whim and all the excitement it’s generated. And, while there’s been so many positive things said about it, there have also been some problems that, fortunately, people have taken the time to ask me about.
The main problem is the fact that Photoshop does not always “Place” images in the exact center of the canvas. I don’t know why. You’d think the smart people over at Adobe could fix this … and they did have it right at one time, but not anymore. Unfortunately, I can’t control this within the scope of an action … or at least I haven’t figured out how to do it yet. It’s because of this, that I added the wording “Make sure the paper is centered …” into the directions just before you open the paper you’re going to use.
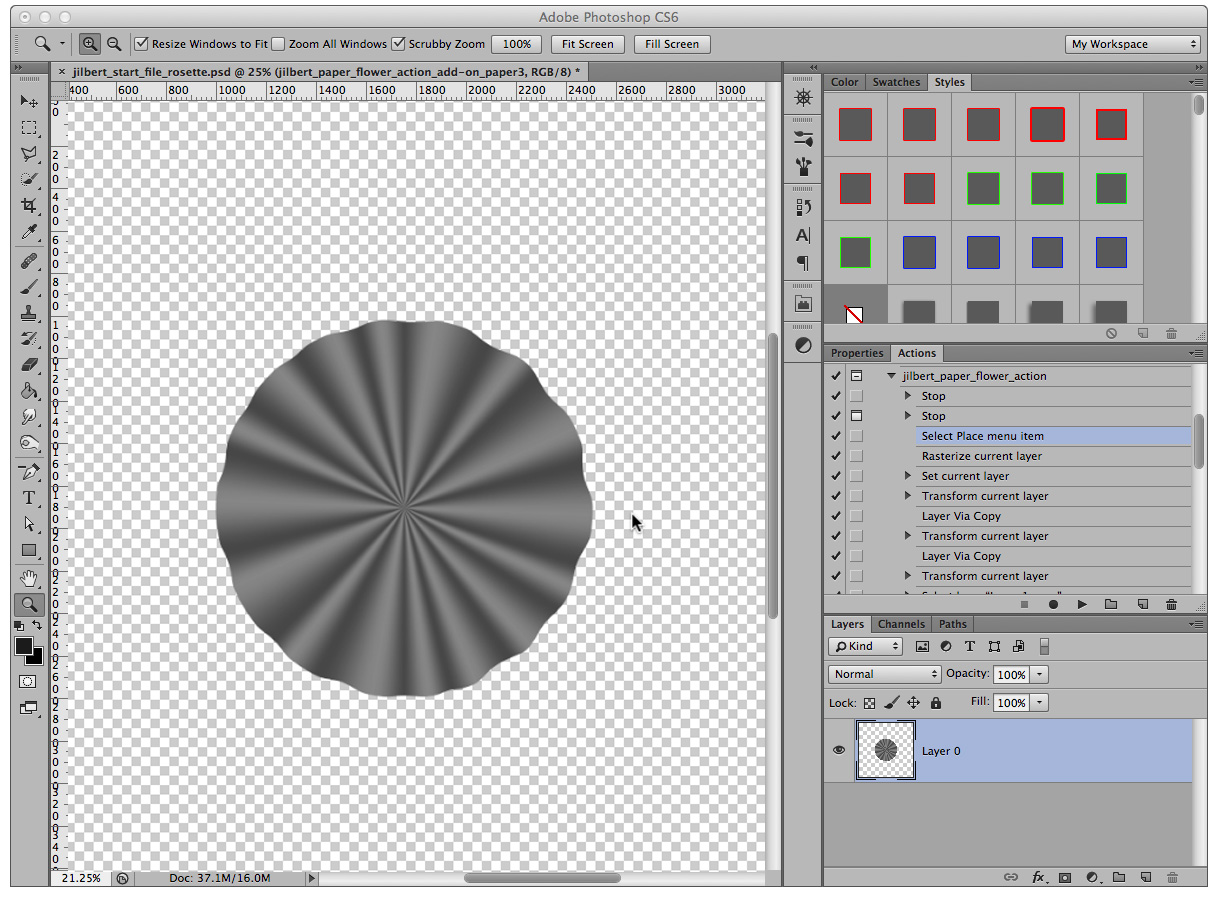
So when you first start off, you open the start file and, depending on your monitor resolution, it kind of looks like this. The reason for all the room around the flower is due to the filter I use to distort the paper that you are about to place on top of the start flower. The canvas is a typical full-size scrapbook page, which is 3600 pixels x 3600 pixels at 300 dpi (or 12 inches x 12 inches at 300 dpi).
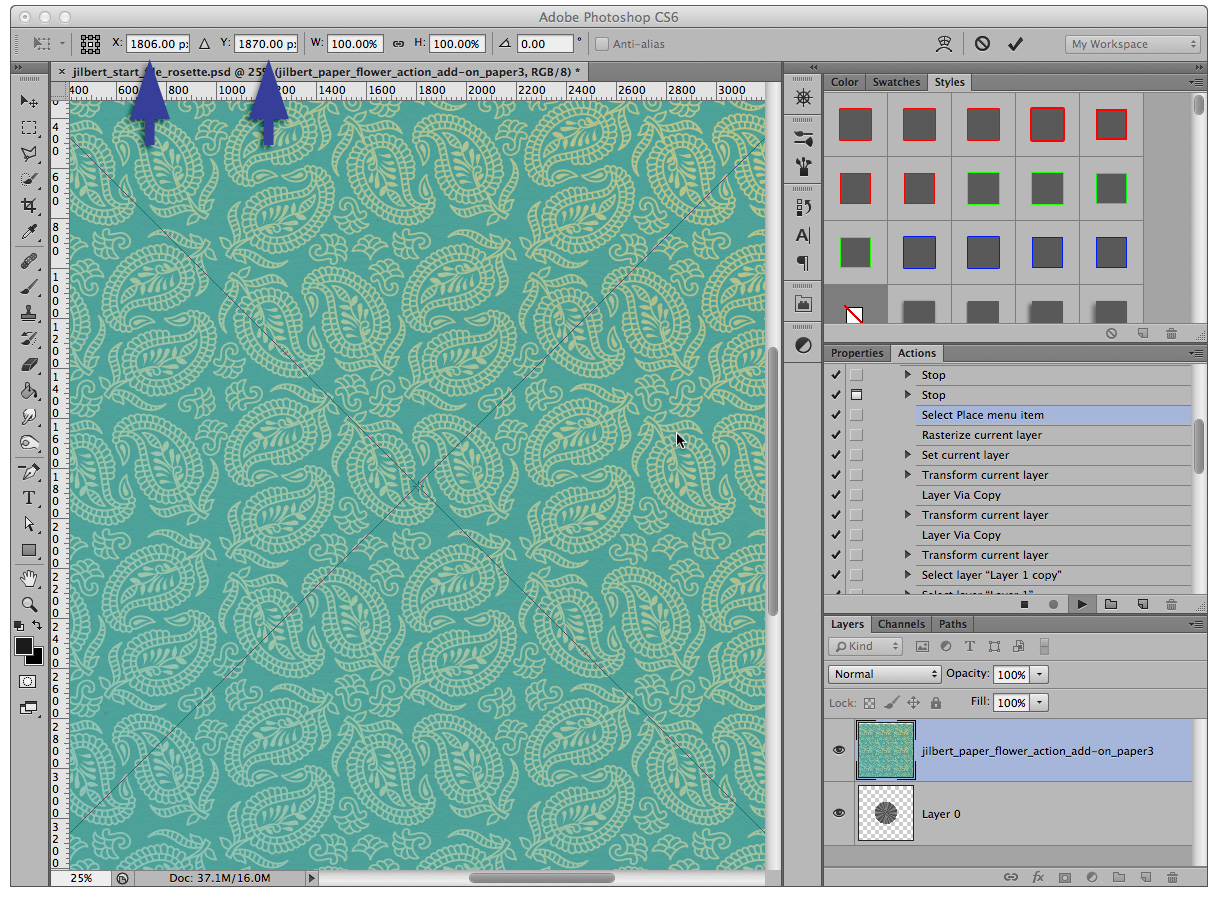
Then the action has you open your paper file, which then gets “Placed” on top of the start flower. As I noted, you need to make sure it’s centered which would mean x=1800 px and y=1800 px … but look … it’s no where near that! In all honesty, unless you look at the numbers in the tool bar, you may not even notice because it might only be a little bit off. However, you really need to get into the habit of looking and making sure the numbers are right. NOTE: Unless you have REALLY good eyesight, click on my images to enlarge them.
Why should you look at the numbers? Well, if it just a little off, no problem. However, I continued to run this action using the placement above and look what happened. Of course, to make things a bit more obvious, I had to unclip the paper.
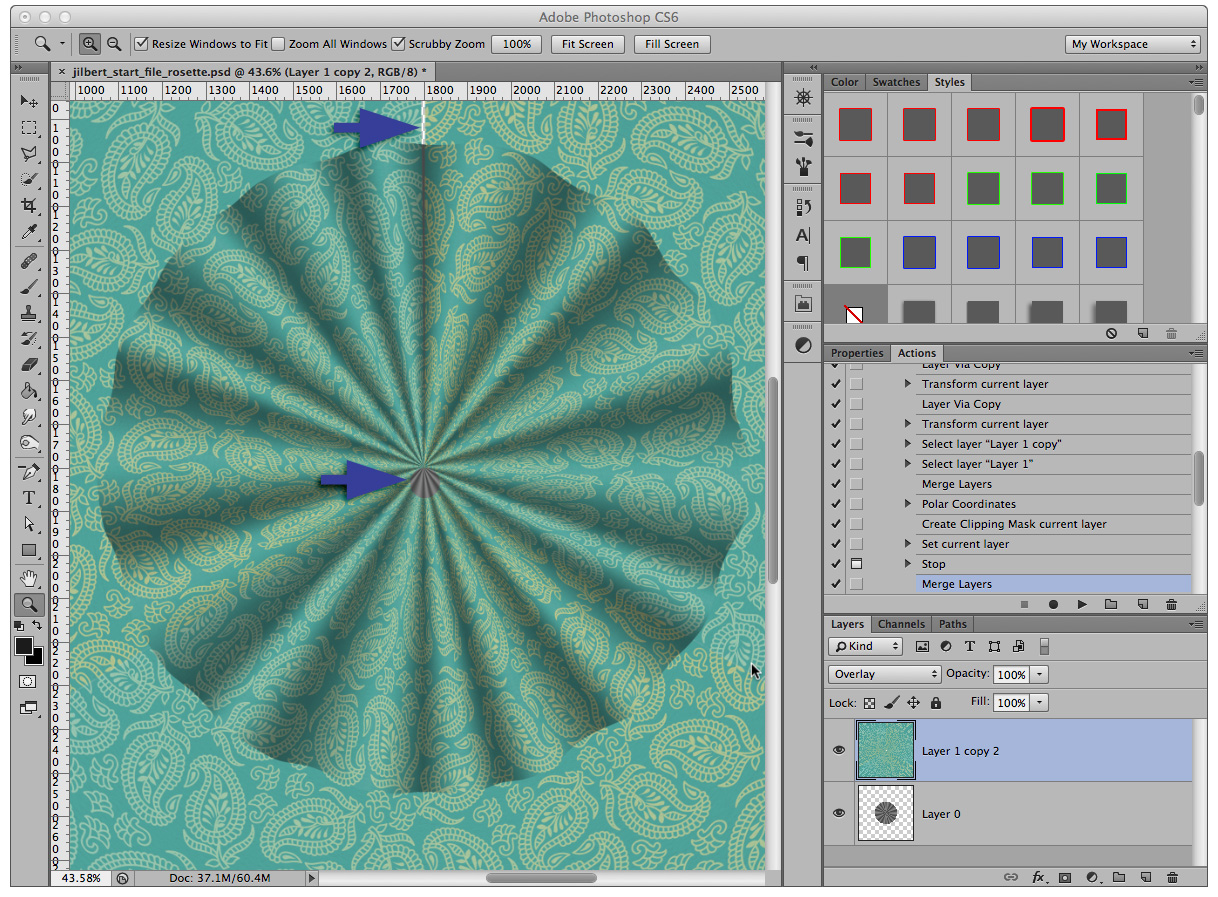
The arrows point out 2 problems. The paper has a gap at the top of the flower and there’s a hole (a little off center) in the middle. This has to do with the filter that I use to distort the paper and, so as not to make your head explode, I’ll not go into the details about it here. In many cases, other than looking weird, if you finish playing the action, the paper will get merged into the start flower and it will pass QC because my start flowers passed QC … but it won’t look right.
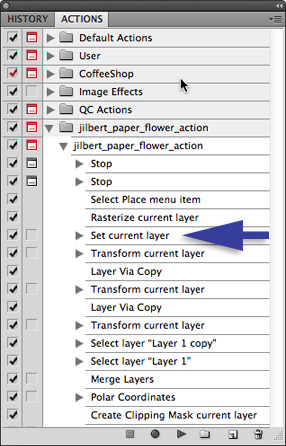
So, is there a way to avoid this? One is to make sure the paper is centered before you finalize its placement. The other way to do this is to open the paper before running the action and do a copy/paste from the paper file to the start file. Or do your own “Place” by holding down the shift key as you place the paper. But you will need to remember NOT to start the action at the beginning. Start things up where I show the arrow in the screenshot below. PLEASE NOTE: This does not apply to PSE versions 6-10. While I have PSE 6, I have yet to test all this out in that version. PLUS, your action was written specifically for the early versions and it’s actually a set of actions and it doesn’t look like the action pictured below.
Personally, while these other methods work, I find it easier to just look in the tool bar and check the position of my paper before I commit it (and this method WILL me work in PSE versions 6-10).
Questions? Comments? I’d love to hear them. I also plan on posting more details on my blog (warning … I’m talking about the kind of details that might make your head explode) — http://BitsOfBytes.jilbert.org — so be sure to keep an eye out if you’re interested.
*** Update ***
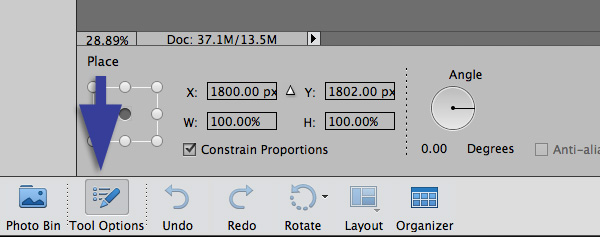
Seems Adobe decided to move the tool information for PSE 12 (maybe even earlier versions, but I only have PSE 6 and 12). You can get this information by selecting “Tool Options” from the bar in the lower left side of the window.


Hi Jill,
I have a Photoshop Elements question. I do not see the display that tells me where the “placed paper” is located. So I can not tell if it is centered. Is there a Preference that I need to have set to see this? I have PSE 12.
Thanks,
Steph
Hi Steph … Look down in the lower left corner of the window. There’s a bar down there that has “Photo Bin” and “Tool Options” …. Click on Tool Options and you should now be able to see what your dimensions and location are when you place something.
Thanks, Jill. I finally found it. I can only see this info when the “Place” command is being used. I thought it was available any time you were adding an object to the canvas.
I am having so much fun making layered flowers! Things are working much better now that I know about the image and canvas size requirements and the need for the center placement of the paper.
Thanks so much for this — I never knew this (and didn’t know either where to find those numbers!) and did wonder why some of my flowers had that line down the middle & others didn’t! (Now for the next tute, could you do one on making flowers from sheer lace????) 😉
LOL!!! You know not what you ask … 😉
There are a number of issues in creating a lace flower this way and the main problem is the semi-transparent seam that Photoshop insists on creating.
Well I’d be REALLY happy if I could make one like the one in Karen’s recent tute on shadowing the lace in the flower… 😉
Oh — and what’s this about the “new product” (lace flower related?) that’s coming out this week????? WHEN????? (like I need to be sitting at my computer with my finger on the “add to cart” button…. 😉 )
Jill, I might know what’s going on with the “place” command in your action. I have written a lot of automation actions for myself that have used the place command and I believe it places it on pixel location related to the zoom you are in. So if you recorded the action with your canvas zoomed in, it will not work the same if the canvas is zoomed out — or vice versa. It seems like it should work on exact pixel location relative to the canvas but it doesn’t seem to. Worth looking into maybe~
You’re right … it’s very much a zoom factor. But it doesn’t matter what zoom level you’re at, it won’t consistently place in the center of the canvas.
I actually had someone try this who runs CS2 and they didn’t have this problem even when they were zoomed way in. So somewhere along the way, Adobe decided to make a change and broke the Place command.