Two weeks ago, we looked at Creating a Custom Color Palette, and then last week, we looked at how to use that Color Palette to easily recolor an object in Photoshop and Photoshop Elements. Today let’s look at one way of Selective Recoloring.
For the purposes of this tutorial, I am using Photoshop CS6.
Here is a layout that Diane (scrappygal) created using one of her photographs, a grungy border from Jilbert’s Bits of Bytes (Transparent Overlays – Grungy Borders 4) and an overlay from my Newsprint Overlays Set 3. (For tips and examples of how to use these new Newsprint Overlays, visit SnickerdoodleDesigns blog.)
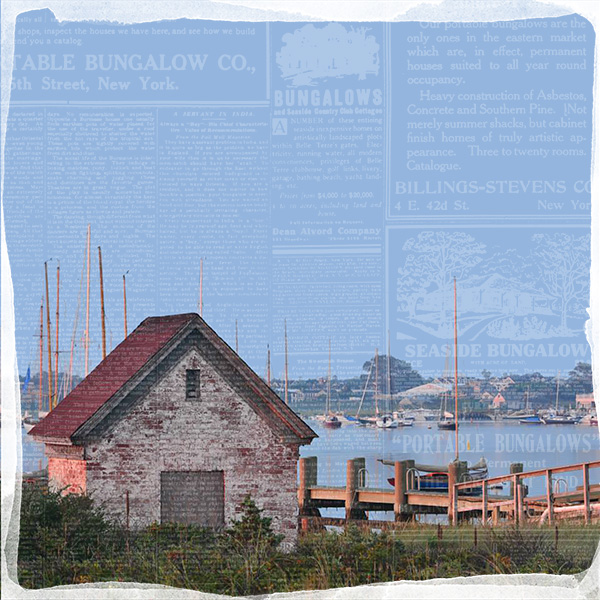
I really love this layout just as it is, but let’s look at how we could make some hue/saturation adjustments, on select colors only, if we wanted to.
To begin, let’s make a duplicate of our photograph. This will allow us to make color adjustments non-destructively. Next, let’s add a Hue/Saturation Adjustment layer over the duplicated photo. We can do this is one of two ways: (1) click on the Hue/Saturation Adjustment icon in the Adjustments Panel, (2) go to the top menu bar > Layer > New Adjustment Layer > Hue/Saturation. ( See last week’s tutorial, How to easily recolor an object in Photoshop and Photoshop Elements for a visual reference, if you would like one.)
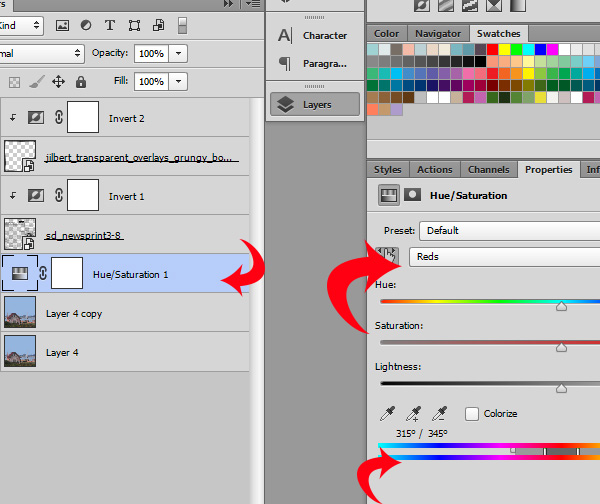
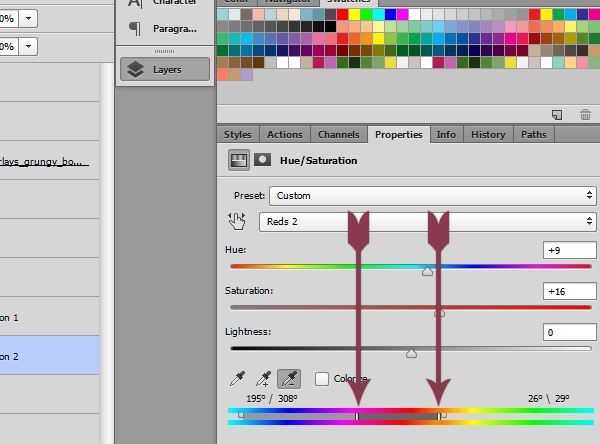
In the image below, in the Layers Panel, you will see (starting from the bottom, going up), Diane’s original photo, a duplicate of the photo, the Hue/Saturation Adjustment layer, a Newsprint Overlay, with an Invert Adjustment clipped to it, and Jilbert’s Border, with an Invert Adjustment clipped to it.
Once you add a Hue/Saturation Adjustment, the Hue/Saturation dialogue box will open, which is what you see on the right in the image below. Click on the pointy-finger icon to make the Color Picker active. Your cursor will change to the Eyedropper tool. Move the eyedropper over your photograph and select the color that you would like to change. I am going to click on the red color in the roof, as I would like to make some changes to that.
When I click on the red in the roof, the color slider at the bottom of the Hue/Saturation Panel will move to the color range that I have chosen.
Next, I just need to move the Saturation slider a little to the right to increase the saturation of the red color that I selected.
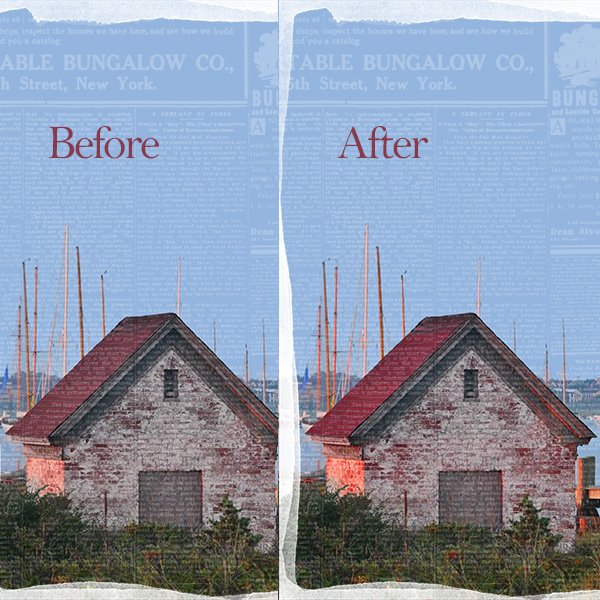
If I wanted to change the red to a different color entirely, I would just need to move the Hue slider to the right or left, until I found the color I wanted.
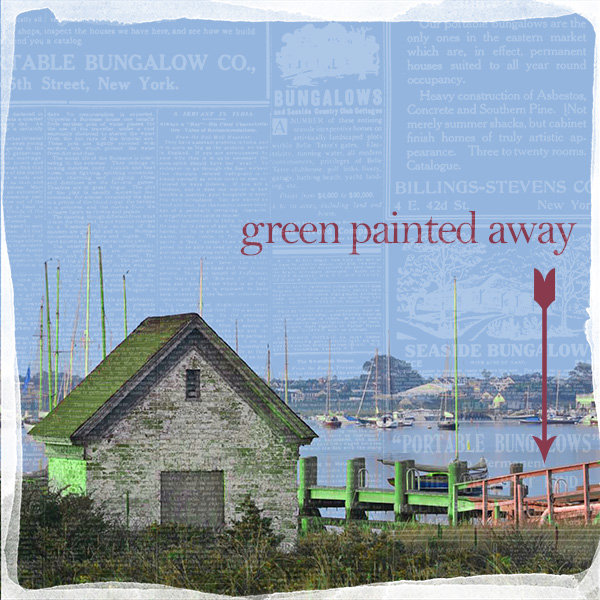
Here I have changed the roof to a green color, just for demonstration purposes. You will see that some of the red in the pier posts and railing was also picked up and changed. If you really wanted the roof green, you could just click on the mask, and using a soft-edged brush, paint away the green color that you didn’t want in other places.
If you would like to alter another color in the photo, just add a 2nd Hue/Saturation Adjustment layer to the photograph and follow the same procedures.
Another tip: if you have selected a color, but want the color range to be a little wider or smaller than is automatically selected for you in the Hue/Saturation dialogue box, you can adjust the sliders manually to choose more or less color – just click on the dividers and drag to the right or left as you wish.
So make your selection, play with the sliders… and have fun!
Special Thanks to SuCanDo for providing the Photoshop Elements Path for us to accomplish selective recoloring in Photoshop Elements! She says:
“You can do this in elements 11 …. here’s how: enhance …. adjust colour ….. replace color …. eye drop into the color you want to replace …. then move the sliders … to get the red brighter slide the saturation arrow to the right …. different path … same result.”


Very good! I did not know you could slide the bottom color indicator like in the last image. Would that, by any chance, work for selecting the different tints and shades? I have to go try.
When I create a color palette, I am lost when it comes to creating the lighter tints and/or darker shades of the selected colors. I know how to lower the Saturation and the Lightness, but, I have heard people talk about setting up the colors with the dark and light variations of each added to extend the coloring. Maybe another lesson?
Thank you! I look so forward to your tutorials!
Su
Thanks for the tutorial idea, Su. Look for it next week! And thank you for the thank you! 😉 LOL!
[…] Selective recoloring in Photoshop – 1 freebie(s)? […]
You can do this in elements 11 …. here’s how: enhance …. adjust colour ….. replace colour …. eye drop into the colour you want to replace …. then move the sliders … to get the red brighter slide the saturation arrow to the right …. different path … same result
[…] Selective Recoloring in Photoshop […]