The past few weeks, we have been focusing on “color,” in Photoshop and Photoshop Elements. In case you have missed any posts, here is a quick reference for you:
Creating a Custom Color Palette in Photoshop and Photoshop Elements
How to Easily Recolor an Object in Photoshop and Photoshop Elements
Selective Recoloring in Photoshop
Today, let’s take a look at creating color variations.
So just what IS the difference between a Hue, a Tint, a Shade, and a Tone? Basically, Hue and Color refer to the same thing, and refer to the colors in the Basic Color Wheel.
- Tinting is adding white to a Basic Color.
- Shading is adding black to a Basic Color.
- Toning is adding gray to a Basic Color
(For a more complete explanation, a great reference is “What’s the Difference between a Hue, Tint, Shade, and Tone?” at Color Wheel Artist.)
As designers and layout artists, many times we want to work with different variations of the same color. Last week Su Hall asked a great question:
“When I create a color palette, I am lost when it comes to creating the lighter tints and/or darker shades of the selected colors. I know how to lower the Saturation and the Lightness, but, I have heard people talk about setting up the colors with the dark and light variations of each added to extend the coloring. Maybe another lesson?”
This is very easy to do in both Photoshop and Photoshop Elements. Let’s take a look at Photoshop first.
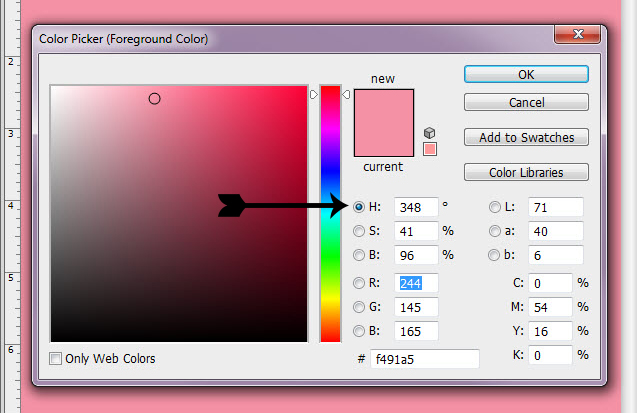
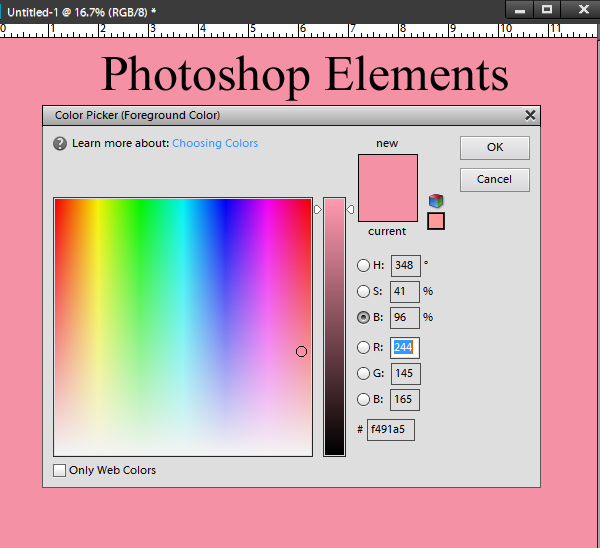
In the image above, I clicked on my Foreground color to open the Color Picker. There are several options here. There are 2 rows of letters. The left row offers us the opportunity to make specific choices regarding:
H = Hue
S = Saturation
B = Brightness
R = Red
G = Green
B = Blue
We also can enter a specific Hex Code, in the box at the bottom of that list.
On the right, we also have options.
L = Luminance
a = how much red or green is in the color
b – how much blue or yellow is in the color
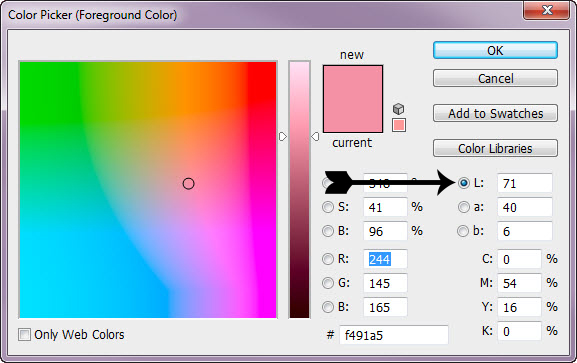
We adjust the lightness or darkness of a color by adjusting the luminance. Once we tick the Luminance Button, notice the difference in the color slider ( skinny bar of color) in the middle of the Color picker. When we had the “H” (Hue) button ticked, all of the colors in the Color Wheel were visible. When we ticked the Luminance button, we have ONLY the color variations of our chosen color. If we grab the little pointy arrows that are on the right and left of the color slider, we can move them up and down to choose a lighter color or a darker color – but the purity of the original chosen color will remain the same. No other colors will be introduced, as often happens when we grab the circle in the large square and try to choose a lighter or darker color.
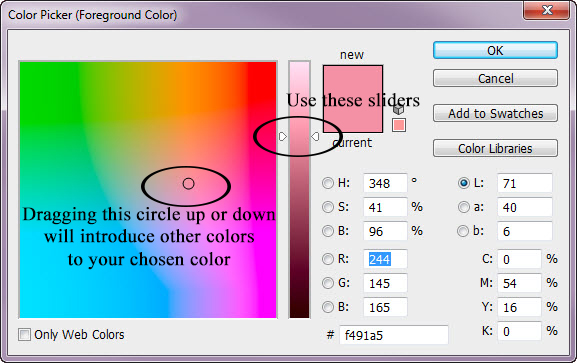
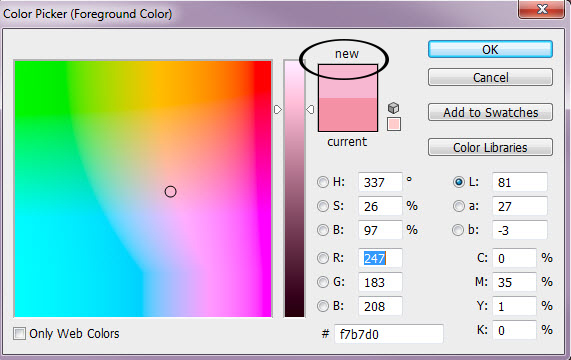
So to get back to Su’s question, to choose variations of the same color, all we need to do is slide the arrows up and down the color bar. As we move the slider, the new color will appear at the top of the “new/current” color box. We can either do this every time we want a color variation, or we can choose as many variations as we like and add them to our Color Swatch Panel to have them readily available for our entire project. (Next week we will look at how to add colors to the Color Swatch Panel.)
(Interested in reading more about Color Luminance? Here is a great article: Color Luminance.)
In Photoshop Elements, we can choose color variations by adjusting the Brightness values.
I hope this answers your question, Su Hall.
I appreciate hearing what YOU want to learn and always welcome your questions and/or suggestions!
Special Note: Thanks to SuCanDo for letting us all know about Selective Recoloring in Photoshop Elements. Please read her comments in Selecting Recoloring in Photoshop, or the amended post itself, for the information she has provided.


[…] Creating Color Variations in Photoshop and Photoshop Elements – 1 freebie(s)? […]
Oh! That is something totally new to me! I don’t think I even noticed the Luminance before!
I used to pull up my color, then, I would move the numbers for Saturation and Brightness either up or down to get my different levels of that color. But, they never really looked right.
This is fantastic! I have wondered about this for at least 5 years and have even asked some others. They never really gave me any instruction, just that they select a lighter and darker shade of each color.
I thank you for answering my question so soon and so perfectly! I would have acknowledged sooner, but, I had a sick grandchild all week! LOL
Hugs,
Su
Thank you so much – you are a Star and a Legend!