Are there times when you need to resize multiple layouts to meet particular specifications? As a designer, perhaps you need to resize Creative Team layouts or images for blog posts? As a Creative Team Member perhaps you need to resize your work for forums? As a personal scrapbook artist, do you need to resize your work to upload to print sites? These are just a few instances where you might wish for a way to resize quickly and efficiently. There is good news! Adobe has provided a way for us to do this in both Photoshop and Photoshop Elements. Let’s take a look at that process today; but before we get started, here’s some news I hope will be helpful for you.
Going forward, you will be able to download a PDF of our tutorials so that you can keep them on your own computer for easy reference. You will also be able to watch the tutorial on YouTube, which will be helpful for visual learners (like me!). Links will be at the bottom of each post. We hope that you will find this helpful!
For today’s tutorial, I am using Creative Cloud 2014. I tested this in CC2014 and Photoshop Elements 13. Please check your own software version to see how this works for you.
Let’s look at Photoshop first:
1. Follow this path: File > Scripts > Image Processor
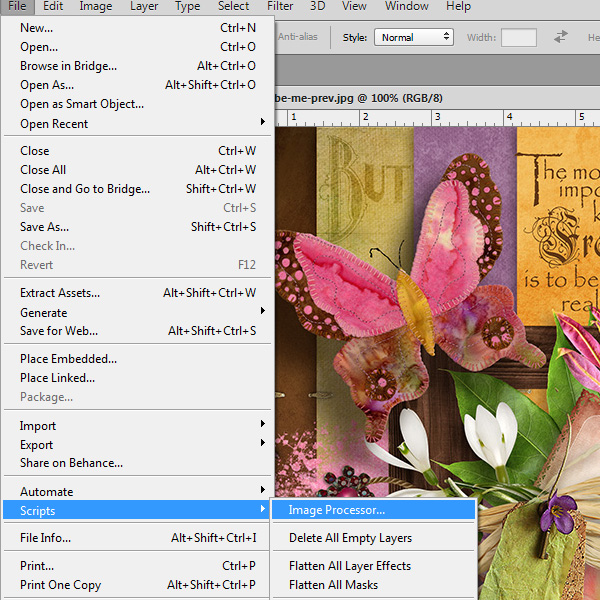
Here is a screen capture of what the Image Processor looks like:
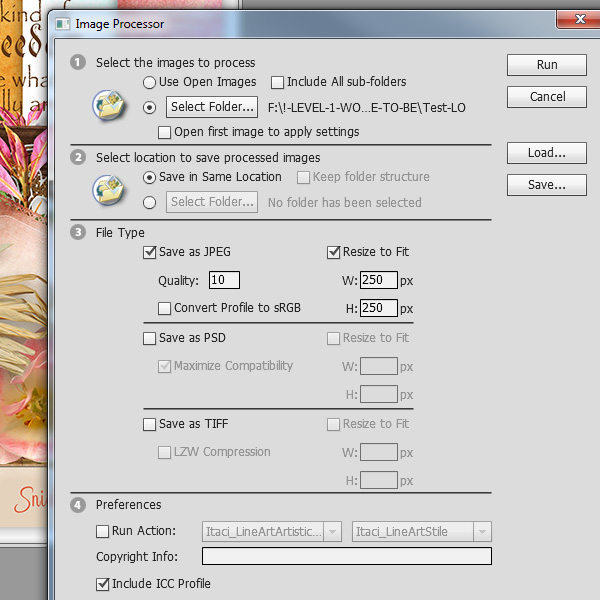
2. Select the folder that contains the images you wish to resize.
3. Choose the location where you wish to save the resized images.
4. Choose the size and type of file you would like your resized images to be.
5. You may also choose to run an action on the images if you like. For simple resizing, I leave this unchecked.
6. Click RUN and Photoshop does the work for you!
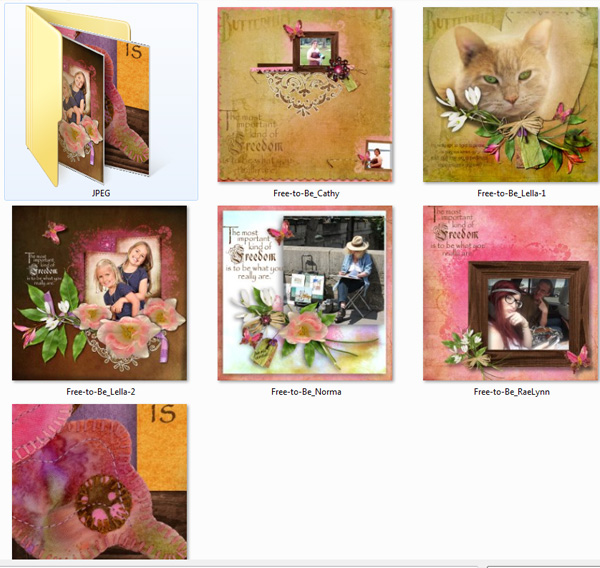
I usually choose to have my resized images placed in my original folder. Photoshop will put the resized images in a folder that it names JPEG. This is what that looks like: (resized images in JPEG folder, in addition to the original images).
In Photoshop Elements, there are just a few differences to note:
1. The path to locate this option is: File > Process Multiple Files.
2. You have the option to rename files if you wish in the “File Naming” section.
3. Image Size: If “Constrain Proportions” is checked, you need only enter the width or height.
4. You can add Quick Fixes (similar to running Actions in Photoshop), and you can also add Labels.
Important Note for Photoshop Elements users: Photoshop Elements will REWRITE over your images if you choose to save the images in the original folder. Unless you want your original images resized permanently, choose to save the resized images in a different location.
And that’s how easy it is! I hope you have found this tutorial helpful!
Credit: The layouts shown in this tutorial are from my creative team, using “Free to Be,” a SnickerdoodleDesigns mini-kit.
Download this tutorial in PDF format.
Watch this tutorial on YouTube.
See you next week!


Thank you, thank you, thank you for the PDF download option!! I do keep the tutorials to refer to later, and the PDF is perfect for that!!
As further feedback – I VERY much prefer being able to read/re-read a tutorial. I can quickly scan it to find what I need to refer to. If a tutorial is offered only as a video, I almost always skip it. It takes longer to watch the video; I feel like I need to take notes in order to not have to watch it again – it just becomes too much trouble. So I vote for PDF’s!! I love your tutorials, and would be sad if they were only available as videos. I think it’s wonderful that you are offering a choice!!
Thank you Karen for the video and PDF; that makes for a very valuable resource!
Fantastic! I love the .PDF idea, as well as, the YouTube video, too! I watched the video, so, the .PDF is sort of a synopsis! Love it!
I don’t use the Script feature very often, but, they can sure save a lot of time! There is a site, SpeedScraps that offers several FREE scripts to perform certain features one might typically accomplish with scripts – bulk work, so to speak. It sounds scary at first, but, it is nothing more that plugging the pertinent information into the proper place!
I forgot to say, THANK YOU!! LOL