Last week we took a very quick look at the Puppet Warp tool in Photoshop. (Do you Use Puppet Warp?) You asked for a more in-depth study of this tool, so let’s look at all of its features today.
As a quick review: Puppet Warp was introduced into Photoshop in the CS5 version. It is not available in prior versions, nor is it available in Photoshop Elements. I am using CC2015. The paths I mention will be similar, if not exactly the same, as in CS5 and CS6.
1. To find Puppet Warp go to the top menu bar: Edit > Puppet Warp
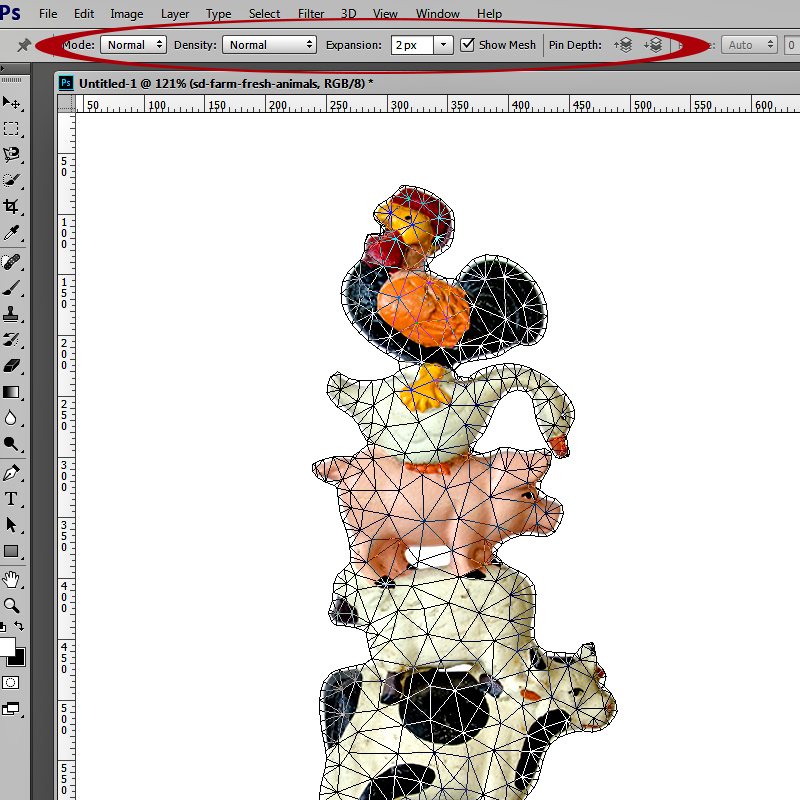
2. When you select Puppet Warp, a mesh is placed over the object on your active layer. Options are available in the Options Bar:
- Mode: Click on the down-pointing arrow to choose either: Rigid, Normal, or Distort. I typically leave this set to the default of Normal; but play with the options, as you can get some pretty fun results (especially with Distort.)
- Density: Click on the down-pointing arrow to choose either: Fewer Points, Normal, More Points. The default is Normal. I usually leave this set to Normal as well.
- Expansion: This indicates the pixel size of the mesh from the edge of the subject. The default is 2 px. I usually change this to 0 px for a tight fit.
- Mesh: You can check or uncheck this box, depending on whether or not you would like to see the mesh or not.
We’ll look at Pin Depth later in this tutorial.
Although it’s good to understand what all of your options are, leaving them all set to their default state usually works just fine.
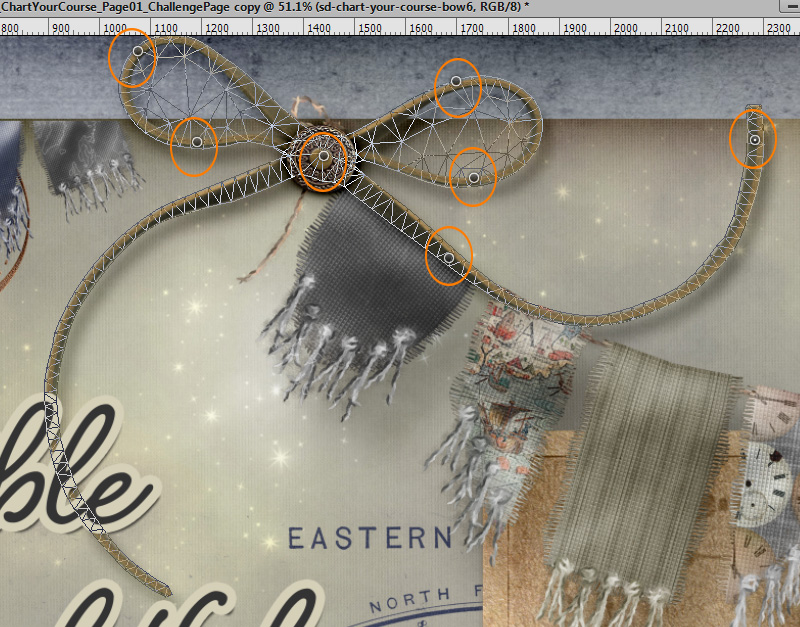
- Refresher from last week: When you move your cursor over your document, it will turn into the image of a “push pin.” click down on any part of your image that you want to remain stationary. Click and drag any part of the image you would like to make an adjustment to. In last week’s tutorial we moved the left tail end of the bow, scooting it over to the right a bit. Once we had made the move, we clicked on the check mark in the options bar to commit our change.
Here are a few more things you need to know about Puppet Warp in order to use it effectively. When you place a pin (anchor point), the image rotates around that pin.
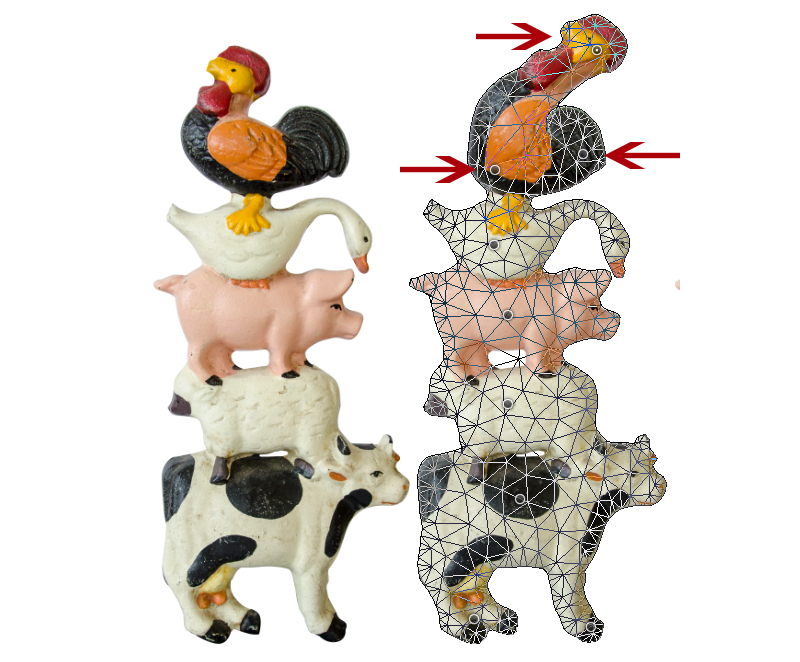
The first image below is the original. I would like to have the rooster looking upward. I placed pins throughout the middle of the entire image to keep the other animals in place. I placed a pin on the roosters tail, his wing, and than on his head. I moved the head pin to the right. I have greatly exaggerated the movement, so you can see how the pixels are rotating from the pin on the wing. (There is also a slight movement on the tail. If I had placed more pins around the lower part of the body, near the tail, we wouldn’t have had any tail movement.)
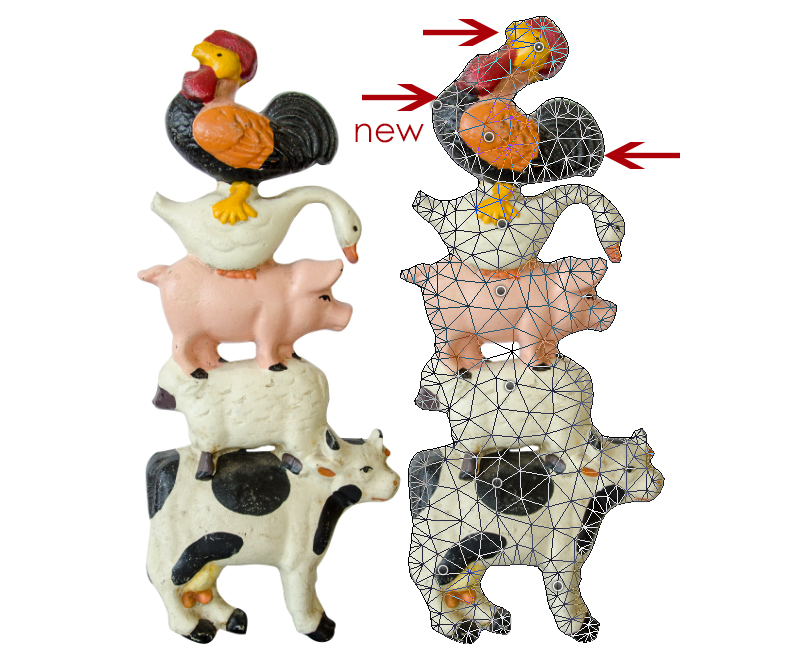
I used Control + Z to undo the changes I had made to the rooster. I next placed pins right where I had them before, but in addition placed a pin on the roosters neck. This time when I clicked on the pin on the top of his head, the pixels were rotated from the new anchor point (neck), creating a better look (and, of course, I didn’t exaggerate this movement). However, it’s still not great looking. Pixels can get distorted easily if you don’t have enough pins placed, or don’t have them placed accurately to get the movement that you want. With a more precise movement of the cursor, it IS possible to get a better result with this particular pin placement; but there’s also an easier way.
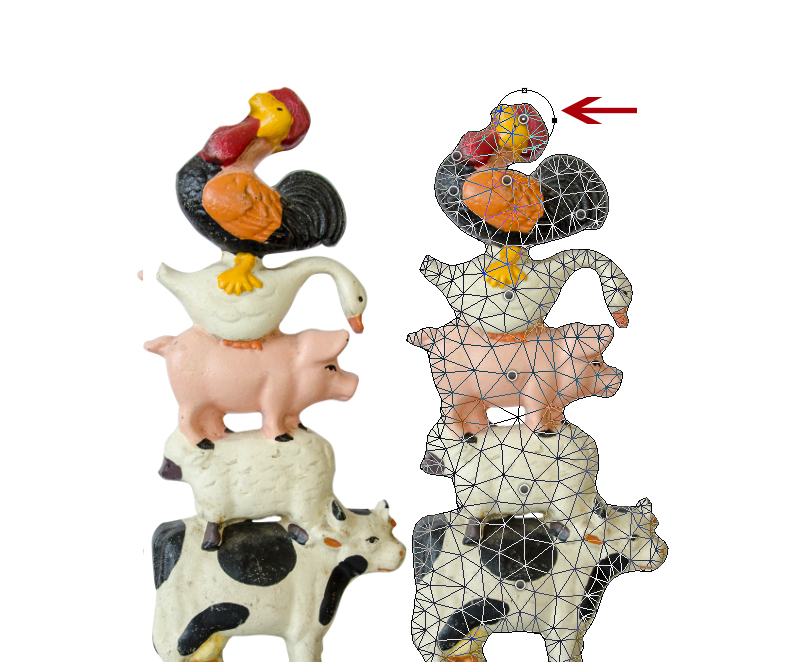
Once again, I have placed the pins on the rooster on his body, neck and head. With the head pin active (you can tell it’s active by the little white dot in the middle of the pin), click on Alt, and a circle will surround your pin. Place your cursor near the circle, and a curved double-ended arrow will appear. Move your cursor in the direction that you would like your pixels to move. The pixels will move from that anchor point (head), rather than a neighboring one (neck)).
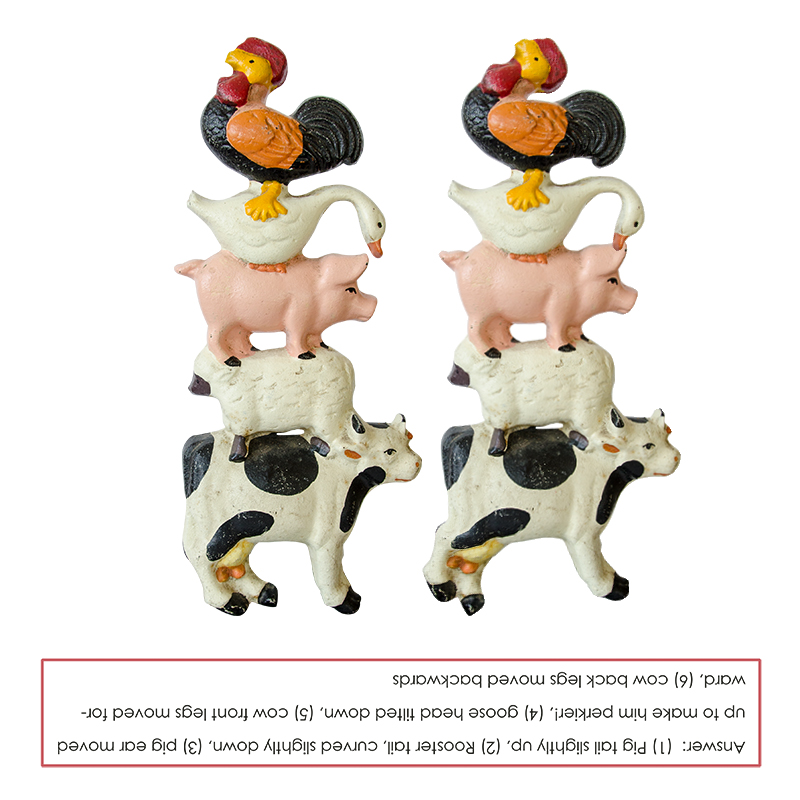
Using this method, I have made a few slight changes (with no distortions!) to the animals. Can you tell what they are? The original piece is on the left; the altered one on the right.
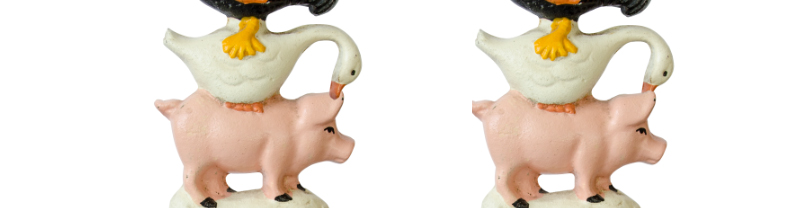
But, oh, dear… now we have the goose’s beak in front of the pigs ear. What if we want it behind the ear? We’ve already clicked on the check mark in the options bar to commit our changes, and the mesh has been removed? Not a problem. Puppet Warp changes are applied as Smart Filters, so we can always adjust them as needed. Click on Edit > Puppet Warp to bring back the mesh on your image.
Remember I said we would come back to Pin Depth, which is available in the Options bar? That is what will help us with the goose’s beak. Click on the pin on the goose’s head to make it active, then click on the Pin Depth with the arrow pointing down. That will cause the pixels on the top of the image to be placed in the rear position. So now we have the goose’s beak behind the pig’s ears.
A few last minute facts:
- Right click a pin to open an options panel, to quickly delete Pins, Remove All Pins, and other options.
- Press and hold H on your keyboard to temporarily hide pins.
- Don’t like your result? Click the Cancel button in the menu bar at any time to start all over again!
I have reviewed the Puppet Warp’s tools and provided just a few examples for you. Here is a link to a great 3 minute video on the Puppet Warp tool, with a great visual on some of the things I have mentioned today: Photoshop Puppet Warp by Blue Lightning TV
The image used in today’s tutorial is included Farm Fresh, which is now in my shop. Be sure to check our newsletter today, where you will find a Farm Fresh Cluster Gift for you to download.
Not signed up for our newsletter yet? Sign up HERE (look on the right side) so you don’t miss a thing in the future! You will find our newsletter archives on our blog, where you will find the link to today’s newsletter. (Look on the right and scroll down just a bit.)
And here’s a Farm Fresh Border for you, just for coming by today! Click on the image to download.
If you would like to keep this tutorial on your computer for easy reference, you may download a PDF here: Puppet Warp, Part 2.
Thank you for your comments last week, letting me know you wanted to learn more about Puppet Warp! I appreciate your feedback!


Thank you so much, you have helped me understand so much. Thank you for sharing.
Also the PDF download link is not working.
Thanks for letting me know, Kay. I should have that updated/fixed in about an hour.
Karen, thanks so much for the awesome page! I will check back to grab the pdf file. I really like this tool, and will have to play with it! thanks for another awesome tutorial too!
Thank you, Stacey! Yes, the Puppet Warp Tool is VERY fun!!! Be sure to watch the Blue Lightning video I included here. The PDF download link is now active and accurate. 😉
[…] Puppet Warp, Part 2 – 3 freebie(s) […]
Oh! Karen you are just wonderful, I LOVE your tutorials, you make everything seem so simple. Thanks you so much for giving us more about the Puppet Warp Tool.
Thank you, Faith! 🙂
Thanks so much. I always learn something! Love the freebie too. Thanks for sharing your time and talent.
thanks so much, Karen! I was able to save it!
You do such an awesome tutorial! Gracious! Thank you for the great write-ups, both of them, on the Puppet Warp tool. (I’m playing catch up and just read both, so, I am commenting once, here. LOL)
I used it, once, on one of those wooden model characters. I had it dancing! Just playing with the figure with it in PW mode is fun! LOL
I am curious as to how you are going to top this! LOL This is a very thorough tutorial for this tool!
Thank you very much!
Thanks, ladies, for taking the time to let me know the tutorial was helpful and something new to you. I appreciate it!
OMG, I had a chance to try this today. We had our photo taken at church for the pictorial directory and it came out great except my hubby’s tie was over to the side. I use the puppet warp tool to straighten his tie and it worked great!! What a cool tool. Thanks so much!!
[…] Farm Fresh Freebie! […]
[…] Check out the matching Farm Fresh Freebie! […]
[…] left. In addition, I used Puppet Warp to warp the stars just a bit (Do you use Puppet Warp and Puppet Warp, Part 2) . I duplicated the stars, clipped a paper to them (Clipping Masks in Photoshop), and added a […]