
Hello scrappers! It’s the last day of our LAD: Stormy Skies and we’re going to do one more day with blending. This time I’m using Adobe Photoshop, but you can blend with almost every program out there. Blending is all about using what you’ve got & spinning it into something unique for you. It’s what sets one page, using the same elements, apart from another page. Not to mention, it’s just plain fun!
I’ve done this Quick Tip like one of our DUO Elements posts. You can scroll down to the bottom and see this tutorial as a video on our YouTube Channel.
- Paper & Element by Mixed Media by Erin
- Background Paper by Cindy Ritter
- Stormy Skies Gradients by me!
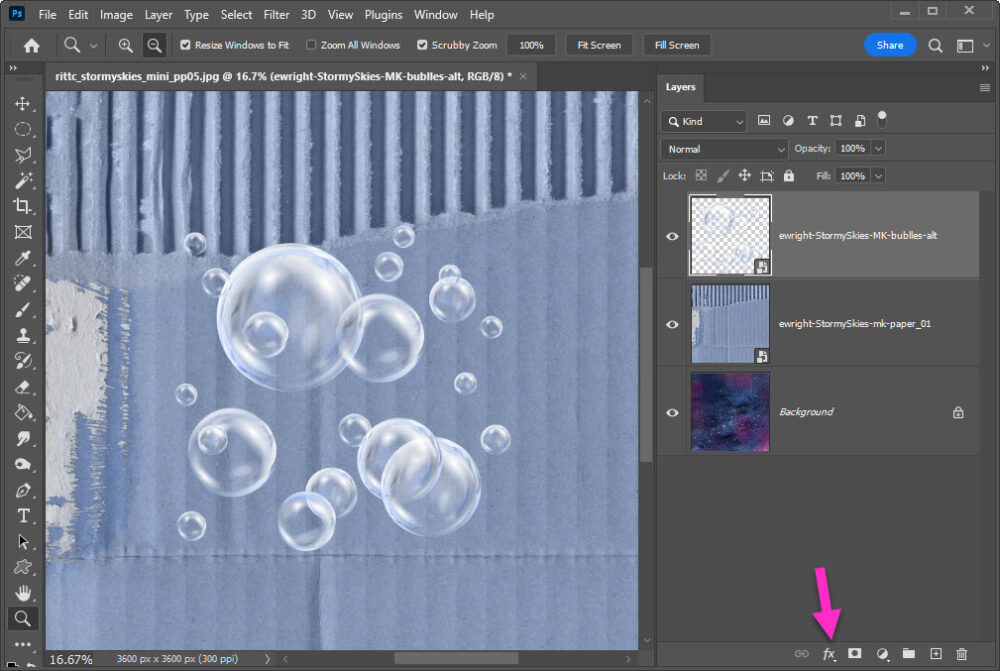
I’ve added both background papers and the elements. I want to see how the bubbles look on both a light & a dark background. Now let’s see how they look with a gradient overlay style applied.
- Click on the fx button to pop open the Style palette

From the pop-up menu:
- Choose Gradient Overlay
- The entire Layer Style menu pops up
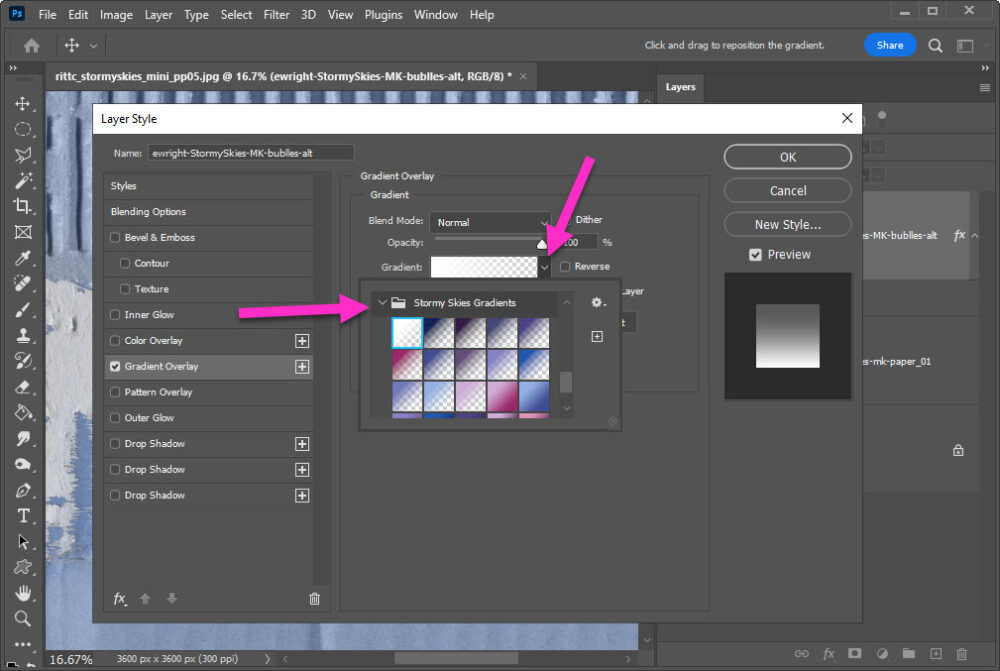
Now choose a gradient, any gradient is fine, I’m using the Stormy Skies Gradients:
- Click on the teeny tiny drop-down arrow next to the Gradient bar
- Open the Stormy Skies Gradients
See the “How to Load Layer Styles” post for help

You can choose any gradient, including one that is half transparent. I prefer one with two or more colors.
- I picked a pink/purple gradient

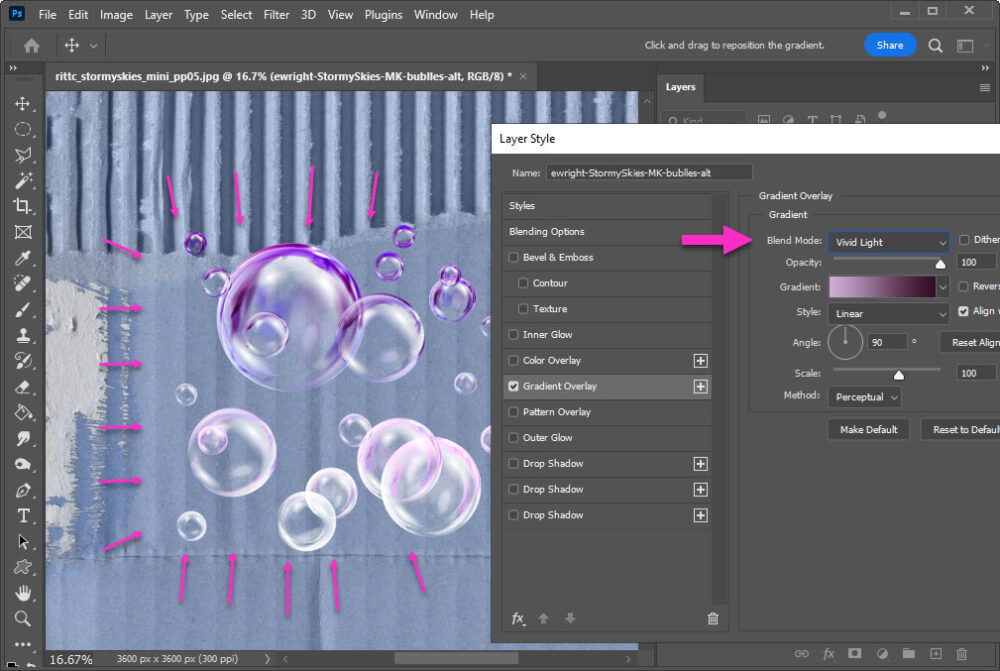
If you only apply the gradient, without setting a blending mode, the result is very flat & boring. To change the blending mode simply reopen the Layer style menu.
- Click on the fx button again
- Or right click on the fx now visible on the bubble layer
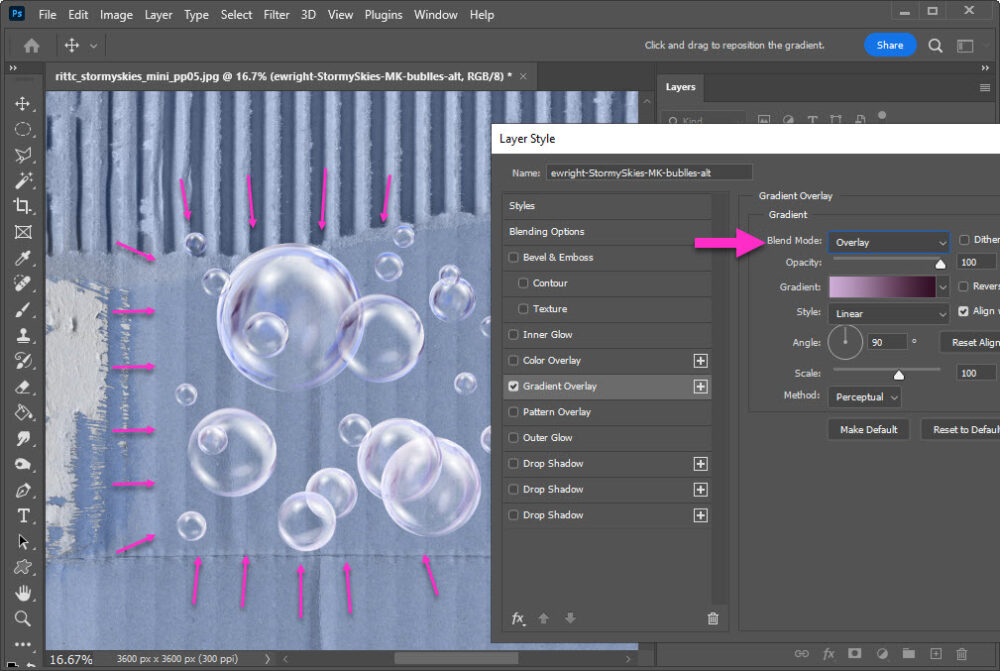
I’ve moved the Layer Style menu to the side so you can see the change in the bubbles as I switch Blend Modes. I’ve just snapped a screenshot to show a couple different ones, but click on the YouTube video below to see each Blend Mode and how it affects the bubbles.
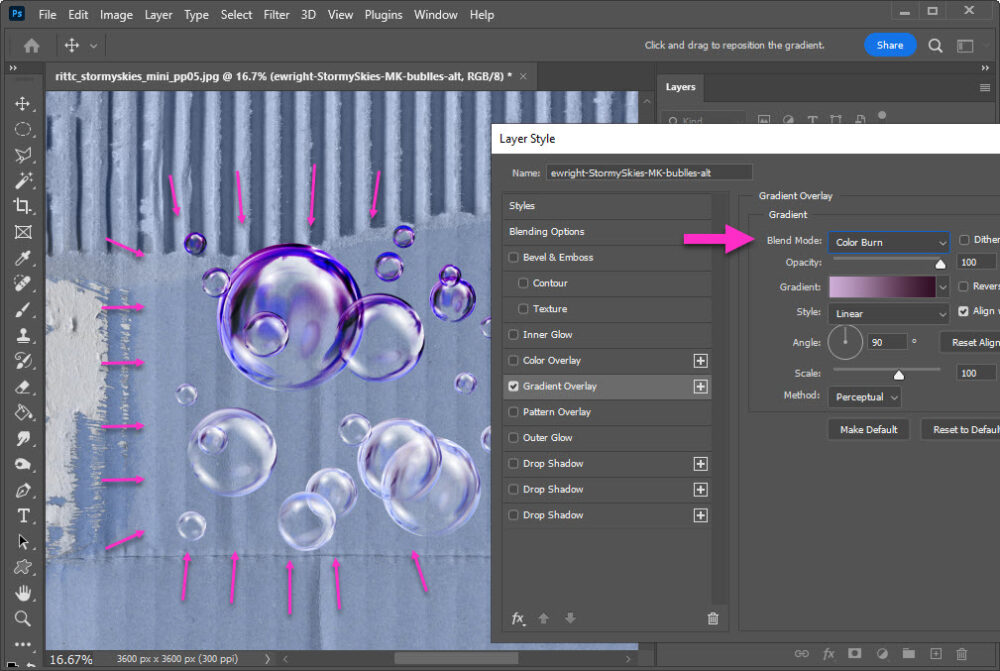
The Vivid Light Blend Mode is the one I choose for my page.
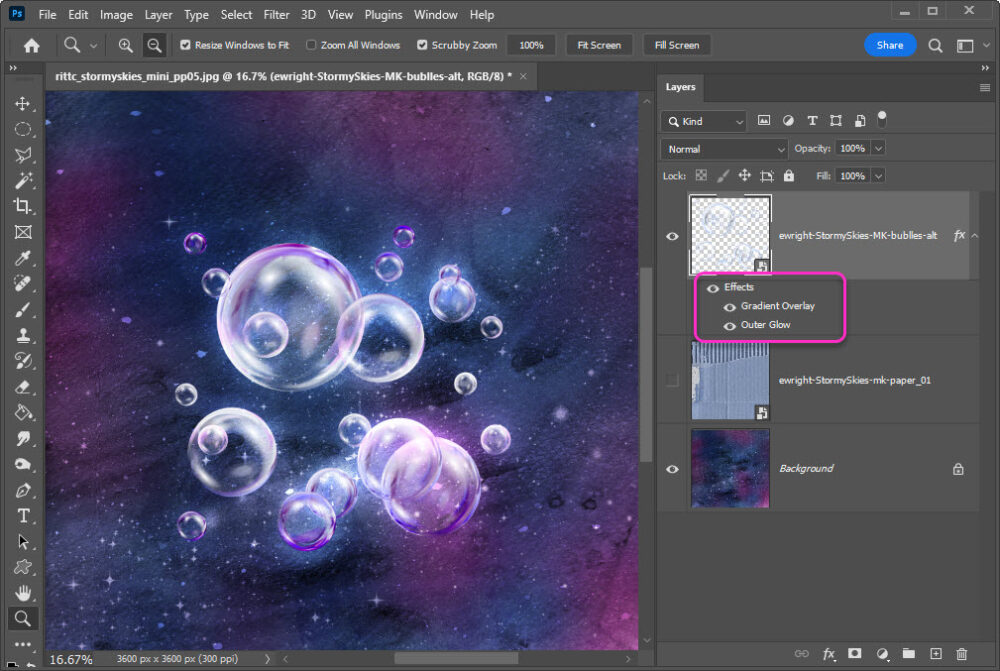
My vision for this page was the bubbles “in space” so with the Vivid Light Blend Mode activated, I switched the the Cindy Ritter background. I looooooove the way the bubbles pop with the gradient added. For a little extra popp-y-ness and 3D-y-ness, I’ve also added a quick Outer Glow.
- Open up the Layer Style pop-up menu again
- Choose Outer Glow
- Color = White
- Blend Mode = Overlay
- Opacity = 100%
- Technique = Softer
- Size = 163
To see all this in action, with a little extra tossed in, take a look at my newest YouTube Photoshop Tutorial:


Curious, will the Stormy Skies gradients be for sale eventually? I like them and I didn’t see them in the event to buy as yet. Great tutorial, I save them all, they help so much!
Thank you so much Toiny.
Where do you get the Stormy Skies gradients at?
Thanks for the tut.
I’ve added them to the store: https://www.digitalscrapbookingstudio.com/collections/layout-a-day-collections/stormy-skies/stormy-skies-gradients/