January 1, 2016. The first day of the new year! We’re starting out the year with a new tutorial for you on Adjustment Layer Masks.
Last week I mentioned that I am frequently asked the difference between Clippings Masks and Adjustment Masks. In How to Create a Clipping Mask, we talked about… well, clipping masks! Today’s let’s take a look at Adjustment Masks.
For the purposes of this tutorial, I am using Photoshop CC2015, but this method works in other versions of Photoshop and Photoshop Elements as well.
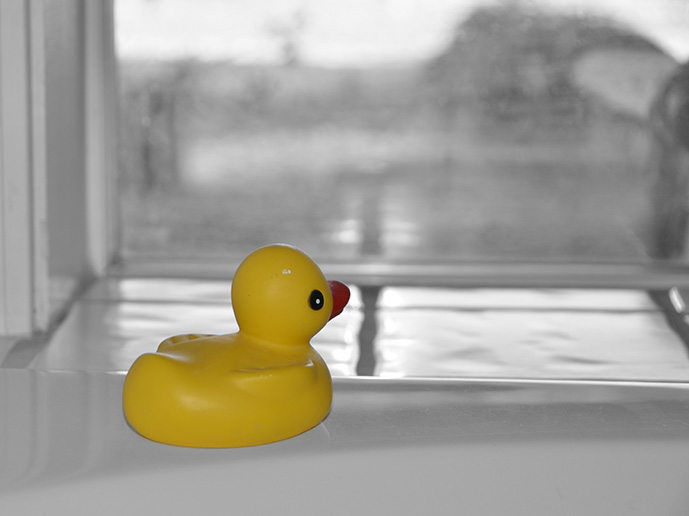
This is a photo I took of a rubber duck (Personal Note: Thankful).
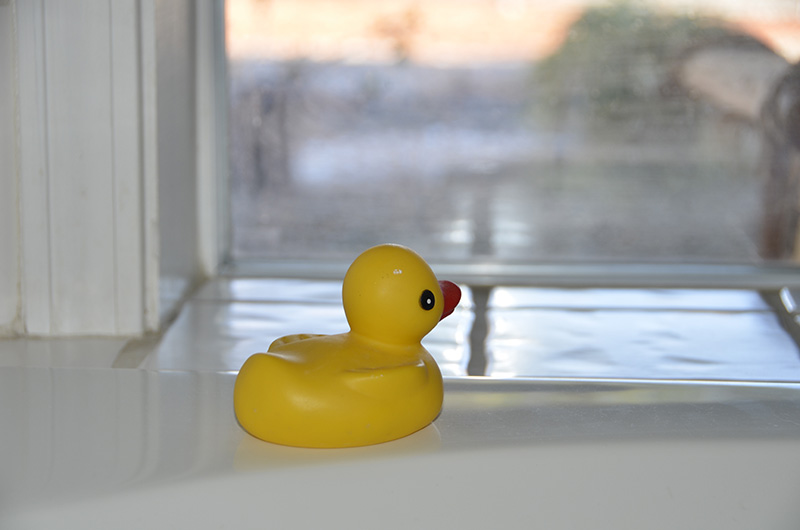
Let’s change the photo to a black and white image, and then paint back in the color of the duck using a mask on the adjustment layer.
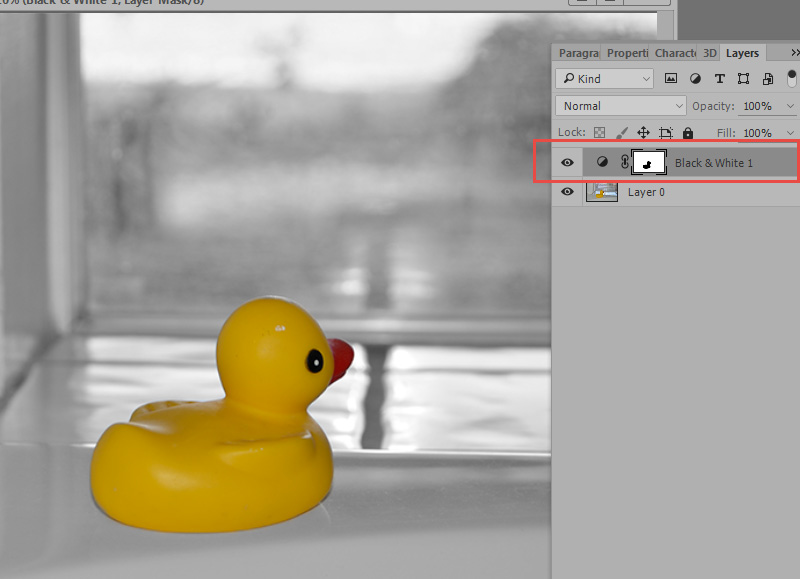
1. To change the image to Black/White, click on the Black White Adjustment icon in the Adjustment Panel:
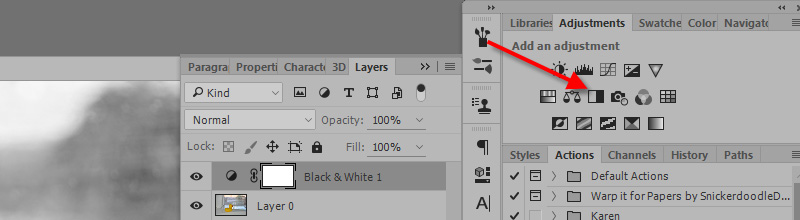
2. When an adjustment is applied to a layer, the effects of the adjustment are applied to the entire image. This is evidenced when we look at the original color photo; it is now black and white. When an adjustment layer is added; however, it is added as a mask. This allows us to make selective choices in our image by painting in the mask.
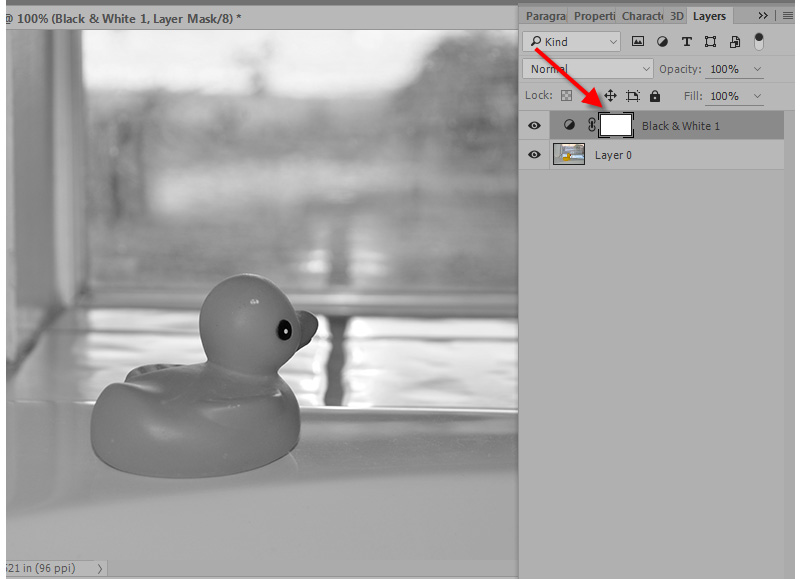
3. Let’s paint away the black and white adjustment on the duck to reveal the original yellow color. When painting on a mask, we paint with the color black to remove the adjustment. Set your foreground color to black and choose a brush to paint with. (For this photo, I chose a 50 px soft-edged round brush size and set the Hardness to 50%.) Click on the mask to make it active, then paint in the image, on top of the duck, to “paint away” the black and white adjustment.
You will see on the mask itself, what you have painted away. Here you can see the duck image, in black, on the mask. This tells me that the Black and White adjustment has been painted away in that area. The end result is a black and white image, with a portion of the image (duck) revealing its original color.
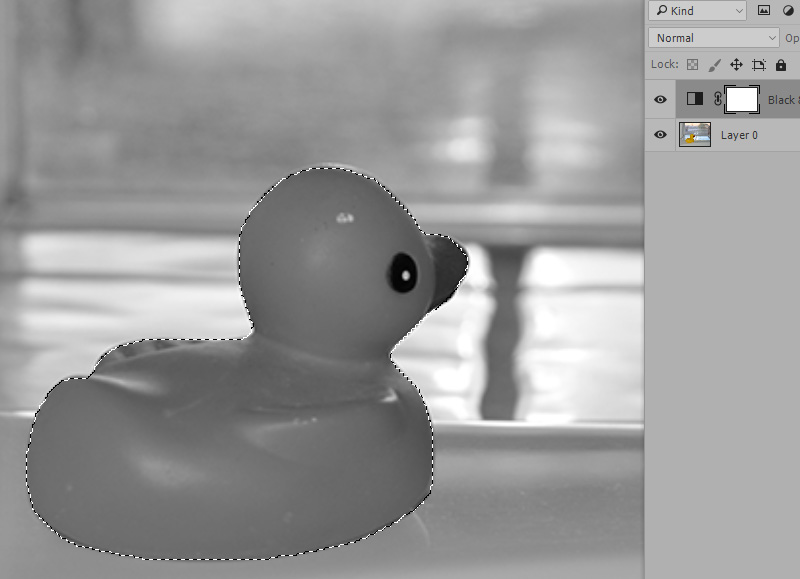
Tip: When working with an image that has clearly defined edges (such as the duck), you can also use any of your favorite selection tools to make your selection. Here, after applying the Black and White Adjustment layer, I used the Quick Selection Tool to select the duck (see the marching ants around the duck in the image below, indicating that the duck is selected). Next, I clicked on the adjustment layer mask to be sure it was active, then (making sure my foreground color was still set to black), held down the ALT key, and hit Back on my keyboard. This keyboard shortcut will fill the selected area with the foreground color – so here, it filled the selected area in the mask black, which is exactly what we wanted in order to remove the adjustment in the selected area.
I cropped a bit away from the left side of the photograph in order to stay within the Rule of Thirds, and here is the final image.
Since Layer Adjustments are applied as masks, we have the ability to fine tune any type of adjustment, not just Black and White.
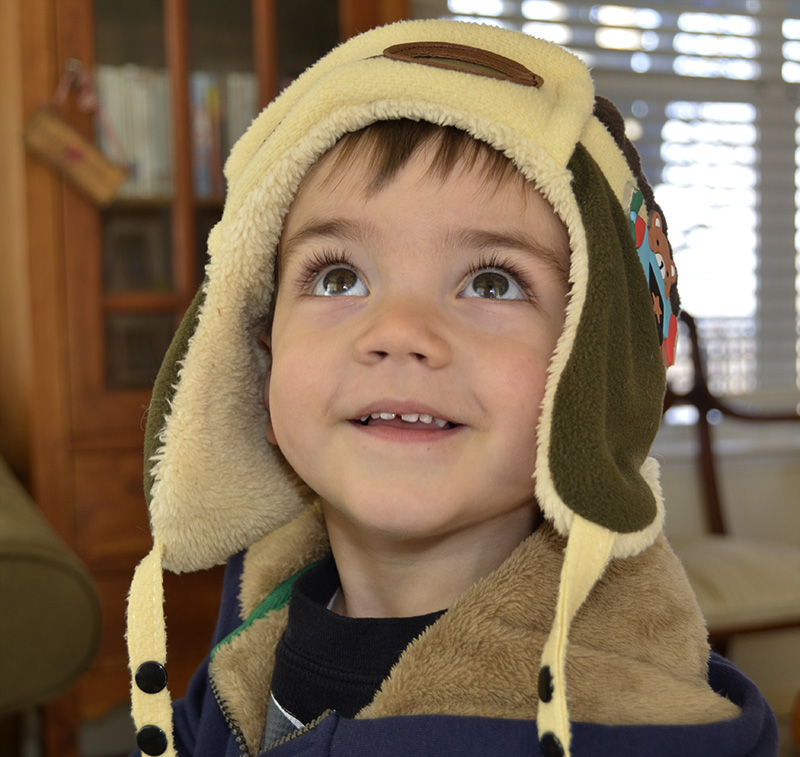
In the image below, the camera flash washed out my grandson’s face a bit.

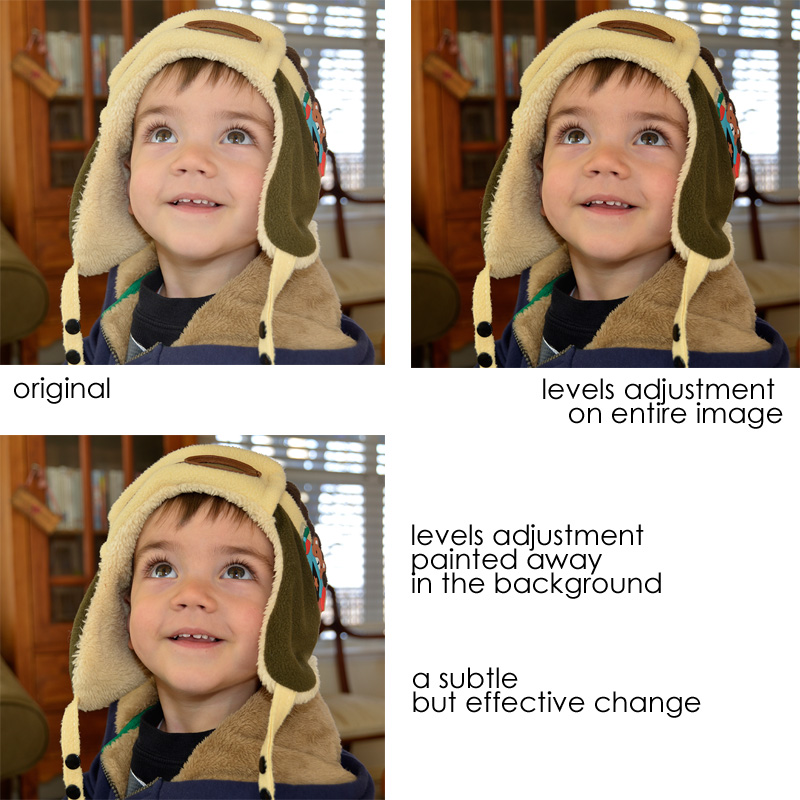
I applied a Levels adjustment, which adjusted the tonal range of the entire photo. Owens face looks better, but I don’t like the adjustment on the background. Making sure my foreground color was set to black, I chose a soft edged brush, and painted on the mask to remove the levels adjustment in the background. (See the portion of the adjustment that was painted away on the Levels mask.)
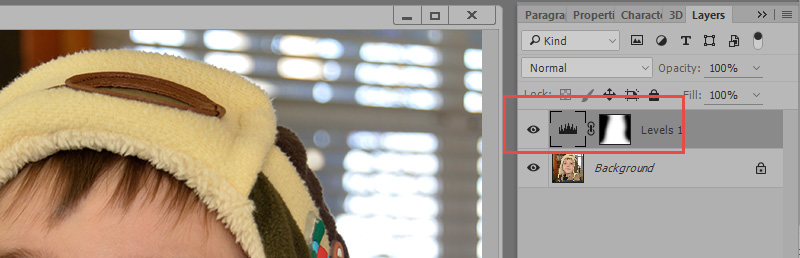
This was the result, which I was happy with. The tonal range on his face is better (brighter, more contrast), but I removed the adjustment on the background to keep it from being so prominent.
Adjustment layers give us so many options to improve our scrapbook pages and our photographs. Masks give us even more options. Using these two tools in combination with each other is “icing on the cake,” as the saying goes!
If you haven’t experimented with adjustment layers or masks yet, why not give it a try? It’s a whole new (exciting!) world!
If you would like to keep this tutorial on your computer for easy reference, you may download a PDF here: Using masks with Adjustment Layers.
Thank you for stopping by! We here, at theStudio, wish you a successful, happy, creative year, filled with new knowledge and skills!


Thanks for the tutorials. They are great, Happy New Year.
I love your tutorials Karen, I learn so much, so simply. Thank you
Love this tip. You make it so easy. Thank you Karen, and thank you for the goal setting pointers! That’s a WOW!!!
Great information. I haven’t used the Adjustment masks very often so now I think I need to do some experimenting.
Thank you so much, this is great!!
Karen,
thanks for the awesome tutorial!